Table of Contents
Advertisement
Advertisement
Table of Contents

Related Manuals for Toshiba Libretto W100


Summary of Contents for Toshiba Libretto W100
- Page 1 User’s Manual Libretto W100...
-
Page 2: Table Of Contents
Table of Contents Copyright..........v Disclaimer . - Page 3 TOSHIBA Disc Creator ........4-10...
- Page 4 Certification agencies ........E-1 TOSHIBA PC Health Monitor Appendix F Starting the TOSHIBA PC Health Monitor..... . F-2 Legal Footnotes Appendix G Non-applicable Icons .
-
Page 5: Copyright
This manual has been validated and reviewed for accuracy. The instructions and descriptions it contains are accurate for the TOSHIBA Libretto W100 Portable Personal Computer at the time of this manual’s production. However, succeeding computers and manuals are subject to change without notice. -
Page 6: Fcc Information
Only peripherals complying with the FCC class B limits may be attached to this equipment. Operation with non-compliant peripherals or peripherals not recommended by TOSHIBA is likely to result in interference to radio and TV reception. Shielded cables must be used between the external devices and the computer’s Universal Serial Bus (USB 2.0) port and... -
Page 7: Eu Declaration Of Conformity
This product is carrying the CE-Mark in accordance with the related European Directives. Responsible for CE-Marking is TOSHIBA Europe GmbH, Hammfelddamm 8, 41460 Neuss, Germany. The complete and official EU Declaration of Conformity can be found on TOSHIBA’s web site http://epps.toshiba-teg.com on the Internet. CE compliance... -
Page 8: Vcci Class B Information
■ Aircraft Environments Any consequences resulting from the use of this product in working environments that are not approved are not the responsibility of TOSHIBA. The consequences of the use of this product in non-approved working environments may be: ■... -
Page 9: Following Information Is Only Valid For Eu-Member States
For more detailed information about the collection and recycling programmes available in your country, please visit our website (http://eu.computers.toshiba-europe.com) or contact your local city office or the shop where you purchased the product. Disposal of batteries and/or accumulators... -
Page 10: Reach - Compliance Statement
The new European Union (EU) chemical regulation, REACH (Registration, Evaluation, Authorization and Restriction of Chemicals), entered into force on 1 June 2007. Toshiba will meet all REACH requirements and is committed to provide our customers with information about the chemical substances in our products according to REACH regulation. -
Page 11: Preface
Windows functions. This manual tells how to set up and begin using your Libretto W100 computer. It also provides detailed information on configuring your computer, basic operations and care, using optional devices and troubleshooting. - Page 12 Libretto W100 Icons Icons identify ports, dials, and other parts of your computer. The indicator panel also uses icons to identify the components it is providing information Keys The Libretto keyboard keys are used in the text to describe many computer operations.
- Page 13 Libretto W100 Terminology This term is defined in this document as follows: Start The word "Start" refers to the " " button in ® Windows SSD or Solid State Your computer is equipped with a "Solid State drive Drive (SSD)" instead of a hard disk drive.
-
Page 14: General Precautions
General Precautions TOSHIBA computers are designed to optimize safety, minimize strain and withstand the rigors of portability. However, certain precautions should be observed to further reduce the risk of personal injury or damage to the computer. Be certain to read the general precautions below and to note the cautions included in the text of the manual. -
Page 15: Creating A Computer-Friendly Environment
Libretto W100 Creating a computer-friendly environment Place the computer on a flat surface that is large enough for the computer and any other items you are using, such as a printer. Leave enough space around the computer and other equipment to provide adequate ventilation. -
Page 16: Pressure Or Impact Damage
Libretto W100 Pressure or impact damage Do not apply heavy pressure to the computer or subject it to any form of strong impact as this can damage the computer's components or otherwise cause it to malfunction. Mobile phones Please be aware that the use of mobile phones can interfere with the audio system. -
Page 17: Equipment Checklist
Some of the features described in this manual may not function properly if you use an operating system that was not pre-installed by TOSHIBA. Equipment checklist Carefully unpack your computer, taking care to save the box and packaging materials for future use. - Page 18 ■ TOSHIBA Face Recognition ■ TOSHIBA eco Utility ■ TOSHIBA Media Controller ■ Online Manual ■ Libretto W100 User's Manual (This manual) * You may not have all the softwares listed above depending on the model you purchased. User’s Manual...
- Page 19 Getting Started Getting Started ■ All users should be sure to read the section Starting up for the first time. ■ Be sure to read the enclosed Instruction Manual for Safety and Comfort for information on the safe and proper use of this computer. It is intended to help you be more comfortable and productive while using a notebook computer.
-
Page 20: Connecting The Ac Adaptor
■ Always use the TOSHIBA AC adaptor that was included with your computer, or use AC adaptors specified by TOSHIBA to avoid any risk of fire or other damage to the computer. Use of an incompatible AC adaptor could cause fire or damage to the computer possibly resulting in serious injury. - Page 21 Getting Started 1. Connect the power cord to the AC adaptor. Figure 1-1 Connecting the power cord to the AC adaptor (2-pin plug) Figure 1-2 Connecting the power cord to the AC adaptor (3-pin plug) Either a 2-pin or 3-pin adaptor/cord will be included with the computer depending on the model.
-
Page 22: Opening The Display
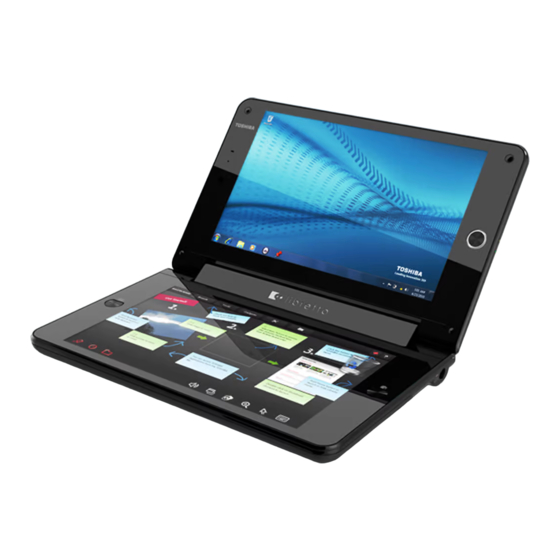
Getting Started Opening the display The Libretto is a dual screen computer provided with two display panels (upper and lower), which can be opened to a wide range of angles for optimal viewing. You can open the display panel as the illustration shown below. 1. -
Page 23: Turning On The Power
Getting Started Turning on the power This section describes how to turn on the power - the Power indicator will then indicate the status. Please refer to the Monitoring of power condition section in Chapter 5, Power and Power-Up Modes for more information. ■... -
Page 24: Turning Off The Power
Getting Started When it is completed, the Windows screen will be displayed in the upper screen, while Libretto Home in the lower screen by default. 1. Windows screen 2. Libretto Home screen Figure 1-6 Starting up for the first time The Libretto Keyboard will be displayed in the lower screen by pressing the Keyboard button. -
Page 25: Sleep Mode
Getting Started Sleep Mode If you have to interrupt your work, you are able to turn off the power without exiting from your software by placing the computer into Sleep Mode. In this mode data is maintained in the computer's main memory so that when you turn on the power again, you can continue working right where you left off. -
Page 26: Hibernation Mode
Getting Started ■ Close the display panels. Please note that this feature must be enabled within the Power Options (to access it, tap Start -> Control Panel -> System and Security -> Power Options). ■ Press the power button. Please note that this feature must be enabled within the Power Options (to access it, tap Start ->... -
Page 27: System Recovery
Getting Started Automatic Hibernation Mode The computer can be configured to enter Hibernation Mode automatically when you press the power button or close the lid. In order to define these settings, you can follow the steps as described below: 1. Tap Start and tap Control Panel. 2. -
Page 28: Creating Recovery Media
Getting Started Creating Recovery Media This section describes how to create Recovery Media. ■ Be sure to connect the AC adaptor when you create Recovery Media. ■ Be sure to close all other software programs except the Recovery Media Creator. ■... - Page 29 To perform this restoration, follow the steps below: 1. Turn off your computer. 2. Turn on your computer - when the TOSHIBA Leading Innovation >>> logo screen appears, press the Keyboard button to enter TOSHIBA Setup Manager.
-
Page 30: Chapter 2 The Grand Tour
Chapter 2 The Grand Tour This chapter identifies the various components of the computer - it is recommended that you become familiar with each before you operate the computer. Legal Footnote (Non-applicable Icons) For more information regarding Non-applicable Icons, please refer to the Legal Footnotes section in Appendix G. -
Page 31: Left Side
The Grand Tour Cooling vents The cooling vents help keep the processor from overheating. MicroSD card slot This slot can accommondate a single microSD memory card in order to transfer data from devices, such as digital cameras, onto your computer. The microSDHC card is also supported. -
Page 32: Right Side
The Grand Tour Please note that it is not possible to confirm the operation of all functions of all USB devices that are available. In view of this it may be noted that some functions associated with a specific device might not operate properly. Right side The following figure shows the computer’s right side. -
Page 33: Underside
The Grand Tour Underside The following figure shows the underside of the computer. You should ensure that the display is closed before the computer is turned over to avoid causing any damage. 1. Battery lock 3. Battery pack 2. Battery release latch Figure 2-4 The underside of the computer Battery lock Slide the battery lock to release the battery pack... -
Page 34: Front With The Display Open
The Grand Tour Front with the display open This section shows the computer with the display panel open. In order to open the display, lift the display panel up and position it at a comfortable viewing angle for you. Figure 2-5 The front of the computer with the display panel open 1. - Page 35 You can use it for video chatting or video conferences using a communication tool such as Windows Live Messenger. TOSHIBA Web Camera Application will help you to add various video effects to your video or photograph.
- Page 36 The Grand Tour Upper screen & Please be aware that, when the computer is Lower screen operating on the AC adaptor, the image displayed on the internal screen will be somewhat brighter than when it operates on battery power. This difference in brightness levels is intended to save power when operating on batteries.
-
Page 37: Ac Adaptor
Always use the TOSHIBA AC adaptor that was included with your computer, or use AC adaptors specified by TOSHIBA to avoid any risk of fire or other damage to the computer. Use of an incompatible AC adaptor could cause fire or damage to the computer possibly resulting in serious injury. -
Page 38: Chapter 3 Hardware, Utilities And Options
Your computer is equipped with one processor and processor type varies depending on model. To check which type of processor is included in your model, open the TOSHIBA PC Diagnostic Tool Utility by tapping Start -> All Programs -> TOSHIBA -> Utilities -> PC Diagnostic Tool. - Page 39 Hardware, Utilities and Options Memory Memory slot 2GB onboard memory only. Video RAM The memory in a computer's graphics adaptor, used to store the image displayed on a bitmap display. The amount of Video RAM available is dependent on the computer's system memory. Start ->...
- Page 40 Hardware, Utilities and Options Disks Solid state drive This computer is equipped with a "Solid State Drive (SSD)" instead of a hard disk drive. ■ 62GB SSD Please note that part of the Solid state drive's overall capacity is reserved as administration space.
-
Page 41: Special Features
Some computers in this series are equipped with a Wireless WAN module. Special features The following features are either unique to TOSHIBA computers or are advanced features which make the computer more convenient to use. Access each function using the following procedures. - Page 42 Hardware, Utilities and Options Display automatic This feature automatically cuts off power to the computer's display panel when there is no power off keyboard input for a specified time, with power being restored the next time a key is pressed. This can be specified in the Power Options.
-
Page 43: Utilities And Applications
For further information on their operation, you may refer to each utility's online manual, help files or README.TXT file (if applicable). TOSHIBA Power TOSHIBA Power Saver provides you with the features of more various power supply Saver managements. - Page 44 Hardware, Utilities and Options TOSHIBA Flash TOSHIBA Flash Cards is a utility that uses a card type design. It provides functions similar to those Cards of the Hot Keys on a standard computer. When this utility is launched, Flash Cards are displayed in a row at the top/bottom of the screen.
- Page 45 To start this utility, tap Start -> All Programs -> TOSHIBA -> CD&DVD Applications -> Disc Creator. TOSHIBA Disc Creator is not preinstalled. You need to install it manually by tapping Start -> All Programs -> TOSHIBA -> Applications and Drivers, and select the TOSHIBA Disc Creator setup files.
-
Page 46: Optional Devices
Press the Home button to launch the Bulletin Board. You can also access this utility by tapping Start -> All Programs -> TOSHIBA -> TOSHIBA Bulletin Board. TOSHIBA ReelTime This application is a graphical history/indexing tool that enables you to view recently accessed files in a fun and easy-to-use format. -
Page 47: Microsd Card Slot
Hardware, Utilities and Options MicroSD card slot The computer is equipped with a MicroSD card slot that can accommodate a MicroSD card with various memory capacities so that you can easily transfer data from devices, such as digital cameras and Personal Digital Assistants. - Page 48 Hardware, Utilities and Options Formatting a microSD/SDHC memory card MicroSD/SDHC memory cards are sold already formatted in conformity to specific standards. If you reformat a microSD/SDHC memory card, be sure to reformat it with a device such as digital camera or digital audio player that uses the microSD/SDHC memory cards, not with the format command provided within Windows.
-
Page 49: Removing A Memory Media
Hardware, Utilities and Options 3. Press the memory media gently to ensure a firm connection is made. 1. MicroSD card slot 2. Memory media Figure 3-2 Inserting a memory media ■ Make sure memory media is oriented properly before you insert it. If you insert the media in wrong direction, you may not be able to remove ■... -
Page 50: Optional Accessories
You are able to add a number of options and accessories in order to make your computer even more powerful and convenient to use. For reference, the following list details some of the items that are available from your reseller or TOSHIBA dealer: Universal AC If you frequently use your computer at more than... -
Page 51: Chapter 4 Operating Basics
Chapter 4 Operating Basics This chapter describes the basic operations of your device, highlights the precautions that should be taken when using it. Finger Tapping to Operate This computer can be easily operated by finger tapping. Using the Touch Screen You can operate the device by using finger tapping and scrolling on both screens, as well as moving icons, files, and the likes by finger dragging across the two screens. -
Page 52: Libretto Keyboard
■ When using this computer in portrait mode, you can take advantage of the CPU at maximum performance by setting the Dynamic CPU Frequency Mode to “Always High” through the TOSHIBA HWSetup under the CPU Tab. Zoom Function You can launch the zoom function by the steps below. -
Page 53: Libretto Taskbar
Press the Home button to launch the Libretto Home. Bulletin Board is launched in the bottom screen. The Libretto Taskbar will be displayed at the bottom. Libretto Taskbar provides several icons to launch applications and utilities such as: TOSHIBA Bulletin Board TOSHIBA ReelTime File Browser Volume Controls User’s Manual... -
Page 54: File Browser
Operating Basics Application Switcher TOSHIBA Flash Cards Zoom Function Libretto Touch Pad Libretto Keyboard Some icons are available on Windows taskbar when both screens are used for Windows (when the Bulletin Board is hidden). The display location of the Bulletin Board and ReelTime is fixed for your computer. -
Page 55: Libretto Settings And Help Feature
1. Tap Start->Control Panel->Hardware and Sound->Tablet PC Settings, the Tablet PC Settings window appears. 2. In the Display box, select 1.Toshiba Internal 1024x600 Panel, which is the first display of your device. 3. If the Reset button is available, tap Reset to remove the calibration data. -
Page 56: Web Camera
You can use it for video chatting or video conferences using a communication tool such as Windows Live Messenger. TOSHIBA Web Camera Application will help you to add various video effects to your video or photograph. -
Page 57: Using The Toshiba Face Recognition
Board. Using the TOSHIBA Face Recognition TOSHIBA Face Recognition uses a face verification library to verify the face data of users when they log in to Windows. The user can thus avoid having to enter a password or the like, which makes the login process easier. - Page 58 Toshiba does not guarantee that the face recognition utility will accurately screen out unauthorized users at all times. Toshiba is not liable for any failure or damage that might arise out of the use of the face recognition software or utility.
- Page 59 Delete image data, account information, and personal record data created during registration. To delete the Face Recognition Data, follow the steps as described below: 1. To launch this utility, tap Start -> All Programs -> TOSHIBA -> Utilities -> Face Recognition. The Management screen is displayed.
-
Page 60: Toshiba Disc Creator
TOSHIBA Disc Creator You can use TOSHIBA Disc Creator when you connect external ODD. Please be aware of the following limitations when you use the TOSHIBA Disc Creator: ■ DVD Video cannot be created using TOSHIBA Disc Creator. -
Page 61: Data Verification
TOSHIBA Disc Creator cannot record in packet format. ■ You might not be able to use the "Disc Backup" function of TOSHIBA Disc Creator to back up a DVD-R, DVD-R (Dual Layer), DVD-RW, DVD+R, DVD+R (Double Layer) or DVD+RW disc that was made with other software on a different optical media recorder. -
Page 62: Wireless Communications
Operating Basics How to learn more about TOSHIBA Disc Creator Please refer to the Help files for additional TOSHIBA Disc Creator information. Media care This section provides tips on protecting data stored on your CD's and DVD's. Handle your media with care. Following the simple precautions listed below will increase the lifetime of your media and protect the data stored on it. - Page 63 Operating Basics ■ Do not use the Wireless LAN (Wi-Fi) or Bluetooth functionalities near a microwave oven or in areas subject to radio interference or magnetic fields. Interference from a microwave oven or other source can disrupt Wi-Fi or Bluetooth operation. ■...
-
Page 64: Worldwide Operation
■ TOSHIBA is not liable for the loss of data due to eavesdropping or illegal access through the wireless LAN and the damage thereof. Bluetooth wireless technology... -
Page 65: Bluetooth Stack For Windows By Toshiba
Enable/disable Wireless communication You can enable or disable wireless communication functions by using the TOSHIBA Flash Cards, which can be launched by pressing the Home button twice quickly or tapping the Flash Cards icon on the Libretto Taskbar. No transmissions are sent or received when wireless communication is turned off. -
Page 66: Computer Handling
Operating Basics Wireless communication Indicator The wireless communication indicator shows the status of the computer's wireless communication functions. Indicator status Indication Indicator off The wireless communication switch is off - no wireless functionality is available. Indicator glows Wireless communication switch is on. Except for the stopped device by the software switch, all the wireless-communications functions can output a radio wave. -
Page 67: Heat Dispersal
Operating Basics ■ Disconnect the AC adaptor and all peripherals before moving the computer. ■ Close the display panel. ■ Before carrying your computer, shut it down, disconnect the AC adaptor and allow it to cool down - a failure to follow this instruction may result in minor heat injury. -
Page 68: Chapter 5 Power And Power-Up Modes
Chapter 5 Power and Power-Up Modes The computer's power resources include the AC adaptor, battery pack and any internal batteries. This chapter provides details on making the most effective use of these resources, and includes information on charging and changing batteries, tips for saving battery power, and information on the different power-up modes. -
Page 69: Monitoring Of Power Condition
Power and Power-Up Modes Table 5-1 Power conditions continued Power on Power off (no operation) Battery charge • Operates adaptor is above low • LED: off battery trigger connected point Battery charge • Operates is below low • LED: flashes amber battery trigger point Battery charge... -
Page 70: Battery
Power and Power-Up Modes If the battery pack becomes too hot while it is being charged, the charge will stop and the DC IN/Battery indicator will go out. When the battery pack's temperature falls to a normal range, charging will resume - this process will occur regardless of whether the computer's power is on or off. - Page 71 ■ The computer's RTC battery is a Ni-MH battery and should be replaced only by your dealer or by a TOSHIBA service representative. The battery can explode if not properly replaced, used, handled or disposed. Dispose of the battery as required by local ordinances or regulations.
-
Page 72: Charging The Batteries
- the DC IN/Battery indicator will glow amber while the battery is being charged. Use only the computer connected to an AC power source or optional TOSHIBA Battery charger to charge the battery pack. Never attempt to charge the battery pack with any other charger. Time Refer to User Information Guide about Charging time. -
Page 73: Monitoring Battery Capacity
Power and Power-Up Modes Monitoring battery capacity Remaining battery power can be monitored using the following methods. ■ Tapping the battery icon on the Taskbar ■ Via the Battery Status in the Windows Mobility Center window ■ You should wait at least 16 seconds after turning on the computer before trying to monitor the remaining operating time. -
Page 74: Retaining Data With Power Off
Power and Power-Up Modes Retaining data with power off Refer to User Information Guide about Retaining time. Extending battery life To maximize the life of your battery packs: ■ At least once a month, disconnect the computer from a power source and operate it on battery power until the battery pack fully discharges. -
Page 75: Removing The Battery Pack
Power and Power-Up Modes ■ Do not remove the battery pack while the computer is in Sleep Mode. Data is stored in RAM, so if the computer loses power it could be lost. ■ In Hibernation Mode, data will be lost if you remove the battery pack or disconnect the AC adaptor before the save is completed. -
Page 76: Power-Up Modes
Power and Power-Up Modes 2. Ensure that the battery pack is securely in place and the battery lock (2) is in its lock position. 1. Battery pack 2. Battery lock Figure 5-2 Securing the battery pack 3. Turn your computer over. Power-up modes The computer has three different power-up modes as follows: ■... -
Page 77: System Automatic Sleep/Hibernation
Power and Power-Up Modes If the panel power off function is enabled, and you manually shut down Windows, do not close the display panel until the shut down process has been completed. System automatic Sleep/Hibernation This feature automatically turns off the system in Sleep or Hibernation Mode if the computer is not used for a set duration. -
Page 78: Chapter 6 Hw Setup
Accessing HW Setup To run the HW Setup program, tap Start -> All Programs -> TOSHIBA -> Utilities -> HWSetup. HW Setup window The HW Setup window contains a number of tabs (General, Password, Boot Priority, CPU, USB, SATA, and Advanced) to allow specific functions of the computer to be configured. -
Page 79: User Password
HW Setup General This window displays the BIOS/EC version, BIOS language and contains two buttons : Default and About. Select the language to use for BIOS settings. BIOS Language Return all HW Setup values to the factory Default settings. Display the HW Setup version. About Setup This field displays the installed BIOS version, date, and EC version. -
Page 80: Boot Priority
HW Setup If they do not match, the following message appears. You must repeat from step 1. Incorrect Password. Boot Priority Boot Priority Options This tab allows you to set the priority for booting the computer. The Boot Priority Options setting window will be displayed as shown below. Tap the up and down arrow buttons to adjust the priority. - Page 81 HW Setup This function allows you to set the processor's operating mode. Dynamic CPU Frequency Mode This option allows you to configure the power saving modes associated with the processor - the following settings are available: The processor's power consumption and Dynamically automatic clock speed switching functions are Switchable...
- Page 82 HW Setup SATA SATA Interface setting This feature allows you to set SATA interface setting. Let HDD/SSD work with maximum performance. Performance (Default) Let HDD/SSD work with battery life mode. If this Battery life setting is selected, this caused performance down.
- Page 83 HW Setup This setting is only available when the Critical battery action in Windows is set to Hibernate (Default). If unchecked, no action is taken, even if the battery power is about to run out while the system is in Sleep Mode. If the battery power runs out while in Sleep Mode, any unsaved data will be lost.
-
Page 84: Troubleshooting
Chapter 7 Troubleshooting TOSHIBA have designed this computer for durability, however, should problems occur you are able to use the procedures detailed in this chapter to help determine the cause. All users should become familiar with this chapter as knowing what might go wrong can help prevent problems from occurring in the first place. -
Page 85: Analyzing The Problem
Troubleshooting ■ Before you attach an external device you should first turn the computer off, then when you turn the computer back on again it will recognize the new device. ■ Make sure all optional accessories are configured properly in the computer's setup program and that all required driver software has been loaded (please refer to the documentation included with the optional accessories for further information on its installation and... -
Page 86: Hardware And System Checklist
Before using a peripheral device or application software that is not an authorized Toshiba part or product, make sure the device or software can be used with your computer. Use of incompatible devices may cause injury or may damage your computer. -
Page 87: Overheating Power Down
If any of the following conditions are present, the self test has failed: ■ The computer stops and does not proceed to display information or messages except for the TOSHIBA logo. ■ Random characters appear on the screen and the system does not function normally. - Page 88 Troubleshooting Battery If you suspect a problem with the battery, you should check the status of the DC IN/Battery indicator. Please refer to Chapter 5, Power and Power- Up Modes for more information on these indicators, together with general battery operation. Problem Procedure Battery doesn’t power...
-
Page 89: Real Time Clock
Alternatively you may wish to run the TOSHIBA PC Diagnostic Tool to check the general operation of the computer. If you are still unable to resolve the problem, contact your reseller, dealer or service provider. -
Page 90: Usb Device
Troubleshooting Problem Procedure MicroSD/SDHC Card Remove the microSD/SDHC Card from the error occurs computer and then reinsert it in order to ensure it is firmly connected. If the problem persists, then you should refer to the documentation supplied with your microSD/SDHC Card for further information. - Page 91 Troubleshooting Problem Procedure Check within the Windows Device Manager application to ensure the sound device is enabled and that the device is properly working. For further information, please refer to "Troubleshooting in Windows" section of Windows Help and Support. Annoying sound is In this instance you may be experiencing heard feedback from the internal microphone.
-
Page 92: Toshiba Support
If you have not created "Recovery Media", please contact TOSHIBA support for assistance. TOSHIBA support If you require any additional help using your computer or if you are having problems operating the computer, you may need to contact TOSHIBA for additional technical assistance. User’s Manual... - Page 93 - they are your best resource for current information and support. Where to write If you are still unable to solve the problem and suspect that it is hardware related, write to TOSHIBA at the nearest location listed below: Outside of Europe In Europe Australia Germany &...
- Page 94 California 92618 USA Business Park Addlestone Road Weybridge, Surrey KT15 2UL India The Rest of Europe TOSHIBA India Pvt Ltd. TOSHIBA Europe (I.E.) GmbH PC Division 6th Floor, DR Gopal Das Geschäftsbereich, Deutschland- Bhawan Barakhamba Road, Delhi- Österreich Hammfelddamm 8, D-...
-
Page 95: Specifications
Appendix A Specifications This appendix summarizes the computer’s technical specifications. Physical Dimensions Refer to User Information Guide about Size. Environmental Requirements Conditions Ambient temperature Relative humidity Operating 5°C (41°F) to 35°C (95°F) 20% to 80% (noncondensing) Non-operating -20°C (-4°F) to 65°C (149°F) 10% to 90% (noncondensing) Wet-bulb 26°C maximum... -
Page 96: Power Requirements
Specifications Power Requirements AC adaptor 100-240V AC 50 or 60 hertz (cycles per second) Computer 19V DC 2.37A User’s Manual... -
Page 97: Display Controller And Video Mode
Appendix B Display Controller and Video mode Display controller The display controller interprets software commands into hardware commands that turn particular parts on the screen on or off. The display controller also controls the video mode and uses industry standard rules to govern the screen resolution and the maximum number of colors that can be displayed at any one time. -
Page 98: Wireless Lan
Appendix C Wireless LAN This appendix is intended to help you get your Wireless LAN network up and running, with a minimum of parameters. Card Specifications Form Factor PCI Express Mini Card ■ IEEE 802.11 Standard for Wireless LANs Compatibility ■... -
Page 99: Radio Characteristics
Wireless LAN Radio Characteristics Radio Characteristics of Wireless LAN module may vary according to: ■ Country/region where the product was purchased ■ Type of product Wireless communication is often subject to local radio regulations. Although Wireless LAN wireless networking products have been designed for operation in the license-free 2.4GHz and 5GHz band, local radio regulations may impose a number of limitations to the use of wireless communication equipment. -
Page 100: Supported Frequency Sub-Bands
Subject to the radio regulations that apply in the countries/regions, your Wireless LAN module may support a different set of 5 GHz/2.4 GHz channels. Consult your Authorized Wireless LAN or TOSHIBA Sales office for information about the radio regulations that apply in the countries/regions. - Page 101 Wireless LAN ■ In a Wireless LAN Access Point, the Wireless LAN module will use the factory-set default channel (printed in bold), unless the LAN Administrator selected a different channel when configuring the Wireless LAN Access Point device. 5GHz Band Channels Sets (Wireless IEEE 802.11 Revision a and n) Frequency Range 5150-5850 MHz Channel ID...
- Page 102 Wireless LAN 5805* 5825* *1 Factory-set default channels *2 The channel which can be used depends on the installed wireless LAN module. And the approved channels on using are different at each country or region. Check if these channels can be used in your country/region. The channel configuration is managed as follows: ■...
-
Page 103: Appendix D Bluetooth Wireless Technology Interoperability
Logo certification with Bluetooth wireless technology as defined by The Bluetooth Special interest Group. ■ When you use Bluetooth Adaptor from TOSHIBA close to 2.4 GHz Wireless LAN devices, Bluetooth transmissions might slow down or cause errors. If you detect certain interference while you use Bluetooth Adaptor from TOSHIBA, always change the frequency, move your computer to the area outside of the interference range of 2.4 GHz... -
Page 104: Bluetooth Wireless Technology And Your Health
Because products with Bluetooth wireless technology operate within the guidelines found in radio frequency safety standards and recommendations, TOSHIBA believes Bluetooth wireless technology is safe for use by consumers. These standards and recommendations reflect the consensus of the scientific community and result from deliberations of panels and committees of scientists who continually review and interpret the extensive research literature. - Page 105 The radiated output power of the Bluetooth Adaptor from TOSHIBA is far below the FCC radio frequency exposure limits. Nevertheless, the Bluetooth Adaptor from TOSHIBA shall be used in such a manner that the potential for human contact during normal operation is minimized.
-
Page 106: Using Bluetooth Adaptor From Toshiba Equipment In Japan
3. Contact TOSHIBA Direct PC if you have problems with interference caused by this product to Other Radio Stations. User’s Manual... -
Page 107: Device Authorization
Bluetooth wireless technology Interoperability 2. Indication The indication shown below appears on this equipment. (1) 2.4 : This equipment uses a frequency of 2.4 GHz. (2) FH : This equipment uses FH-SS modulation. (3) 1: The interference range of this equipment is less than 10 m. This equipment uses a frequency bandwidth from 2,400 MHz to 2,483.5 MHz. -
Page 108: Ac Power Cord And Connectors
Appendix E AC Power Cord and Connectors The power cord’s AC input plug must be compatible with the various international AC power outlets and the cord must meet the standards for the country/region in which it is used. All cords must meet the following specifications: Length: Minimum 1.7 meters... - Page 109 AC Power Cord and Connectors Denmark: DEMKO Norway: NEMKO Finland: FIMKO Sweden: SEMKO France: LCIE Switzerland: Germany: United Kingdom: In Europe, two conductors power cord must be VDE type, H05VVH2-F or H03VVH2-F and for three conductors power cord must be VDE type, H05VV-F.
-
Page 110: Toshiba Pc Health Monitor
Toshiba or Toshiba's authorized service providers. Additionally, Toshiba may also use this information for quality assurance analysis. Once enabled, you may disable the TOSHIBA PC Health Monitor at any time by uninstalling the software via Uninstall a program in the Control Panel. -
Page 111: Starting The Toshiba Pc Health Monitor
Starting the TOSHIBA PC Health Monitor The TOSHIBA PC Health Monitor can be started using the following methods: ■ Tap Start -> All Programs -> TOSHIBA -> Utilities -> PC Health Monitor. ■ Tap the icon ( ) in the notification area, then tap the "Enable PC Health Monitor..."... -
Page 112: Legal Footnotes
Appendix G Legal Footnotes This chapter states the Legal Footnotes information applicable to TOSHIBA computers. Non-applicable Icons Certain computer chassis are designed to accommodate all possible configurations for an entire product series. Therefore, please be aware that your selected model may not have all the features and specifications corresponding to all of the icons or switches shown on the computer chassis. -
Page 113: Memory (Main System
86°F) or >25°C (77°F) at high altitude (all temperature references are approximate and may vary depending on the specific computer model - please refer to your computer documentation or visit the Toshiba website at www.pcsupport.toshiba.com for details). CPU performance may also vary from specifications due to design configuration. -
Page 114: Battery Life
Published battery life numbers are achieved on select models and configurations tested by Toshiba at the time of publication. Recharge time varies depending on usage. Battery may not charge while computer is consuming full power. -
Page 115: Wireless Lan
Legal Footnotes Wireless LAN The transmission speed over the wireless LAN and the distance over which wireless LAN can reach may vary depending on surrounding electromagnetic environment, obstacles, access point design and configuration, and client design and software/hardware configurations. The actual transmission speed will be lower than the theoretical maximum speed. -
Page 116: Glossary
Glossary The terms in this glossary cover topics related to this manual. Alternate naming is included for reference. Abbreviations AC: Alternating current ANSI: American National Standards Institute AMT: Intel Active Management Technology ASCII: American Standard Code for Information Interchange BIOS: basic input/output system bps: bits per second CD: compact disc CD-ROM: Compact Disc Read-Only Memory... - Page 117 Glossary IDE: integrated drive electronics IEEE: Institute of Electrical and Electronics Engineers I/O: input/output IRQ: interrupt request KB: kilobyte LAN: local area network LCD: liquid crystal display LED: light emitting diode MB: megabyte MMC: multi media card OCR: optical character recognition (reader) PC: personal computer PCI: peripheral component interconnect RAM: random access memory...
-
Page 118: Index
Battery pack 3-5, 4-17 Heat dispersal additional Hibernation Mode replacing HW Setup 3-4, 4-14 Bluetooth accessing Bluetooth Stack for Windows by Boot priority Toshiba problems general Boot Priority password Bulletin Board SATA window 4-16 Cleaning the computer 4-16 Computer Handling... - Page 119 Power TOSHIBA Assist conditions TOSHIBA ConfigFree 1-10 Hibernation Mode 3-8, 4-10 TOSHIBA Disc Creator indicators TOSHIBA HDD/SSD Alert Utility 3-5, 5-9 panel on/off TOSHIBA PC Diagnostic Tool Shut Down mode (Boot Mode) TOSHIBA ReelTime Sleep Mode TOSHIBA Service Station 5-10...
Need help?
Do you have a question about the Libretto W100 and is the answer not in the manual?
Questions and answers