Advertisement
Table of Contents
- 1 Table of Contents
- 2 Lantern Master Diagram
- 3 Spare Parts/Tool Kits
- 4 Lantern Parts Diagram
- 5 Warranty / Tech. Support
- 6 Prior to Starting Your Britelyt
- 7 Step by Step Lighting Instructions
- 8 Shutdown Procedure
- 9 Storage Procedure
- 10 Tips, Troubleshooting / Warranty Reg
- 11 For a Video Tutorial on How to Use Your Lantern
- 12 EZ-Pump Instructions
- 13 EZ-Cook Instructions
- 14 Mutli-Fuel Operation
- Download this manual
Advertisement
Table of Contents

Summary of Contents for BriteLyt Rapid 829/500CP
- Page 1 USER MANUAL / INSTRUCTIONS Rapid 829/500CP Multi Fuel Lantern BriteLyt Rapid 829/500CP REV 4.3 0801_13...
-
Page 2: Table Of Contents
Rapid 829/500CP Multi-Fuel Lantern Lantern Master Diagram Spare Parts/Tool Kits Lantern Parts Diagram Warranty / Tech. Support Prior to starting your BriteLyt Step by Step Lighting Instructions Shutdown Procedure Storage Procedure Tips, Troubleshooting / Warranty Reg. EZ-Pump Instructions EZ-Cook Instructions... - Page 3 BriteLyt, Multi-Fuel Lantern! Many years of passion and lantern know-how have gone into creating the most functional pressurized liquid-fuel lantern ever! On behalf of all of us at BriteLyt congratulations and we hope you enjoy your new lantern for many years to come! IMPORTANT: Read this manual in its entirety.
-
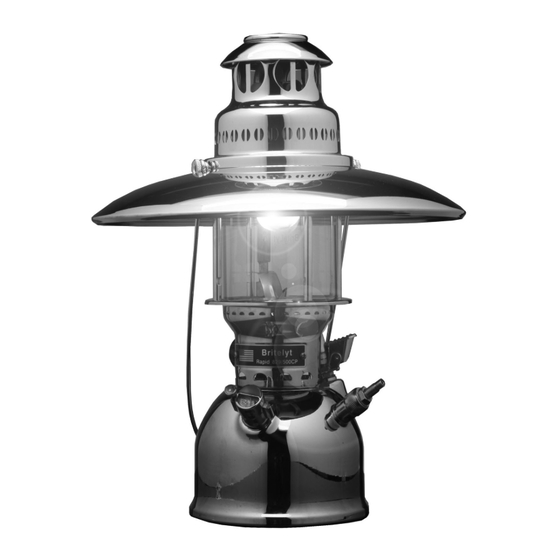
Page 4: Lantern Master Diagram
9) Rapid Pre-Heater 3) Hood Inner Casing 10) Fuel Dial 4) Non-Ceramic Burner Assembly 11) Bleeder Screw 5) Handle/Reflector Screws 12) Hand Pump 6) Needle and Spray Nozzle 13) Pressure Gauge 7) Preheat Cup 14) Fuel Tank BriteLyt Rapid 829/500CP... -
Page 5: Spare Parts/Tool Kits
Parts Kits Your BriteLyt lantern is shipped with a parts/tools kit packet. Be sure to refer to the lantern parts listing on page 5 for parts descriptions. These tools and parts will need to be accessible as you begin to set up your new lantern for its first use. -
Page 6: Lantern Parts Diagram
Lantern Parts Diagram BriteLyt Rapid 829/500CP... - Page 7 Rapid Pre-Heater Conducting Piece Conducting Rod Complete Excentre Nipple for Wheel Graphite Packing Hand Wheel / On & Off Knob Nut for Wheel Sleeve Nut for Excentre Excentre Complete Vaporize Complete Inner Casing Complete Fuel Tank BriteLyt Rapid 829/500CP...
-
Page 8: Warranty / Tech. Support
BriteLyt Limited Lifetime Warranty BriteLyt products are fully warranted to the original owner against defects in materials and workmanship for the lifetime of the product. If a product ever fails due to a manufacturing defect, even after extended use, we will repair the product, without charge, or replace it, at our discretion. -
Page 9: Prior To Starting Your Britelyt
Keep Pre-Heater tube clean and clear at all times • Never burn old or dirty fuel in your lantern. BriteLyt assumes no responsibility or liability due to improper use. Using anything other than BriteLyt brand replacement parts will result in the expiration and cancellation of your lantern’s factory warranty. -
Page 10: Step By Step Lighting Instructions
Lighting your BriteLyt Lantern Before lighting your BriteLyt lantern read this manual through in its entirety. Note all warnings and safety cautions. Ensure you comprehend all instructions before beginning. Do not inhale smoke or use lantern indoors. Refer to diagram on page 2 for parts labels. - Page 11 Step 5 Ensure that the pointer on the fuel dial is pointing upright to 12 O’clock (This is the off position). Screw the pressure gauge back onto the tank by hand. BriteLyt Rapid 829/500CP...
- Page 12 Immediately light the now flowing fuel just above the open lever using a lighter or match. Lighters are the rec- ommended ignition source. If needed, unlock hand pump and again plunge repeatedly to maintain pres- sure in tank. BriteLyt Rapid 829/500CP...
- Page 13 If your lantern begins to dim, use the hand pump to in- crease the tank pressure. Use the fuel dial to control the level of light output. BriteLyt Rapid 829/500CP...
-
Page 14: Shutdown Procedure
Shutdown of your BriteLyt Lantern Step 1 To extinguish the lantern open up the bleeder valve on the pressure gauge. Turn the fuel dial to point vertically (12 O’clock) to cut off the flow of fuel. Storage of your BriteLyt Lantern •... -
Page 15: Tips, Troubleshooting / Warranty Reg
This will help to preheat faster. Warranty Registration BriteLyt’s limited lifetime warranty requires the lantern be regis- tered to you. In order to register your warranty, visit us online at www.britelyt.com/reg to digitally register your lantern. -
Page 16: Ez-Pump Instructions
CO2 filler. Be sure that incoming pressure does not exceed 30psi. Do not use a CO2 system over 12G. For a video tutorial on how to use your lantern or troubleshooting suggestions visit: www.BriteLyt.com/howto BriteLyt Rapid 829/500CP... -
Page 17: Ez-Cook Instructions
EZ-Cook Accessory Instructions (Optional Accessory) Step 1 Loosen the handle/reflector screws to remove the hood/ cover from the lantern. Replace the hood/cover with the EZ-Cook adapter using the set grooves as guides. BriteLyt Rapid 829/500CP... -
Page 18: Mutli-Fuel Operation
DO NOT BURN HOMEMADE/CUSTOM FUELS! Burning fuels that are not listed in this manual should be done at your own risk. BriteLyt as- sumes no responsibility for the burning of non listed fuels. Burning fuels not listed in this manual can cause... - Page 19 Motor Oil and Gasoline Type Fuel Pre-Heat Time approximately: 1 1/2 to 3 min and may have to use Alcohol cup and not preheater (part 35). (Must test pre- heater if it does not work use heat cup part 35) BriteLyt Rapid 829/500CP...
- Page 20 4500 140th Ave N, Ste 101 - Clearwater, FL 33762 (727) 451-7020 Fax: (727) 451-7198 www.BriteLyt.com BriteLyt Rapid 829/500CP...
Need help?
Do you have a question about the Rapid 829/500CP and is the answer not in the manual?
Questions and answers