Table of Contents
Advertisement
Advertisement
Table of Contents

Related Manuals for Venturer SVP580

Summary of Contents for Venturer SVP580
- Page 1 5-DVD/CD PLAYER VENTURER SVP580 CD PLAYBACK CD-R VIEWER OWNER'S MANUAL...
-
Page 2: Important Safety Instruction
Important Safety Instructions The lightning flash with an arrowhead symbol, within CAUTION the equilateral triangle, is intended to alert the user to the presence of uninsulated "dangerous voltage" within the product's enclosure that may be of sufficient magnitude to cause an electric shock. The exclamation point within the equilateral triangle is WARNING: TO REDUCE THE RISK OF ELECTRIC intended to alert the user to the presence of important... -
Page 3: Important Safety Instruction
Important Safety Instructions 1. Read Instructions - All the safety and operating instructions should be read before the appliance is operated. 2. Retain Instructions - The safety and operating instructions should be retained for future reference. 3. Heed Warnings - All warnings on the appliance and in the operating instructions should be adhered to. 4. -
Page 4: Table Of Contents
Table of Contents Important Safety Instruction ..... 1-2 Playing MP3 and Picture File Disc..21-22 Disc Formats ..........4 Playing a MP3 file disc ..........21 Playing a Picture file disc ........22 Before You Start ........... 5 Playing a MP3/Picture file disc ....... 22 Using the remote control .......... -
Page 5: Disc Formats
Disc Formats The Unit can playback. DVDs [12cm(5”) disc] Compatible Audio CDs [12cm(5”) disc] Region Management Information Region Management Information: This Unit is designed and manufactured to respond to the Region Management Information that is encoded on DVD discs. If the Region number printed on the DVD disc does not correspond to the Region number of this Unit, this Unit cannot play that disc. -
Page 6: Before You Start
Before You Start Using the Remote Control • Point the Remote Control at the REMOTE SENSOR located on the Unit. • When there is a strong ambient light source, the performance of the infrared REMOTE SENSOR may be degraded, causing unreliable operation. •... -
Page 7: Parts And Functions
Parts and Functions Remote Control 1) OPEN/CLOSE button Use to open or close the disc tray. 2) DISC SKIP button To change next available disc. 3) Number (0 - 9) and (+10) buttons Use when creating programs, and entering a parental level password. -
Page 8: Remote Control
Parts and Functions Remote Control 17) STANDBY / ON button Turns the Unit on and puts it in standby mode. CURSOR buttons Use to highlight selections on a menu screen and make adjust certain settings. 19) MENU button Open and close DVD's menu. 20) ENTER button Confirm selections on a menu screen. -
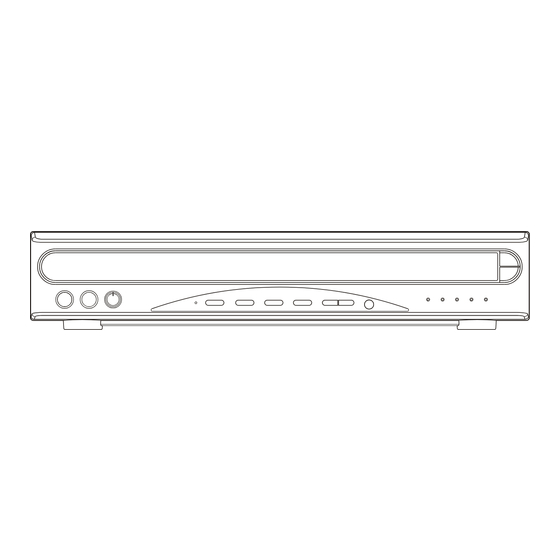
Page 9: Front And Rear Panel
Parts and Functions Front Panel 4 5 6 7 8 12 13 PAUSE button 1) MIC 1/MIC 2 INPUT JACK Pause playback, frame advance. Connect the microphone. PLAY button 2) MIC VOL (microphone volume) control Press to start or resume playback. Adjust the microphone volume level. -
Page 10: Display
Display Display Information The DVD displays the information shown below on the TV screen and on the Unit's DVD display depending on the operation status. Display Examples TV Screen Remarks "No Disc" appears when the tray is closed and: If no disc is loaded 1)There is no disc in the tray. -
Page 11: Setup
Setup A. Connecting a TV The Unit can be connected to your TV in several different ways, depending on the design of your TV. RCA Audio/Video cable Use the supplied Audio/Video cable. Connect the VIDEO OUT and left/right AUDIO OUT jacks on the unit to the VIDEO IN and left/right AUDIO IN jacks on your TV. -
Page 12: Connecting Another Source
Setup Coaxial Antenna Jack Some TVs do not have an RCA or S-Video jack, they only have a coaxial antenna jack. In order to connect this Unit to these TVs, you must purchase an RF modulator (available in the Audio/Video department of most electronics retailers or at http://www.18002526123.com) and follow the instructions included with it. -
Page 13: Turning On The Unit And Tv
Setup Need More Help? DO NOT RETURN THIS TO THE STORE Please call Customer Service at 1-800-252-6123 or visit online help at http://www.18002526123.com Turning on the Unit and TV 1)Press the power button to turn the Unit ON, or 2)Press the STANDBY/ON button on the remote control to turn on the Unit while the Unit is in standby mode. 3)Turn on the TV by pressing its POWER button. -
Page 14: Playing A Disc
Playing a Disc Basic playback This owner’s manual explains the basic instructions of this DVD Unit. Some DVD discs are produced in a manner that allows specific or limited operation during playback. As such, the DVD Unit may not respond to all operating commands. This is not a defect in the DVD Unit. Refer to the instruction notes of discs. -
Page 15: Fast Foward/Fast Reverse
Playing a Disc Fast Forward/Fast Reverse 1. Press the SEARCH SEARCH button when a disc is playing. • The disc begins fast scan at x2 speed. • Four speeds are available. Each time SEARCH SEARCH button is pressed, the speed of fast scan changes in the following sequence: 2. -
Page 16: Audio Selection
Playing a Disc 2. Press the ANGLE button repeatedly to change the scene to the next angle in those recorded. • About two seconds later, playback continues from the new angle you selected. • If no button is pressed within 10 seconds, playback continues without changing the current angle. -
Page 17: Special Functions
Special Functions Basic playback DISPLAY function Using DISPLAY, you can check and change the current settings of the following items: ANGLE, AUDIO and SUBTITLE. • While the disc is playing, press the DISPLAY button to display the screen shown below. Elapsed time: Elapsed time from the beginning of the chapter which is currently playing. -
Page 18: Locating A Specific Title
Special Functions Basic playback Locating a specific title If a DVD disc contains title numbers, you can locate a specific title by directly selecting a title number. 1. In stop mode, press the GOTO button. 2. Press button to highlight a specific field and press the corresponding number button(s) for the title you want. -
Page 19: Locating A Specific Time
Special Functions Basic playback Locating a specific time You can move to a specific location by entering its corresponding time (hours, minutes, seconds) 1. Press the GOTO button. 2. Press button to highlight time. 3. Press the corresponding number buttons for the setting point you want. •... -
Page 20: Cd / Dvd Programmable Memory
Advanced CD / DVD programmable memory playback Programmable memory The two types of programmed playback provided by this Unit are title programmed playback and chapter programmed playback. Title / Chapter programmed playback 1. Press the MEMORY button while the disc is stopped. 2. -
Page 21: Repeat Playback
Advanced Repeat Playback playback You can play a specific title or chapter repeatedly. (Title repeat, chapter repeat, A-B repeat) Repeating a title You can play the same title repeatedly. 1. While the disc is playing, press the REP DISC button until the “ ”... -
Page 22: Playing Mp3 And Picture File Disc
Playing MP3 and Picture File Disc This Unit will play MP3 and Picture files recorded on CD-R discs Playing a MP3 file disc 1. Press the OPEN /CLOSE button, the disc tray opens. 2. Insert a MP3 file disc on the disc tray with the label side up. 3. -
Page 23: Playing A Picture File Disc
Playing MP3 and Picture File Disc Playing a Picture file disc 1. Press the OPEN /CLOSE button, the disc tray opens. 2. Insert a Picture CD on the disc tray with the label side up. 3. Press the OPEN/CLOSE button, the disc tray closes. 4. -
Page 24: Customizing The Function Settings
Customizing the Function Settings LANGUAGE setting OSD (On Screen Display) Menu 1. Press the STOP button so that no disc is playing. 2. Press the SETUP button. 3. Use button to select the Language, then press the ENTER button. 4. Use button to OSD Menu, then press the ENTER button. -
Page 25: Dvd Menu
Customizing the Function Settings DVD Menu 1. Press the SETUP button. 2. Use button to select the Language, then press the ENTER button. 3. Use button to DVD Menu, then press the ENTER button. 4. Use button to English, then press the ENTER button. 5. -
Page 26: Tv System
Customizing the Function Settings Cut off when a wide-screen video image is played. 4:3 PS (Pan Scan) • When wide-screen video material is played, this mode clips the right and left sides of the image so that it can be viewed on a conventional TV screen. •... -
Page 27: Video Output
Customizing the Function Settings Video Output 1. Press the SETUP button. 2. Use button to select Video, then press the ENTER button. 3. Use button to select Video Output, then press the ENTER button. 4. Use button to shift and select the signal, then press the ENTER button. 5. -
Page 28: Rating Setting
Customizing the Function Settings RATING setting Password/Parental lock DVD discs equipped with the password function are rated according to their content. The contents allowed by a parental lock level and the way a DVD disc can be controlled may vary from disc to disc. For example, if the disc allowed, you could edit out violent scenes unsuitable for children and replace them with more suitable scenes, or you could lock out playback of the disc altogether. -
Page 29: Load Factory
Customizing the Function Settings Load Factory If you want to return the initial language setting to the factory default, do the following: 1. Press the SETUP button. 2. Use button to select the Rating, then press the ENTER button. 3. Use button to shift and select the Load Factory, then press the ENTER button. -
Page 30: Language Code List For Disc Language
Language Code List for Disc Language Code Language Name Code Language Name Code Language Name Code Language Name Afar Frisian Malagasy Slovenian Abkhazian Irish Maori Samoan Afrikaans Scots Gaelic Macedonian Shona Ameharic Galician Malayalam Somali Arabic Guarani Mongolian Albanian Assamese Gujarati Moldavian Serbian... -
Page 31: Maintenance
Maintenance Cleaning Disc A defective or soiled disc inserted into the Unit can cause sound to drop out during playback. Handle the disc by holding its inner and outer edges. • Do NOT touch the surface of the unlabeled side of the disc. •... - Page 32 Trouble Shooting Guide SYMPTOM CAUSE (AND REMEDY) • The audio cable is not connected securely. No sound or only a very low-level sound is • Make sure that you've selected the correct equipment on the system. heard. • The system is in pause mode. Press the PLAY button to return to normal play mode.
Need help?
Do you have a question about the SVP580 and is the answer not in the manual?
Questions and answers