
Subscribe to Our Youtube Channel
Related Manuals for Ultra GammaView 2555

Summary of Contents for Ultra GammaView 2555
-
Page 1: User Manual
GammaView 2555 2-Port Value DVI KVM U12-41379 User Manual ©2011 Streak Products, Inc. PAPE-1337-SY1G Printing date: 02/2011 All brand names and trademarks are the registered property of their respective owners. -
Page 2: Fcc Information
FCC Information This equipment has been tested and found to comply with the limits for a Class B digital device, pursuant to Part 15 of the FCC Rules. These limits are designed to provide reasonable protection against harmful interference in a residential installation. This equipment generates, uses and can radiate radio frequency energy, and if not installed and used in accordance with the instruction manual, may cause interference to radio communications. -
Page 3: Online Registration
U12-41379 User Manual Online Registration You can register your product at our online support center: North America http://www.ultraproducts.com/register Technical Support For international online technical support – including troubleshooting, documentation, and software updates: http://www.ultraproducts.com For North American technical support: Email Support support@help.ultraproducts.com Telephone Support 1-888-222-5487... -
Page 4: Package Contents
Copyright © 2011 Streak Products, Inc. Manual Date: 2011-03-11 ULTRA and the ULTRA logo are trademarks of Streak Products, Inc. All rights reserved. All other trademarks are the property of their respective owners. - 4 -... - Page 5 Overview The GammaView 2555 2-Port Value DVI KVM takes a giant step forward from prior cable KVM models by offering DVI functionality, USB 2.0 peripheral sharing (via a USB hub attached to the USB mouse port), a rich bass experience for 2.1 surround systems, and a firmware upgrade function that allows you to keep up with latest available versions.
- Page 6 Compact design, built-in all-in-one cables (2 x 4 ft) Superior video quality – up to 1920 x 1200 Compatible with widescreen LCD monitors Video DynaSync – exclusive ULTRA technology which eliminates boot-up display problems and optimizes resolution when switching between ports Power on detection –...
-
Page 7: System Requirements
3. To use the USB 2.0 mouse port as a USB hub, you must first disable mouse emulation mode. See Hotkey Summary Table, page 15 for information. An additional power adaptor for USB hub is recommended. System Requirements Console A DVI monitor capable of the highest resolution that you will be using on any computer in the installation A USB Keyboard and a USB Mouse Speakers and microphone (optional) -
Page 8: Operating Systems
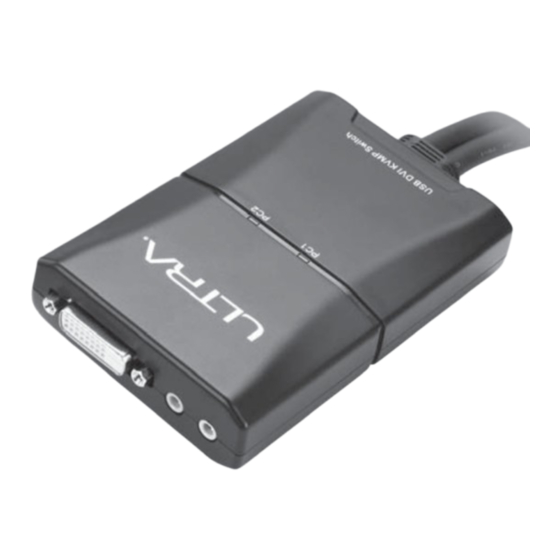
Operating Systems Supported operating systems are shown in the table, below: Version Windows 2000 / XP / Vista / 7 Linux RedHat 6.0 and higher SuSE 8.2 and higher Mandriva (Mandrake) 9.0 and higher UNIX 4.3 and higher FreeBSD 3.51 and higher Solaris 9 and higher Novell Netware... - Page 9 Components U12-41379 Remote Port Selector - 9 -...
- Page 10 Component Description Console Audio Ports Your console speakers and microphone plug in here. Console Monitor Port Your console DVI monitor plugs in here. Port LEDs The Port LEDs indicate status. The LED lights on to indicate that the computer attached to the corresponding port is selected and has the KVM focus.
-
Page 11: Installation
Installation 1. Make sure that the power to any device that you connect to the installation has been turned off. You must unplug the power cords of any computers that have the Keyboard Power On function. 2. Make sure that all devices you will be installing are properly grounded. -
Page 12: Installation Diagram
Installation Diagram KVM Cable - 12 -... -
Page 13: Operation
Operation The GammaView provides three convenient methods of selecting computers: Manual – click the pushbutton on the Remote Port Selector; Mouse – click the mouse’s scroll wheel; and Hotkey – enter combinations from the keyboard. Manual Port Selection Press the port selection pushbutton on the Remote Port Selector to toggle the KVM and Audio focus between the two computers. -
Page 14: Hotkey Port Selection
Hotkey Port Selection All hotkey operations begin by tapping the Scroll Lock key twice. See the Hotkey Summary Table for full details. Note: If using [Scroll Lock] conflicts with other programs, [Ctrl] can be used instead. Alternate Entering Hotkey Mode Press [Scroll Lock] [Scroll Lock] [x] [Enter]. -
Page 15: Hotkey Summary Table
Hotkey Summary Table Combination Function [Scroll [Enter] Toggles the KVM and Audio focus between the two Lock] ports. [Scroll Note: If the KVM and Audio focus are on different Lock] + ports, only the KVM focus switches. [k] [Enter] Only toggles the KVM focus. [s] [Enter] Only toggles the Audio focus. -
Page 16: Keyboard Emulation
Keyboard Emulation PC Keyboard Mac Keyboard PC Keyboard Sun Keyboard [Shift] Shift [Ctrl] [T] Stop [Ctrl] Ctrl [Ctrl] [F2] Again [Ctrl] [F3] Props [Ctrl] [1] [Ctrl] [F4] Undo [Ctrl] [2] [Ctrl] [F5] Front [Ctrl] [3] [Ctrl] [F6] Copy [Ctrl] [4] [Ctrl] [F7] Open [Alt]... -
Page 17: The Firmware Upgrade Utility
The Firmware Upgrade Utility To upgrade the GammaView’s firmware, do the following: 1. From a computer that is not part of your KVM installation, download the latest Firmware Upgrade package for the KVM from our Internet support site ( www.ultraproducts.com 2. -
Page 18: Upgrade Failed
Upgrade Failed If the Upgrade Succeeded screen doesn’t appear, it means that the upgrade failed to complete successfully, in which case you should do the following: 1. Disconnect the USB connectors on the KVM cables from the computer. 2. Press and hold the Remote Port Selector’s pushbutton. While you are still holding the pushbutton, reconnect the KVM cable’s USB connectors to the computer. -
Page 19: Specifications
Specifications Function U12-41379 Computer Connections Console Connections Port Selection Remote Port Selector, Mouse, Hotkeys Connectors Console 1 x USB Type A Female (Silver) Ports Video 1 x DVI-D Female (White) Mouse 1 x USB Type A Female (Silver) Speakers 1 x Mini Stereo Jack Female (Green) Mic. -
Page 20: Factory Default Hotkey Settings
Factory Default Hotkey Settings Setting Default Port Switching [Scroll Lock] [Scroll Lock] Auto Scan Interval 5 seconds Keyboard Operating Platform PC Compatible Mouse Emulation Mouse Port-Switching Limited Warranty IN NO EVENT SHALL THE DIRECT VENDOR'S LIABILITY EXCEED THE PRICE PAID FOR THE PRODUCT FROM THE DIRECT, INDIRECT, SPECIAL, INCIDENTAL OR CONSEQUENTIAL DAMAGES RESULTING FROM THE USE OF THE PRODUCT, DISK OR ITS DOCUMENTATION.
Need help?
Do you have a question about the GammaView 2555 and is the answer not in the manual?
Questions and answers