Table of Contents
Advertisement
INSTALLATION INSTRUCTIONS
VB0052
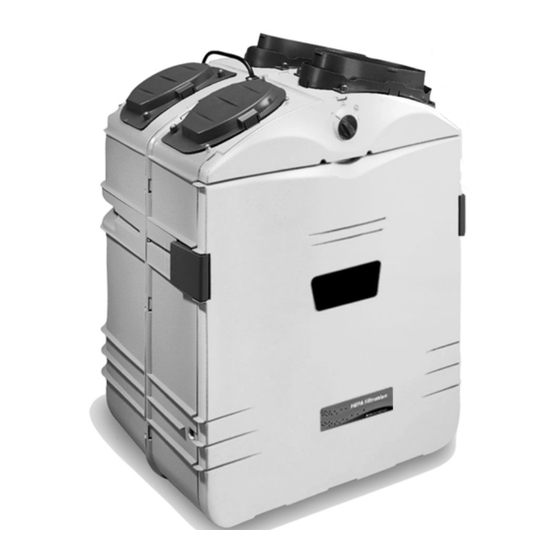
HEPA
Filtration*
GSFH1K
*Patents pending
INSTALLER: LEAVE THIS MANUAL WITH CONSUMER.
CONSUMER: USE AND CARE INFORMATION
AND USER MANUAL
HEPA Filtration and
Ventilation*
RESIDENTIAL USE ONLY
ON PAGES 31 and 35 to 38.
www.GuardianPlusAirSystems.com
www.Broan-NuTone.com
Broan-NuTone LLC
Fresh Air
GSVH1K
HEPA Filtration,
Fresh Air and Heat
Recovery*
GSHH3K
04326
rev
1.
99043105
Advertisement
Table of Contents

Related Manuals for Guardian Plus GSFH1K

Summary of Contents for Guardian Plus GSFH1K
-
Page 1: Installation Instructions
Fresh Air Ventilation* VB0052 GSVH1K HEPA HEPA Filtration, Filtration* Fresh Air and Heat GSFH1K Recovery* GSHH3K *Patents pending RESIDENTIAL USE ONLY INSTALLER: LEAVE THIS MANUAL WITH CONSUMER. CONSUMER: USE AND CARE INFORMATION ON PAGES 31 and 35 to 38. www.GuardianPlusAirSystems.com www.Broan-NuTone.com... - Page 2 ABOUT THIS MANUAL Congratulations! Your purchase of this whole-house HEPA filtration, with optional ventilation will allow you and your family to enjoy clean and healthy air throughout your home for years to come! Please read this manual thoroughly. Several models are described in this publication. Some details of your unit may be slightly different than the ones shown, as the illustrations are typical ones.
- Page 3 ABOUT THESE UNITS WARNING TO REDUCE THE RISK OF FIRE, ELECTRIC SHOCK, OR INJURY TO PERSON(S) OBSERVE THE FOLLOWING: 1. This unit is intented for residential installation only. 2. Installation must be done in accordance with all applicable codes and standards, including fire-rated construction codes and standards.
-
Page 4: Table Of Contents
TABLE OF CONTENTS .......5 EFORE STARTING Inspect the Content of the Box . -
Page 5: Before Starting
(model GSHH3K), insulation, dampers (models GSVH1K and GSHH3K), prefilter, HEPA filter, etc. are all intact. • If the unit was damaged during shipping, contact your local distributor, or Broan-NuTone at 1 800 558-1711. 2. TECHNICAL DATA GSFH1K GSVH1K GSHH3K HEPA Filtration & HEPA Filtration, Models... -
Page 6: Dimensions
2. TECHNICAL DATA (CONT’D) 2.1 D IMENSIONS HEPA FILTRATION UNIT, MODEL GSFH1K 29'' (737 mm) 17.8'' (452 mm) 22.9'' (581 mm) VK0047 FRONT VIEW TOP VIEW HEPA FILTRATION AND HEPA FILTRATION, FRESH AIR FRESH AIR VENTILATION AND HEAT RECOVERY MODEL GSVH1K MODEL GSHH3K 29.4''... -
Page 7: Mounting And Servicing Considerations
NOTES: 1. If there is not enough space to use the Tandem ® tansition, the optional exterior single hood must be installed to bring the fresh outside air to the unit. See Section 5.6 and Section 5.8. 2. When installing a HEPA Filtration model GSFH1K, there is no Tandem ® tansition. - 7 -... -
Page 8: Planning The Installation
3. PLANNING THE INSTALLATION The Guardian Plus units are versatile appliances capable of delivering filtered air (model GSFH1K) or both filtered and fresh air to your home (models GSVH1K and GSHH3K). Because each installation is different, it is recommended you take the time to plan your installation. -
Page 9: Planning Of The Ductwork
Return-to-Return*. * Different connections to a forced air system. Multiple furnaces or air handlers may require installation of Guardian Plus on each system for maximum IAQ benefit. NOTE: A grounded three-prong electrical outlet has to be available within 3 feet from the unit. -
Page 10: Stand Alone Installation
4. TYPICAL INSTALLATIONS (CONT’D) 4.1 S TAND LONE NSTALLATION (Primarily for homes with no central air mover or equipped with wall furnaces, radiant hot water or electric baseboard heating.) 4.1.1 B ASEMENT • Ideal for homes without a central furnace in the basement. Allows filtration and a better air circulation throughout the house. - Page 11 INSTALLATION CONSIDERATIONS: • Installing the unit near an exterior wall will shorten the length of the insulated ducts (not necessary for HEPA Filtration only model GSFH1K). • If a HEPA Filtration Fresh Air & Heat Recovery model GSHH3K is installed, a water drain must be close to collect the run-off.
- Page 12 • Easy access to perform the periodic maintenance (twice a year). • The HEPA Filtration model GSFH1K has no connection to outside, so all parts encircled are not required. CAUTION When the ambient temperature for the unit location is below freezing (32°F...
-
Page 13: Central Draw Point Installation
• The furnace/air handler does not need to run continuously. • Easy access to perform the periodic maintenance. • Offers an ambient temperature above freezing (32°F - 0°C). • The HEPA Filtration model GSFH1K has no connection to outside, so all parts encircled are not required. INSTALLATION CONSIDERATIONS: •... -
Page 14: Return-To-Return Installation
PACE • Simplify the installation by using the existing ductwork. • Non-visible ducts. • The HEPA Filtration model GSFH1K has no connection to outside, so all parts encircled are not required. CAUTION When the ambient temperature for the unit location is below freezing (32°F - 0°C), the unit must run continuously to prevent condensation. -
Page 15: Install The Unit
• Jigsaw (except for the HEPA Filtration model GSFH1K) • Extension cord • Caulking gun and caulking (except for the HEPA Filtration model GSFH1K) • 6’’ Diameter insulated ducting (except for the HEPA Filtration model GSFH1K) • 8’’ Diameter insulated ducting. -
Page 16: For Suspended Applications
According to your needs and model type, you can install the unit either in a vertical or horizontal position. ERTICAL POSITION LL MODELS ORIZONTAL POSITION LEFT SIDE ORIZONTAL POSITION RIGHT SIDE GSFH1K GSVH1K LL MODELS ODELS ONLY VD0075 VD0076 CAUTION Make sure the unit is level. -
Page 17: Installing 8" Ducts And Registers
5. INSTALL THE UNIT (CONT’D) 5.4 F ’ USPENDED PPLICATIONS CONT • Insert the four hooks in the square holes and fix them to the unit using four screws #8 - 32 x 3/4”. NOTE: To wire the wall control, go to Section 6.2 to 6.4. •... - Page 18 5. INSTALL THE UNIT (CONT’D) 5.5 I 8’’ D NSTALLING UCTS AND EGISTERS 5.5.1 S 4.1) TAND LONE YSTEM AS ILLUSTRATED IN ECTION How to connect the 8’’ flexible duct to the registers and unit’s duct connector. • Once the register location is determined, cut out a 10-1/4’’...
- Page 19 5. INSTALL THE UNIT (CONT’D) 5.5 I 8’’ D ’ NSTALLING UCTS AND EGISTERS CONT 5.5.2 C 4.2) ENTRAL OINT AS ILLUSTRATED IN ECTION Stale air ductwork Same as for Stand Alone System, described in point 5.5.1. Filtered air ductwork (Return side connection) WARNING When performing duct connections, always use approved tools and materials.
-
Page 20: Installing Insulated Flexible Ducts
5. INSTALL THE UNIT (CONT’D) 5.5 I 8’’ D ’ NSTALLING UCTS AND EGISTERS CONT 5.5.3 R ETURN ETURN 4.3) AS ILLUSTRATED IN ECTION WARNING When performing duct connections, always use approved tools and materials. Respect all corresponding laws and/or safety regulations. Please refer to your local building code. - Page 21 5. INSTALL THE UNIT (CONT’D) 5.6 I (GSVH1K GSHH3K NSTALLING NSULATED LEXIBLE UCTS MODELS ’ ONLY CONT NOTE: If there is not sufficient space to install the Tandem transition ® , both optional single exterior hood and AirDuo™ exterior hood must be used.
- Page 22 5. INSTALL THE UNIT (CONT’D) 5.6 I (GSVH1K GSHH3K NSTALLING NSULATED LEXIBLE UCTS MODELS ’ ONLY CONT 5.6.2 C 5’’ 6’’ ’ ONNECTION TO THE OVAL PORTS OF THE UNIT CONT 2. Connect the interior flexible duct to the port using a 24’’...
-
Page 23: Installing Airduo™ Exterior Hood
5. INSTALL THE UNIT (CONT’D) 5.7 I ™ E (GSVH1K GSHH3K NSTALLING XTERIOR MODELS ONLY 5.7.1 A ™ E SSEMBLING XTERIOR ™ exterior hood requires assembly. Assemble the top metal screen, the plastic grille and the bottom metal screen to the dual exterior hood. - Page 24 5. INSTALL THE UNIT (CONT’D) 5.7 I ™ E (GSVH1K GSHH3K NSTALLING XTERIOR MODELS ’ ONLY CONT ® 5.7.4 C ™ ONNECTING ANDEM TRANSITION TO EXTERIOR 1. Using a jigsaw, cut a 6’’ diameter hole in the exterior wall and insert the Tandem ®...
-
Page 25: Installing Two Exterior Hoods
5. INSTALL THE UNIT (CONT’D) 5.8 I (GSVH1K GSHH3K NSTALLING XTERIOR OODS MODELS ONLY 5.8.1 A SSEMBLING XTERIOR OODS Both exterior AirDuo™ hood and optional exterior single hood require assembly. Assemble the top metal screen, the plastic grille and the bottom metal screen to the AirDuo™... - Page 26 5. INSTALL THE UNIT (CONT’D) 5.8 I (GSVH1K GSHH3K NSTALLING XTERIOR OODS MODELS ONLY ’ CONT 5.8.3 L ™ E OCATING THE XTERIOR WARNING Make sure this hood is at least 3’ (0.9 m) away from any of the following: •...
- Page 27 5. INSTALL THE UNIT (CONT’D) 5.8 I (GSVH1K GSHH3K NSTALLING XTERIOR OODS MODELS ONLY ’ CONT CAUTION The exterior backplate must be installed with the word ‘’TOP’’ pointing upward. 5.8.4 C ’ ONNECTING NSULATED UCTS TO XTERIOR OODS CONT 2. Pull back the insulation to expose the flexible duct and, using a tie wrap, attach it to the inner ring of the exterior backplate (5’’...
-
Page 28: Connecting The Drain
5. INSTALL THE UNIT (CONT’D) 5.9 C GSHH3K M ONNECTING THE RAIN ONLY ODEL slide VO0046 VO0025 1. Remove the door by turning the 2. Hand tighten the two plastic drain switch knob to the OFF position (to fittings (1) using the gaskets (2) unlock the door).Then, unlatch the and nuts (3) as shown. -
Page 29: Low Temperature Applications Below Freezing (32°F Or 0°C)
5. INSTALL THE UNIT (CONT’D) 5.10 L (32°F 0°C) EMPERATURE PPLICATIONS ELOW REEZING ODELS CAUTION When the ambient temperature surrounding the unit falls below freezing (32°F or 0°C), all units must run continuously to prevent condensation. GSHH3K H ONLY EAT RECOVERY ODEL CAUTION •... - Page 30 5. INSTALL THE UNIT (CONT’D) 5.10 F (32°F 0°C) ( ’ EMPERATURE PPLICATIONS ELOW REEZING CONT 5.10.1B ’ LANKET NSULATION CONT Wrap the unit as shown. Make sure that all joints are fully sealed to prevent cold air penetration between the insulation and the unit. VR0002 NOTES: 1.
-
Page 31: Controls
UNLOCKED BOOST: NIT IS OPERATING ON HIGH SPEED VC0053 6.2 W ONTROLLERS There are two wall controllers available: ACCGSC1 control (intended for GSFH1K and GSVH1K models only) and ACCGSC3 control (intended for GSHH3K model only). VC0047 VC0048 ACCGSC1 ACCGSC3 CONTROLLER CONTROLLER 6.3 D... -
Page 32: Installation Of The Wall Controllers
6. CONTROLS (CONT’D) 6.4 I NSTALLATION OF THE ONTROLLERS BOTH MODELS WARNING Always disconnect power to the unit before making any connections. Failure in disconnecting power could result in electrical shock or damage of the wall control or electronic module inside the unit. CAUTION Never install more than one optional wall controller per unit. - Page 33 6. CONTROLS (CONT’D) 6.4 I ’ NSTALLATION OF THE ONTROLLERS BOTH MODELS CONT 6. Reinstall the cover plate. Using provided wall anchors and provided screws, mount the wall controller on the wall. Use only 2 screws to mount on outlet box. See illustrations below.
- Page 34 6. CONTROLS (CONT’D) 6.4 I ’ NSTALLATION OF THE ONTROLLERS BOTH MODELS CONT 8. Looking inside the right side front port, you gain access the field wiring terminals for the controller. Remove the side door located on the electrical box and punch out its knock out.
-
Page 35: Operating Accgsc1 Controller
6. CONTROLS (CONT’D) 6.5 O ACCGSC1 PERATING CONTROLLER OWER INDICATOR BOOST: LIGHTS UP WHEN SLIDE NIT IS OPERATING AT NORMAL SWITCH IS IN THE ITS HIGH SPEED BOOST POSITION ILTER MAINTENANCE ORMAL INDICATOR NIT IS OPERATING AT FLASHES EVERY MINUTE TO ITS NORMAL SPEED INDICATE IT IS ON DUTY FLASHES EVERY SECOND... -
Page 36: Maintenance
7. MAINTENANCE WARNING Risk of electrical shocks. Before performing any maintenance or servicing, always disconnect the unit from its power source. 7.1 S ANNUAL AINTENANCE ESSENTIAL Your wall controller (ACCGSC1 or ACCGSC3) tells you when to perform this maintenance when the Filter Maintenance light is flashing. Otherwise, maintenance should be performed every six months to ensure proper operation for years to come. - Page 37 7. MAINTENANCE (CONT’D) 7.1 S ’ ANNUAL AINTENANCE ESSENTIAL CONT Using your thumbs, push on the prefilter side to disengage it from the filter cartridge. Then, slide it out of the filter cartridge and discard it. Install the new prefilter by reversing this operation. VD0092 VD0093 1) Filter cartridge...
-
Page 38: Annual Maintenance
7. MAINTENANCE (CONT’D) 7.2 A NNUAL AINTENANCE ESSENTIAL Your unit is equipped with a wall controller (ACCGSC1 or ACCGSC3), which tells when to perform maintenance when the Filter Maintenance light stays ON. Otherwise, this maintenance must be performed once a year to ensure your unit proper operation for years to come. -
Page 39: Troubleshooting
8. TROUBLESHOOTING PROBLEMS SOLUTIONS 1.Unit does not start at Normal • Check breaker or fuse in main or Boost position. distribution panel. • Check there is 120V at the electrical outlet. • Make sure the unit main switch is properly set in Normal or Boost position. -
Page 40: Warranty
9. WARRANTY WHOLE-HOUSE AIR FILTRATION SYSTEM WARRANTY Broan-NuTone warrants to the original consumer purchaser of its products, that such products will be free from defects for a period of two (2) years, from date of original purchase. THERE ARE NO OTHER WARRANTIES, EXPRESS OR IMPLIED, INCLUDING, BUT NOT LIMITED TO, IMPLIED WARRANTIES OF MERCHANTABILITY OR FITNESS FOR A PARTICULAR PURPOSE.
Need help?
Do you have a question about the GSFH1K and is the answer not in the manual?
Questions and answers
service light stays on
The service light stays on for the Guardian Plus GSFH1K when the filter maintenance indicator is triggered. This happens when it is time to perform maintenance, specifically when the Filter Maintenance light remains ON. It indicates that the HEPA filter cartridge, including the prefilter, needs to be replaced as part of the required annual maintenance.
This answer is automatically generated