
Subscribe to Our Youtube Channel
Related Manuals for LENCO IR-3000


Summary of Contents for LENCO IR-3000
- Page 1 User Manual Internet Radio Tuner IR-3000 For information and support, www.lenco.eu Please read this user manual carefully before using the receiver...
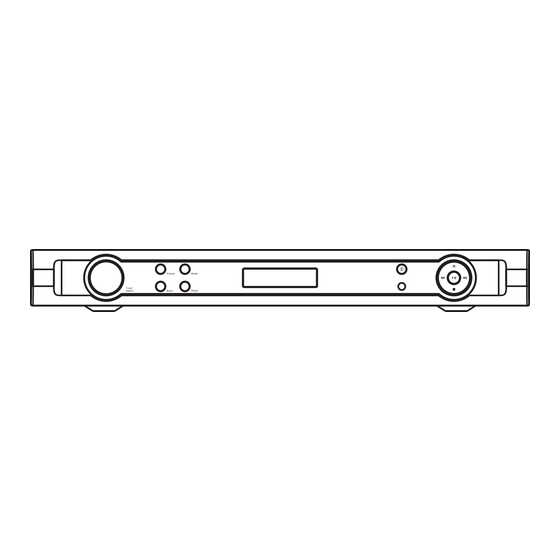
- Page 2 1. Tune/Select 7. Play/Pause 13. Antenna 2. Preset 8. Browse 14. LAN 3. Mode 9. Next 15. Right Audio 4. LCD Display 10. Back 16. Left Audio 5. Standby 11. Reply 17. AC Power Socket 6. Previous 12. Stop 18. Power ON/OFF - 1 -...
-
Page 3: Step 1- Switching On The Radio
SETTING UP Please follow these steps to connect the radio to your network. Step 1- Switching on the radio: Plug the AC power lead into the socket at the back of the radio (17) then switch on at the main switch to power-on the unit. - Page 4 Wired/Wireless (7) Press the SELECT button; (8) Rotate the dial to select the option that best describes your set up (Auto, Wired Only, Wireless Only). Auto Wired Only If you select Auto, the system will automatically detect your settings. If you select Wired Only, it will only connect via Wired Ethernet. You should make sure the Wired Ethernet lead is plugged into the RJ45 socket.
-
Page 5: Using The Equipment
You may see the following message <Station Update From Reciva>. This indicates that a new list of available stations is being downloaded. USING THE EQUIPMENT Choosing a radio station to listen to 1. Press the SELECT button when <Stations> appears in the highlighted menu. <... - Page 6 Storing a radio station in a preset via the panel control: To store the current radio station to one of the 12 available presets: (1) Press the “preset” button. (2) Select which preset number to store the station to by turning the dial to highlight the desired location, then holding the "select"...
- Page 7 3. Press the SELECT button. 4. Press Tune up or down until the display says<Clock>. < Clock > 5. Press the SELECT button. Rotate the dial until the display says<Set Time>. < Set time > 6. Press the SELECT button Set time 00:00 7.
-
Page 8: Getting Started With The Media Player
Sleep Timer Rotate the dial to change to sleep timer value and then press SELECT to begin the sleep timer. You can select OFF from 00:15 to 03:15 (in 15 minute steps) as the sleep timeout setting. Note: When you set the sleep timer, the radio will continue to play as normal, but it will go into standby mode once the sleep timer period is reached. - Page 9 A. If you select ‘Windows Shares’ menu (1) Scan for PCs is displayed, press the SELECT button. The system will scan your network and a list of all available PCs will be displayed. Note: If a PC does not have global file sharing turned on, or a third party firewall is protecting the PC it will not be visible when you scan for it.
- Page 10 Queuing up tracks for playback later 1. Highlight the required track. 2. Press the SELECT button. ‘Track Added To Queue’ will be displayed. Queuing up albums for playback later. 1. Highlight the required album. 2. Press the SELECT button. ’Tracks Added to Queue’ will be displayed. Controlling playback 1.
- Page 11 Locating and playing media files using the radio and universal plug ‘n’ play (UPnP) 1. Once the UPnP server is configured to share media files with the Internet radio, you can play the files by performing the following actions on the radio. 2.
- Page 12 Selecting ‘Media Sharing…’ for Windows Media Player11 : 5. From the ‘Media Sharing’ windows, the radio will be listed as an unknown device. Click on the unknown device listed, then click the ‘Allow’ button and then click ‘OK’. Allowing the Radio to Connect: Note: When the media is playing, you are able to change the mode of playback via selecting Media Player/Playback Mode.
-
Page 13: Configure Menu
Configure Menu 1. Press the SELECT button. Note: If you make a mistake at any point, press the BACK button to go back to the previous screen. 2. Rotate the dial until ‘Configure’ is displayed 3. Press the SELECT button. 4. - Page 14 2. Rotate the dial to highlight the desired menu mode and press SELECT. 3. The radio will now display the current backlight value for the menu mode. You can alter this value by rotating the dial to increase or decrease it. <Deemphasis>...
-
Page 15: Troubleshooting
TROUBLESHOOTING If you have trouble connecting the radio to your wireless network, these steps may help to resolve the problem: Confirm that another Wi-Fi or Ethernet Wired-connected PC can access the Internet (i.e. can browse the web) using the same network. Check that a DHCP server is available, or that you have configured a static IP address on the radio. - Page 16 can be selected in Control Panel, by selecting Folder options, view Tab. The safest way for users to enable the service is to run the ‘Set up a home or small office network’ wizard from Control Panel, Network Connections. You have a firewall set on your PC which is stopping you accessing shared files. Windows 2000 doesn’t come with a real firewall so unless you have installed one this should not be a problem.
- Page 17 Try re-connecting the PC with the media content into the network via cable. This will dramatically increase the speed at which the Internet Radio is able to scan the content of the Media PC. Playlists: Some media ripping applications allow ‘Playlists’ to be created. The Internet Radio is able to detect and stream these playlists, but they must be stored in the folder with the rest of the Media content and they must have the file extension.m3u.
- Page 18 Remote control: POWER: Press to switch the Internet radio ON/OFF. 2. MUTE: Press to mute the sound. 3. REPLY: Reserved for future services. 4. 0---9: Numeric buttons for Store and Recall functions. 5. STORE: Use to store 100 (0–99) radio stations. 6.
Need help?
Do you have a question about the IR-3000 and is the answer not in the manual?
Questions and answers