Advertisement
Quick Links
Tech Specs
2 Channnel
"C" and "H" amps
Max Power Usage
Pre Amp Tubes
3 each 12AX7/ECC83
"C" Power Tubes
"H" Power Tubes*
* Power Tubes should be purchased as matched sets. Use only tubes in quads that are factory-matched. Failure to use
matched tubes can lead to tube failure and amplifier damage or abnormal operation.
Main Fuses
120V 60Hz
Type 20mm X 5mm
100V 50/60Hz
Type 20mm X 5mm
230V 60Hz
Type 20mm X 5mm
Filament Fuses
2 each 10A 250V Type 3AG/AB
B+ Fuses
Weight
Head
1x12 Combo
Dimensions
Head
21.5" W x 10" H x 9.5" D
546mm W x 254mm H x 241mm D
1x12 Combo
24" W x 23" H x 11" D
609mm W x 584mm H x 279mm D
50 Watt
200W
3 each 12AT7
2EA EL34
2EA 6L6
3A 250V
3A 250V
1.5A 250V
1 each 1 Amp
250V Type 3AG/AB
32.8 lbs (14.9kg)
62.8 lbs (28.5 kg)
Service Notes
Tubes
Tubes are consumables, as they have a given usable lifespan. They are part of the heart of
the tone, so keeping correctly operating tubes is essential. Tubes can fail catastrophically or
gradually, and it's good to know what to look for if they start to go bad. Periodically inspect
them and look to see if anything inside the tube is glowing cherry red other than the normal
orange glow of the filament. This would indicate a situation where the tube is conducting
more current than it is capable of handling and most likely about to fail. Two other conditions
to observe are: 1) filaments not glowing or 2) a miniature fireworks display inside the tube. Any
of the above conditions indicate serious problems with the tube and should be taken care of
immediately. Tubes quite often are the cause of spurious noise in the amp. Microphonic tubes
will squeal or rattle with the vibrations of the cabinet. If suspected, tap each tube lightly with
a pencil with the amp powered up—the suspect tube will let you know. Note that there is a
normal metallic clinking when doing this, but a microphonic tube will be quite loud.
Instructions for Qualified Service Technician: To install the tubes, check that the power cord
is not plugged in, then remove the back panel with a screwdriver and notice the tube sockets.
Note that the cooling fan may need to be unplugged from the chassis. Looking from the back,
install the Power tubes (EL34, 6L6, etc.) in the sockets. In each case, align the center pin guide
correctly with the socket, making sure that the pin guide key fits with the corresponding slot
in the socket. The preamp tubes can then be placed in the smaller 9-pin sockets to the right of
the power tubes. Please refer to the tube chart in this manual (inside, panel 4) for proper tube
locations. Be aware of the pin alignment with these, as there is only one way they can fit. We
utilize tube sockets that allow relative ease of tube installation, but never force tubes into the
sockets if there becomes a problem. Also, never torque the tubes, only gently rock them from
side to side during insertion or removal. After preamp tube installation, place the cylindrical
spring tension preamp tube covers over the tubes.
Replacing preamp tubes will not require any adjustment, but the power tubes will need
rebiasing to assure proper operation. After power tube replacement, initially inspect the tubes
often to assure there are no "cherry red" components within the tube. Tubes today can have a
wide variety of tolerances and a re-bias is highly recommended with new ones.
Fuses
There are 4 fuses installed in the amplifier. 2 of these fuses are accessible on the back panel:
the main fuse, and the B+ fuse. These are replaceable by the user. Two of these fuses are high
voltage, and 2 internal fuses are for the lower filament voltages. In all cases, labels indicate the
type and rating of the fuse. Replacement fuses MUST BE THE SAME TYPE AND RATING. If they
are not you can permanently damage your amplifier. Please contact your local PRS dealer or
the PRS accessories web site for information on ordering replacement fuses.
Instructions for Qualified Service Technician: Replacement of internal fuses requires removal
of the back panel and removal of the chassis. First, ensure the power cord is not plugged in,
then remove the back panel with a screwdriver. Loosen the 4 screws holding the chassis to the
top of the cabinet. Check that all components are cool so that burns do not occur. Then, by
holding onto the transformers, carefully pull the chassis out of the cabinet.
NOTE! Capacitors may retain an electric charge and can be dangerous even when the unit is
off, unplugged, and has not been played for an extended period of time. USE CAUTION!!!!
Locate the fuse holders, remove them, and check for continuity. Blown fuses can indicate a
failure condition and should be treated as though a problem exists. Check the label for the
proper type and rating. After all fuses have been replaced and the amp is tested as acceptable
and safe, reinstall the chassis by working in reverse. Be sure to plug the reverb cords back into
place.
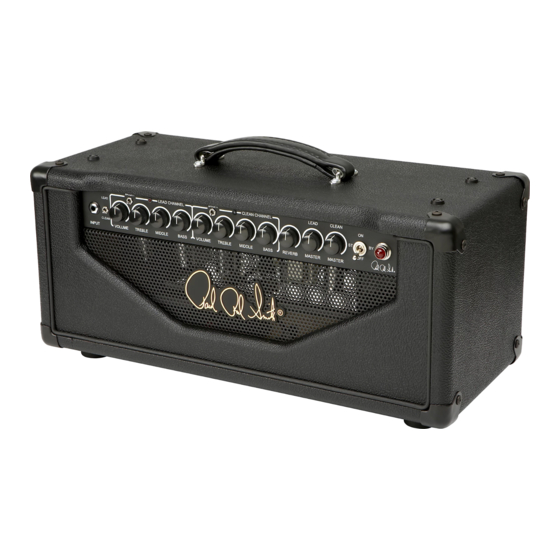
2 Channel Guitar Amplifier
User's Manual
Advertisement

Related Manuals for PRS Guitars 2 Channel Guitar Amplifier


Summary of Contents for PRS Guitars 2 Channel Guitar Amplifier
- Page 1 Power tubes (EL34, 6L6, etc.) in the sockets. In each case, align the center pin guide 2 Channel Guitar Amplifier correctly with the socket, making sure that the pin guide key fits with the corresponding slot Main Fuses in the socket.
- Page 2 1 o’clock. “Modern Eagle,” “SE Custom,” “SC 245,” “SC 250,” “Starla”, “Tonare”, “Sewell”, “ Blue Sierra”, and “Angelus” are all trademarks of Paul Reed Smith Guitars. The Birds, New Birds, are copyrighted by PRS Guitars. panel 1...
Need help?
Do you have a question about the 2 Channel Guitar Amplifier and is the answer not in the manual?
Questions and answers