
Subscribe to Our Youtube Channel
Related Manuals for Magellan SmartGPS 5390


Summary of Contents for Magellan SmartGPS 5390
- Page 1 ® For complete details on using your Magellan ® SmartGPS , please go to magellanGPS.com/support and download the user manual in.pdf format. $AVE Phone sends to SmartGPS User Manual Magellan SmartGPS 5390...
-
Page 2: Safety Notice
It is your responsibility to comply with all traffic laws and to use the Magellan SmartGPS and mounting options in such a manner that the user is in compliance with applicable laws. - Page 3 Only use the car charger approved for/supplied with your Magellan SmartGPS receiver. Use of another type of car charger will result in fire or electric shock. For safety reasons, the battery in your Magellan SmartGPS receiver will stop charging when the ambient temperature is less than 32°F (0°C) or more than 113°F (45°C).
- Page 4 This transmitter must not be co-located or operated in conjunction with any other antenna or transmitter. Lifetime Traffic is for the lifetime of the GPS Device or until Magellan no longer receives relevant traffic data whichever is shorter. Lifetime Traffic may not be transferred to another Magellan device and may not be available in certain areas.
- Page 5 © 2013 MiTAC International Corporation. The Magellan logo, Magellan, SmartGPS and Quickspell are registered trademarks of MiTAC International Corporation. SmartDetour and OneTouch are trademarks of MiTAC International Corporation and are used under license by MiTAC International Corporation. All rights reserved.
-
Page 6: Table Of Contents
Map Screen Footer Bar ......................7 Instructions ......................7 Power ..........................7 Turning the Magellan SmartGPS Receiver On ..............7 Turning the Magellan SmartGPS Receiver Off (Suspend Mode) ........7 Turning the Magellan SmartGPS Receiver Off (Shutdown) ..........8 Selecting Map Display ......................8 Adjusting the Volume ......................8 Muting the Volume .........................8... - Page 7 Connecting to a Non-Broadcasting Wi-Fi Network ............14 Forgetting a Network Connection ..................15 Refreshing the Network List ....................15 Syncing to MiCloud with Magellan Content Manager..........15 Syncing Content from Magellan Content Manager ............15 Connecting to MiCloud with Smartphone ..............16 Installing the Magellan App on Android Phones............16 Installing the Magellan App on iPhone ................16...
- Page 8 Using the Keyboard to Enter an Address .............22 Using the Keyboard to Search for POIs ............24 My Places ......................25 Address Book ....................25 My Places ..................25 Instructions ......................26 Address Book .........................26 Accessing the Address Book ....................26 Adding a Place to the Address Book .................26 Adding a Yelp or Foursquare Location to Places in the Address Book .......26 Editing the Name for Place in the Address Book ............27 Deleting a Place from the Address Book ................27...
- Page 9 Map Screen While Routing ................34 Routing ..................34 Maneuver Information ..................35 Maneuver Icons ......................35 Traffic Information ..................36 Traffic Icons ........................36 My Route .........................37 GO Screen ........................38 Instructions ......................38 Routes ..........................38 Creating a Route from a Content Square .................38 Creating a Route from the Address Book .................38 Creating a Route from the Wish List ..................39 Creating a Route from Recent Places ................39 Creating a Route from the OneTouch Menu ..............39...
- Page 10 Bluetooth ..................44 Using Bluetooth on the Magellan SmartGPS ..........44 Pairing Your Smartphone.....................44 Answering a Call .....................44 Making a Call ....................44 Messaging ......................45 Instructions ......................45 Answering a Call........................45 Hanging Up ..........................46 Creating a Call with the Dial Pad..................46 Redialing ..........................46 Making an Emergency 911 Call ..................46...
- Page 11 Product Information ......................52 End-User License Agreement ....................52 Acknowledgments ........................52 Navigation and Maps ..................52 Enable Live Traffic .........................52 Auto-Zoom on Turns ......................53 Enable U-Turns ........................53 Avoid Toll Roads ........................53 Avoid Unpaved Roads ......................53 Night Mode ..........................53 Visible Speed Warning ......................53 Speed Limit Warning Threshold ..................53 Location ......................53 Region............................53 Set GPS Position ........................54...
- Page 12 Browser ...........................56 Weather ..........................56 Content Sync Status ......................56 www.magellangps.com...
-
Page 13: Fundamentals
Home Press the Home button to return to the split Map screen display Button from any where in the Magellan SmartGPS receiver. Always useful when you need to return to the Map screen quickly. Power Press and hold to turn the device on or to completely shutdown. -
Page 14: Map Screen
Time of Day Time is transmitted from the GPS satellites using an atomic clock as reference. The Magellan SmartGPS factors in the time zone for your location as well as daylight savings time conditions to compute the local time displayed. There are no settings for the time displayed. - Page 15 Status being transmitted and you must be using a Magellan-approved vehicle power adapter. When the Magellan SmartGPS receiver is turned on, it may take a minute or more before any traffic information is displayed. Traffic information is being received. No traffic information is being received.
-
Page 16: Map Screen Map Area
Set the slider all the way to the bottom to mute the sound. Speaker On. Volume set by slider bar. Speaker Muted. Current Displays the current location of the Magellan SmartGPS receiver in Location relation to the displayed map. Indicator Tap on the Current Location Indicator to get information on your current location. -
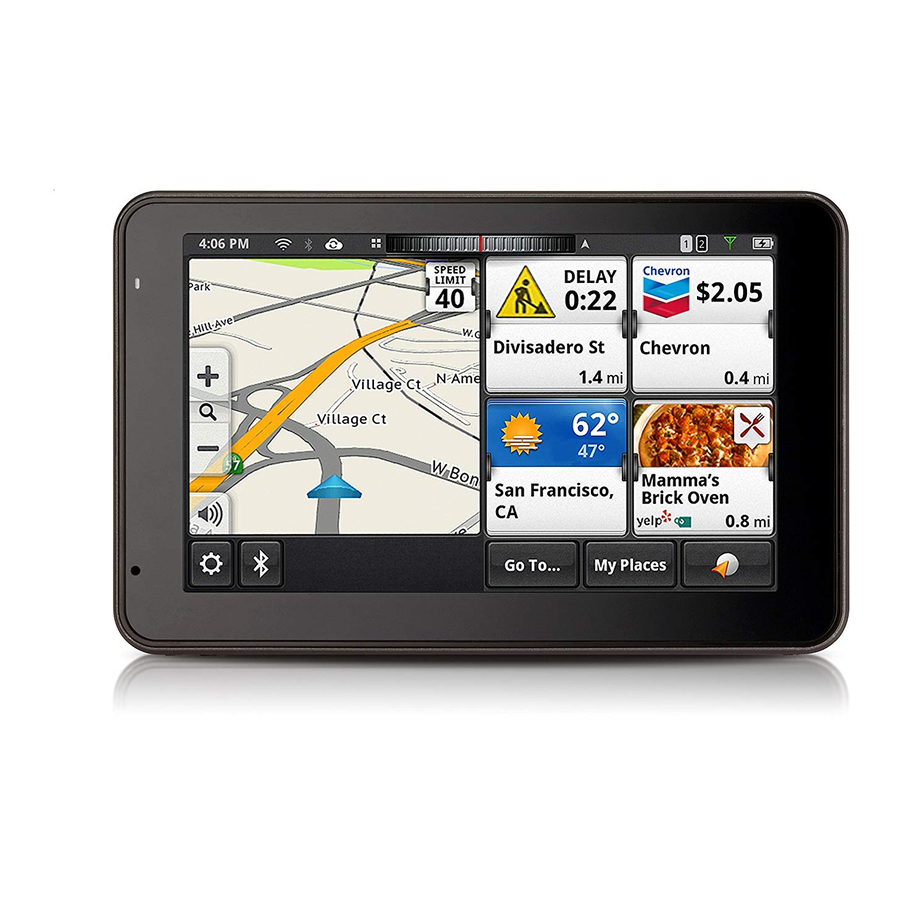
Page 17: Map Screen Content Squares
Location of a fixed speed camera. Map Screen Content Squares There are eight different content squares that are available on the Magellan SmartGPS receiver. Slide the Screen Dial to the left to view all eight squares. Normal operation is that while displaying the split screen, four squares are shown. - Page 18 Tap to view information on the displayed delay. Other traffic incidents can be viewed by flipping through the squares. If you are traveling on a route, the Magellan SmartGPS receiver will try to compute a detour around the traffic incident. If a detour is available that will save time, the Detour Traffic button will be enabled.
-
Page 19: Map Screen Footer Bar
Map Screen Footer Bar Settings Tap to access setting options for the Magellan SmartGPS receiver. Bluetooth Tap to bring up phone functions and access to Bluetooth settings. Go To... Tap to set a destination. Destinations can be an address you enter or a preloaded POI. -
Page 20: Turning The Magellan Smartgps Receiver Off (Shutdown)
Turning the Magellan SmartGPS Receiver Off (Shutdown) Press and hold the Power button for 2-3 seconds and release when the Shutting Down message is displayed. The receiver will completely shutdown, clearing it’s memory. NOTES Shutdown Mode: The device completely shuts down and clears memory. -
Page 21: Changing The Data Field
Changing the Data Field The data field is shown on the Map screen whenever the device is routing to a destination or the Map screen display is set to full map. Tap on the data field. Select the desired data type from the list displayed. -
Page 22: Changing The Map Style
Changing the Map Style The map can be changed to be viewed in 3-dimensional, 2-dimensional - North up or 2-dimensional - heading up style. Swipe the screen over the map area. Select the desired style from the footer bar. 3-Dimensional 2-Dimensional - North Up 2-Dimensional - Heading Up Viewing Current Location Details... -
Page 23: Saving Current Location
Saving Current Location Tap on the current location icon The Current Location screen is displayed. Tap on Save. Select where to save the location (Wish List, My Places or OneTouch). Use the keyboard to enter a name for the location. Tap Save. -
Page 24: Content
Chapter Content Magellan SmartGPS Content There are various types of content available on the Magellan SmartGPS. Preloaded POIs (Points of There are approximately 7 million POIs preloaded into Interest) the Magellan SmartGPS. Any of these POIs can be selected as a route’s destination using the “Go To...”... -
Page 25: Syncing Content From Micloud
Syncing Content from MiCloud As described in the table above, much of the content available on the Magellan SmartGPS is added through the MiCloud using a Wi-Fi network, Magellan Content Manager or Bluetooth connection. How It Works When you register your device a MiCloud account is created where your content is stored. -
Page 26: Instructions
You need to initially connect to a Wi-Fi network before you can access it. Once you have successfully connected, the information for connecting to the network is stored in the Magellan SmartGPS and it automatically connects to the network when in range. -
Page 27: Forgetting A Network Connection
Forgetting a Network Connection After connecting to a network, the password for the network is stored in the Magellan SmartGPS until you “forget” the password. After forgetting, you will need to re-enter the password to connect. From the Map screen press Tap on the Wi-Fi button. -
Page 28: Connecting To Micloud With Smartphone
Connecting to MiCloud with Smartphone To use your smartphone to sync content with your Magellan SmartGPS you need to have the Magellan app installed and running on your smartphone and your smartphone paired to the Magellan SmartGPS. Installing the Magellan App on Android Phones Go to play.google.com... -
Page 29: Adding User-Entered Content
Adding User-Entered Content Content can be saved in two ways, when you create a route to a destination or entering it directly into your address book. Both methods are fundamentally the same, just accessed from different areas. Adding User-Entered Places or Contacts From the Map screen tap My Places. -
Page 30: Transferring Content From An Apple Iphone
Adding Content from a Smartphone A convienent feature of using a smartphone with the Magellan SmartGPS is the ability to send content from your smartphone directly to the Magellan SmartGPS. NOTES This requires that the smartphone you are using has the Magellan RoadMate app and has Bluetooth connection to the Magellan SmartGPS. -
Page 31: Adding Content Through Magellan Content Manager
If your Magellan SmartGPS is on, the location will be sent to it. If it is not on, the location will be sent the next time it is turned on and Bluetooth connection is established. On your Magellan SmartGPS you can select GO to create a route immediately to the location sent, or tap Move to save the location in your address book, wish list or OneTouch menu. -
Page 32: Phantomalerts
PhantomALERTS You can select how the PhantomALERTS will be presented. You can turn the visiblity of the alert on the map on or off as well as turning the audible alert on or off. Customizing the Alerts From the Map screen press Tap Content. -
Page 33: Weather
Weather Weather can be customized to display the temperature in fahrenheit (°F) or celsius (°C). You can also set which five cities will have weather information available. Setting Weather Units From the Map screen press Tap Content. Tap Weather. Select °F or °C. Browser Browser settings let you customize the way you browse the web, including several that help you control your privacy... -
Page 34: Using The Keyboard
Using the Keyboard Keyboard Basics If you have used the keyboard on your smartphone you will find the keyboard on the Magellan SmartGPS very easy to use. Since there are a few minor differences, and for those who have not used a smartphone keyboard, the basics of the Magellan SmartGPS keyboard will be explained here. - Page 35 Swipe down on the keyboard to view more cities in the list. Tap in the entry field to view the keyboard again. When you see the city and state you are looking for, tap on the city name in the list. There are multiple options available: • Tap the “X”...
-
Page 36: Using The Keyboard To Search For Pois
Enter the address number until it appears in the list. When the address appears, check that it is correct and tap on the address in the list. This completes the address entry. The next screen will either be a GO to the address entered or Add to your address book. -
Page 37: My Places
Chapter My Places My Places My Places can be best described as the place where all of the saved destinations and routes are stored. There are four separate sections to My Places, each one with its own distinct purpose. Address Book The Address Book stores contacts, places and trips that you have saved. -
Page 38: Instructions
Trips The Address Book also provides the convenience of saving trips that you might take. You could plan your vacation travels in advance or possibly your business requires you to go to multiple locations on a regular basis. You can create these trips and call upon them whenever needed from the Address Book. -
Page 39: Adding A Yelp Or Foursquare Location To Places In The Address Book
Adding a Yelp or Foursquare Location to Places in the Address Book From the Map screen, tap on a Yelp or Foursquare square to save to the Address Book. From the Go screen, tap Save. Tap Places. Enter a Name for the location or accept the default name. Tap Save. Editing the Name for Place in the Address Book Only the descriptive name for a place can be edited. -
Page 40: Adding A Yelp Or Foursquare Location To Contacts In The Address Book
Tap new icon Enter the address (see Using the Keyboard ) to be added. When the address has been entered, tap Add. Enter a contact name. Tap Save. Tap Done to finish editing. Adding a Yelp or Foursquare Location to Contacts in the Address Book From the Map screen, tap on a Yelp or Foursquare square to save to the Address Book. -
Page 41: Adding A Trip To The Address Book
Confirm the deletion. Tap Done to finish editing. Adding a Trip to the Address Book From the Map screen, tap My Places. Tap the Trip tab icon Tap Edit. Tap new icon Create a trip (see Routes ) to be added. When the trip has been entered, tap Save. -
Page 42: Wish List
Wish List Accessing the Wish List From the Map screen, tap My Places. Tap Wish List. Deleting a Location from the Wish List From the Map screen, tap My Places. Tap Wish List. Tap the delete icon for the location to be deleted or tap Clear All to delete all the locations in the Wish List. -
Page 43: Onetouch
OneTouch Adding a OneTouch Button - Location From the Map screen or My Places, tap the OneTouch button Select an empty button and tap the add icon Select where the location will be added from; Search, My Places or Recent. Search displays the keyboard where you can search for a POI or enter an address. -
Page 44: Editing The Name Of A Onetouch Button
Deleting a OneTouch Button From the Map screen or My Places, tap the OneTouch button Tap Edit. Tap the delete icon Confirm the deletion. Tap Done. Editing the Name of a OneTouch Button From the Map screen or My Places, tap the OneTouch button Tap Edit. - Page 45 If there is no current location, choose where the location will be selected from; Search, My Places, or Recent. Search displays the keyboard where you can search for a POI or enter an address. (see Using the Keyboard .) My Places displays the Address Book where you can select the location from your saved places or contacts.
-
Page 46: Map Screen While Routing
Chapter Routing Map Screen While Routing The Map screen changes when there is an active route. This provides you with the information needed to route to your destination. Maneuver The maneuver bar provides information on the type of maneuver you are approaching, the distance to the maneuver and the name of the street that the maneuver will be done on. -
Page 47: Maneuver Information
NOTES The Magellan SmartGPS will provide audiable alerts while you are routing. If you missed an alert or just want to hear it again, tap on the header with the street name for the maneuver and the message will repeat. -
Page 48: Traffic Information
Traffic Information The Traffic Alert square (or the Driving Alert square if on an active route) displays an icon and pertinent information for the traffic incident. Traffic Icons Traffic Traffic Special Traffic Lane Accident Danger Equipment Restrictions Required Road Closed Slow Traffic Vehicle Road Work... -
Page 49: My Route
Turn List The Turn List will display all of the maneuvers involved in the route. There is also the option of deleting a maneuver in the list and the Magellan SmartGPS will recalculate the route with that maneuver removed. Detour Tap Detour and select the distance (3, 5, or 9 miles) to detour. -
Page 50: Go Screen
GO Screen Every route begins from the GO screen. Details for the route are displayed in an easy-to-view format. The map area graphically displays your route on the map. Above the map is the distance and the estimated time of arrival to the destination. -
Page 51: Creating A Route From The Wish List
Creating a Route from the Wish List From the Map screen tap on My Places. Tap on Wish List. Tap on the desired destination from the list of places in the Wish List. Choose how you want the route computed; Fastest, Shortest, or Least Highways. Tap GO. -
Page 52: Creating A Route To An Intersection
Tap Done. Choose how you want the route computed; Fastest, Shortest, or Least Highways. Tap GO. Creating a Route to an Intersection From the Map screen tap on Go To... Using the instructions found in Using the Keyboard , enter the name or zip code for the city. -
Page 53: Adding A Destination To A Route
Beginning a Route from a Smartphone This involves sharing the destination from the RoadMate app on your smartphone to the Magellan SmartGPS using a Bluetooth paired smartphone. RoadMate app: Enter an address, search for a POI or select an location from your address book. -
Page 54: Routing
Routing Selecting the Data Field on the Map Screen Tap on the data field. Select the desired data type from the list displayed. NOTES See Fundamentals for a list of available data types. Cancelling a Route From the Map screen, tap My Route. Tap the Route Cancel icon Confirm the cancellation of the route. -
Page 55: Detouring Around A Maneuver
Shortcut: Tap on the Maneuver Icon on the Map screen to go directly to the Turn List. on the maneuver to be detoured around. Confirm by tapping GO. CAUTION Not all maneuvers can be detoured around but the Magellan SmartGPS will try to recalculate the route avoiding the maneuver. www.magellangps.com... -
Page 56: Bluetooth
SmartGPS. Additionally, the Magellan SmartGPS has full-featured, hands-free capabilities for making and receiving phone calls utilizing the Bluetooth link from your smartphone. Before you can use your smartphone with the Magellan SmartGPS you need to pair the phone to the Magellan SmartGPS. -
Page 57: Messaging
My Places Address Book. Messaging The Magellan SmartGPS also contains the means for sending SMS messages. You can send one of the predefined messages or a custom message you have created. The Magellan SmartGPS is not designed as a conversation tool for messaging as that is unsafe to do while driving but rather as a quick response to a received message. -
Page 58: Hanging Up
Hanging Up From the Bluetooth screen, tap or hang up from your smartphone. Creating a Call with the Dial Pad. From the Map screen, tap Use the dial pad to enter the phone number. When the number is correct, tap the Call button. -
Page 59: Adding To The Speed Dial List
Making an Call using Speed Dial From the Map screen, tap Tap the speed dial tab Tap on the name in the Speed Dial list that you want to call. Adding to the Speed Dial list From the Map screen, tap Tap the speed dial tab Tap Edit. -
Page 60: Editing The Contacts Phone Book
Tap on the Call button to begin the call. Editing the Contacts Phone Book The Contacts Phone Book can not be edited within the Magellan SmartGPS but can be imported from your paired smartphone. Make the changes to your Address Book on your smartphone and then follow these instructions. -
Page 61: Setting Audible Maneuver Warning
Syncing Content using Bluetooth This setting will allow or prevent your smartphone from automatically syncing content from MiCloud to the Magellan SmartGPS. WARNING Syncing MiCloud to your device via your smartphone may cause increased data usage. -
Page 62: Settings
Chapter Settings Settings Menu The Settings Menu is the starting point for accessing the tools needed to customize and set the necessary parameters for the Magellan SmartGPS. General Access tools to set the language, units of measure, Settings auto power off, screen brightness settings as well as devices details such as available storage, product information, etc. -
Page 63: General Settings
Provides access to pairing phones. Content Customize what content is displayed and set the options for the browser. Tutorial View a demo video for the Magellan SmartGPS. General Settings Software Update Tap Software Update when highlighted to download and install updates. This option is highlighted only when a software update is available. -
Page 64: Screen Brightness
View detailed information for the device. (Serial number, the geographic areas being used, information on the maps, software version, etc.) End-User License Agreement Legal statement describing the contract between Magellan and the end-user as to how the software can and cannot be used as well as any restrictions imposed by Magellan. Acknowledgments Recognizes the originators of content data used in the Magellan SmartGPS. -
Page 65: Navigation And Maps
You can cancel, reroute or continue. Night Mode The Magellan SmartGPS is normally set to Auto which changes the map colors to a darker scheme during night hours automatically. This can be changed to On (the darker map is on continuously) or Off (the normal map is displayed continuously). -
Page 66: Location
Location Region Displays the currently selected region for the map used. When additional maps are available you can select the desired region to be used. Set GPS Position When GPS is selected the current location is calculated from signals received from the GPS satellite constellation. -
Page 67: Wi-Fi
Tap Refresh to scan for additional networks. Bluetooth Device Name Displays the name of the Magellan SmartGPS device that will be displayed on your smartphone while pairing. Auto-connect When checked the Magellan SmartGPS will attempt to use Bluetooth to connect to a paired phone whenever in range. -
Page 68: Content
Tap Pair Phone Now to search for a list of available Bluetooth devices. Once the list is displayed, tap the Connect button to begin the pairing process. Tap Import Contacts import the contact list from a Bluetooth connected device. WARNING Importing Contacts replaces the phone contacts in the Magellan SmartGPS. Content Tap to access Gas settings. - Page 69 Displays the time and date of the last successful syncing with the MiCloud. While syncing, a bar graph is displayed indicating the level of sync completed. Tutorial Demo: Tap Play to view the Demo video for the Magellan SmartGPS. www.magellangps.com...
Need help?
Do you have a question about the SmartGPS 5390 and is the answer not in the manual?
Questions and answers