Table of Contents
Advertisement
Quick Links
TEATRONICS LIGHTING CONTROLS, INC.
TEATRONICS LIGHTING CONTROLS,
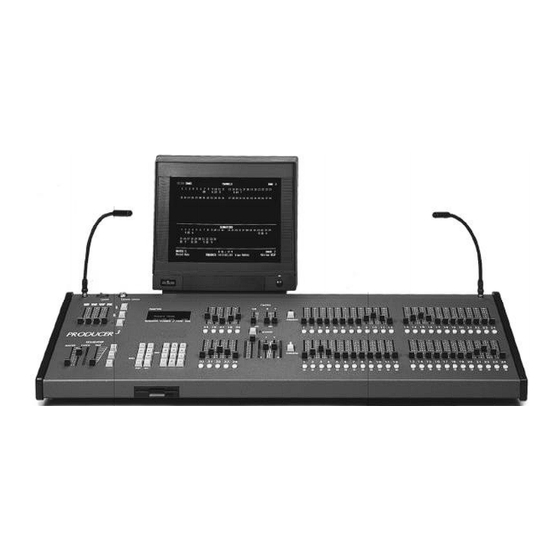
Lighting Control Console
PRODUCER 3
Lighting Control Console
Owner's Manual
PRODUCER 3
Model 224, 236, 248
TEATRONICS LIGHTING CONTROLS, INC.
1236 Los Osos Valley Road Suite G
1236 Los Osos Valley Road Suite G
Los Osos , California 93402
Los Osos , California 93402
Phone: (805) 528-6900
Phone: (805) 528-6900
FAX: (805) 528-9345
FAX: (805) 528-9345
INC.
06/18/97
page
06/17/97
Advertisement
Table of Contents

Summary of Contents for Teatronics Lighting Controls 224
-
Page 1: Lighting Control Console
TEATRONICS LIGHTING CONTROLS, TEATRONICS LIGHTING CONTROLS, INC. INC. Owner's Manual PRODUCER 3 Model 224, 236, 248 Lighting Control Console TEATRONICS LIGHTING CONTROLS, INC. 1236 Los Osos Valley Road Suite G 1236 Los Osos Valley Road Suite G Los Osos , California 93402... -
Page 2: Receiving Your Equipment
TEATRONICS LIGHTING CONTROLS, TEATRONICS LIGHTING CONTROLS, INC. INC. RECEIVING YOUR EQUIPMENT As soon as you have received your equipment, open the boxes and examine the equipment inside. If any damage is noted, contact the carrier immediately to file a claim for damages. When the equipment left the factory it was in good condition and properly packed. -
Page 3: Preface
Differences may exist between this manual and units in the field. Up-to-date information is available free of charge from the Teatronics Lighting controls, Inc., Service Department at (805) 528-6900 from 8:00 am to 5:00 pm Pacific Standard Time. -
Page 4: Introduction
TEATRONICS LIGHTING CONTROLS, INC. INC. INTRODUCTION Thank you for buying an Teatronics Lighting controls, Inc. PRODUCER 3 control console. Please read this manual thoroughly to understand your unit and to insure that you get the most out of it. The purpose of the owner's manual is to assist you in becoming familiar with your Producer 3: its installation, operation, troubleshooting, and maintenance. -
Page 5: Table Of Contents
TEATRONICS LIGHTING CONTROLS, TEATRONICS LIGHTING CONTROLS, INC. INC. TABLE OF CONTENTS RECEIVING YOUR EQUIPMENT ..................i PREFACE ........................ii INTRODUCTION ......................iii TABLE OF CONTENTS ....................iv-v TABLE OF EXAMPLES ..................... vi SETUP AND CONNECTION ....................1 Mechanical Installation .....................1 Electrical Installation ....................1 Interface to Dimmers ....................2... -
Page 6: Table Of Contents
TEATRONICS LIGHTING CONTROLS, TEATRONICS LIGHTING CONTROLS, INC. INC. TABLE OF CONTENTS (continued) KEY FUNCTIONS ......................30 Sequencer ........................ 33 SPECIAL FEATURES ......................34 Viewing the version of software ................34 Initializing the Patch ....................34 Initializing the Submasters ..................34 Clearing a Single Submaster .................. -
Page 7: Table Of Examples
TEATRONICS LIGHTING CONTROLS, TEATRONICS LIGHTING CONTROLS, INC. INC. TABLE OF EXAMPLES RECORD MODE Patch Assignments: Assigning a single dimmer to a channel at full .............8 Assigning a series of dimmers to a channel at full ..........9 Assigning a series of dimmers to a channel at various levels ......10 Using the clear key to correct mistakes .............. -
Page 8: Setup And Connection
NOTE: Replace the gooseneck lamps only with standard intensity lamps. Use of high intensity quartz lamps will overload the internal power supply. A high intensity quartz work light option is available from Teatronics Lighting controls, Inc. ELECTRICAL INSTALLATION Input voltage to the Producer 3 console is120 to 240 volts, 50 or 60 Hz. The current required to... -
Page 9: Interface To Dimmers
5 -- No Connection 5 -- No Connection Teatronics Lighting Controls, Inc., is very flexible in regards to custom output requirements. It is therefore quite possible that your Producer has different output connectors or pinouts. If you need assistance in connecting a Producer 3 that has been supplied with custom outputs please contact your Teatronics Lighting Controls, Inc., Dealer or the Factory. -
Page 10: Grounding
TEATRONICS LIGHTING CONTROLS, TEATRONICS LIGHTING CONTROLS, INC. INC. SETUP AND CONNECTION (continued) GROUNDING The ground serves two purposes. Its primary purpose is to connect to earth ground all, conductive parts of the system which can be touched, so that a person, with some other part of his or her body grounded, will not become a conductor of electrical current (get hurt or killed). -
Page 11: Operation
TEATRONICS LIGHTING CONTROLS, TEATRONICS LIGHTING CONTROLS, INC. INC. OPERATION GETTING UP AND RUNNING The purpose of this section is to get the new Producer 3 user up and running in the shortest period of time. It will take less than five minutes to read this section of the manual. We recommend that you finish this section of the manual before attempting to use your new lighting console, and then complete reading the rest of the manual at your leisure. - Page 12 TEATRONICS LIGHTING CONTROLS, TEATRONICS LIGHTING CONTROLS, INC. INC. OPERATION (continued) GETTING UP AND RUNNING (continued) In effect, the grand masters on each of the ten consoles would be acting as submasters would on a Producer 3; each controlling the look set up on its channel sliders. The Producer 3 doubles the functionality of it's two scene slide pots, to also act as the channel sliders for each of the ten submasters.
-
Page 13: Understanding The Patch
TEATRONICS LIGHTING CONTROLS, TEATRONICS LIGHTING CONTROLS, INC. INC. OPERATION (continued) GETTING UP AND RUNNING (continued) One more feature of the Producer 3 to be described in this Getting Up and Running Section; using the channel sliders 1 through 24 as additional submasters. Next to channel one's slider in each scene is a button labeled "SUBMASTER"... - Page 14 TEATRONICS LIGHTING CONTROLS, TEATRONICS LIGHTING CONTROLS, INC. INC. OPERATION (continued) UNDERSTANDING THE PATCH (continued) To understand the function of the patch, it might be helpful to know how each dimmer's level is determined. The Producer 3 calculates the level for each dimmer 20 to 30 times each second. It does this by first looking up which channel controls which dimmer in the patch table.
-
Page 15: Record Mode
TEATRONICS LIGHTING CONTROLS, TEATRONICS LIGHTING CONTROLS, INC. INC. OPERATION (continued) RECORD MODE The record mode on the Producer 3 allows the entry of the dimmer/channel assignments (the patch) and the recording of submasters. The Producer 3 toggles between record and play mode each time the record button is pressed. -
Page 16: Assigning A Series Of Dimmers To A Channel At Full
TEATRONICS LIGHTING CONTROLS, TEATRONICS LIGHTING CONTROLS, INC. INC. OPERATION (continued) RECORD MODE/Recording Dimmer Assignments (continued) Example 2 Assigning a series of dimmers to a channel at full. This example assigns dimmer numbers 15 through 20 to channel number 15 with the dimmers' outputs being 100% of the channel level setting. -
Page 17: Assigning A Series Of Dimmers To A Channel At Various Levels
TEATRONICS LIGHTING CONTROLS, TEATRONICS LIGHTING CONTROLS, INC. INC. OPERATION (continued) RECORD MODE/Recording Dimmer Assignments (continued) Example 3 Assigning a series of dimmers to a channel at various levels. This example assigns the following dimmer numbers to channel number 15: dimmer 15 at 100%, dimmers 190 and 192 at 80%, dimmers 147 through 151 at 60%, and dimmers 1 and 5 at 100%. -
Page 18: Using The Clear Key To Correct Mistakes
TEATRONICS LIGHTING CONTROLS, TEATRONICS LIGHTING CONTROLS, INC. INC. OPERATION (continued) RECORD MODE/Recording Dimmer Assignments (continued) Example 4 Using the clear key to correct mistakes. In this example we will make two errors when entering the patch. The clear key will be used to correct both mistakes. -
Page 19: Recording Submaster Assignments
TEATRONICS LIGHTING CONTROLS, TEATRONICS LIGHTING CONTROLS, INC. INC. OPERATION (continued) RECORD MODE (continued) Recording Submaster Assignments The assignment of channels to a submaster on the Producer 3 is done either with a "load from manual" procedure, or via the numeric keypad. The load-from-manual technique is the fastest and most common way to load a submaster assignment. -
Page 20: Using One Submaster To Build Another Submaster
TEATRONICS LIGHTING CONTROLS, TEATRONICS LIGHTING CONTROLS, INC. INC. OPERATION (continued) RECORD MODE/Recording Submaster Assignments (continued) KEY STROKE DISPLAY RESULT Record Mode Console in Record Mode Record Sub -- Waiting Submaster Input Record Sub# 30 Waiting for ENTER ENTER Record Mode... -
Page 21: Adding Channels To A Previously Recorded Submaster
TEATRONICS LIGHTING CONTROLS, TEATRONICS LIGHTING CONTROLS, INC. INC. OPERATION (continued) RECORD MODE/Recording Submaster Assignments (continued) Example 8 Adding channels to a previously recorded submaster. This example adds channels 13 and 24 at 30% to submaster 5. Adding channels to a submaster may be done by re-recording a submaster, using the submaster as one component, and adding the additional channels. -
Page 22: Altering Submaster Assignments
TEATRONICS LIGHTING CONTROLS, TEATRONICS LIGHTING CONTROLS, INC. INC. OPERATION (continued) RECORD MODE (continued) Altering Submaster Assignments The second way to assign channels to a submaster is by altering a previously recorded or a blank submaster. This is done from the keyboard using the alter (ALT) key. The programming sequence is as follows: Place the console in record mode (if it isn't already) by pressing the RECORD button. -
Page 23: Increasing The Level Of A Channel In A Submaster
TEATRONICS LIGHTING CONTROLS, TEATRONICS LIGHTING CONTROLS, INC. INC. OPERATION (continued) RECORD MODE/Altering Submaster Assignments (continued) Example 9 Increasing the level of a channel in a submaster. In the last example (example 8 above) we added channels 13 and 24 to submaster 5 at 30%. -
Page 24: Programming Chase Sequences
TEATRONICS LIGHTING CONTROLS, TEATRONICS LIGHTING CONTROLS, INC. INC. OPERATION (continued) RECORD MODE Programming Chase Sequences (NOTE: On early consoles, the CHASE key was called the EFFECTS key and labeled EFF.) A chase sequence is programmed by switching the console to the record mode and by pressing the chase (CHS) key followed by the number of the chase to be recorded (0 through 9). -
Page 25: Recording A Simple Four Channel Chase
TEATRONICS LIGHTING CONTROLS, TEATRONICS LIGHTING CONTROLS, INC. INC. OPERATION (continued) RECORD MODE/Programming Chase Sequences (continued) Example 11 Recording a simple four channel chase. This example records a sequence in which channel 1 is brought to full, followed by channel 2, then 3, and finally 4. -
Page 26: Recording A Complex Chase Sequence
TEATRONICS LIGHTING CONTROLS, TEATRONICS LIGHTING CONTROLS, INC. INC. OPERATION (continued) RECORD MODE/Programming Chase Sequences (continued) Example 12 Recording a complex chase sequence. This example shows how to use the AND (AND or &) and thru (THRU or -) keys to record a somewhat more complex sequence into chase 9. -
Page 27: Recording A Blackout Step In A Chase
TEATRONICS LIGHTING CONTROLS, TEATRONICS LIGHTING CONTROLS, INC. INC. OPERATION (continued) RECORD MODE/Programming Chase Sequences (continued) Example 13 Recording a Blackout step in a chase. This example shows the use of the special "zero step". The desired effect is to flash the lights on stage, with the ratio of the time the stage is lit to the time the stage is black equaling about 1 to 3. -
Page 28: Error Display When Programming Too Long A Chase
TEATRONICS LIGHTING CONTROLS, TEATRONICS LIGHTING CONTROLS, INC. INC. OPERATION (continued) RECORD MODE/Programming Chase Sequences (continued) Example 14 Error display when programming too long of a chase. This example attempts to record a chase that exceeds the available memory. The allowable length of a chase is least 192 steps. -
Page 29: Copying Shows
TEATRONICS LIGHTING CONTROLS, TEATRONICS LIGHTING CONTROLS, INC. INC. OPERATION (continued) RECORD MODE Copying Shows Often it is desirable to copy a portion of one show (i.e. the patch) into another show. The copy function provided on the Producer 3 allows copying an entire show from the "current show" to any other show. -
Page 30: Reviewing Dimmers Assigned To A Channel
TEATRONICS LIGHTING CONTROLS, TEATRONICS LIGHTING CONTROLS, INC. INC. OPERATION (continued) PLAY MODE/Reviewing Dimmer Assignments (continued) Example 15 Reviewing dimmers assigned to a channel. This example reviews the dimmers assigned to channel 15. KEY STROKE DISPLAY RESULT CHAN Channel -- Waiting for Channel Number... -
Page 31: Reviewing Channel Assignments
TEATRONICS LIGHTING CONTROLS, TEATRONICS LIGHTING CONTROLS, INC. INC. OPERATION (continued) PLAY MODE Reviewing Channel Assignments Pressing the channel (CHN) key twice while in play mode will display three dashes in the dimmer/submaster window. Entering a three digit dimmer number will display the channel that controls the dimmer number entered and the level for that dimmer. -
Page 32: Reviewing Submaster Assignments
TEATRONICS LIGHTING CONTROLS, TEATRONICS LIGHTING CONTROLS, INC. INC. OPERATION (continued) PLAY MODE (continued) Reviewing Submaster Assignments The channel levels within a submaster may be reviewed on the Producer 3 by pressing the submaster (SUB) key, while in play mode, followed by the two digit submaster number to be reviewed. -
Page 33: Reviewing Chase Sequences
TEATRONICS LIGHTING CONTROLS, TEATRONICS LIGHTING CONTROLS, INC. INC. OPERATION (continued) PLAY MODE (continued) Reviewing Chase Sequences A chase sequence may be reviewed while in play mode by pressing the chase (CHS) key twice followed by the number of the chase to be reviewed. Upon entering the number of the chase, the first step of the chase will be displayed in the DIMMER/SUBMASTER window. -
Page 34: Selecting Chase Sequences
TEATRONICS LIGHTING CONTROLS, TEATRONICS LIGHTING CONTROLS, INC. INC. OPERATION (continued) PLAY MODE (continued) Selecting Chase Sequences A chase sequence may be selected only while in play mode. To select a chase, place the console in play mode and press the chase key followed by the number of the chase to be selected. -
Page 35: Play Mode Chase Modifiers
TEATRONICS LIGHTING CONTROLS, TEATRONICS LIGHTING CONTROLS, INC. INC. OPERATION (continued) PLAY MODE (continued) Play Mode Chase Modifiers (Bounce, Build, Step, Reverse) Four of the keyboard keys serve as chase sequence modifiers when in play mode. These keys only perform their chase modifier function when in play mode. These keys do not work while reviewing the patches, submasters, or chases, nor while in record mode. -
Page 36: Changing Shows
PLAY MODE Changing Shows Current models of Producer 3 224, 236, and 248 have eight "shows" included as standard, the 196 model has four "shows". Each show is like having a completely separate console. Switching shows causes the Producer 3's computer to use a different portion of its memory. The switching routine takes only a few thousandths of a second and may be done in the middle of a scene if desired. -
Page 37: Key Functions
TEATRONICS LIGHTING CONTROLS, TEATRONICS LIGHTING CONTROLS, INC. INC. KEY FUNCTIONS The following section describes the uses of the various keys on the 20 key keyboard. Clears the current entry back to zero. If no numbers have been entered, the clear key backs up the entry sequence. - Page 38 TEATRONICS LIGHTING CONTROLS, TEATRONICS LIGHTING CONTROLS, INC. INC. KEY FUNCTIONS (continued) AND or & In record mode, the AND key is used to assign a number of dimmers to a channel without having to re-enter the channel number. The AND key is also used to assign channels, submasters, and dimmers to chase steps.
- Page 39 TEATRONICS LIGHTING CONTROLS, TEATRONICS LIGHTING CONTROLS, INC. INC. KEY FUNCTIONS (continued) RECORD The RECORD key places the console in and out of record mode. When in record mode, the fade times, submasters, dimmer patch, and chase routines may be changed or recorded. When in play mode the submasters, fade times, dimmer patch, and chase routines may be reviewed.
-
Page 40: Sequencer
TEATRONICS LIGHTING CONTROLS, TEATRONICS LIGHTING CONTROLS, INC. INC. SEQUENCER SEQUENCE The SEQUENCE key sets the next Cue (Submaster) that will be sequenced in the stack. Enter the Show number and Submaster number by pressing the SEQUENCE key and using the number keypad to enter first the number of the show (1-8), and the cross fadeable submaster number (1- 24). -
Page 41: Special Features
TEATRONICS LIGHTING CONTROLS, TEATRONICS LIGHTING CONTROLS, INC. INC. SPECIAL FEATURES The software which runs the computer assisted portion of the Producer 3 has some special features built in to it to simplify certain often performed tasks. These "hidden" features are accessed in the record mode by pressing a sequence of keys not used in the normal programming of the console. -
Page 42: Clearing A Single Submaster
TEATRONICS LIGHTING CONTROLS, TEATRONICS LIGHTING CONTROLS, INC. INC. SPECIAL FEATURES (continued) CLEARING A SINGLE SUBMASTER The alter function is often used to record a submaster "blind". The alter function only affects the channel numbers that are entered, however, if it is not known what was in the submaster previous to altering it, first it must be cleared. -
Page 43: In Case Of Trouble
Read the operating instructions carefully. BE SURE you know how to operate the equipment. This includes the dimmers as well. Do not expect your Teatronics Lighting controls, Inc. equipment to operate exactly like others. The performance and controls of modern equipment are all different. - Page 44 TEATRONICS LIGHTING CONTROLS, TEATRONICS LIGHTING CONTROLS, INC. INC. IN CASE OF TROUBLE (continued) TROUBLESHOOTING (continued) Assuming the afore mentioned check out correctly, next check to see if the dimmer or the console is at fault. If your dimmer pack has "override" or "test" switches on the channels, use these to try to turn the outputs on.
- Page 45 TEATRONICS LIGHTING CONTROLS, TEATRONICS LIGHTING CONTROLS, INC. INC. IN CASE OF TROUBLE (continued) TROUBLESHOOTING (continued) Channel Coupling The symptoms of this failure mode are that one control slider on the Producer 3 acts as if it brings up the next higher control channel but at a lower level. The failure usually affects only one control slider and in only one scene.
-
Page 46: Self Diagnostic Techniques
TEATRONICS LIGHTING CONTROLS, TEATRONICS LIGHTING CONTROLS, INC. INC. IN CASE OF TROUBLE (continued) TROUBLESHOOTING (continued) Let There Be Light Luckily, this failure is highly unlikely because there is almost nothing that can be done to solve it in the field. It is almost always a problem in the console. The symptoms are easy to spot, all the lights come on full, and if you have a lot of lights, the stage looks like the day of creation. -
Page 47: Sorting Out The Amx Signals
TEATRONICS LIGHTING CONTROLS, TEATRONICS LIGHTING CONTROLS, INC. INC. IN CASE OF TROUBLE (continued) SELF DIAGNOSTIC TECHNIQUES (continued) Another diagnostic technique which may prove useful is to patch all the dimmers to channel zero then patch a suspected problem dimmer to channel one. Bringing up channel one then should bring up only the suspect dimmer. - Page 48 TEATRONICS LIGHTING CONTROLS, TEATRONICS LIGHTING CONTROLS, INC. INC. IN CASE OF TROUBLE (continued) SORTING OUT THE AMX SIGNALS (continued) Measure the voltage between the pins picked in step 4. The voltage should now be greater. Note which pin is negative with respect to the other. The negative pin is COMMON.
-
Page 49: Periferals
TEATRONICS LIGHTING CONTROLS, TEATRONICS LIGHTING CONTROLS, INC. INC. PERIFERALS DISK DRIVE Two commands support the optional Producer 3 disk drive. One command saves the shows to disk, the other loads the show from disk. SAVING TO DISK Place the console in PLAY mode. -
Page 50: Crt Display
TEATRONICS LIGHTING CONTROLS, TEATRONICS LIGHTING CONTROLS, INC. INC. PERIFERALS (continued) CRT DISPLAY The CRT display on the Producer 3 echoes the gas fluorescent display; no additional keys or operations are required. For example, to review a patch using the display, the user would place the console in play mode, press the channel (CHN) key, and enter the channel number. -
Page 51: Reference Tables
TEATRONICS LIGHTING CONTROLS, TEATRONICS LIGHTING CONTROLS, INC. INC. REFERENCE TABLES The tables on the following pages are provided as masters for the user to photo copy if desired. They provide a standard method of documenting the information used to program the Producer 3 for a particular show. Even if a show is not expected to be reused;... -
Page 52: Appendix I - Default Patch Table
Appendix I DEFAULT PATCH TABLE TEATRONICS LIGHTING CONTROLS, TEATRONICS LIGHTING CONTROLS, INC. INC. CHANNEL DIMMERS___________________________________________________________________________ PRODUCER 3 06/18/97 Lighting Control Console page... -
Page 53: Appendix Ii - Softpatch Cross Reference Table
Appendix 2 SOFTPATCH CROSS REFERENCE TABLE TEATRONICS LIGHTING CONTROLS, TEATRONICS LIGHTING CONTROLS, INC. INC. SHOW NAME DISK NUMBER SHOW NUMBER PATCH NAME CHANNEL DIMMER NOTES NUMBER PATCH PRODUCER 3 06/18/97 Lighting Control Console page... -
Page 54: Appendix Iii - Recorded Submasters Reference Table
Appendix 3 RECORDED SUBMASTERS REFERENCE TABLE TEATRONICS LIGHTING CONTROLS, TEATRONICS LIGHTING CONTROLS, INC. INC. SHOW NAME DISK NUMBER SHOW NUMBER PATCH NAME Submaster______ Submaster______ Submaster______ Submaster______ Submaster______ ________________ ________________ ________________ ________________ ________________ Ch____at_______ Ch____at_______ Ch____at_______ Ch____at_______ Ch____at_______ Ch____at_______ Ch____at_______ Ch____at_______... -
Page 55: Appendix Iv - Producer 3 Quick Reference Sheet
Appendix 4 TEATRONICS LIGHTING CONTROLS, TEATRONICS LIGHTING CONTROLS, INC. INC. PRODUCER 3 QUICK REFERENCE SHEET To Record a submaster: Place console in record mode. Set up desired look using channels, submasters, and bumps. Press SUB. Enter submaster number (1 through 34). -
Page 56: Warranty
INC. LIMITED WARRANTY Teatronics Lighting controls, Inc. (TLC) agrees that its products shall be free from defects in material or workmanship for a period of one year from date of delivery. Said warranty will not apply if equipment is used in conditions of service for which it is not specifically intended. The manufacturer is not responsible for damage to its apparatus through improper installation, physical damage, or poor operating practice.
Need help?
Do you have a question about the 224 and is the answer not in the manual?
Questions and answers