Table of Contents
Advertisement
Advertisement
Table of Contents

Related Manuals for Sirius XM RAdio vehicle kit


Summary of Contents for Sirius XM RAdio vehicle kit
- Page 1 User Guide Vehicle Kit For Sirius Radios...
-
Page 3: Table Of Contents
Table of Contents Introduction . . . . . . . . . . . . . . . . . . . . . . . . . . . . . . . . . . . . . . . . . . . . . . . . . . . . . . 5 Features . -
Page 6: Introduction
Introduction Features Congratulations, on your purchase of the Vehicle Kit! The Vehicle Kit lets you easily move your SiriusXM Radio to a second vehicle so you can enjoy your favourite programming in whichever vehicle you choose to drive . Compatible with the Sportster 5/6, Starmate 3/4/5/6/7/8, Stratus 3/5/6/7, Streamer 3/GT3/GT5 . -
Page 7: Safety And Care Information
Safety and Care Information IMPORTANT! Always read and understand all the instructions to avoid injury to yourself and/or damage to your device . Sirius XM Canada Inc . disclaims all responsibility for damage from data loss due to breakdown, repair, or other causes . - Page 8 Introduction WARNING! • Opening the case may result in electric shock . • Make sure that you insert the PowerConnect+ Power Adapter’s plug all the way into the outlet . • For optimal audio performance, insert the PowerConnect+ Power Adapter directly into your vehicle’s cigarette lighter/power outlet .
-
Page 9: What's In The Box
What’s in the Box? Window Mount Dash Mount PowerConnect+ Vehicle Dock Aux In Cable PowerConnect+ Magnetic Mount Antenna Screws Alcohol Power Adapter and Tail Preparation Pads... -
Page 10: Powerconnect+ Vehicle Dock
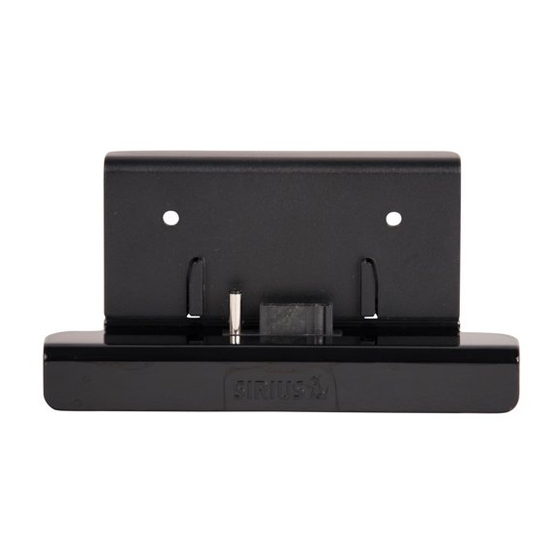
Introduction PowerConnect+ Vehicle Dock Color-Coded Connections The color-coded PowerConnect+ Vehicle Dock makes it simple to connect, just match the colors on the cable ends to the colors on the dock to see what goes where . Front and Side Views AUDIO PWR (Red) ANT (Silver) -
Page 12: Vehicle Installation
Vehicle Installation Step 1: Choose a Location for Your Radio Before you begin, you may want to have the User Guide for your Satellite Radio handy, as there are a couple of steps where we suggest you reference it . If you do not have the User Guide, go to siriusxm .ca, DASH MOUNT - Option 1 click on ACTIVATE, then INSTALLATION... - Page 13 DASH MOUNT - Option 3 WINDOW MOUNT - Option 1 WINDOW MOUNT - Option 2...
-
Page 14: Step 2: Install The Dash Or Window Mount
Vehicle Installation Step 2: Install the Dash or Window Mount Depending on your situation, you can either choose to use the Dash Mount or the Window Mount . Installing the Dash Mount: CAUTION! The adhesive used on the Dash Mount may be difficult to remove . Do not install this mount on leather surfaces (contact your automobile dealership if you are unsure about your dash surface), and make sure the air temperature is at least 60°... - Page 15 Choose a Location for Your Radio” on page 12 . 3 Attach the Dash Mount to the PowerConnect+ Vehicle Dock using the provided screws . 4 Clean the surface with the alcohol preparation pad and let it dry thoroughly . 5 Peel off the adhesive liner .
- Page 16 Vehicle Installation TIP! To remove, carefully lift the adhesive pad with your fingers or a spoon . Warming the pad with a hair dryer for several minutes will help soften the adhesive . Be careful not to overheat the surface with the hair dryer or you may damage the surface or Dash Mount .
- Page 17 IMPORTANT! For clarity, the illustrations on this page do not show the dock attached to the mount . However, the dock should already be attached as shown in step 3 . 4 Press and hold the mount against the windshield . Then press the lever all the way down to attach the Window Mount Lever to the windshield .
-
Page 18: Step 3: Mount The Magnetic Mount Antenna
Vehicle Installation Step 3: Mount the Magnetic Mount Antenna The Magnetic Mount Antenna contains a strong magnet which will stick to any metal part of your vehicle, but will not damage the vehicle . To install the Magnetic Mount Antenna: 1 Choose the best location for your Magnetic Mount Antenna considering your vehicle type . - Page 19 SUV: We recommend mounting the antenna at the rear of the roof as shown . Convertible: We recommend mounting the antenna at the leading edge of the trunk as shown . Pickup Truck: We recommend mounting the antenna just above the front windshield as shown .
- Page 20 Vehicle Installation 2 Attach the Rubber Tail to the antenna Magnetic Mount Antenna and press the antenna cable into the (Upside-Down) Rubber Tail . The Rubber Tail will help to position the antenna the correct distance from the edge of the roof or trunk lid .
- Page 21 TIP! Mount the antenna on the roof (for most vehicles) or trunk (for convertibles) where it has a clear view of the sky in all directions .
- Page 22 Vehicle Installation 3” TIP! Mount the antenna on the roof where it has at least 3 inches of clear space around it . TIP! Use the supplied Rubber Tail to cover and protect the antenna cable . CAUTION! Don’t mount the antenna closer than 3 inches from the edge of the roof .
- Page 23 CAUTION! Don’t mount the antenna inside the vehicle, for example, on the dashboard . CAUTION! Don’t mount the antenna on any of the vehicle’s front, back or side pillars . CAUTION! Don’t mount the antenna close to a roof rack . Adjust the rack so it’s further away from the antenna or move the antenna closer to the center of the roof .
- Page 24 Vehicle Installation CAUTION! Don’t mount the Magnetic Mount Antenna close to another antenna . Mount it at least 3 inches away . TIP! Always be careful to include enough slack in your cable to accommodate open doors or trunk lids . Use things typically found around the home, like electrical tape, to secure cables in areas so that hinges do not pinch the cable with the door .
-
Page 25: Step 4: Route The Magnetic Mount Antenna Cable
Step 4: Route the Magnetic Mount Antenna Cable Before you begin routing the antenna cable, read these general instructions for how to route and hide the antenna cable . Then route your antenna cable according to the instructions which follow for your specific type of vehicle . Use a blunt plastic putty knife, a credit card, a plastic knife, or a similar blunt tool to lift the rubber window moulding... - Page 26 Vehicle Installation Route cable out from under rear windshield moulding and tuck into weatherstripping around trunk opening Avoid sharp bends by running cable through Pull weatherstripping weatherstripping for several inches from trunk opening Tuck cable into weather- stripping. Route cable through weatherstripping several inches to avoid sharp bends Pull cable out of weather-...
- Page 27 Bring cable out of weatherstripping and into trunk Route cable along trunk wall and into cabin through gap or conduit, along existing wiring harness Route cable along trunk wall and into cabin...
- Page 28 Vehicle Installation Use a blunt plastic putty knife or similar blunt tool trim and tuck cable under trim. Continue Route cable under towards front of vehicle trim or upholstery Continue routing cable under trim or carpet towards front of vehicle Route cable from trunk under interior trim, into cabin and towards front...
- Page 29 Continue routing cable under carpet or console to radio location Coil excess cable under Pull carpet carpet or mat or mat back Bring cable out from trim Bring cable out from trim and route under carpet to dashboard or console TIP! Always be careful to include enough slack in your cable to accommodate open doors or trunk lids .
- Page 30 Vehicle Installation • Sedan/Coupe With Antenna Placed at the Rear of the Roof: 1 . Feed the antenna cable from the antenna underneath the rubber molding around the rear window . Use a blunt plastic putty knife or similar blunt tool to lift the rubber molding around the rear window and tuck the antenna cable underneath the molding .
- Page 31 the dashboard or console . Coil any excess cable in a hidden location, such as under the carpet, keeping it away from any vehicle pedals or controls . Secure the excess cable with wire ties (purchased separately) . 6 . Bring the end of the cable out at the PowerConnect+ Vehicle Dock location .
- Page 32 Vehicle Installation • Sedan/Coupe With Antenna Placed at the Front of the Roof: 1 . Feed the antenna cable from the antenna underneath the rubber molding around the windshield . Use a blunt plastic putty knife or similar blunt tool to lift the rubber molding around the windshield and tuck the antenna cable underneath the molding .
- Page 33 • SUV: 1 . Feed the antenna cable underneath the rubber weather stripping of the rear tailgate window/door and route the cable along the rear hatch . Lift the weather stripping from the opening and tuck the cable inside it, then replace the weather stripping .
- Page 34 Vehicle Installation • Convertible: 1 . Bring the antenna cable from the antenna into the trunk at the front edge of the trunk lid . Keep any bends in the cable loose . Tape or tie the cable along the inside of the trunk lid to the trunk lid hinge strut . 2 .
- Page 35 • Pickup Truck: 1 . Use a blunt plastic putty knife or similar blunt tool to lift the rubber molding around the windshield and tuck the antenna cable underneath it . 2 . Continue tucking the cable underneath the windshield molding around the windshield to the lowest corner .
-
Page 36: Step 5: Connect The Magnetic Mount Antenna And Powerconnect+ Power Adapter
Vehicle Installation Step 5: Connect the Magnetic Mount Antenna and PowerConnect+ Power Adapter 1 Plug the Magnetic Mount Antenna into the silver ANT connector on the right side of the PowerConnect+ Vehicle Dock . AUDIO 2 Insert the PowerConnect+ Power Adapter into your vehicle’s cigarette lighter or power adapter socket . -
Page 37: Step 6: Connect The Audio
Step 6: Connect the Audio To play audio through your vehicle’s stereo or FM radio, decide on one of the following audio connection options: • Option 1: Best: Use the included Aux In Cable if your vehicle’s stereo system has an auxiliary input connection . Refer to your vehicle’s owners manual to find the location of the auxiliary input jack, or consult the vehicle dealer . - Page 38 Vehicle Installation Option 1: Aux In Cable Installation Instructions 1 Plug one end of the Aux In Cable into the green AUDIO connector on the dock . AUDIO 2 Plug the other end into the auxiliary input jack connection of your vehicle’s stereo system .
- Page 39 4 Power on your Radio by pressing the Power button . 5 Set your vehicle’s stereo system to play input from the auxiliary input source . 6 Be sure the vehicle is outside and the antenna has a clear view of the sky . Verify that you are receiving jump the satellite signal .
- Page 40 Vehicle Installation Option 2: Cassette Adapter Installation Instructions 1 Plug the Cassette Adapter into the green AUDIO connector on the dock . 2 Insert the Cassette AUDIO Adapter in the vehicle’s cassette deck . 3 Place your Radio into the PowerConnect+ Vehicle Dock, aligning the Radio against the rear of the dock so that the rails on the dock fit into the mounting slots in the back of the Radio .
- Page 41 5 Set the vehicle’s stereo system to play from the cassette source . 6 Be sure the vehicle is outside and the antenna has a clear view of the sky . Verify that you are receiving the satellite signal . Refer to the User Guide which accompanied your Radio, and display the Signal jump Indicator screen .
- Page 42 Vehicle Installation Option 3: PowerConnect+ Installation Instructions 1 Place your Radio into the PowerConnect+ Vehicle Dock, aligning the Radio against the rear of the menu dock so that the rails on the dock fit jump into the mounting slots in the back of the Radio .
- Page 43 4 You’ll first need to find an available FM channel to listen to the SiriusXM audio through your vehicle’s FM radio . Refer to “How To Find Available FM Channels In Your Area” on page 46 . 5 Ensure that the Radio is tuned to channel 184 . Upon power up, the Radio should tune to channel 184 by default, when it’s not yet activated .
- Page 44 Vehicle Installation into the AUDIO connector on the PowerConnect+ Vehicle Dock . Refer to “Troubleshooting” on page 50 for additional help . Option 4: FM Direct Adapter (FMDA) Installation The FMDA needs to be installed by a professional installer . Professional installation can help improve your Radio’s reception and significantly reduce the visibility of wires .
-
Page 46: Appendix: How To Find Available Fm Channel
Appendix: How To Find Available FM Channel How To Find Available FM Channels In Your Area An available FM channel is one that is not being used by an FM radio station in your area . When you tune your FM radio to an available channel, you should only hear static or silence –... - Page 47 2 Manually tune through your local FM channels Manually tune through your local FM channels on your vehicle’s FM radio . Turn on your vehicle’s FM radio . Start at 88 . 1 and use the ‘Manual’ tune function on your vehicle’s FM radio to tune through each FM channel one-by-one (88 .
- Page 48 Appendix: How To Find Available FM Channels TIP! If you regularly drive from one location to another, such as your daily commute, you may need to use different FM channels along your route for best performance . If this is the case, we recommend saving the best FM channels as presets on your FM radio and on your Satellite Radio .
-
Page 50: Troubleshooting
Troubleshooting Your Vehicle Kit has been designed and built to be trouble-free, but if you experience a problem, try this: • Check that all connections are firm and secure . • Make sure the vehicle power socket is clean and free of corrosion . - Page 51 If you see this on the screen: Try this: Invalid Channel • You have attempted to tune to a channel that you have not subscribed to, or does not exist . Select a channel to which you have subscribed . Firmware Updating • Your Radio is being updated over the air with the latest software .
- Page 52 Troubleshooting If this happens: Try this: Audio fades or has static when • Check all cables for a firm and secure connection . listening • If you are using PowerConnect+ or the FMDA to listen via your vehicle’s FM radio, and the problem persists, it most likely is interference from another commercial or broadcast FM station .
-
Page 54: Product Specifications
Product Specifications System: Power Requirements: 9-16 V DC, 500 mA (max) Operating Temperature: 4°F to +140°F (-20°C to +60°C) Audio Output: 1 .8 Vrms (max) Radio Dependent Power Connect+ Vehicle Dock: Dimensions: 4 .0 in (width) x 2 .3 in (height) x 1 .2 in (depth) 102 mm (width) x 59 mm (height) x 31 mm (depth) Weight: 1 .6 oz (46 g) -
Page 55: Patent Information
. Environmental Information Follow local guidelines for waste disposal when discarding packaging and electronic appliances . Your Second Vehicle Kit is packaged with cardboard, polyethylene, etc ., and does not contain any unnecessary materials . - Page 56 IC Statement This Class B digital apparatus complies with Canadian ICES-003 . IC STATEMENT Operation is subject to the following two conditions: (1) this device may not cause interference, and (2) this device must accept any interference, including interference that may cause undesired operation of the device . For product available in the Canada market, only channel 1~11 can be operated .
- Page 57 FCC Statement The user is cautioned that changes or modifications not expressly approved by Sirius XM Canada Inc . can void the user’s authority to operate this device . This device complies with Part 15 of the FCC Rules . Operation is subject to the following two conditions: This device may not cause harmful interference .
- Page 58 © 2012 Sirius XM Canada Inc . “SiriusXM”, the SiriusXM logo, channel names and logos are trademarks of Sirius XM Radio Inc . and are used under license . “NFL” and the NFL Shield design are trademarks of the National Football League .
- Page 60 .siriusxm .ca Sirius XM Canada Inc . 135 Liberty St . - 4th floor Toronto, Ontario, M6K 1A7 1-888-539-SIRIUS (7474) © 2012 Sirius XM Canada Inc . Sirius Vehicle Kit User Guide 121004a...
Need help?
Do you have a question about the vehicle kit and is the answer not in the manual?
Questions and answers