Table of Contents
Advertisement
Advertisement
Table of Contents

Related Manuals for SpeakerCraft SoundSource

Summary of Contents for SpeakerCraft SoundSource
- Page 1 OWNER’S MANUAL SoundSource In-Wall Audio System...
-
Page 2: Important Safeguards
Page 2 SoundSource Owner’ s Manual IMPORTANT SAFEGUARDS Explanation of Symbols This symbol is intended to This symbol is intended to WARNING alert the user of the presence alert the user of the pres- To prevent fire or shock hazard, do not of uninsulated “dangerous... -
Page 3: Table Of Contents
Package Contents & Optional Accessories ........................4 SoundSource Placement ..............................5 Mounting Surface Preparation ............................5 Installing the Wall Mounting Bracket & SoundSource Unit ....................6 Connecting the SoundSource ............................7 Connecting the Power Supply ............................7 FUNCTIONAL OVERVIEW ..........................8-16 Front Panel .................................. -
Page 4: Installation
• SoundSource Link System (SSL-A and SSL-B) - Makes connecting auxiliary audio from remote sources easier. (SpeakerCraft P/ Ns CTL01010 and CTL01020) • SoundSource FM Modulator (SFM-1.0) - Allows for quick & wireless connection to other sources, such as MP3 players. (SpeakerCraft P/N CTL01100) -
Page 5: Soundsource Placement
After the hole When positioning the SoundSource unit, bear in mind that is cut and the drywall is installed, the SoundSource can be every receiver produces heat which must be able to dissipate easily installed following the instructions under “Installing Wall... -
Page 6: Installing The Wall Mounting Bracket & Soundsource Unit
INSTALLING THE WALL MOUNTING BRACKET AND SOUNDSOURCE UNIT 1. Rotate the Wall Mounting Bracket’ s clamping dogs so that 7. Holding the SoundSource at a slight angle, slide it into they are inside the frame. (See Diagram 4) opening, engaging the locking tabs on the bottom of unit with the cut-outs on bottom of the Wall Mounting Bracket. -
Page 7: Connecting The Soundsource
Diagram 8: being used, this jack can be utilized as a Voltage Trigger for Back of Power Supply SpeakerCraft’ s Big Bang amplifiers with a series 1k Ω resistor. For more details, contact SpeakerCraft Technical Support. 5. FM Antenna For connecting the supplied 75Ω FM antenna or external FM antenna. -
Page 8: Functional Overview
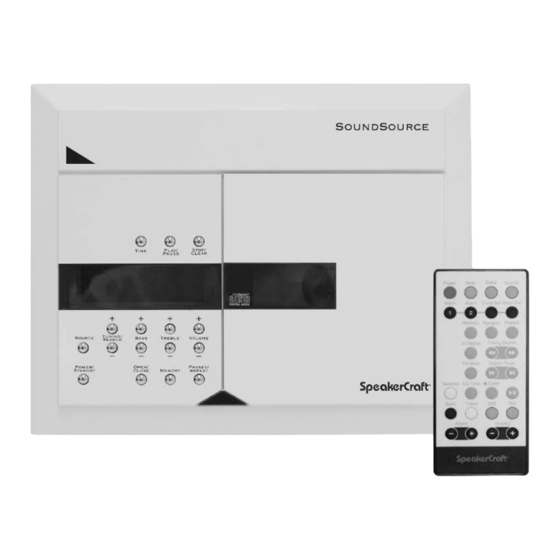
SoundSource Owner’ s Manual After all connections are complete, turn the power supply switch on. Note: This may be left in the “on” position. (See Diagram 9) The SoundSource can be turned on or off from the front panel. FRONT PANEL (See Diagram 10) 1. -
Page 9: Fluorescent Display
SoundSource Owner’ s Manual Page 9 FLUORESCENT DISPLAY (See Diagram 11) 1. Sleep Illuminates if you select the Sleep Timer function. For details, Illuminates when CD playback has been paused. see page 13. 2. Repeat/Repeat 1 Illuminates if you select the Time function. -
Page 10: Remote Control
Page 10 SoundSource Owner’ s Manual The Remote Control is shipped with the battery removed. Push the tab in to slide open the panel on the lower rear of the remote and insert the battery as indicated. REMOTE CONTROL page 12. - Page 11 (+) or (-) to increase or decrease the level treble. For right channels. For details, see page 13. details, see page 13. 21. Dim 16. Tuning/Search Press to adjust SoundSource Display brightness. • In Tuner mode, press less than ⁄ second for Manual tun- ing.
-
Page 12: Clock Set
ALARM SET Your system can automatically turn itself on. You choose when The Clock will display when the SoundSource is turned off. you want the system to turn on and when the “on” time arrives, the system will turn on. -
Page 13: Sleep Timer
Press Adjust (-) or (+) button to decrease or increase the level of bass. (Or press 1. While the SoundSource is on, press the Sleep button until Bass (-) or (+) on the front panel.) “Sleep”... -
Page 14: Cd Normal Playback
Page 14 SoundSource Owner’ s Manual CD NORMAL PLAYBACK CD RANDOM PLAYBACK 1. Press the Play/Pause button to start CD playback; Press 1. Press the Random button on the Remote Control before or again to pause CD playback. during CD playback to select the Random function. -
Page 15: Cd Repeat Playback
SoundSource Owner’ s Manual Page 15 CD REPEAT PLAYBACK CD MEMORY PLAYBACK 1. Press the Preset/Repeat button once on the front panel 1. Once the CD tracks have been programmed, the “Memory“ before or during CD playback to select Repeat 1 Track indicator will illuminate. -
Page 16: Auto/Manual Tuning
Page 16 SoundSource Owner’ s Manual AUTO/MANUAL TUNING TUNER PRESET MEMORY 1. Press Power to turn the SoundSource on. Select the TUNER Storing preset stations function by pressing the Source button repeatedly on the front panel or on the Remote Control. -
Page 17: General Information
SoundSource Owner’ s Manual Page 17 TROUBLESHOOTING Please make these simple checks before calling service. These tips can save you time and money. NO POWER • Make sure the power cord is fully inserted into an AC outlet. • Check to be sure outlet is not controlled by a wall switch. -
Page 18: Included Accessory: Sir-1.0 (Soundsource Ir Interface Lead)
So un d S o u rce IR Inte rf ac e L ea d Use this lead to make connections between the SoundSource “Remote Out” IR Jack and inter-room wir- ing. Refer to Diagram 24 to familiarize yourself with the SIR-1.0 components and Diagram 25 for a typical system... -
Page 19: Optional Accessories
S ou nd S o urce Lin k Sy st em , Uni t A O rd e r Stock # CTL 01010 • Connects up to two audio sources, i.e. CD player and MP3 player, to the SoundSource • Connects up to four SoundSource units per system •... -
Page 20: Warranty
Dealer will, at its option, repair or replace this product at no additional charge, except as set forth below. If this model is no longer available and cannot be repaired effectively, SpeakerCraft, at its sole option, may replace the unit with a current model of equal or greater value. In some cases where a new model is substituted, a modification to the mounting surface may be required.
Need help?
Do you have a question about the SoundSource and is the answer not in the manual?
Questions and answers