Table of Contents
Advertisement
Advertisement
Table of Contents

Subscribe to Our Youtube Channel
Related Manuals for Leoxsys Networks LEO-150N-BT

Summary of Contents for Leoxsys Networks LEO-150N-BT
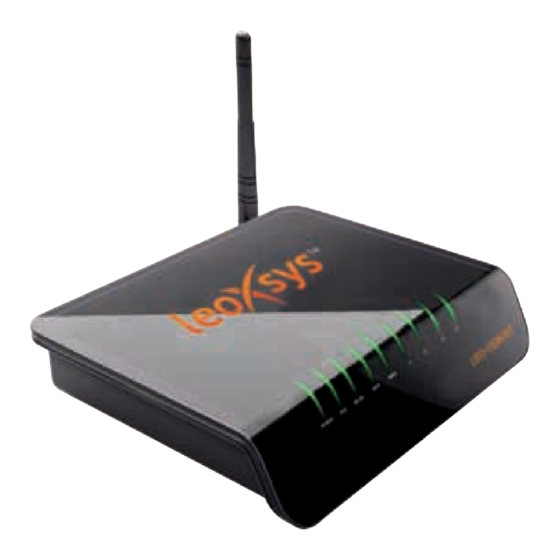
- Page 1 11N Wireless Storage Router LEO-150N-BT User Manual...
-
Page 2: Table Of Contents
Contents Introduction………………………………………………………………….... 1.1 Package Contents………………………………..………………….….... 1.2 Description……………………….……………….……………….……..... 1.3 Key Features……………………………………………..…………..….... 1.4 Specification……………………………………………………………....Hardware installation…………………………….………………………....2.1 The Front Panel………………………………………………………….... 2.2 The Rear Panel………………………………….……………………….... 2.3 System Requirements……………………………………………..……... Installing And Using Wireless Router …………………………...…....3.1 Network configuration setup………………………………………….…..3.2 Computer configuration setup……………………………………...……..3.3 Configure IP addresses………………………………………..…….... Management……………………………………………………………….….. - Page 3 4.8 USB Apps…………………..…………………………………………....4.8.1 Printer Server……………………………………………………………..4.8.2 DL Settings………………………………….…………………....... 4.8.3 DL Torrents…………………………………………………………………..4.8.4 DL HTTP/FTP………………………………………………………………..4.9 Management…………………..…………………………………………..4.9.1 Operation Mode……………………………………………………………..4.9.2 Load Factory Defaults………………………………….…………………..4.9.3 Upgrade……………………………………………………………………….. 4.9.4 Save/Reload…………………………………………………………………... 4.9.5 Command……………………………………………………………………... 4.9.6 Password……………………………………………………………………..4.9.7 Reboot………………………………………………………………………..4.9.8 System Log……………………………………………………………………. 4.10 Status…………………………………………………………………………..37 4.10.1 Status……………………………………………………………………………...
-
Page 4: Introduction
Introduction 1.1 Package Contents Thank you for purchasing 802.11n Wireless Router. Before you start, please check all the contents of this package. The product package should include the following: 1. One Wireless Router 2. One Power Adapter 3. One User Manual 4. -
Page 5: Key Features
Internet without the restriction of connecting cables LEO-150N-BT router also act as USB Print Server, connect your USB printer with router and share the printer resources over network environment. Simply connect USB storage with LEO-150N-BT and build up personal File Server,FTP Sever,Torrent Server in a few clicks. -
Page 6: Specification
1.4 Specification IEEE 802.11nIEEE 802.11gIEEE 802.11bIEEE 802.3IEEE Standards 802.3uCSMA/CACSMA/CDTCP/IPDHCPICMPNATPPPE 4 x 10/100M RJ45 Port Auto MDI/MDIX Interface Type 1 x 10/100M RJ45PortAuto MDI/MDIX Frequency range 2.4~2.4835GHz 11n270/243/216/162/108/81/54/27Mbps 135/121.5/108/81/54/40.5/27/13.5Mbps 130/117/104/78/52/39/26/13Mbps Radio Data Rate 65/58.5/52/39/26/19.5/13/6.5Mbps 11g54/48/36/24/18/12/9/6M 11b11/5.5/2/1M Channel 270M-68dBm@10% PER130M -68dBm@10% PER 108M-68dBm@10% PER54M-68dBm@10% PER Sensitivity @PER 11M-85dBm@8% PER6M-88dBm@10% PER... -
Page 7: Hardware Installation
Hardware installation 2.1 The Front Panel The front panel of the 802.11n Wireless Router consists of several LED indicators, which is designed to indicate connections. Viewed from left to right, the table describes the LEDs on the front panel of the router. Name Action Description... -
Page 8: The Rear Panel
2.2 The Rear Panel The rear panel contains the following features. (Viewed from left to right:) Rear Panel 1 Wireless antenna, one Unfix antenna. WAN RJ45 port for connecting the router to a cable, DSL modem or Ethernet. Four LAN 10/100Mbps RJ45 ports for connecting the router to the local PCs . -
Page 9: System Requirements
2.3 System Requirements Broadband Internet Access Service (DSL/Cable/Ethernet). • One DSL/Cable modem that has an RJ45 connector (you do not need it if you • connect the router to Ethernet). Each PC on the LAN needs a working Ethernet Adapter and an ethernet cable •... -
Page 10: Configure Ip Addresses
Note: 1. The default network setting of the device: IP address: 192.168.7.1 Subnet Mask: 255.255.255.0 DHCP Server: enabled 2. In the following TCP/IP configuration guide, the IP address “192.168.7.2” is assumed to be your IP address if you want to specify IP addresses manually. Please DO NOT choose “192.168.7.1”... -
Page 11: Management
You may choose “Obtain an IP address automatically”(recommend) to get IP address automatically or choose “Use the following IP address” to specify IP addresses manually. Please click the OK button after your configuration. Management 4.1 Wireless Router configuration setup This product provides Web based configuration scheme, which is configuring by Netscape Communicator or Internet Explorer. -
Page 12: Wireless Settings
After login successfully, web-configuration will be displayed. 4.2 Wireless Settings 4.2.1 Basic Settings You can set up the configuration of your Wireless and monitor the Wireless Clients associate with your AP... - Page 13 1 Radio Status: The Status of Wireless. 2 Radio On/Off: Click the button to enable the wireless function. If you want to use wireless, click the button ‘Radio On’, and if you don’t want to use wireless, click the button ‘Radio off’. 3 Network mode: Select one of the following: 11g - Select if all of your wireless clients are 802.11g.
-
Page 14: Advance
8 WDS Mode: WDS is commonly used in areas requiring multiple APs, where wiring is not possible or costly and for providing back-up paths between APs. The number of ports on an AP available for the WDS is dependent on the AP model. Disable –... - Page 15 1 BG Protection Mode: Select either Auto On or Off. Default is Auto 2 Basic Data Rates: Select the data rate. Default is 1-2-5.5-11-22-54Mbps 3 Beacon Interval: Beacons are packets sent by an Access Point to synchronize a wireless network. Specify a value. 100 is the default setting and is recommended. 4 Data Beacon Rate (DTIM): (Delivery Traffic Indication Message) 1 is the default setting.
-
Page 16: Security
12 IEEE 802.11H: This enables 802.11h operation. 802.11h is a wireless specification developed to allow implementation of wireless networks in countries that cannot use the 802.11 standard. This feature should only be enabled if you are in a country that requires it. Click either Enable or Disable. Default is Disable. only in A band 13 Country Code: Here you can select the Country Code. -
Page 17: Wps
4.2.4 WPS 1 WPS: Enable – select if you want to make the WPS enable. If you don’t need, select disable and click Apply button. The following display the setting and status of WPS. 2 WPS mode: the mode of WPS, if you select PIN button, you need a PIN, or else, you select the PBC button. -
Page 18: Wan Setting
In this page, you can see the status station list of the wireless network, which display MAC Address, Aid , PSM. 4.3 WAN Setting WAN Basic 4.3.1 1 WAN Connection Type: the connection mode of WAN port. There are five choice you can select. - Page 19 Choose PPPoE (Point to Point Protocol over Ethernet) if your ISP uses a PPPoE connection. Your ISP will provide you with a user name and password. This option is typically used for DSL services. Make sure to remove your PPPoE software from your computer.
- Page 20 Choose L2TP (Layer 2 Tunneling Protocol) if your ISP uses a L2TP connection. Your ISP will provide you with a user name and password. This option is typically used for DSL services. L2TP Server IP Address: Enter the Server IP provided by your ISP (optional). User Name: Enter your L2TP user name.
-
Page 21: Wan Advanced
2 Enabled: Enable – select if you want to clone the wan port MAC Address. 3 MAC Address: fill the MAC Address you want to clone. Also you can click Fill my MAC button to fill you PC’s MAC Address automatically. 4.3.2 WAN Advanced 1 Ping from WAN: Enable –... -
Page 22: Lan Setting
network. 2 L2TP passthrough: Enable – select if you want to let the L2TP packet pass through the Wireless Router from WAN port. 3 IPSec passthrough: Enable – select if you want to let the IPSEC packet pass through the Wireless Router from WAN port. 4 PPTP passthrough: Enable –... -
Page 23: Dhcp Setting
6 UPNP: To use the Universal Plug and Play (UPnP ™ ) feature click on Enabled. UPNP provides compatibility with networking equipment, software and peripherals. 7 PPPOE relay: Uncheck the box to transfer the PPPoE server information from your ISP to your computers. If checked, your computers will use the router for PPPoE server. -
Page 24: Security
4.5 Security 4.5.1 Firewall 1 Firewall: firewall feature filters out unrecognized packets to protect your LAN network and prevent cyber attacks. So all computers networked with the Wireless Router are invisible to the outside world. The Wireless Router offers a firewall type functionality. -
Page 25: Mac Filtering
2 Default Policy: default if accepted. 3 Source IP Address: Enter in the source IP address of the computers that you want the policy to apply to. If it is only a single computer that you want the policy applied to, then enter the IP address of that computer in the Start Source IP and leave the End Source IP blank. -
Page 26: Service
4.6 Service 4.6.1 DMZ Sometimes you may want a computer exposed to the outside world for certain types of applications. If you choose to expose a computer, you cam enable DMZ. DMZ is short for Demilitarized Zone. This option will expose the chosen computer completely to the outside world. -
Page 27: Remote Control
1 Virtual Server Settings: Check Enabled to activate entry. 2 IP Address: enter the IP Address of the computer on your local network that you want to allow the incoming service to. 3 Port Range: enter the port range of the computer on your local network that you want to allow the incoming service to. -
Page 28: Ddns
1 Web Remote Control: Enable – the Remote Control function is become effective. 4.6.4 DDNS The DDNS feature allows you to host a server (Web, FTP, Game Server, etc…) using a domain name that you have purchased (www.whateveryournameis.com) with your dynamically assigned IP address. -
Page 29: Ntp Setting
2 Enable DDNS Service: When an IP address is automatically assigned by a DHCP server, DDNS automatically updates the DNS server. Check the box to enable DDNS. 3. Go to www.dyndns.com website and register for free account and create one DDNS hostname. -
Page 30: Storage
1 Time Zone: Select the Time Zone from the drop-down menu. 2 NTP Server: NTP is short for Network Time Protocol. NTP synchronizes computer clock times in a network of computers. Check this box to use a NTP server. This will only connect to a server on the Internet, not a local server. 3 NTP synchronization: synchronize NTP 4.7 Storage 4.7.1... -
Page 31: Disk
1. Username =admin Username and password is provided for the security and administrator can create new username and password also. 2. FTP used This is only for authenticated users. The same user can be allowed to access samba server as well as FTP to download and/or upload the files. 3. -
Page 32: Smb Server
FTP server Most web browsers and file managers can connect to FTP servers. This allows manipulation of remote files over FTP through an interface similar to that used for local files. This is done via an FTP URL, which takes the form ftp(s)://<ftpserveraddress>. - Page 33 1. Workgroup A workgroup is a collection of individuals working together on a task. Workgroup computing occurs when all the individuals have computers connected to a network that allows them to send e-mail to one another, share data files, and schedule meetings.Sophisticated workgroup systems allow users to define workflows so that data is automatically forwarded to appropriate people at each stage of a...
-
Page 34: Usb Apps
Sharing directory list users can share the directories of the USB using this option. USB apps 4.8.1 Print server setup 1) Please attach printer USB port to the router USB port. 2) Go to the home page page of router then select USB application.Select print server and enable the print server option. - Page 35 3).Wizard Window should appear - press Next 4. Select Local printer and remove check mark at "Automatically detect ...", press Next 5. Select "Create a new port option" and "Standard TCP/IP port" in the drop down list, press Next...
- Page 36 6. New wizard window will appear, press Next 7). Type your wl500g address in the IP address box, press Next...
- Page 37 8. Select Custom option on the next screen, and press Settings 9. New "Configure standard ..." window will appear, and you will need to check the RAW option, if not already checked and change port number - specify 9101 for LPT printer or 9100 for USB one.
- Page 38 10. Add Standard TCP/IP Printer port finished, press Finish...
- Page 39 11). Once you've completed port configuration Add Printer should appear and you will need to continue with regular printer setup procedure. 4.8.2 DL Schedule...
-
Page 40: Dl Torrents
User can set download and upload speeds , the deafault speeds are 50 kbps and 10 kbps respectively. If the user selected the option “Always On” then the torrent files and http/ftp will be downloading all the time. If user selected “in between ” option then he/she can set the time ,in which time between only Torrent/Http/FTP download works. -
Page 41: Dl Http/Ftp
4.8.3 DL HTTP/FTP User can copy HTTP/FTP to path and if any username/password ,set in Username and password field and press Add Path button. To start download press Start button.To stop download press stop button. To delete perticular download press delete button. User can download max two http/ftp at a time. -
Page 42: Load Factory Defaults
1 Wireless Access Point: All (blue and yellow) ethernet ports and wireless interface are bridged into a single bridge interface and are treated as Wireless access points. ALL interfaces(blue,Yellow,Wireless interface)are treated as LAN ports. 2 Wireless Router: The first blue ethernet port is treated as WAN port. The other yellow ethernet ports and the wireless interface are bridged together and are treated as LAN ports. -
Page 43: Upgrade
4.9.3 Upgrade You can upgrade the firmware or bootloader of the device using this tool. Make sure that the firmware or bootloader you want to use is saved on the local hard drive of the computer. Click on “Browse” to search the local hard drive for the firmware or bootloader to be used for the update. -
Page 44: Password
4.9.6 Password This page allows you to change the factory default user name and password of the router. It is strongly recommended that you change the factory default user name and password of the router. All users who try to access the router’s web-based utility will be prompted for the router’s user name and password. -
Page 45: Reboot
4.9.7 Reboot Click Reboot button to restart the unit. -
Page 46: System Log
4.9.8 System Log The router automatically logs (records) events of possible interest in it’s internal memory. If there isn’t enough internal memory for all events, logs of older events are deleted but logs of the latest events are retained. The System Log allows you to view the router logs. -
Page 47: Cable Check
The Status page displays the router’s current status and message. All information is read-only 1 Memory This field displays the current system Memory for the total memory, left memory. 2 WAN/LAN This field displays the current WAN port and LAN port packet message for the WAN Rx packets, WAN Rx bytes, WAN Tx packets, WAN Tx bytes, LAN Rx packets, LAN Rx bytes, LAN Tx packets, LAN Tx bytes, 4.10.3 Cable Check... -
Page 48: Appendix 1: Wireless Basics
Appendix 1: Wireless Basics Wireless products are based on industry standards to provide easy-to-use and compatible high-speed wireless connectivity within your home, business or public access wireless networks. Strictly adhering to the IEEE standard, the wireless family of products will allow you to securely access the data you want, when and where you want it. - Page 49 (WPAN). 1)Wireless Local Area Network (WLAN) In a wireless local area network, a device called an Access Point (AP) connects computers to the network. The access point has a small antenna attached to it, which allows it to transmit data back and forth over radio signals. With an indoor access point as seen in the picture, the signal can travel up to 300 feet.
-
Page 50: Appendix 2: Wireless Modes
Eliminate Interference Place home appliances such as cordless telephones, microwaves, and televisions as far away as possible from the router/access point. This would significantly reduce any interference that the appliances might cause since they operate on same frequency. Security Don’t let you next-door neighbors or intruders connect to your wireless network. Secure your wireless network by turning on the WPA security feature on the router. - Page 51 • Safari 1.2 or higher (with Java 1.3.1 or higher) • Camino 0.8.4 or higher • Firefox 1.5 or higher • Verify physical connectivity by checking for solid link lights on the device. If you do not get a solid link light, try using a different cable or connect to a different port on the device if possible.
- Page 52 You should start at 1424 and work your way down by 10 each time. Once you get a reply, go up by 2 until you get a fragmented packet. Take that value and add 28 to the value to account for the various TCP/IP headers. For example, lets say that 1402 was the proper value, the actual MTU size would be 1480, which is the optimum for the network we’re working with (1402+28=1430).
- Page 53 authentication protocol (EAP). WEP regulates access to a wireless network based on a computer’s hardware-specific MAC address, which is relatively simple to be sniffed out and stolen. EAP is built on a more secure public-key encryption system to ensure that only authorized network users can access the network. WPA-PSK/WPA2-PSK uses a passphrase or key to authenticate your wireless connection.
Need help?
Do you have a question about the LEO-150N-BT and is the answer not in the manual?
Questions and answers