Nokia 3200 User Manual
Hide thumbs
Also See for 3200:
- User manual (112 pages) ,
- User manual (153 pages) ,
- User manual (73 pages)
Table of Contents
Advertisement
Quick Links
Nokia 3200 User Guide
What information is
needed?
My number
Voice mail number
Wireless provider's number
Provider's customer care
Model number
Phone type
Electronic serial number
(ESN)
Numbers
3200
Where is the number?
Wireless service provider
Wireless service provider
Wireless service provider
Wireless service provider
Label on back of phone
(under battery)
Label on back of phone
(under battery)
Label on back of phone
(under battery). See "Find
information about your
phone" on page 8.
Advertisement
Table of Contents

Related Manuals for Nokia 3200


Summary of Contents for Nokia 3200
- Page 1 Nokia 3200 User Guide What information is Numbers Where is the number? needed? My number Wireless service provider Voice mail number Wireless service provider Wireless provider’s number Wireless service provider Provider’s customer care Wireless service provider 3200 Label on back of phone...
-
Page 2: Legal Information
Includes RSA BSAFE cryptographic or security protocol software from RSA Security. Java is a trademark of Sun Microsystems, Inc. The information contained in this user guide was written for the Nokia 3200 product. Nokia operates a policy of ongoing development. Nokia reserves the right to make changes to any of the products described in this document without prior notice. - Page 3 FCC/INDUSTRY CANADA NOTICE Your device may cause TV or radio interference (for example, when using a telephone in close proximity to receiving equipment). The FCC or Industry Canada can require you to stop using your telephone if such interference cannot be eliminated.
- Page 4 Manufactured or sold under one or more following US Patents. Asterisk (*) indicates design patents pending. RE 32,580 4558302 4868846 4945633 4969192 5001372 5101175 5151946 5173927 5212834 5230091 5241583 5311151 5317283 5331638 5335362 5353328 5371481 5378935 5384782 5396657 5400949 5416435 5442521 5446364 5479476...
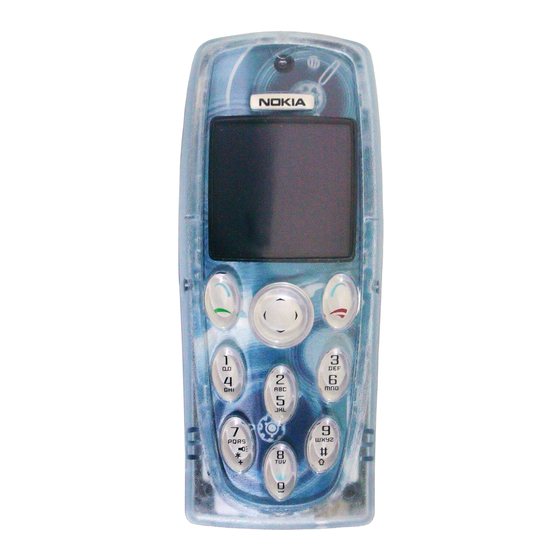
- Page 5 Nokia 3200 phone at a glance Power key Earpiece Display screen Right Left selection key selection key End key Talk key Four-way scroll key Keypad Pop-port™ Charger port connector Microphone Nokia 3200 User Guide Copyright © Nokia 2003...
-
Page 6: Quick Guide
Select Options > Reply. Write a reply, and select Options > Send. Press Press a key briefly and release it. Press and hold Press a key, hold it for two to three seconds, and release it. Copyright © Nokia 2003... -
Page 7: Table Of Contents
Nokia PC Suite ........ - Page 8 Make and answer calls ........17 Earpiece volume .
- Page 9 Multimedia messages ........42 Voice messages .
- Page 10 Display settings ..........60 Time and date settings .
- Page 11 Disconnect from the mobile Internet......98 Set up an automatic connection .......98 Receive a call while online .
- Page 12 21 Technical information ......125 22 Nokia one-year limited warranty ....126 Appendix A Message from the CTIA ..
-
Page 13: For Your Safety
Use only in the normal position as explained in the product documentation. Don't touch the antenna unnecessarily. QUALIFIED SERVICE Only qualified personnel may install or repair this product. ENHANCEMENTS AND BATTERIES Use only approved enhancements and batteries. Do not connect incompatible products. Nokia 3200 User Guide Copyright © Nokia 2003... -
Page 14: Connecting To Other Devices
These Network Services may not be available on all networks or you may have to make specific arrangements with your service provider before you can utilize Network Services. Your service provider may need to give you additional Copyright © Nokia 2003... -
Page 15: Shared Memory
Some of the features may have a certain amount of memory specially allotted to them in addition to the amount of memory shared with other features. Nokia 3200 User Guide Copyright © Nokia 2003... -
Page 16: Overview Of Functions
PC using Nokia PC Suite software, and upload it to a web address with the content image uploader. When you attach a picture to an entry in your list of contacts, the picture is displayed when your contact calls you. -
Page 17: Speakerphone
For more information, see “GPRS, EDGE, CSD” on page 65. Also, consult the PC Suite 5.7 User Guide and PC Connectivity Guide. The guide, Nokia PC Suite, and all related software can be downloaded from the U.S. Mobile Phone products section of www.nokia.com. -
Page 18: Advanced Multimedia Player
Right selection key that lists the functions that you use most often. For more information about the Go to menu, see “Personal shortcuts” on page 63. Quick keys from the start screen take you instantly to functions accessed frequently. See “Quick keys” on page 10 for more information. Copyright © Nokia 2003... -
Page 19: About Your Phone
For more information on connectivity, refer to the PC Suite 5.7 User Guide and PC Connectivity Guide. The guide, Nokia PC Suite, and all related software can be downloaded from the U.S. Mobile Phone products section of www.nokia.com. -
Page 20: Find Information About Your Phone
• International mobile equipment identity (IMEI) • GET HELP If you need help, Nokia Customer Care is available for assistance. We recommend that you write down the following information and have it available if you call. • The IMEI printed on the back of the phone, beneath the battery •... -
Page 21: Contact Your Service Provider
Service providers may differ in their support of features. Before you sign up, make sure that your service provider supports the features that you want to use. Guide updates From time to time, Nokia updates this guide to reflect changes. The latest version may be available at www.nokia.com/us. Online tutorials An interactive tutorial for this product may be available at the web site www.nokiahowto.com. -
Page 22: Start Screen
Press any key to deactivate the screen saver. For more information, see “Set screen saver timeout” on page 61. Wallpaper You can set the phone to display a background picture (wallpaper) when it is in the standby mode. See “Wallpaper” on page 60. Copyright © Nokia 2003... -
Page 23: Indicators And Icons
Calls are limited to a closed user group. See “Closed user groups” on page 26. The timed profile is selected. See “Profiles” on page 59. A headset, handsfree, or Nokia Loopset enhancement is connected to the phone. Voice privacy encryption is active (or is not active) in the network. -
Page 24: Accessibility Solutions
1-888-665-4228. • NOKIA PC SUITE Nokia PC Suite is a collection of powerful tools that you can use to manage phone features and data. For example, with PC Suite you can manage the photos from the phone camera, create new ringing tones and wallpapers, and create new cut-out covers from your photos. - Page 25 For example, to delete the list of missed calls, select Menu 2-4-2 (Menu > Call log > Delete recent call lists > Missed) from the start screen. After a brief pause, the list of missed calls is deleted. Nokia 3200 User Guide Copyright © Nokia 2003...
-
Page 26: Basic Operations
Lift the cover from the phone. REMOVE THE BATTERY Remove the battery by lifting it from the finger grip. INSERT THE SIM CARD Slide the SIM card holder backwards to release it. Swing the SIM card holder open. Copyright © Nokia 2003... - Page 27 REPLACE THE BACK COVER 12 Slide the back cover just below its locked position on the back of the phone. 13 Slide the back cover forward to lock the cover into place. Nokia 3200 User Guide Copyright © Nokia 2003...
-
Page 28: Switch The Phone On Or Off
• SET THE CLOCK Before many functions such as call timers will operate properly, you need to set the clock. From the menus, select Settings > Time and date settings > Clock > Set the time. Copyright © Nokia 2003... -
Page 29: Make And Answer Calls
When the new call picks up, select Options > Conference to connect the calls. To add a new participant to the call, repeat steps 2–4. To have a private conversation with one participant, select Options > Private, and select the desired participant. Nokia 3200 User Guide Copyright © Nokia 2003... -
Page 30: Answer Or Reject An Incoming Call
The loudspeaker is deactivated automatically when a call (or a call attempt) ends or when certain enhancements are connected. Note: When you select the New call option from the in-call menu, the loudspeaker does not automatically deactivate. Copyright © Nokia 2003... -
Page 31: Options During A Call
Record—Make an audio recording of the call. (See “Voice recorder” on page 81 for more information.) Auto volume on or Auto volume off—Set the automatic volume control on or off (See “Automatic volume control” on page 68 for more information.) Nokia 3200 User Guide Copyright © Nokia 2003... -
Page 32: Text Entry
To switch to 123 mode from Abc mode, press and hold the # key at any message entry screen until the icon in the upper left corner of the display switches from Abc to 123 (or vice versa). Copyright © Nokia 2003... -
Page 33: Predictive Text Input
Add new words to the dictionary If you encounter a word that predictive text does not recognize, a question mark (?) follows the word and Spell appears in the lower left of the display. Nokia 3200 User Guide Copyright © Nokia 2003... -
Page 34: Punctuation And Special Characters
• When the dictionary is full, the most recent addition replaces the first. Predictive text example To write Nokia with predictive text on and with the English dictionary selected, press each of the following keys once: the 6 key the 6 key... -
Page 35: Phone Security
After a brief pause, you are prompted to enter the current PIN code. Enter the PIN code and select OK. Scroll to On and select OK. A message appears in the display confirming your selection. Nokia 3200 User Guide Copyright © Nokia 2003... -
Page 36: Call Restrictions
Select OK. Change your restriction password Contact your service provider for your original restriction password. From the menus, select Settings > Security settings > Access codes > Change restriction password. Enter your new password, and select OK. Copyright © Nokia 2003... -
Page 37: Fixed Dialing
Any numbers which you have assigned to fixed dialing appear in the display. Scroll to a number and select Options. The following options appear in the display. View number—View the number for an entry. Nokia 3200 User Guide Copyright © Nokia 2003... -
Page 38: Closed User Groups
The security level determines your access to features when a nonowner SIM card is used. A nonowner SIM card is one (other than the original) that is inserted after you power off the phone. There are three security levels: Off—Owner and Nonowner cards are treated the same. Copyright © Nokia 2003... -
Page 39: Access Codes
(default is 12345). Enter the current security code and select OK. You are prompted to enter the new security code. Enter the new security code (up to 10 characters) and select OK. Nokia 3200 User Guide Copyright © Nokia 2003... -
Page 40: Pin Code
Enter the new PIN2 code and select OK. You are asked to verify the new PIN2 code by entering it again. Enter the new PIN2 code and select OK. A message appears in the display confirming you have changed the PIN2 code. Copyright © Nokia 2003... - Page 41 If you enter an incorrect PUK or PUK2 code 10 times in succession, SIM rejected appears in the display and the SIM card can no longer be used. You must contact your service provider for a new SIM card. Nokia 3200 User Guide Copyright © Nokia 2003...
-
Page 42: Messages (Menu 1)
See “Delete messages” on page 34 for more information. • BEFORE YOU CAN SEND AND RECEIVE MESSAGES You will need the following to send and receive messages: • A messaging service through your service provider Copyright © Nokia 2003... -
Page 43: Icons
Insert number—Insert a number from contacts into your message. Use template—Insert a predefined template into your message. Insert picture—Insert a picture from the gallery into your message. Exit editor—Save the message to your archive automatically and leave the message editor. Nokia 3200 User Guide Copyright © Nokia 2003... -
Page 44: Default Message Type
From the menus, select Messages > Message settings > Text messages > Sending profile > Default profile > Messages sent via. Select the message type of your choice. A message appears in the display confirming your selection. Copyright © Nokia 2003... -
Page 45: Font Size
You can save messages to an existing folder or to a folder that you created. From the menus, select Messages > Text messages > Create message. Write your message and select Options > Save message. Nokia 3200 User Guide Copyright © Nokia 2003... -
Page 46: View Saved Messages
If your message memory is full and you have more messages waiting at the network, blinks in on the start screen. You can do the following to create more space: • Read some of the unread messages and then delete them. Copyright © Nokia 2003... -
Page 47: A Single Message
Messages sent via—Select the message type Text, E-mail, Page, or Fax. Message validity—Define how long the network attempts to send your Nokia 3200 User Guide Copyright © Nokia 2003... -
Page 48: Multimedia Message Settings
Default slide timing—Set the default interval for slides in your presentations. Enter the time in mm:ss format and select OK. Allow multimedia reception—Choose Yes, No, or In home network for your multimedia service. In home network cannot receive multimedia messages Copyright © Nokia 2003... -
Page 49: Write And Send A Text Message
• WRITE AND SEND A TEXT MESSAGE From the menus, select Messages > Text messages > Create message. Press the Scroll left key at the start screen. Compose a message using the keypad and select Options > Send. Nokia 3200 User Guide Copyright © Nokia 2003... -
Page 50: Read Messages
• REPLY TO A MESSAGE While viewing a message, select Options > Reply. Select a Start reply with option: • Empty screen • Original text • Template • • • • Thank you • Congratulations • Happy birthday Copyright © Nokia 2003... -
Page 51: Forward A Message
Your phone can download pictures, or receive them from compatible phones using text messaging to use in messages. You can also create pictures and send them to your phone or other compatible phones using Nokia PC Suite. Note: This function can be used only if it is supported by your service provider. -
Page 52: Compose And Send A Picture Message
To view another picture, select Back, scroll to another picture, and select View. To send the picture message, select Options > Send. Enter the phone number for your recipient, or select Find to retrieve a number from contacts, and select OK. Copyright © Nokia 2003... -
Page 53: E-Mail
Enter a subject for the e-mail and select OK. Compose your e-mail, leaving enough space in the total character count (160) for the e-mail address, and select Options > Send e-mail. Enter the e-mail server number and select OK. Nokia 3200 User Guide Copyright © Nokia 2003... -
Page 54: Multimedia Messages
If a received message contains unsupported elements, they may be replaced with the text Object format not supported. Before you can use the multimedia message feature, you must define the multimedia message settings. See “Multimedia message settings” on page 36 for more information. Copyright © Nokia 2003... -
Page 55: Write And Send
Note: If you have attached a picture to the message, you cannot send the message using e-mail. 15 Enter the recipient’s number or e-mail address, or search for it in contacts, then select OK. The message is moved to the Outbox folder for sending. Nokia 3200 User Guide Copyright © Nokia 2003... -
Page 56: Read And Reply
Open image—View the image included in the message. Select Options to zoom the image, save it in the gallery, set its contrast, or view its details. Open sound clip—Select Options to play the sound clip, save it in the gallery, or view its details. Copyright © Nokia 2003... -
Page 57: Voice Messages
• From the menus, select Messages > Voice messages > Listen to voice messages. Once you connect and the prerecorded greeting begins, follow the automated instructions to listen to your voice messages. Nokia 3200 User Guide Copyright © Nokia 2003... -
Page 58: Automate Voice Mail
Scroll to an empty 1-touch dialing slot and select Assign. Enter your voice mailbox number, including the area code. Enter any dialing codes as necessary. For example, if you pause for 5 seconds after connecting to voice mail, enter Copyright © Nokia 2003... -
Page 59: Info Message Service
From the menus, select Messages > Service commands. In the Message edit screen, enter a service request, such as an activation command for a specific network service, and select Send. Nokia 3200 User Guide Copyright © Nokia 2003... -
Page 60: Call Log (Menu 2)
Call time—Display the date and time of the call. Send message—Send a message to the number. View number—Display the number. Edit number—Edit the number and associate a name with the number. Save—Enter a name for the number and save it to contacts. Copyright © Nokia 2003... -
Page 61: Missed Calls
At the start screen, press the Talk key. From the menus, select Call log > Dialed numbers. Scroll to a name or number and select Options and the desired option from the list. Nokia 3200 User Guide Copyright © Nokia 2003... -
Page 62: Call Times
Duration of received calls—Show the duration of all received calls. Duration of dialed calls—Show the duration of all dialed calls. Duration of all calls—Show the duration of all calls (missed, dialed, and received). Clear timers—Reset all call timers to zero. Copyright © Nokia 2003... -
Page 63: Contacts (Menu 3)
Caller groups—View and edit the properties (such as the ringing tone) for any of the caller groups. • TYPES OF INFORMATION Each contact entry can contain one or more of the following types of information: General phone number Mobile phone number Home phone number Nokia 3200 User Guide Copyright © Nokia 2003... -
Page 64: Save Information
The first number you save for any entry is automatically set as the default, or primary number. It is indicated with a frame around the number type indicator. Make sure that the memory in use is either Phone or Phone and SIM. Copyright © Nokia 2003... -
Page 65: Save Addresses And Notes
Select Details to view the details of the selected entry. Use the Scroll up and Scroll down keys to scroll through the details of the entry, if necessary. Nokia 3200 User Guide Copyright © Nokia 2003... -
Page 66: Make A Call
Scroll to the entry you wish to delete, select Delete > OK to confirm the deletion. To delete the entire contents of contacts, select Delete all > Phone or SIM card > Delete > OK. You are asked to enter the security code. Enter the security code and select OK. Copyright © Nokia 2003... -
Page 67: Copy Entries
Select Save to save the business card in phone memory, or select Exit > OK to discard the business card. Send a business card You can send a business card using IR or as a text message to a compatible phone or other handheld device. Nokia 3200 User Guide Copyright © Nokia 2003... -
Page 68: 1-Touch Dialing
Scroll to the 1-touch dialing entry you wish to change and select Options > Change. Enter the new number, or select Find to retrieve a number from contacts, and select OK. Enter a name for the entry and select OK. Copyright © Nokia 2003... -
Page 69: Info, Service, And Own Numbers
Group ringing tone—Set the ringing tone for the group. Group logo—View the graphic for the caller group, and turn it on or off. Group members—Add or remove members from the caller group. Nokia 3200 User Guide Copyright © Nokia 2003... -
Page 70: Add A Contact To A Caller Group
Contacts view—Select the Name list, Name and number, Name only, or Name and image view. Memory status—View the amount of phone or SIM memory used and available. Copyright © Nokia 2003... -
Page 71: Select A Profile
Select the profile you want to customize, select Customize and one of the following: Ringing options—Select the ringing tone style. Ringing tone—Select the ringing tone for incoming calls. Ringing volume—Set the volume of your ringing tone. Vibrating alert—Turn the vibrating alert on or off. Nokia 3200 User Guide Copyright © Nokia 2003... -
Page 72: Set A Timed Profile
PC Suite from your PC and then save them in the Gallery. Your phone supports JPEG, GIF, BMP, PNG, and WBMP formats. Copyright © Nokia 2003... - Page 73 Select 2 minutes or 5 minutes. If you want to set a custom time (up to 60 minutes), select Other, then enter the custom time and select OK. A message appears in the display confirming your selection. Nokia 3200 User Guide Copyright © Nokia 2003...
-
Page 74: Time And Date Settings
From the menus, select Settings > Time and date settings > Clock > Time format > 24-hour or 12-hour. A message appears in the display confirming your selection. Show or hide the date You can display or not display the date on the start screen. Copyright © Nokia 2003... -
Page 75: Personal Shortcuts
This list of functions is called the Go to menu. You can also select an operator-specific name for the Right selection key to be displayed in the start screen. Nokia 3200 User Guide Copyright © Nokia 2003... -
Page 76: Connectivity
Right selection key takes you to the operator’s WAP site. • CONNECTIVITY In this menu you can connect the phone to a compatible device using an IR connection. You can also define when the phone connects to the (E)GPRS network. Copyright © Nokia 2003... - Page 77 IR-equipped laptop or IR-equipped desktop PC using the IR port. For more information, see the PC Suite 5.7 User Guide and PC Connectivity Guide. The guide, Nokia PC Suite, and all related software can be downloaded from the U.S. Mobile Phone products section of www.nokia.com.
- Page 78 Indicates that the GPRS connection has been interrupted by a voice call or text message. The phone tries to reestablish the connection after the call. Indicates an active GPRS connection, for example, when you are using the browser. Copyright © Nokia 2003...
-
Page 79: Data Communication Applications
Forward all fax calls—Forward all fax calls to a fax mailbox. Forward all data calls—Forward all data calls to a data mailbox. Cancel all call forwarding—Cancel any call forwarding options you may have set. Nokia 3200 User Guide Copyright © Nokia 2003... -
Page 80: Automatic Volume Control
If you increase the volume during an active call by pressing the Right scroll key, the phone volume level increases regardless of whether or not automatic volume control is activated. When you end the call, the volume returns to the level set before automatic volume control was activated. Copyright © Nokia 2003... -
Page 81: Anykey Answer
Send my caller identity You can prevent your number from being displayed on the receiving party’s caller ID. This feature is network-dependent and works on a call-by-call basis. Contact your service provider for more information. Nokia 3200 User Guide Copyright © Nokia 2003... -
Page 82: Phone Settings
Enter the emergency number and press the Send key. You can set the keypad of your phone to lock automatically after a preset time delay (from 10 seconds to 60 minutes). When the preset delay expires, the keypad locks automatically. Copyright © Nokia 2003... - Page 83 From the menus, select Settings > Phone settings > Network selection and one of the following: Automatic—Your phone defaults to those settings which have been preset by your service provider. Manual—Your phone searches for a network which has a roaming agreement with your service provider. Nokia 3200 User Guide Copyright © Nokia 2003...
-
Page 84: Confirm Sim Service Actions
Each compatible enhancement appears in the Enhancement settings menu only after it has been connected to the phone. Once an enhancement has been connected, it always appears in the menu even if it is not currently connected. Copyright © Nokia 2003... -
Page 85: Headset Options
Automatic answer—Calls are answered automatically after one ring when a loopset is connected. Select On or Off. TTY options Use TTY—Activates the TTY feature. Select Yes to activate TTY or No to deactivate. Nokia 3200 User Guide Copyright © Nokia 2003... -
Page 86: Security Settings
Enter the security code (the default is 12345) and select OK. A message appears in the display confirming that original settings have been restored. Note: Data that you have entered or downloaded is not deleted. For example, names and numbers in contacts are not affected. Copyright © Nokia 2003... -
Page 87: Gallery (Menu 5)
You can save pictures and ringing tones to folders in the gallery, or create folders of your own and save them there. You can download images and tones using MMS, web sites, or Nokia PC Suite. Your phone supports usage rights to protect content that you have acquired. A piece of content, such as a ringing tone, can be protected and associated with certain usage rules, for example the number of usage times. -
Page 88: Edit An Image
Scroll to an image and select Options > Edit image > Options. Options include Save, Insert text, Insert frame, Insert clip-art, and Crop image. To insert text in the center of the image: Select Insert text. Copyright © Nokia 2003... - Page 89 The portion of the image inside of the marking box appears in the display. To save the edited image: Select Options > Save. Enter a name for the image and select OK. Select the folder where you want to save the image. Nokia 3200 User Guide Copyright © Nokia 2003...
-
Page 90: Take A Photo
MMS, save it as wallpaper in the standby mode, save it in a compatible PC using Nokia PC Suite software, and upload it to a web address with the content image uploader. When you attach a picture to an entry in your list of contacts, the picture is displayed when your contact calls you. -
Page 91: Self Timer
Default title—Define the title that will be used when saving a photo. If you select Automatic, the default title will be used, or if you select My title, you can enter or edit a new title. Nokia 3200 User Guide Copyright © Nokia 2003... -
Page 92: Radio
Rename—Enter a new name for the saved channel and select OK. Loudspeaker—Listen to the radio through the speakerphone. Headset—Listen to the radio through the headset. Mono output/Stereo output—Listen to the radio in monaural mode (default) or in stereo. Stereo output is available through a stereo enhancement. Copyright © Nokia 2003... -
Page 93: Save A Radio Channel
To send the latest recording as a multimedia message or by IR to a compatible phone, select Send. Record a phone call During a call, select Options > Record. To stop recording, select Stop. Nokia 3200 User Guide Copyright © Nokia 2003... -
Page 94: Manage Recordings
Set as ring tone—Use the recording as the phone ringing tone. Details—View the name, size, date, time, length, format, and copyright status of the recording. Sort—Sort the recordings in the folder by name, date, format, or size. Copyright © Nokia 2003... -
Page 95: Organizer (Menu 7)
Alarm on appears briefly in the display and appears on the start screen. Turn off an alarm setting From the menus, select Organizer > Alarm clock > Alarm time > Off. Alarm off appears briefly in the display. Nokia 3200 User Guide Copyright © Nokia 2003... -
Page 96: Calendar
The month view provides an overview of the selected month and weeks. It also allows you to jump to a specific date. Any days or dates that appear in bold font contain calendar notes such as a meeting or reminder. Month view Copyright © Nokia 2003... -
Page 97: Week View
You are then given the option to set an alarm. Call prompts you to enter a phone number, a name, and the time. You are then given the option to set an alarm. Nokia 3200 User Guide Copyright © Nokia 2003... - Page 98 Go to date—Jump to another date on your calendar (available only in header view). Send note—Send the note to another device using Infrared or as a text message or in vCal format. Copy—Copy the note. You can then paste the note to another date. Copyright © Nokia 2003...
-
Page 99: Send A Calendar Note To Another Device
Press the scroll keys to view the entire message, if necessary. SAVE RECEIVED CALENDAR NOTES After viewing the Calendar note, select Options > Save. DISCARD VIEWED CALENDAR NOTES After viewing the Calendar note, select Options > Discard. Nokia 3200 User Guide Copyright © Nokia 2003... -
Page 100: Calculator
From the menus, select Organizer > Calculator > Options > Exchange rate and one of the following: Foreign units in home units—Enter the number of home units it takes to make one unit of foreign currency. Copyright © Nokia 2003... - Page 101 Home units in foreign units—Enter the number of foreign units it takes to make one unit of your home currency. Enter the exchange rate and select OK. The exchange rate is saved. Nokia 3200 User Guide Copyright © Nokia 2003...
-
Page 102: Launch A Game
Select or Back (returns to the game). Game options While viewing the games list, select Options to display the following options. Scroll to an option and select Select to activate the option or enter its submenu. Open—Play the game. Copyright © Nokia 2003... -
Page 103: Collection
Shakes > On or Off. • COLLECTION Launch an application From the menus, select Applications > Collection > Select application. Scroll to an application or an application set. To launch the application, press the Talk key. Nokia 3200 User Guide Copyright © Nokia 2003... -
Page 104: Application Options
See “Navigate the mobile Internet” on page 95 for information on browsing web pages. If the connection fails, you may enter the Services menu and activate another set of service settings. See “Options while online” on page 99 for more info on Copyright © Nokia 2003... -
Page 105: View Memory Status For Applications
Note: Only install sources that offer adequate protection against harmful software. View memory status for applications You can view the size of memory available for game and application installations. From the menus, select Applications > Collection > Memory. Nokia 3200 User Guide Copyright © Nokia 2003... -
Page 106: Services (Menu 9)
From the menus, select Services > Settings > Connection settings > Active service settings. Scroll to the desired connection set and select Activate > Edit active service settings. Select each setting and enter the required information. Contact your service provider for details. Copyright © Nokia 2003... -
Page 107: Sign On To The Mobile Internet
To browse the WAP site, press the Scroll up key or the Scroll down key. • To select a highlighted item, press the Talk key. • To enter letters and numbers, press a key from 0–9. • To enter special characters, press the * key. Nokia 3200 User Guide Copyright © Nokia 2003... -
Page 108: Examples Of Mobile Internet Sites
Your device may have some bookmarks loaded for sites not affiliated with Nokia. Nokia does not warrant or endorse these sites. If you choose to access them, you should take the same precautions for security or content as you would with any mobile Internet site. -
Page 109: Receive A Bookmark
To view a saved service message: From the menus, select Services > Service inbox. Scroll to the desired message and select Options and one of the following: Retrieve—Fetch the content indicated in the message. Nokia 3200 User Guide Copyright © Nokia 2003... -
Page 110: File Upload
• To answer the incoming call, press the Talk key. • To reject the incoming call, press the End key. Note: After you end your voice call, the GPRS connection automatically resumes. Copyright © Nokia 2003... -
Page 111: Make A Call While Online
Save to folder—Save the current page in a folder. Other options—View a list of other available options, including. • Go to address—Go to another site on the mobile Internet. • Service inbox—Receive service messages (“pushed” messages) from your Nokia 3200 User Guide Copyright © Nokia 2003... -
Page 112: Security
Settings > Security settings > Authority certificates > Certificate list. Security module The security module improves security services and allows you to use a digital signature. It can contain certificates and public and private keys. Your service provider saves the certificates in the security module. Copyright © Nokia 2003... -
Page 113: Allow Or Reject Cookies
Select the user certificate you want to use, enter the signing PIN (provided with the SIM card if the SIM card has a security module), and select OK. The digital signature icon disappears, and the service may display a confirmation of your purchase. Nokia 3200 User Guide Copyright © Nokia 2003... -
Page 114: Appearance Settings
Character encoding—Specify the character set that the phone uses for showing browser pages that do not include that information, or to specify whether to always use UTF-8 encoding when sending a Web address to a compatible phone. Copyright © Nokia 2003... -
Page 115: Go To (Menu 10)
SIM services, select Settings > Phone settings > Confirm SIM service actions > Yes. Accessing these services may involve sending a text message or making a phone call for which you may be charged. Nokia 3200 User Guide Copyright © Nokia 2003... -
Page 116: Instant Messaging
The following table shows the instant messaging icons and their descriptions. The icons and display text may appear differently, depending on which instant messaging service you use. Available Do not disturb/discreet Appear offline Available with an alert set Copyright © Nokia 2003... -
Page 117: Obtain User Name And Password
Logging in appears, then Logged in, followed by the IM online menu. After you have logged into instant messaging initially, you have the option of a manual login or an automatic login. See “Set up automatic login” on Nokia 3200 User Guide Copyright © Nokia 2003... -
Page 118: Set Your Availability
When you receive an instant message, a screen appears, showing you have a new instant message with the name of the sender. Select Open > Options > Write message and enter a message. Select Options > Send. Copyright © Nokia 2003... -
Page 119: Chat Sessions
Enter the name you want to use for the conversation and select Options > Save. Conversation saved appears. View chat history From the IM offline menu, select Saved convers. and the chat history you want to view. Nokia 3200 User Guide Copyright © Nokia 2003... -
Page 120: Contacts
The Nickname screen appears, with the contact’s nickname displaying. If you want to change the nickname, select Clear as many times as necessary to delete the nickname, and enter the new nickname. Select Options > OK. Copyright © Nokia 2003... -
Page 121: Search For A Contact
Select OK. Updating information appears, followed by a confirmation note. Set an alert for a contact You can set an alert for a contact to notify you when the contact’s availability changes. Nokia 3200 User Guide Copyright © Nokia 2003... -
Page 122: Private Groups
To add other members to the group, repeat steps 1–3. Remove private group members In the group list, scroll to the member you want to remove. Select Options > Remove memb.. A message appears, asking you if you want to remove the member. Select OK. Copyright © Nokia 2003... -
Page 123: Invitations To Group Chat
Updates option, or display how your presence is seen by other users by using the Authorization option. Set up screen name You can set up or revise a screen name that is 1–20 characters in length. Nokia 3200 User Guide Copyright © Nokia 2003... -
Page 124: Log Off Service
From the IM online menu, you can exit the IM application but still stay connected to the IM service. This enables you to receive instant messages and chat invitations from your contacts while using your phone for other purposes, such as playing a game. Copyright © Nokia 2003... -
Page 125: Exit Instant Messaging
If you want to exit IM, select Back until Closing application appears. The IM main menu screen appears. Select Exit. If you open IM again, you do not need to log in again. Nokia 3200 User Guide Copyright © Nokia 2003... -
Page 126: Hardware And Enhancements
You can use the phone while the charger is connected. The battery provides up to 4 hours of talk time and up to 12 days of standby time. Operation times are estimates and may vary depending on network conditions, charging and phone use. Copyright © Nokia 2003... - Page 127 To remove the front cover, gently pull the top of the front cover from the phone. Remove the old back cut-out cover from the back cover. Remove the keymat and the old front cut-out cover from the front cover. Nokia 3200 User Guide Copyright © Nokia 2003...
-
Page 128: Enhancements
720-mAh Li-Ion Battery (BLD-3) • Standard Travel Charger (ACP-7) • Rapid Travel Charger (ACP-8) • Travel Charger (ACP-12) • Mobile Charger (LCH-12) • Spare Battery Charger (DDC-1) is compatible with: Standard Travel Charger (ACP-7) Rapid Travel Charger (ACP-8) Data Copyright © Nokia 2003... - Page 129 Loopset (LPS-4) Accessibility • Phone adapter (HDA-10) • Car installation kit (CARK-126) • Full car kit (CARK-143) • Antenna coupler (AXF-15S) • Mobile holder (MBC-15S) • Privacy handset (HSU-3) • Headrest handsfree (BHF-1) Nokia 3200 User Guide Copyright © Nokia 2003...
-
Page 130: Reference Information
The battery can be charged and discharged hundreds of times but it will eventually wear out. When the talk and standby times are noticeably shorter than normal, buy a new battery. Use only Nokia approved batteries, and recharge your battery only with Nokia approved chargers designated for this device. -
Page 131: Enhancements, Batteries, And Chargers
LCH-12. Warning: Use only batteries, chargers, and enhancements approved by Nokia for use with this particular model. The use of any other types may invalidate any approval or warranty, and may be dangerous. For availability of approved enhancements, please check with your dealer. When you disconnect the power cord of any enhancement, grasp and pull the plug, not the cord. -
Page 132: Additional Safety Information
Use the device only in its normal operating positions. To maintain compliance with radio frequency exposure guidelines only use accessories approved by Nokia for use with this device. When the device is on and being worn on the body, always use an approved carrying case. -
Page 133: Potentially Explosive Environments
They include below deck on boats, chemical transfer or storage facilities, vehicles using liquefied petroleum gas (such as propane or butane), and areas where the air contains chemicals or particles such as grain, dust or metal powders. Nokia 3200 User Guide Copyright © Nokia 2003... -
Page 134: Emergency Calls
Your wireless phone may be the only means of communication at the scene of an accident. Do not end the call until given permission to do so. Copyright © Nokia 2003... - Page 135 When worn on the body as described in this user guide: FCCID # L JPRH-30 is 0.95 W/kg FCCID # L JPRH-31 is 0.97 W/kg (Body-worn measurements differ among phone models, depending upon available enhancements and FCC requirements). Nokia 3200 User Guide Copyright © Nokia 2003...
- Page 136 SAR values may vary depending on national reporting requirements and the network band. For SAR information in other regions please look under product information at www.nokia.com. Copyright © Nokia 2003...
-
Page 137: Technical Information
Battery voltage 3.7 Vdc Number of channels Memory capacity 8 MB flash memory 1.5 MB RAM Operating temperature Between 59°F and 77°F (15°C and 25°C). Number of entries in Up to 250 contacts Nokia 3200 User Guide Copyright © Nokia 2003... -
Page 138: Nokia One-Year Limited Warranty
Product at the time the Consumer returns the Product for repair, determined by the price paid by the Consumer for the Product less a reasonable amount for usage. Nokia shall not be liable for any other losses or damages. These remedies are the Consumer’s exclusive remedies for breach of warranty. - Page 139 Trojan Horses, cancelbots or damage caused by the connection to other products not recommended for interconnection by Nokia. c) Nokia was not advised in writing by the Consumer of the alleged defect or malfunction of the Product within fourteen (14) days after the expiration of the applicable limited warranty period.
- Page 140 FOREGOING LIMITED WRITTEN WARRANTY. OTHERWISE, THE FOREGOING LIMITED WARRANTY IS THE CONSUMER’S SOLE AND EXCLUSIVE REMEDY AND IS IN LIEU OF ALL OTHER WARRANTIES, EXPRESS OR IMPLIED. NOKIA SHALL NOT BE LIABLE FOR SPECIAL, INCIDENTAL, PUNITIVE OR CONSEQUENTIAL DAMAGES, INCLUDING BUT NOT LIMITED TO LOSS OF ANTICIPATED BENEFITS...
- Page 141 Nokia one-year limited warranty provider or seller of any extended warranty or service agreement. 13 This is the entire warranty between the Nokia and the Consumer, and supersedes all prior and contemporaneous agreements or understandings, oral or written, relating to the Product, and no representation, promise or condition not contained herein shall modify these terms.
- Page 142 Copyright © Nokia 2003...
-
Page 143: Appendix A Message From The Ctia
Appendix A Message from the CTIA Appendix A Message from the CTIA (Cellular Telecommunications & Internet Association) to all users of mobile phones. © 2001 Cellular Telecommunications & Internet Association. All Rights Reserved.1250 Connecticut Avenue, NW Suite 800, Washington, DC 20036. Phone: (202) 785-0081 [ 131 ]... - Page 144 Safety is the most important call you will ever make. A Guide to Safe and Responsible Wireless Phone Use Tens of millions of people in the U.S. today take advantage of the unique combination of convenience, safety and value delivered by the wireless telephone. Quite simply, the wireless phone gives people the powerful ability to communicate by voice--almost anywhere, anytime--with the boss, with a client, with the kids, with emergency personnel or even with the police.
- Page 145 Appendix A Message from the CTIA 4 Suspend conversations during hazardous driving conditions or situations. Let the person you are speaking with know you are driving; if necessary, suspend the call in heavy traffic or hazardous weather conditions. Rain, sleet, snow and ice can be hazardous, but so is heavy traffic.
- Page 146 For more information, please call 1-888-901-SAFE. For updates: http://www.wow-com.com/consumer/issues/driving/ articles.cfm?ID=85 © 2001 Cellular Telecommunications & Internet Association. All Rights Reserved. 1250 Connecticut Avenue, NW Suite 800, Washington, DC 20036. Phone: (202) 785-0081 [ 134 ]...
-
Page 147: Appendix B Message From The Fda
Appendix B Message from the FDA Appendix B Message from the FDA (U.S. Food and Drug Administration) to all users of mobile phones. July 18, 2001 ..For updates: http://www.fda.gov/cdrh/phones [ 135 ]... -
Page 148: Consumer Update On Wireless Phones
Consumer Update on Wireless Phones U.S. Food and Drug Administration 1. Do wireless phones pose a health hazard? The available scientific evidence does not show that any health problems are associated with using wireless phones. There is no proof, however, that wireless phones are absolutely safe. - Page 149 Appendix B Message from the FDA FDA shares regulatory responsibilities for wireless phones with the Federal Communications Commission (FCC). All phones that are sold in the United States must comply with FCC safety guidelines that limit RF exposure. FCC relies on FDA and other health agencies for safety questions about wireless phones.
- Page 150 5.What research is needed to decide whether RF exposure from wireless phones poses a health risk? A combination of laboratory studies and epidemiological studies of people actually using wireless phones would provide some of the data that are needed. Lifetime animal exposure studies could be completed in a few years.
- Page 151 Appendix B Message from the FDA Manufacturers of wireless phones must report the RF exposure level for each model of phone to the FCC. The FCC website (http://www.fcc.gov/oet/rfsafety) gives directions for locating the FCC identification number on your phone so you can find your phone’s RF exposure level in the online listing.
- Page 152 distributed leaflets containing such a recommendation in December 2000. They noted that no evidence exists that using a wireless phone causes brain tumors or other ill effects. Their recommendation to limit wireless phone use by children was strictly precautionary; it was not based on scientific evidence that any health hazard exists.
-
Page 153: Index
Index Numerics call duration ....50 1-touch dialing ..56 , 69 forwarding ....67 lists, delete . -
Page 154: Infrared Connectivity
copy ..... . 55 emergency calls while online delete ....54 find entry . -
Page 155: Message Alert Tone
Nokia PC Suite ....23 ....12 notes, calendar . -
Page 156: Special Characters
recorder, voice call forwarding ... . .67 ... 81 – 82 redial a number call waiting ....69 . - Page 157 summary after call ..69 take a photo ....78 text entry ....20 – 22 messages .
- Page 158 NOTES Para obtener un manual del usuario en español favor de llamar o enviar un fax al teléfono 1-888-NOKIA-2U, fax 813-249-9619. 05/03 [ 146 ]...
Need help?
Do you have a question about the 3200 and is the answer not in the manual?
Questions and answers