Table of Contents
Advertisement
Advertisement
Table of Contents

Related Manuals for AEG Electrolux FAVORIT 86080 Vi


Summary of Contents for AEG Electrolux FAVORIT 86080 Vi
- Page 1 FAVORIT 86080 Vi User manual Dishwasher...
- Page 2 Dear Customer Thank you for choosing one of our high quality products. With this appliance you will experience the perfect combination of functional design and cutting edge technology. Convince yourself that our appliances are engineered to deliver the best per formance and control indeed we are setting the highest standards of excel lence.
-
Page 3: Table Of Contents
Contents Contents Operating Instructions Safety Diagram of appliance Control panel Prior to using for the first time Setting the water softener Adding special salt Filling up with rinse aid Activating/deactivating the acoustic signal In daily use Loading cutlery and dishes Adjusting the height of the upper basket Adding detergent Using 3in1 detergents... -
Page 4: Operating Instructions
Operating Instructions Operating Instructions Safety Prior to using for the first time • Follow the ”Instructions for installation and connection”. Correct use • The dishwasher is only intended for washing domestic dishes. • Additions or modifications to the dishwasher are not permitted. •... -
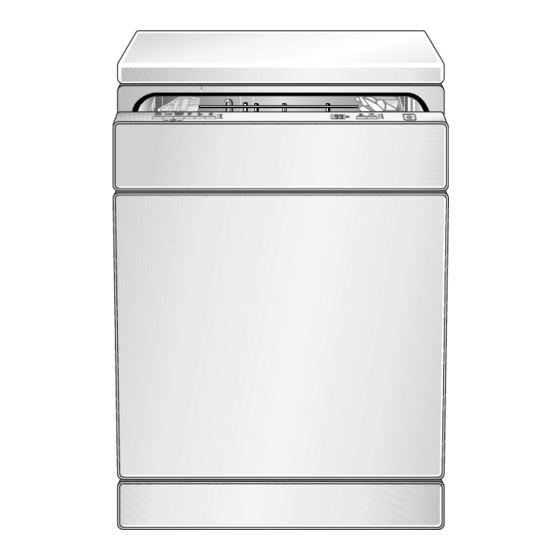
Page 5: Diagram Of Appliance
Diagram of appliance Diagram of appliance Upper basket spray arm and floor spray arm Water hardness dial Dispenser for special salt Dispenser for detergent Dispenser for rinse aid Control panel Rating plate Filters Interior lighting This dishwasher has an internal light that turns on and off when the opening and closing of the dishwasher’s door occurs. -
Page 6: Control Panel
Control panel Control panel To use the appliance, always open the dishwasher door first. ON/OFF button The ON/OFF button is used to turn the dishwasher on and off. Programme buttons Control Function buttons indicators The Programme buttons are used to select the desired dishwashing cycle. Function buttons: In addition to the pre set dishwashing cycle, the following functions can also be set using these buttons: Function button 1... - Page 7 Control panel Multi display Control indicators Set delay Select timer 3 in1 function The multi display can indicate: – the level of hardness to which the water softener is set. – whether the rinse aid inflow has been activated/deactivated. – whether the acoustic signal has been activated/deactivated. –...
-
Page 8: Prior To Using For The First Time
Prior to using for the first time Prior to using for the first time If you wish to use 3 in 1 detergent: – First read the section “Using 3in1 detergents”. – Do not fill up with special salt or rinse aid. If you do not use 3in1 detergent, before using for the first time 1. - Page 9 Prior to using for the first time 2. Press function buttons 2 and 3 simultaneously and keep them pressed. The LED indicators for function buttons 1 to 3 will flash. 3. Press function button 1. The LED indicator for function button 1 will flash. The multi display will indicate the hardness setting.
-
Page 10: Adding Special Salt
Prior to using for the first time Adding special salt To decalcify the water softener, it must be filled up with special salt. Use only special salt suitable for domestic dishwashers. If you do not use 3 in1 detergent, fill up with special salt: –... -
Page 11: Filling Up With Rinse Aid
Prior to using for the first time Filling up with rinse aid With rinse aid the rinsing water drains away better and so you get smear free, gleaming dishes and clear glasses. If you do not use 3in1 detergent, fill up with rinse aid: –... -
Page 12: Setting The Amount Of Rinse Aid Required
Prior to using for the first time Setting the amount of rinse aid required Only change the amount dispensed, if smears, milky spots (reduce the amount) or dried on water spots (increase the amount) can be seen on glasses and dishes. (See section “If dishwashing results are not satisfactory”.) The dosage can be set from 1 6. - Page 13 Prior to using for the first time Activating rinse aid inflow when 3in1 function is selected If the 3in1 function is not selected, the rinse aid inflow is always activated. If the 3in1 function is selected due to the use of 3in1 detergent, the rinse aid in flow is deactivated.
-
Page 14: Activating/Deactivating The Acoustic Signal
Prior to using for the first time Activating/deactivating the acoustic signal In addition to the optical display (e.g. indicating the end of the cycle, errors) you can also choose to set an acoustic signal. 1. Press the ON/OFF button. If the only LED indicator illuminated is one that belongs to a programme button, this means that this dishwashing cycle has been activated. -
Page 15: In Daily Use
In daily use In daily use Loading cutlery and dishes Sponges, cleaning cloths and any other objects that can absorb water must not be washed in the dishwasher. Plastic and Teflon coated dishes and pans tend to retain water droplets. These dishes and pans therefore do not dry as well as those made of china and stainless steel. -
Page 16: Loading Cutlery
In daily use Loading cutlery Warning: Sharp knives and other items of cutlery with sharp edges must be laid in the cutlery rack or in the upper basket to avoid the risk of injury. To ensure that all items of cutlery in the cutlery basket can be reached by the water, you should: 1.Place the grid insert on the cutlery 2.Place forks and spoons in the cutlery... - Page 17 In daily use Loading / Unloading lower basket and upper basket To load and unload, pull out or push in the upper and lower baskets in the middle us ing the handle on the front of the basket. Pots, Pans, Large Plates Load larger and heavily soiled dishes and pans in the lower basket.
-
Page 18: Beer Glasses And Champagne Glasses
In daily use Beer glasses and champagne glasses Up to four wheat beer glasses, Pils glasses, etc. can be hung in the beer glass holders on the lefthand side in the bottom basket. If necessary, the beer glass holders can be folded up out of the way. - Page 19 In daily use The bars that fix the beer glass holders or cup racks can be removed, if required. 1. Push the bars back using the thumbs (see the picture). Important: Risk of injury: Do not take hold of the bars with the hand; place the hand under the bars on the cut lery basket for support.
- Page 20 In daily use Cups, Glasses, Coffee Service Load smaller, fragile crockery and long, sharp cutlery in the upper basket. • Arrange items of crockery on and under the folding cup racks so that they are offset from each other and water can reach all items.
-
Page 21: Adjusting The Height Of The Upper Basket
In daily use • The row of spikes on the left of the upper basket is also in two parts and can be folded away. Spikes not folded away: place glasses, mugs etc. in the upper basket. Spikes folded away: More room for serv ing dishes. -
Page 22: Adding Detergent
In daily use Adding detergent Detergents remove the dirt from dishes and cutlery. The detergent must be added before the cycle starts. Only use detergent intended for domestic dishwashers. The detergent compartment is located on the inside of the door. 1. -
Page 23: Using 3In1 Detergents
In daily use Detergent tablets Detergent tablets from different manufacturers dissolve at different rates. For this reason, some detergent tablets do not attain their full cleaning power dur ing short cycles. Therefore please use dishwashing cycles with pre wash when using detergent tablets. - Page 24 In daily use If you do not want to use 3in1 products any more If you want to stop using 3in1 products, please do the following: • Deactivate the 3in1 function. • Fill up the dispensers for salt and rinse aid again. •...
-
Page 25: Selecting The Dishwashing Cycle (Cycle Table)
In daily use Selecting the dishwashing cycle (Cycle Table) Programme Consumption sequence values Dishwashing Suitable Type of cycle for: soiling AUTOMATIC Dinner service and normally soiled, • • • • (50° 65°) cookware dried on food remains 30 MIN Dishes, excluding just used, lightly to nor •... -
Page 26: Selecting A Programme
In daily use Selecting a programme When your dishes look like this, select: an intensive programme. a normal or energy saving programme. a short programme (e.g. 30 minute pro gramme). -
Page 27: Starting A Dishwashing Cycle
In daily use Starting a dishwashing cycle 1. Check that the spray arms can turn freely. 2. Turn the water tap on fully. 3. Press the ON/OFF button. 4. Select the desired cycle. The programme indicator comes on. The remaining time expected for the cycle will be shown in the multi display. -
Page 28: Setting The Delay Timer
In daily use Setting the Delay Timer With the delay timer you can delay the start of a dishwashing cycle for between 1 and 19 hours. 1. Press the Delay Timer button repeatedly until the multi display shows the de sired time delay, for example 12h, if the cycle is to start in 12 hours. -
Page 29: Switching Off The Dishwasher
In daily use Switching off the dishwasher When the dishwasher cycle has ended, the dot shaped light signal below the door of the appliance goes out. If the acoustic signal has been enabled, a continuous tone will sound for approx. 15 seconds at the end of the dishwashing cycle. -
Page 30: Care And Cleaning
Care and cleaning Care and cleaning Do not use furniture care products or aggressive cleaners. • When necessary, clean the dishwasher’s controls with a soft cloth and clean warm water. • Occasionally check the internal dispensers, door seal and water inlet filter (if fitted) for dirt and clean them, if necessary. -
Page 31: What To Do If
What to do if… 5. Remove the flat filter (3) from the base of the washing compartment and clean both surfaces thoroughly. 6. Re insert the flat filter. 7. Place the fine filter in the micro filter and fit the two together. 8. - Page 32 What to do if… Malfunction Possible cause Remedy Water tap is blocked with Check the water tap and have it limescale or faulty. repaired if necessary. The tap is turned off. Turn the tap on. 1 short warning tone, con The filter (where present) in the tinuously repeated, can be Clean the filter in the threaded...
- Page 33 What to do if… Malfunction Possible cause Remedy The indicator is there to re mind you to check the dish washer’s filters occasionally The indicator goes out auto The control indicator and to clean them, if necessary. matically at the start of the lit.
-
Page 34: If The Dishwashing Results Are Not Satisfactory
What to do if… If the dishwashing results are not satisfactory The dishes are still dirty. • The wrong dishwashing cycle was selected. • The dishes were loaded is such a way that the dishwashing water did not reach all items. The baskets for the dishes must not be overloaded. •... -
Page 35: Disposal
Disposal Disposal Packaging material The packaging materials are environmentally friendly and can be recycled. The plastic components are identified by markings, e.g. >PE<, >PS<, etc. Please dis pose of the packaging materials in the appropriate container at the community waste disposal facilities. Old appliance The symbol on the product or on its packaging indicates that this product... -
Page 36: Notes For Test Institutes
Notes for Test Institutes Notes for Test Institutes Testing in accordance with EN 60704 must be carried out with the appliance fully loaded and using the test cycle (see “Cycle Table”). Tests in accordance with EN 50242 must be carried out when the salt dis penser in the water softener and the rinse aid dispenser have been filled with salt and rinse aid respectively, and using the test cycle (see “Cycle Table”). - Page 37 Notes for Test Institutes Lower basket with cutlery basket Cutlery basket *) If necessary, you can remove the cup racks on the left hand side and/or the beer glass holder.
-
Page 38: Installation And Connection Instructions
Installation and connection instructions Installation and connection instructions Safety information for the installation • Only transport the dishwasher in an upright position, otherwise salt water may run out. • Before using the dishwasher for the first time, check for any damage caused in transport. -
Page 39: Installing The Dishwasher
Installing the dishwasher Installing the dishwasher • The dishwasher must be installed on a firm floor and adjusted to ensure that it is stable and level in all directions. • To compensate for unevenness in the floor and to match the height of the ap pliance to that of surrounding units, extend the threaded feet using a screw driver. -
Page 40: Connecting The Dishwasher
Connecting the dishwasher Connecting the dishwasher Connecting to the water supply • The dishwasher can be connected to cold and hot water supplies up to max. 60°C. • The dishwasher must not be connected to open hot water appliances or in stantaneous water heaters. -
Page 41: Water Drainage
Connecting the dishwasher WARNING! Dangerous voltage (This does apply to dishwashers with safety valve). The electrical cable for the safety valve is in the double walled water inlet hose and is live. Therefore do not immerse the water inlet hose or the safety valve in water. Water drainage Drain hose The drain hose must not be kinked, crushed... -
Page 42: Electrical Connection
Connecting the dishwasher Anti flood system For protection from water damage, the dishwasher is equipped with a anti flood system. In the event of a fault, the safety valve in the water inlet hose immediately in terrupts the supply of water to the appliance. Electrical connection Details about the voltage, type of supply and the fuses required are to be found on the rating plate. -
Page 43: Guarantee/Customer Service
Guarantee/Customer Service Guarantee/Customer Service Belgium DECLARATION OF GUARANTEE TERMS. Our appliances are produced with the greatest of care. However, a defect may still occur. Our consumer serv ices department will repair this upon request, either during or after the guarantee period. The service life of the appliance will not, however, be reduced as a result. -
Page 44: European Guarantee
European Guarantee This appliance is guaranteed by Electrolux in each of the countries listed at the back of this user manual, for the period specified in the appliance guarantee or otherwise by law. If you move from one of these coun... - Page 45 2774 518 Paço de Arcos Romania +40 21 451 20 30 Str. Garii Progresului 2, S4, 040671 RO Schweiz/Suisse/ +41 62 88 99 111 Industriestrasse 10, CH 5506 Mägenwil Svizzera Electrolux Ljubljana, d.o.o. Slovenija +38 61 24 25 731 Tržaška 132, 1000 Ljubljana...
- Page 46 Domáce spotrebièe SK, Seberíniho 1, 821 03 Bratislava Suomi +35 8 26 22 33 00 Konepajanranta 4, 28100 Pori Electrolux Service, S:t Göransgatan 143, Sverige +46 (0)771 76 76 76 S 105 45 Stockholm Tarlabaþý caddesi no : 35 Taksim Türkiye...
-
Page 47: Service
Service Service In the event of technical faults, please first check whether you can remedy the problem yourself with the help of the operating instructions (section “What to do if…”). If you were not able to remedy the problem yourself, please contact the Cus tomer Care Department or one of our service partners. - Page 48 www.electrolux.com...