Table of Contents
Advertisement
Advertisement
Table of Contents

Related Manuals for AEG 9600 D


Summary of Contents for AEG 9600 D
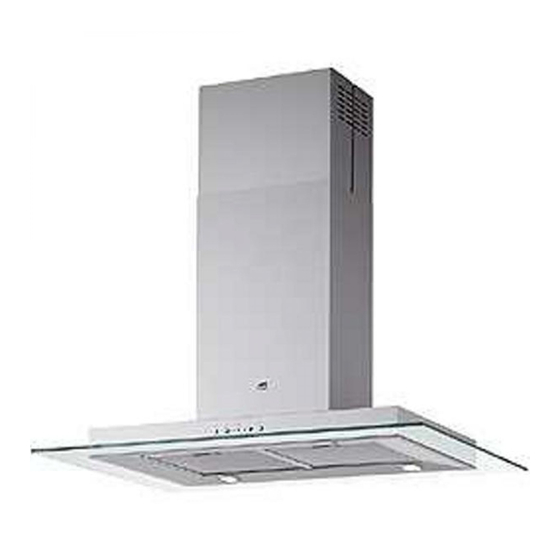
- Page 1 9600 D Cooker hood Operating and Installation Instructions...
-
Page 2: Table Of Contents
Charcoal filter Remove the upper glass panel Changing the light bulb Cleaning Special accessories Technical assistance service Technical Specifications Mounting accessories included Electrical connection Safety warnings for the electrician Mounting Printed on recycled paper AEG - putting words into action... -
Page 3: Safety Warnings
Safety warnings for the user • Always cover lighted elements, to prevent excess heat from damaging the appliance. In the case of oil, gas and coal fired cookers it is essential to avoid open flames. • Also, when frying, keep the deep frying pan on the cooker top/cooker under careful control. - Page 4 • The air outlet must not be connected to chimney flues or combustion gas ducts. The air outlet must under no circumstances be connected to ventilation ducts for rooms in which fuel-burning appliances are installed. • It is advisable to apply for authorization from the relevant controlling authority when connecting the outlet to an unused chimney flue or combustion gas duct.
-
Page 5: Description Of The Appliance
• The air is filtered through a charcoal filter and returned to the kitchen through the top grill of the outlet pipe. • You will need an original AEG KF8 charcoal filter for the filtering function. (See Special Accessories). • Fix the deflector using 4 screws Ø... -
Page 6: Control Panel
Control Panel • Best result are obtained by using a low speed for normal conditions and a high speed when odours are more concentrated. Turn the hood on a few minutes before you start cooking, you will then get an under pressure in the kitchen. The hood should be left on after cooking for about 15 minutes or until all the odours have disappeared. -
Page 7: Led Indicator Lights For Verifying The Saturation Of Filters
LED Indicator lights for verifying the saturation of filters This hood is supplied without a charcoal filter. If the hood is to be used in the recirculation mode with a charcoal filter, the saturation indicator must be activated as follows: Depress and hold the A and B buttons simultaneously for 3 seconds. -
Page 8: Maintenance And Care
Maintenance and care • The hood must always be disconnected from the electricity supply before beginning any maintenance work. Metal grease filter • The purpose of the grease filters is to aspirate grease particles which form during cooking and it must always be used, either in the external evacuation or internal recycling function. -
Page 9: Charcoal Filter
Charcoal filter • The charcoal filter should only be used if you want to use the hood in its filtering function. • To do this you will need an original AEG charcoal filter (see special accessories). • Cleaning/replacing the charcoal filter Unlike other charcoal filters, the LONGLIFE charcoal filter can be cleaned and reactivated. -
Page 10: Remove The Upper Glass Panel
Remove the upper glass panel The upper glass panel can be removed for cleaning. • Remove the grease filters. • Pull the handle L down. Fig. 5. • Remove the glass panel. Fig. 5 Warning • Failure to observe the instructions on cleaning the unit and changing the filters will cause a fire hazard. -
Page 11: Cleaning
Cleaning • Warning: always disconnect the hood from the mains power supply before cleaning it. Never insert pointed objects in the motor’s protective grid. • Wash the outside surfaces using a delicate detergent solution. Never use caustic detergents or abrasive brushes or powders. •... -
Page 12: Technical Specifications
Technical Specifications Models 9600 D Dimensions - extractor ver (in cm): Height 80-122,5 Width 89,8 Depth Dimensions - filter version (in cm): Height 82-122,5 Width 89,8 Depth Maximum absorbed power: 215 W Motor absorption: 1 x 130 W Lighting: 4 x 20W... -
Page 13: Electrical Connection
Electrical connection Safety warnings for the electrician Before connecting the appliance to the power supply, check that the voltage indicated on the rating plate corresponds to the mains power supply available. Appliances fitted with a plug can be connected to any standard power socket within easy access. -
Page 14: Mounting
Mounting – Figure 7 • Place the outline (1) on the angle above the cooker hood. • As demonstrated, drill the hole and insert four screw anchors and four screws (2). Do not screw in the screws completely, because they act as a hook for the cooker hood. •... - Page 15 Bild 7...
- Page 16 AEG Hausgeräte GmbH Postfach 1036 D-90327 Nürnberg http://www.aeg.hausgeraete.de © Copyright by AEG LI1VVB Ed. 05/02...
Need help?
Do you have a question about the 9600 D and is the answer not in the manual?
Questions and answers