Table of Contents
Advertisement
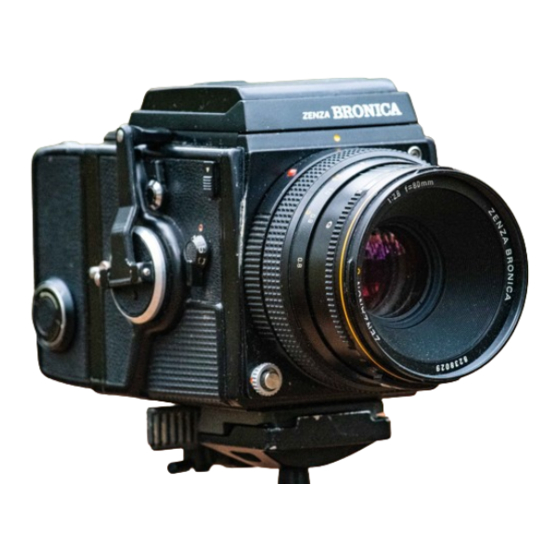
SQ-A
Congratulations on your choice of the Bronica SQ-A single lens reflex camera that has been
developed to give you quality performance, simple handling convenience and extremely
useful versatility, such as required for professional photography.
The Zenza Bronica SQ-A has been designed to take full advantage of the square 6cm x 6cm
medium format. It has also been developed as a complete modular "system" camera, with a
very high degree of interchangeability in lenses, finders, focusing screens, film backs, etc.
To obtain best results from your camera, we suggest that you read this instruction manual
carefully, before you even touch the camera. Thoroughly familiarize yourself with its work-
ing parts, before loading your first roll of film, and your pleasure in using the Zenza Bronica
SQ-A will be even greater.
NOTICE
Although instructions following are based on a standard combination consisting of the
main camera body with standard lens, film back SQ 120 and waist level finder, the choice of
lens, film back and finder is left to the discretion of the photographer, who should choose
those items best suited to the type of assignments contemplated.
1
Advertisement
Table of Contents

Related Manuals for Bronica SQ-A

Summary of Contents for Bronica SQ-A
- Page 1 The Zenza Bronica SQ-A has been designed to take full advantage of the square 6cm x 6cm medium format. It has also been developed as a complete modular "system" camera, with a very high degree of interchangeability in lenses, finders, focusing screens, film backs, etc.
-
Page 2: Table Of Contents
Contents Page 3, 4 Specifications of the ZENZA BRONICA SQ-A Parts of the ZENZA BRONICA SQ-A Loading the Battery Battery Checking 6, 7 Attachment and Removal of Film Backs Construction of Film Back 8, 9, 10 Film Loading ASA/ISO Film Speed Dial... -
Page 3: Specifications Of The Zenza Bronica Sq-A
Specifications of the ZENZA BRONICA SQ-A Type 6cm x 6cm format lens shutter single reflex camera, with interchangeable lens, film back, finder and focusing screen systems. Frame Size 55.6mm x 55.6mm Film 120/220/135 roll films and Polaroid pack film, with exclusive film backs. -
Page 4: Specifications Of The Zenza Bronica Sq-A
S) Weight 1,500 grams- (with standard lens, Film Back SQ 120 and waist-level finder S) 915 grams- SQ-A main camera body w/ Film Back SQ 120 115 grams- Waist level finder S 470 grams- Zenzanon-S 80mm lens The specifications are subject to change without prior notice. -
Page 5: Parts Of The Zenza Bronica Sq-A
Parts of the ZENZA BRONICA SQ-A Aperture Ring Depth of field scale Flash synch socket Distance scales Focusing ring Lens alignment dot Waist-level finder Focusing hood catch Shutter speed dial Shutter speed scale Magnifier Back cover release button Back cover release... -
Page 6: Loading The Battery
1. Loading the Battery The electronically controlled shutter will not work without loading the battery. The shutter will be mechanically controlled when the battery is not loaded and will be released at 1/500 sec., regardless of the setting on the shutter speed dial. Use one 6 volt silver oxide battery or alkaline-manganese battery. - Page 7 3.Attachment and Removal of Film Backs If winding is not possible, all preparations for taking pictures have been completed. But, if winding is possible, rotating the film winding crank until it stops will automatically take care of the incomplete action, even if the shutter is uncocked or film is not advanced. Thus, it's always possible to choose the film type most suited for the shot, even midway in the roll.
-
Page 8: Construction Of Film Back
4. Construction of Film Back A. The film back consists of a film holder and a film back frame, with exclusive film backs available for 120 and 220 roll films. The film hold- er has an insert or frame for loading film, as well as a built-in winding mechanism. - Page 9 5. Film Loading (con’t) D. After loading the fresh film spool properly, draw out the leading end of the film and turn it across the film pressure plate (as illustrat- ed). Run it down and turn it over to the take-up spool. Insert the leading end into the slit of the take-up spool and wind slightly until securely engaged.
-
Page 10: Asa/Iso Film Speed Dial
5. Film Loading (con’t) H. Upon loading the film, rotate the film-winding crank until it stops to place the first frame into place for taking the picture. The expo- sure counter will also change from "S" to "1", while the shutter will also be cocked. -
Page 11: Film Type Indicator Frame
7. Film Type Indicator Frame Upon loading the film, tear off the end flap from the empty film pack- age and insert it in the film type indicator frame. This will help you keep track of the film loaded in the film back, even when two or more film backs are used with different films. -
Page 12: Film Unloading
10. Film Unloading A. After the 12th exposure of the 120 roll film (24th exposure of the 220 roll film), the film-winding crank will turn freely with further rota- tions. Therefore, continue rotating the film-winding crank until the remaining film and all leader paper is wound up on the take-up spool. -
Page 13: Shutter Release Button
12. Shutter Release Button A. Depress the shutter release button with the ball of the finger. Use a smooth, gentle action and press all the way in, without using strength or jerking. * A red-colored LED will light up in the front central area of the finder and will indicate that the shutter has closed, in this case. -
Page 14: Time (T) Exposure
13. Time (T) Exposures (con’t) A. Unscrew the set screw on the time exposure lever until further rev- olution is impossible, which will permit the lever to be moved freely. * Except for time exposures, always shift the time exposure lever so that "A"... -
Page 15: Interchanging Finders
* There is no standard finder for the Bronica SQ-A, with the user hav- ing a choice of several finders. Instructions are based on the waist- level finder because of its popularity. -
Page 16: Setting The Aperture
* Intermediate settings cannot be used when the finders with built-in exposure meters are used. B. All interchangeable lenses for the Zenza Bronica SQ-A have fully automatic lens diaphragms, which means that the focusing screen is always viewed at the full aperture, with the brightest possible image. -
Page 17: Focusing Adjustments
18. Focusing Adjustments A. The lens is focused on the subject by rotating the focusing ring in either direction, while checking the effect on the microprism / split- image rangefinder spot in the center of the focusing screen (standard type). B. -
Page 18: Distance Scale And Depth Of Field Scale
19. Distance Scale and Depth of Field Scale (con’t) These identical pairs of apertures indicate the distance that will be in focus at these lens openings. For example, if the 80mm lens is focused at a distance of 3m, it can be seen from the depth of field scale that the zone will extend from 2 to 7 meters (6 ft. -
Page 19: Multiple Exposures
22. Multiple Exposures A. To make up multiple exposures, rotate the film winding crank (to advance the film and cock the shutter) and then turn the multiple exposure lever in the clockwise or arrow-indicated direction, which will expose a red mark. When set in this manner, the shutter can be released and cocked any number of times, without advancing the film. -
Page 20: Mirror Lock-Up
23. Mirror Lock-Up (con’t) D. When S is set to the index with the mirror lock-up switch lever, the lever will automatically return to N, with the next film advancing and shutter cocking action. And, following shots will be normal. E. -
Page 21: Interchanging Focusing Screens
Then, slide both screen removal levers forward to secure the focusing screen. * Seven types of focusing screens are available for the Zenza Bronica SQ-A. Microprism / split-image Microprism / split-image... -
Page 22: Attachment Of The Neck Strap
25. Attachment of the Neck Strap A. First, insert the U-shaped ring into the neck strap eyelet, as illus- trated. B. Next, place the plastic ring cover over the u-shaped ring, as illus- trated. C. Next, thread the neck strap through the plastic ring cover (and the U-shaped ring) and pull it out, as illustrated. -
Page 23: Facts About The Battery
The battery supplies power for the various electronic control mechanisms incorporated in the Zenza Bronica SQ-A. When used incorrectly, there is a possibility of the wrong exposure being set to the camera and/or the camera not operating. Be sure to use and store the bat- tery correctly for obtaining optimum performance from it at all times. -
Page 24: Care Of The Sq-A
28. Care of the SQ-A Restrict cleaning of the reflex mirror to blowing or brushing with the blower brush or a soft camel hair brush. Don't touch the surface with your fingers or a cloth. Use lens cleaning tissue and liquid to clean the surface of the lens. Do not use silicon-coat- ed cloth for this purpose, as it will prove detrimental to the lens coating. -
Page 25: Depth Of Field Table
29. Depth of Field Table F-num- Meters bers 13.3 5.68 3.22 2.09 1.55 1.23 1.02 0.92 0.81 39.8 8.03 4.46 2.81 1.92 1.45 1.17 0.98 0.89 0.79 15.1 5.99 3.32 2.13 1.57 1.24 1.03 0.92 0.82 28.9 7.47 4.29 2.74 1.89 1.44 1.16... -
Page 26: Specifications Of Zenzanon-S Lenses
30. Specifications of the Zenzanon-S Lenses 40mm F4 50mm F3.5 80mm F2.8 105mm F3.5 150mm F3.5 No. of group-ele- ment 8 - 11 8 - 10 4 - 6 4 - 6 5 - 5 Angle of View Apertures 4 - 22 3.5 - 22 2.8 - 22 3.5 - 22... - Page 27 30. Specifications of the Zenzanon-S Lenses (con’t) 200 mm F4.5 250 mm F5.6 500 mm F8 Tele-converter S No. of group-ele- ment 5 - 5 5 - 5 6 - 7 5 - 6 Angle of View 22° 30’ Apertures 4.5 - 32 5.6 - 32 8 - 45...
Need help?
Do you have a question about the SQ-A and is the answer not in the manual?
Questions and answers