
Summary of Contents for Whip Mix Xcavator
- Page 1 Xcavator ™ User Manual Patent Pending Whip Mix Corporation 361 Farmington Ave. P.O. Box 17183 Louisville, KY 40217-0183 USA • • • 502-637-1451 800-626-5651 Fax 502-634-4512 www.whipmix.com • • •...
-
Page 2: Intended Purpose
BEAD MEDIA. FOR BEST AnD MOST RElIABlE DIVESTInG RESulTS WE STROnGly RECOMMEnD yOu uSE WHIP MIX BRAnD BEADS. A five watt heater is supplied with the Xcavator to be WHIP MIX BEADS FlOW MORE RElIABly, AnD ARE lESS PROnE placed fully submerged in the bead storage container. It TO CluMPInG DuRInG HIGH HuMIDITy COnDITIOnS. -
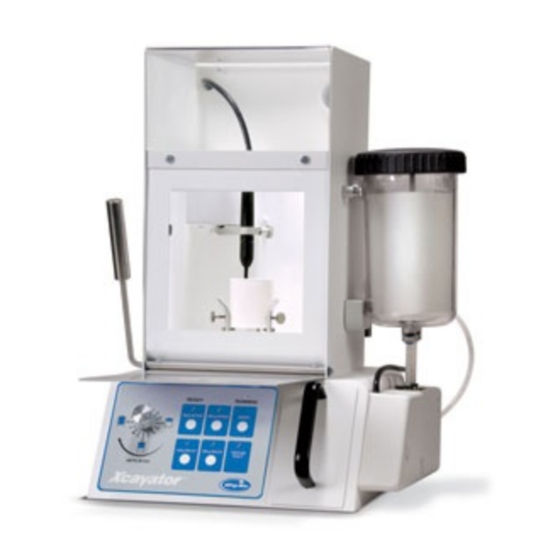
Page 3: Control Panel
Xcavator Operating Instructions Familiarization Access Door Control Panel 1. Ready indicator 2. 100 Gram cycle start key (cool mold) 3. 200 Gram cycle start key (cool mold) 4. 100 Gram time delay before start indicator (hot mold) 5. 200 Gram time delay before start indicator (hot mold) 6. - Page 4 4. Connect your central vacuum system or dedicated vacuum unit to the rear of the cabinet as shown (Figure 4). CAuTIOn: nEVER OPERATE THE XCAVATOR unIT WITHOuT SuCTIOn InSIDE THE CABInET TO PREVEnT HuMAn EXPOSuRE TO FInE PARTICulATE MATTER WHICH CAn BE HAZARDOuS TO yOuR HEAlTH.
- Page 5 Filling jar IMPORTAnT nOTE: THE XCAVATOR PRODuCT HAS BEEn EXHAuSTIVEly TESTED WITH WHIP MIX BRAnD 50 MICROn GlASS BEAD MEDIA. FOR BEST AnD MOST RElIABlE DIVESTInG RESulTS WE STROnGly RECOMMEnD yOu uSE WHIP MIX BRAnD BEADS. WHIP MIX BEADS FlOW MORE RElIABly, AnD ARE lESS PROnE TO CluMPInG DuRInG HIGH HuMIDITy COnDITIOnS.
-
Page 6: Theory Of Operation
100 gram or 200 gram investment mold unattended. It will shorten the button and the Xcavator will announce when the mold is 95 overall press to pattern recovery time significantly. percent divested with a beeping sound, and the green Ready light will be lit. - Page 7 Before you Commission for Every Day use calibrate each brand of inVestMent oVer the ranGe of concentrations you are usinG. Typical settings for Whip Mix Formula 1 Investment: We recommend you pour up some empty test molds for each brand of investment you use at the minimum and maximum...
- Page 8 Step 3 Select the mold chuck size which corresponds to the ring size (100 gram or 200 gram) (Figure 1). 100 gram Step 4 Open the door on the Xcavator by swinging 200 gram the handle towards you (Figure 2).
- Page 9 Xcavator (Figure 8). Step 10 Press the Delay button corresponding to the mold size you just put in the Xcavator. You can go about other duties until the Xcavator beeps and the Ready LED lights (Figure 9).
-
Page 10: General Cleaning
Excess bead/investment debris inside the unit may be swept into the slot opening inside the cabinet using the brush provided with the Xcavator. When the drawer below becomes full it can be removed by pulling it towards you [support underneath with your other hand] and fully withdraw from the cabinet for transport to a recycling unit or disposal container. -
Page 11: Nozzle Replacement
The O-Ring goes inside the nozzle cap AFTER the nozzle. Remove the O-Ring, then the old nozzle Turn the Xcavator power off. Open the front door of the from the nozzle cap. Place the new nozzle into the Xcavator and reach in and grasp the cutting hand piece nozzle cap, allowing the nozzle to drop into the hole and swing it into the center of the door opening. -
Page 12: Troubleshooting
Another indication is the two inch plastic tubing on the bottom of the bead jar closest to the front of the Xcavator... - Page 13 Xcavator Operating Instructions Troubleshooting (continued) Mold not Cut to Center – Reference the diagram above as you read the Premature Cycle Termination description below. The air pressure is regulated to 35 psi in the air regulator Press the Abort key to reinitialize the system, then...
- Page 14 Xcavator Operating Instructions Troubleshooting (continued) Adjusting the Wand Height for Diagnosing non-Cutting Issues Optimum Results no Ready/Idle Indication The default wand height setting may not be optimized for If the Ready/Idle indicator is off AND one of the cycle your conditions to produce the desired uniformity of the cut.
-
Page 15: Environmental Specifications
7. 5 Watt Glass Bead Heater 2.92 min. 6.40 min. 4. Brush, 2-inch 3.08 min. 6.76 min. Description / Item # 3.27 min. 7.16 min. Xcavator Automated Divesting Unit 09800 3.48 min. 7.62 min. 3.71 min. 8.14 min. Replacement Parts list 3.99 min. 8.74 min. - Page 16 MPL5300 12/08...
Need help?
Do you have a question about the Xcavator and is the answer not in the manual?
Questions and answers