Table of Contents
Advertisement
Advertisement
Table of Contents

Summary of Contents for Wattbike Monitor
-
Page 1: User Manual
User Manual Monitor wattbike.com... -
Page 2: Table Of Contents
Contents Getting Started ................................4 ............................Overview of the Wattbike monitor ...................................... Keypad .................................... Connections ....................................Main menu ..........................Quick Start guide to Main Menu options Just Ride ...................................6 Default Riding Views ....................................8 ........................Polar Graph, Current Power & Average Power ........................ - Page 3 Reset all States ..................................Set Time & Date Properties ..................................46 ....................................General ......................................Bike ....................................Memory ....................................Battery Device Usage & Care ..............................47 ............................. Battery Charging Information ................................Safety Information ............................Heart Rate Monitor compatibility Monitor Menu Map ..............................48...
-
Page 4: Getting Started
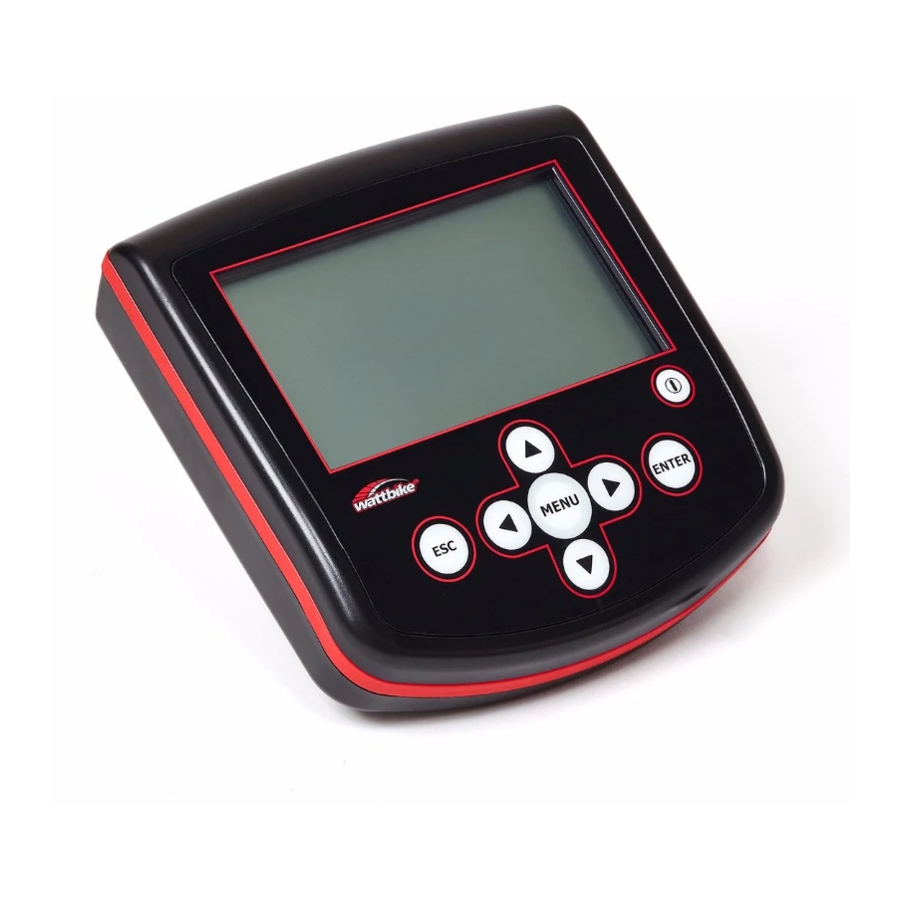
Getting Started Overview of the Wattbike Monitor Keypad ESC – One step backwards / Back / No Arrow Keys – Up, Down, Left, Right menu & tab navigation Enter – Select an item / Start / Done / Proceed / Yes / Delete / Log in / Switch... -
Page 5: Connections
Charger – Connect your WBM to the supplied power adaptor Main Menu To power up the Wattbike computer either press the power button or start turning the pedals. After the boot up logo you will see the MAIN MENU (fig 0.1) -
Page 6: Quick Start Guide To Main Menu Options
Recall – View old workout and Race data. For users who are logged, view Statistic data for that user. Race – (This option is only available when two or more Wattbike computers are connected) Create race for either time or distance. - Page 7 Click MENU button for drop down menu, allowing you to change the user’s weight to be defined in imperial units of measurements (fig0.4). fig 0.4 Once the user has entered their weight (fig0.5) the session will initialise (fig0.6) after clicking the ENTER button.
-
Page 8: Default Riding Views
Default Riding Views Use the LEFT and RIGHT arrow keys to view alternate measuring parameters (from fig0.7) or the UP and DOWN arrow keys to cycle through the following screen views. Polar Graph, Current Power & Average Power fig 0.6.1 Polar Graph, Peak Force Angle &... -
Page 9: Kcal Per Hour, Total Kcal & Kcals Per Revolution
Kcal per Hour, Total Kcal, & Kcals per Revolution fig 0.6.4 Speed, Distance, Average Speed & Average RPM fig 0.6.5 Pace per Kilometre, Distance, & Average Pace per Kilometre fig 0.6.6... -
Page 10: Alternate Riding Views
Alternate Riding Screen Views During a workout there are several screen views to choose from while you ride showing various parameters on multiple displays. Use the arrow keys to scroll between them. Power fig 0.7 Energy fig 0.8 Pace fig 0.9... -
Page 11: Speed
Speed fig 1.0 Symmetry fig 1.1 Polar fig 1.2... -
Page 12: Riding Screen Sub-Views
Riding Screen Sub-Views *(fig1.3) is only visible if the pace is set to a value more than 00:00. Speed, Distance & Pace Sub View fig 1.3 *(fig1.4) is only visible if the parameter is turned on in the SETTINGS section. Speed, Distance, Peak Power &... -
Page 13: Speed, Distance, Average Speed & Average Rpm
Speed, Distance, Average Speed & Average RPM fig 1.6 Speed, Distance & Average Pace per Kilometre fig 1.7 Speed, Distance & Kcals per Revolution fig 1.8... -
Page 14: Real Time Summary View
Real Time Summary Screens Click the ENTER button during a session to view a real time summary analysing each pedal revolution turn by turn. The summary default view will appear over two pages showing 12 parameters measured (fig 1.9 & 2.0). Use the LEFT and RIGHT arrow keys to move between the two screens. fig 1.9 fig 2.0 Use the UP/DOWN arrow keys to view the summary on one screen (fig2.1) -
Page 15: Measurement Unit Options In Just Ride
Measurement Unit Options in Just Ride Click the Menu button (fig2.2) during a Just Ride session enables you to set your preferences, such as changing units, setting the pace (fig2.3) value and pausing the session (fig2.4). fig 2.2 fig 2.3 fig 2.4... -
Page 16: Workouts/Tests Menu
Workouts/Tests Menu To ride a pre-defined workout, select Workout/Tests from the Main menu (fig2.5) to ride a timed or distance session. fig 2.5 Standard Timed Workouts Select from Single Interval, Repeating Intervals, or Repeating Intervals with Rest (fig2.6). fig 2.6 Each interval type has a list of pre-defined workouts (fig2.7, 2.8, 2.9). -
Page 17: Standard Distance Workouts
fig 2.8 fig 2.9 Standard Distance Workouts Select from Single Interval, Repeating Intervals, or Repeating Intervals with Rest (fig3.0) fig 3.0 Each interval type has a list of pre-defined workouts (fig3.1, 3.2, 3.3). Select an option using the Up/ Down arrow keys and Enter to confirm selection. - Page 18 fig 3.1 fig 3.2 fig 3.3...
-
Page 19: Create New Workout
Create New Workout Create your own custom workout. Select from either a Time or Distance session: Time or Distance: one single interval (fig3.4, 3.5 & 3.6). Intervals – Time: timed session with up to 50 repeating intervals. Pace and Rest optional. Intervals repeat until the user escapes from the workout (fig3.7). -
Page 20: Intervals - Varied
fig 3.7 fig 3.8 Intervals – Varied Intervals here are set up one by one, by selecting the desired interval type from the list (fig3.9). The Interval number that follows will be displayed along the bottom of the screen. fig 3.9 Each interval will be displayed in the list as it’s confirmed (fig4.0). -
Page 21: Favourites
fig 4.0 Favourites The favourites list holds up to 8 custom workouts, consisting of two separate lists – metric sessions and imperial sessions. This list works on a ‘first in, first out’ principle, as the most recent favourite workout saved to the list is placed at the top. Once the list is full, adding another workout will delete the oldest workout from the bottom of the list. - Page 22 fig 4.3 Click ‘Yes’ to input a workout name (fig4.4). Use the arrow keys to select each letter and move on to the next. fig 4.4 To confirm the new workout session name click Enter to save it (fig4.5). fig 4.5 If you choose not to name the workout, the new session will appear in the list as custom with the interval types appended (fig4.6).
-
Page 23: Tests
4.7 Tests There are multiple pre-loaded tests (fig4.8) built-in to the Wattbike monitor, including: Power peak 5” (sec), Power peak 6” (sec), 30’ (min) test, 3’ (min) aerobic test, 10’ (min) progress test, Ramp test a 20’ (min) test, and a pedalling (symmetry) technique test. Ramp test consist of 1-minute intervals with zero rest between each interval. -
Page 24: Power Peak Test
Power Peak Test fig 4.9 Pedal Technique Test fig 5.0 Ramp Test fig 5.1 All other pre-loaded tests use the standard workout display view. -
Page 25: Link Hr Belt
Wear the chest belt and wet the contact points as per the instructions, then select your desired belt using the arrow buttons to navigate across the tabs (fig5.2) fig 5.2 The Wattbike monitor will auto detect your chest belt as it begins to transmit, and display your current heart rate and chest belt ID (fig5.3). fig 5.3 Select your chest belt and click Enter. -
Page 26: Recall
Recall All completed workouts are saved into the memory of the Wattbike and is stored in Recall. Saved data is collected in two sections: ‘Old Workout Data’ and ‘Old Race Data’ (fig5.5). fig 5.5 Old workout data stores all sessions complete with date and timestamp, workout type and number of intervals (fig5.6). - Page 27 fig 5.8 Selecting a session to view an in depth analysis of the workout separated into tabs (fig5.9). Note. The intervals tab only appears for sessions with multiple intervals. Use Up and Down buttons to navigate from tabs to graphs. If the graph is selected use the Left and Right buttons to view data for each interval and the Enter button to change the parameters.
- Page 28 fig 6.1 In the Summary tab, use the Up and Down arrow buttons to navigate through each interval in the session (fig6.2). fig 6.2 In the Splits tab (fig6.3), use the Menu button to view options from the drop down menu, including set duration of split, jump to first split and jump to last split (fig6.4).
- Page 29 (fig6.5). fig 6.5 Click the Menu button for options, including jump to first revolution, jump to last revolution or jump to a specified time (fig6.6). fig 6.6 The General tab displays information about the session, and the Wattbike monitor (fig6.7).
- Page 30 fig 6.7 For logged in users, a Personal tab will also be displayed. Use the Up and Down arrow buttons and click ‘View Statistics’ to jump directly to the Statistics section for that user (fig6.8). fig 6.8 Old Race data stores all racing sessions complete with date and timestamp, and race type (fig6.9). fig 6.9 Use the Up and Down buttons to select a race from the list to view more detailed race information (fig7.0).
-
Page 31: Graphical View
fig 7.0 Click the Menu button, to open drop down options to see race details, or to switch between a numerical and graphical view or between a simplified and detailed view (fig7.1). fig 7.1 Graphical View fig 7.2 Race Detailed View fig 7.3... -
Page 32: Users
7.5 Delete a User To remove a user from the Wattbike monitor memory click ‘Delete User’ (fig7.6). Select a user from the list to delete. Click Enter to confirm, note all data for this user will be deleted. fig 7.6... -
Page 33: User Log In
User Log In To log in, click ‘Log In for More Options’, select a user from the list (fig7.7). Click the Enter button to confirm selection. fig 7.7 Once a user has been logged in, there are more options available in the users menu: ‘View Ride Statistics for User’, ‘Manage Profile for User’, and ‘Log Out’... -
Page 34: Using A Usb Stick
Plugging in a USB stick for the first time will automatically begin the set up process (fig7.9.1). fig 7.9.1 The monitor creates a ‘Wattbike Expert’ folder on the USB stick, along with all the necessary files and copies current monitor settings of Language, Metric/Imperial units, W/Kg, etc. -
Page 35: Inserting A Usb Stick
When a USB stick is plugged into the Wattbike monitor, it performs quick check whether or not it is able to read and write to it. If any errors are present, the monitor reports it with message box “USB stick not compatible”. -
Page 36: User Statistics
7.9.7 Settings from USB stick are used in monitor as long as the USB stick is present. Also changing of any settings on monitor are made only on the USB stick settings. Once the USB stick is disconnected, all settings are reverted back to the original monitor settings. -
Page 37: User Profile
fig 8.2 fig 8.3 User Profile To manage the profile of a logged in user select ‘Manage Profile for user’ from the Users menu. Use the arrow keys to navigate across the tabs. To edit the stored data use the Up and Down arrow keys, then click Enter. -
Page 38: Detailed Data
The Heart Rate & Chest belt tab (fig8.6) enables users to set a default chest belt to their user account so that every time a specified user logs in the Wattbike monitor will connect to the specified chest belt. Stored Heart Rate & Chest Belt link data fig 8.6... -
Page 39: Race
Race Race menu (fig8.8) is only available if the Wattbike monitor is connected to another monitor via an RJ45 / Ethernet cable. fig 8.8 Create Race Selecting ‘Create Race’ gives the user options to either ‘Repeat Last race’ or create a new timed or distance race (fig8.9). -
Page 40: Join Race
For multiple race invites, click the Menu button to open a drop down menu (fig9.1) and select either ‘Invite all’ or ‘Force all’. Selecting ‘Force all’ will automatically accept all other connected users to the current race without having to accept the race invite on their monitor display. fig 9.1 Join Race For all invited user to join a race, click either the Enter button to accept or Esc to decline (fig9.2). -
Page 41: Default Race View
fig 9.4 You can select from various race view displays when a race is in progress. To access an alternative view, click the Left or Right button (fig9.5). Default Race View fig 9.5... -
Page 42: Settings
Settings Access the settings menu from the main menu (fig9.6), to set preferences for measurement units, display, and sound. Restore factory-reset settings and set zero state. fig 9.6 Measurement Settings fig 9.7 Display Settings fig 9.8... -
Page 43: Sound Settings
Settings’. Use the Up and Down arrow buttons to select ‘Set Zero State’ and click Enter (fig10.1). fig 10.1 Click the Enter button to confirm selection. Please wait a few seconds as the Wattbike monitor resets the zero state (fig 10.2). -
Page 44: Reset All States
10.2 Reset All States fig 10.3 Confirming reset, activates ‘first run’ mode (fig10.4) and restores factory-default settings. The Wattbike monitor will power down and back up again and reset the following parameters: Parameter Default Value Units Metric Energy units... -
Page 45: Set Time & Date
10.4 After powering up, the Wattbike monitor will prepare the necessary files (fig10.5) and prompt for a local time and date input (fig10.6). fig 10.5 Set Time & Date fig 10.6... -
Page 46: Properties
Properties Navigate across the tabs using the Left and Right arrow buttons to access Wattbike monitor technical information for device id, firmware versions and Wattbike sensor id, including battery and memory capacity level. General fig 10.7 Bike fig 10.8 Memory... -
Page 47: Battery
Safety Information Do Not Open the plastic case keep clean and dry Drop the unit Use between 0° and 40° Spray with a cleaner or expose to liquids Recycle correctly Submerge underwater Use supplied mains charger only Heart Rate Monitor compatibility... -
Page 48: Monitor Menu Map
Monitor Menu Map Just Ride Workouts/Tests - Last Workout Past Workouts Time - Single Interval Repeating Intervals Repeating Intervals with Rest Distance - Single Interval Repeating Intervals Repeating Intervals with Rest Favourites Tests - Power Peak 5” Power Peak 6”... - Page 49 wattbike.com...