Table of Contents
Advertisement
Quick Links
Operator's manual
AUDIO VIDEO CONTROL RECEIVER
Operator's manual
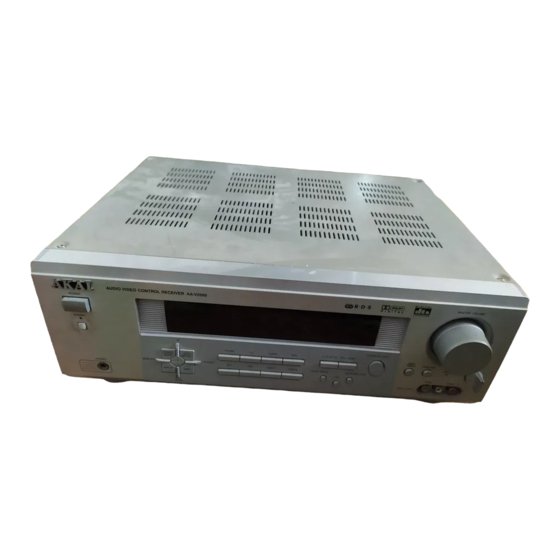
AUDIO VIDEO CONTROL RECEIVER AA-V2080
POWER
STANDBY
UP
STEREO
AUTO
MONO
MANUAL
MEMORY
PHONES
DISPLAY
BAND
DOWN
AA-V2080
PHONO
CD
TUNER
TAPE
STATION
AUX
DVD
VIDEO 1
VIDEO 2
DOLBY DIGITAL
1
R D S
SURROUND MODE
6 CH EXT. IN
INPUT MODE
BASS
BASS MGT.
TREBLE
DOLBY PRO LOGIC
2 CH
VIDEO
VIDEO 2 INPUT
MASTER VOLUME
BALANCE
RESET
L
AUDIO
R
1-17
Advertisement
Table of Contents

Related Manuals for Akai AA-V2080


Summary of Contents for Akai AA-V2080
- Page 1 Operator's manual AUDIO VIDEO CONTROL RECEIVER AA-V2080 R D S MASTER VOLUME AUDIO VIDEO CONTROL RECEIVER AA-V2080 POWER STANDBY SURROUND MODE BALANCE 6 CH EXT. IN INPUT MODE BASS PHONO TUNER TAPE BASS MGT. TREBLE STEREO AUTO RESET MONO MANUAL...
- Page 2 CAUTION: READ THIS BEFORE OPERATING YOUR UNIT. IMPORTANT SAFETY INSTRUCTIONS READ AND FOLLOW INSTRUCTIONS---All the safety and operation instructions should be read before the product is operated. Follow all operation instructions. RETAIN INSTRUCTIONS---The safety and operation instructions should be retained for future reference. HEED WARNINGS---Comply with all warnings on the product and in the operation instructions.
- Page 3 technician to restore the product to its normal operation. E. If the product has been dropped or damaged in any way, and F. When the product exhibits a distinct change in performance--- this indicates a need for service. Servicing ---Do not attempt to service this product yourself as opening or removing covers may expose you to dangerous voltage or other hazards.
-
Page 4: Table Of Contents
A B L E O F C O N T E N T Safety Information P.1 - P.2 Table of Content General Information Panel information P.5 - P.7 Front Panel Back Panel Remote Control Connection P.8 - P.9 Operation P.10 Switching on the Receiver P.10 Playing the Analog Program Source... -
Page 5: General Information
E N E R A L N F O R M ATION A C C E S S O R I ES Analog audio cables x 2 (with red and white plugs) “2A” size batteries x 2 for the remote control Remote control Instruction Manual AM Loop Antenna... -
Page 6: Panel Information
PANEL INFORMATION FRONT PANEL 11 12 13 14 15 AUDIO VIDEO CONTROL RECEIVER AA-2080 16 17 18 19 20 21 22 23 24 25 26 27 29 30 32 33 34 1. POWER ON / OFF 19. MEMORY 2. STANDBY INDICATOR 20. -
Page 7: Back Panel
B AC K P A N E L 6 CHANNEL EXTERNAL IN COAXIAL IN Front L & R Center Surround L& R Sub- Woofer 75 OHM JACK FM ANTENNA IN OPTICAL IN AM LOOP L & R SOCKET V I D E O MONITOR OUT VIDEO 1 IN DVD IN... -
Page 8: Remote Control
T. TONE PHONO STATION DYNAMIC TUNER CH. TRIM BAND DOWN AUTO VOLUME STEREO AA-V2080 1. POWER ON / STANDBY 17. DYNAMIC 2. MUTE 18. CD 3. APS 19. TAPE 4. MEMORY 20. DVD 5. STATION UP 21. VIDEO 1 / 2 6. -
Page 9: Connection
O N N E C T I O N P R E C A U T I O N Disconnect the power cord from the power socket before any connection. The digital optical connection is less sensitive to external disturbance Loose connect may create noise when operating The single small number in bracket is the key no. - Page 10 C O N N E C T I O N T O S P E A K E R S Connect the cord between speakers to the unit at (Back Panel label 10) the SURROUND SPEAKERS R & L (8 ohm), CENTER SPEAKERS (8 ohm) and FRONT SPEAKERS R & L (8 ohm) sockets on back panel. C O N N E C T I O N T O S U B W O O F E R Connect the cord between the subwoofer with built-in amplifier (super woofer) and this unit at SUBWOOFER OUT (Back Panel label 6).
-
Page 11: Operation
P E R A T I O N (* The small numbers in bracket is the key no. on panel / remote control information respectively unless specify) SWITCHING ON THE RECEIVER Power On / Off Press (Front Panel label 1) to switch the unit on. The (2) will be lighted. - Page 12 SING URROUNDING UNCTION DOLBY SURROUND This unit is equipped with digital signal processing sections for decoding and reproducing movie soundtracks the same way as in movie theaters. Dolby Pro Logic When using conventional video tapes, laser discs, TV programs or CDs with the mark, Dolby Pro Logic extremely natural sound movement and positioning, immersing you in the on screen action.
- Page 13 Relationship between SR-D and DOLBY DIGITAL 35 mm Dolby SR-D film Manufactured under license from Dolby Laboratories. “Dolby”, “Pro Logic” and the double-D symbol are trademarks of Dolby Laboratories...
-
Page 14: Setting
ETTING TEST TONE It is to adjust playback level from different speakers and is only effective in Dolby Pro Logic and Dolby Digital modes. Press T.TONE (Remote label 28) repeatedly to see L, R, LS, RS, C, and SUB sequentially. Press the VOL UP / DOWN (Remote label 31 and 32) to adjust the sound level of each speaker. - Page 15 Default DRC values: 0/4, 1/4, 2/4, 3/4, 4/4. Level of Compression Sound Level Increasing Decreasing LOW FREQUENCY EFFECT (LFE) It can be adjusted when playing program sources recorded in Dolby Digital. It can only be adjusted under 5.1 channels playback. If the subwoofer clips due to the LFE signal during Dolby Digital playback, adjust the level as needed.
-
Page 16: Listening To The Radio
LISTENING TO THE RADIO Auto. Tuning 1. Select TUNER (Front Panel label 6) as the source. 2. Press BAND (Remote label 7) to choose AM/FM band frequency. 3. Press AUTO/MANUAL (Front Panel 24) or AUTO (Remote label 10) to select to have auto tuning or not. 4. -
Page 17: Other Operation
DISPLAY (w/o RDS) Digital (CD, DVD, VIDEO 1 & VIDEO 2) mode---Press this key to display the digital source of the underplaying CD, DVD, VIDEO 1 & VIDEO 2. PS (Station Name) 1. Press DISPLAY (Front Panel 20) until PS appears. 2. -
Page 18: Specification
PECIFICATION Audio Section Rated Power Output : FRONT 80 W + 80 W (EIAJ) CENTER 80 W REAR 80 W + 80 W Output Terminals : FRONT 8 ohm CENTER 8 ohm REAR 8 ohm Total Harmonic Distortion : less than 0.05% at 1/2 rated power output Line Input (Each Line Input - FRONT SPEAKER OUT) Input Sensitivity/Impedance :...
Need help?
Do you have a question about the AA-V2080 and is the answer not in the manual?
Questions and answers