Table of Contents
Advertisement
Advertisement
Table of Contents

Subscribe to Our Youtube Channel
Related Manuals for ZMODO IP Camera


Summary of Contents for ZMODO IP Camera
- Page 1 IP Camera User Manual For further help, please visit www.zmodo.com...
- Page 2 Embedded web server allows user to view real-time footage and remote control via IE browser. This series of IP camera is well suited for home and small business, as well as any situation which needs to apply remote network transmission and remote network control.
-
Page 3: Table Of Contents
® Contents 1 Product Introduction..................2 1.1 BRIEF INTRODUCTION................2 1.2 MAIN FEATURES..................2 1.3 INSTALLATION STATEMENT..............2 1.4 NETWORK IP CAMERA CONNECTION.............3 2 Log in.......................3 3 Preview......................5 4 System Setting....................6 4.1 LOCAL CONFIGURATION................6 4.2 REMOTE CONFIGURATION...............7 4.2.1 Video Setting.....................7 4.2.2 Network Parameter..................10 4.2.3 Alarm setting....................19 4.2.4 System Information.................20... -
Page 4: Product Introduction
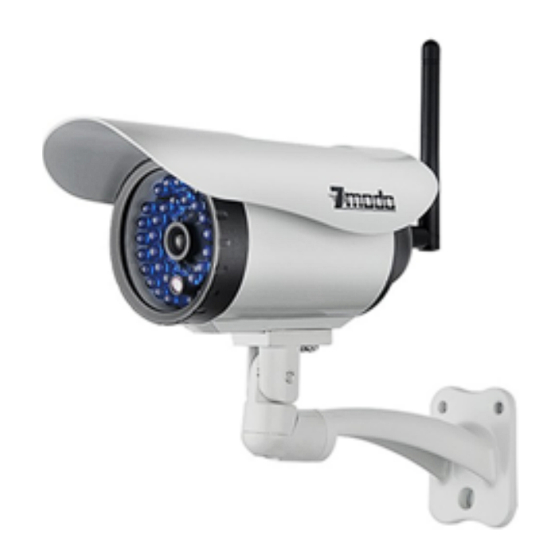
Efficient Linux system, code in flash and small size that’s reliable and steady. Power Network Reset Figure 1-1 Network IP Camera Figure 1-2 Camera Cable Ports 1.2 Main Features * The highest pixels for 30 W, 2M frame rate, real-time image * Advanced video compression standard, high compression rate and flexible operation * 1/4’’CMOS sensor, fluid motion pics... -
Page 5: Network Ip Camera Connection
IP of the IPC. 2 Log in When using IE (Internet Explorer) to visit IP camera for the first time, you have to set the security level for ActiveX controls. Set security level: Open Internet Explorer, enter the IE Tools menu [Tools/Internet Options/Security Settings/Custom Level…], Enable the “Active X Controls and... - Page 6 ® Figure 2-1 Security Level Setting Install ActiveX and plugins: Type the network camera IP address in the IE browser address bar, and press [Enter] to pop out dialog box of install ActiveX. Click [OK] to install. Log in and Preview: In Login screen, type in network camera username, password, choosing language and click [OK] to enter the video preview interface.
-
Page 7: Preview
® 3 Preview Figure 3-1 Real-time Preview Interface In the real-time preview interface, the user can control the video channel switch, record, snapshot, full screen preview, image process, image color, direction configuration, and PTZ control. [Video Channel] Double Click the channel number to open the video channel to view image, right click and choose “Close”... -
Page 8: System Setting
® Figure 3-2 I Figure 3-3 Figure3-4 mage parameter adjustment Color and direction control PTZ control [System parameter setting] Click this button to enter into system parameter setting interface. [Reboot device] Click this button to reboot the device. 4 System Setting 4.1 Local Configuration Figure 4-1 Local Configuration... -
Page 9: Remote Configuration
® [Video files Packing time] Set the file size record time. [Video/Captured file Storage path] Set file path for local recording and capture. After configuration is finished, click [Submit] button, the configuration will take effect immediately. 4.2 Remote configuration 4.2.1 Video Setting ·On Screen Display (OSD) control Figure 4-2 OSD control setting [Title] Name of video channel will be shown on the up left of the image, maximum... - Page 10 ® ·Video C o d i n g Figure 4-3 Video coding setting [Video Quality] The user can choose the appropriate desired image quality: Best, Very Good, Good, Common, Not Good. [Stream Type] Two types: CBR(Constant bit rate)and VBR(Variable bit rate) to choose, CBR enables constant bit rate coding, VBR enables variable bit rate coding.
- Page 11 ® ·Video shield Figure 4-4 Video shield setting [Video shield switch] Enable or disable the video shield functionality [Shield area setting] User can set shield area by dragging mouse with left key pressed, and cancel the shield box on the shield area by right clicking the mouse. You can choose to shield the whole image, or only shield the part of the image.
-
Page 12: Network Parameter
·Wired Setting Figure 4-5 wired network setting [DHCP] If the router allows DHCP functionality, select DHCP. The IP Camera will obtain IP address automatically from the router. If the router does not allow for DHCP functionality, then the IP address must be obtained manually. - Page 13 [Whether to use DHCP] If the router allows DHCP function, select this type, IP camera will obtain IP address automatically from router. [IP address] Set wireless IP address of IP camera. [subnet mask] Set IP address of the current wireless gateway( router/AP), such as 192.168.0.1...
- Page 14 Note: WIFI setting only works to those types with WIFI function. WIFI mode supported by IP Camera: 802.11b/g protocol (small power WiFi type) 802.11a/b/g/n protocol (large power WiFi type) To use the wireless function of IP camera, a wireless router is needed such as D-link.
- Page 15 ® ·Listener port (LPRT) Figure 4-8 LPRT setting [Web LPRT] The default port 80(port 80 is recommended), port for download active X, if necessary to change, it should add port number behind IP address during web visit http://ip:port/, such as http://192.168.0.100:/81 . [Video LPRT] default 8000 (8000 is recommended).
- Page 16 ® ·PPP0E Figure 4-9 PPPOE parameters setting [Switch] Set to open or close PPPOE dial-up function [User name] The ADSL dial-up account, obtain from internet service provider [Password] Password of ADSL dial-up account, obtain from internet service provider After setting all parameters, click the [submit] button, the setting will take effect immediately.
- Page 17 ® ·UNPN (Auto port mapping) Figure 4-10 UNPN port mapping setting [Switch] If in LAN it has server with UPNP functionality, enable this function, the server will automatically forward the set port to public network. [web mapping port] Set the web port which will be mapping to the server. [digital mapping port] Set the digital port which will be mapping to the server.
- Page 18 ® ·Email Figure 4-11 Email parameters setting It is used to set Email address and related parameter of alarm email. [SMTP Server] send email server address, different email service provider provides different email server address, such as SMTP server of Google email box: smtp.gmail.com [Email receiving address] Email address to receive the email.
- Page 19 ® ·FTP Figure 4-12 FTP parameters setting FTP services will send the alarm triggered recording file or captured photo via FTP to certain FTP server. [FTP server] IP address or HTTP network address of FTP server. [FTP port] Port of FTP server, default port is 21. [User] User name of the FTP Server.
- Page 20 [Switch] Setting open or close DDNS function. [Server] 3322.org or dynDDNS.org selectable. [DNS] The device domain which is set by user, such as zmodo.3322.org. [User] The user name which you registered on DDNS server. [Password] The password which you registered on DDNS server.
-
Page 21: Alarm Setting
® 4.2.3 Alarm setting Figure 4-14 Motion detection setting [Protection time setting] Set the protection time of motion detection. It can set detail time period of everyday, up to four time periods. Select the time and click the [Save] button, then the time period selection will take into force. [Motion detection switch] Set open or close of motion detection,enable this switch to edit the motion detection area. -
Page 22: System Information
® 4.2.4 System Information Figure 4-15 Version Information Figure 4-16 System time setting... -
Page 23: Advanced Setting
·User management Figure 4-17 User management interface Each IP camera can be set up to have up to 15 users. Admin is the system default super user and cannot be deleted, but the admin password can be changed. User's authority is as following:... - Page 24 ® ·Periodic maintenance Figure 4-18 Periodic maintenance setting [Periodic Maintaining] Choose to open periodic maintenance and set maintenance time, detailed maintenance time on everyday can be configured. After setting all parameters, click the [submit] [Restore factory setting] Click this button to recover all the setting of the device back to factory setting.
- Page 25 [Update File] Click “.” to browse for the correct update file (application file: REL- APP, Please not change the file name), click “Update”. During the update, it will display update information. After update finished, IP Camera will reboot automatically. Log into the device once again and enter the software update interface to check whether the system version has been updated.
-
Page 26: Serial Port Set Up
4.2.6 Serial port set up Figure 4-20 Serial port setting When IP camera has external RS485 communication or control device (such as a PTZ controller) the user needs to set the RS 485 parameter according to the setting of these external devices. The channel, address, speed, protocol, and bit rate need to be set accordingly. -
Page 27: Appendix
·Appendix 3 Apply for DDNS domain service IP Camera DDNS brief introduction DDNS dynamic DNS means real-time analysis to a fixed domain and dynamic public network IP address of IP camera. All internet users can visit this IP camera through a certain fixed domain, as shown:... - Page 28 ® IP Camera DDNS Analysis process If you would like to assign a DDNS service to your IP Camera, please contact product support for a recommended current DDNS service. Recommended DDNS services will periodically change as a result of support developments or cost changes. Product support will be happy to recommend a current DDNS service.
- Page 29 ® If you have registered in this website, directly input user name and password, click login enter the website. If you have not registered, click Create Account, choose Free DNS, enter the registration interface Step one Registration: Follow the step one by one, and fill in the required blank, click the ”I Accept, Create my Account”...
- Page 30 ® After enter your own space, you need to apply for your own free domain, now click the button Hosts/Redirects, enter into host management. Choose Add a Host Enter the interface of host application: Hostname: the domain name you are applying Host Type: please choose DNS Host IP Address: you’re outer net IP Assign to Group: Group distribution (you can choose default value)
- Page 31 ® For example, this is the free domain which is just applied successfully: jerry123. zapto.org. Step Three: DDNS setting No-IP.com jerry123.zapto.org jerry123 Adjust the IP address of device, the IP address needs to be LAN IP of the router which means the network segment when you enter into the internet in ordinary time.
- Page 32 ® Port mapping setting of D-Link router Type in the IP address of router in browser, to log in the main interface of router management.
- Page 33 Be sure to choose always, and hit apply. Repeat as necessary until all ports are forwarded. If successfully set DDNS in “network setting” of the IP camera, then you can visit the IP camera by typing your DDNS domain name into an Internet Explorer...
- Page 34 Your Security · Our Priority...
Need help?
Do you have a question about the IP Camera and is the answer not in the manual?
Questions and answers