Table of Contents
Advertisement
Advertisement
Table of Contents

Related Manuals for Samson SD8


Summary of Contents for Samson SD8
- Page 1 S D 8 MIXER OWNERS MANUAL ®...
- Page 2 Produced by On The Right Wavelength for Samson Technologies Corp. Copyright 1997, Samson Technologies Corp. Printed March 1997 Samson Technologies Corp. 575 Underhill Blvd. P.O. Box 9031 Syosset, NY 11791-9031 Phone: 1-800-3-SAMSON (1-800-372-6766) Fax: 516-364-3888...
-
Page 3: Table Of Contents
Guided Tour 4 Overview 4 Channel 5 Main Section 7 Rear Panel 9 Connecting The SD8 - General Suggestions 11 Setting Up and Using the SD8 12 Setting the Correct Gain Structure 13 Suggested Performance Application 15 Grounding Techniques 16... -
Page 4: Introduction
(including wiring diagrams) and tell you in detail how to set up your SD8 and how best to use the unit in live performance. Finally, we’ll cover a number of specific topics (such as grounding techniques, using equalization and auxiliary sends and returns, and details about the onboard multi-effects processor) and then wrap things up with full specifications. -
Page 5: Sd8 Features
• Independent three-band equalization for each channel, enabling you to shape the sound of your input signal sources. In addition, a ten-band graphic master equalizer allows you to “tune” the output of the SD8 to the particular room environment you are in. This can be particularly useful for eliminating ringing or feedback problems. - Page 6 SD8 Features • Protection relay circuitry prevents “thumps” when powering on or off. This means that you can use the SD8 with a single power strip into which other audio devices are connected, without danger of damage to connected speakers.
-
Page 7: Guided Tour
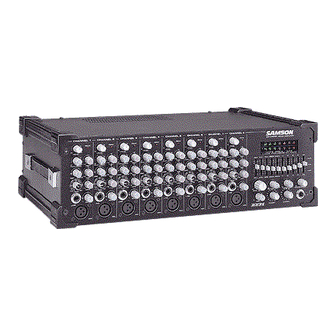
Guided Tour - Overview The following illustration shows an overview of the front panel of the SD8: CHANNEL 1 CHANNEL 2 CHANNEL 3 CHANNEL 4 CHANNEL 5 CHANNEL 6 CHANNEL 7 CHANNEL 8 SAMSON SD8 STEREO MIXER AMPLIFIER PEAK PEAK... -
Page 8: Channel
1: Level (white) - This knob determines the final signal level being sent by a channel to the main speaker outputs. In practice, this will be used to adjust the levels of the various signals being blended together by the SD8. The “0” CHANNEL 1 position indicates unity gain (no level attenuation or boost). - Page 9 9: Mic input connector - Connect a microphone to any of the SD8’s eight channels using this standard XLR jack. This jack is intended to accept signal...
-
Page 10: Main Section
SD8. When a slider is at its center detented (“0 dB”) position, the selected frequency area is unaffected (it is said to be flat). When a slider is moved up (above the “0 db”... - Page 11 At its fully counterclockwise (“ ”) position, the signal is infinitely attenuated—that is, there is no sound. At its 2 o’clock position, the SD8 mixer section is at unity gain and is providing no attenuation or boost to the output signal.
-
Page 12: Rear Panel
Aux Return knob on the front panel of the SD8 (see #5 on page 8). Because the SD8 is a stereo system, the signal arriving at Aux return 1 is automatically panned hard left and the signal arriving at Aux return 2 is automatically panned hard right. - Page 13 9: Speaker Outputs - These are the SD8’s main outputs; use these four unbalanced jacks (two of which carry the left signal and two of which carry the right) to connect the SD8 to loudspeakers rated at 4 ohms or greater (that is, 4, 8, or 16 ohms).
-
Page 14: Connecting The Sd8 - General Suggestions
Connecting The SD8 - General Suggestions The actual connections you’ll make to and from the SD8 will vary according to the environment you use it in and the particular equipment you have. However, here are a few basic rules concerning connections that will apply in pretty much all situations: •... -
Page 15: Setting Up And Using The Sd8
SD8 speaker jack goes to the “+” (hot) input of your loudspeaker, and that the sleeve of the SD8 speaker jack is connected to the “-” (ground) input of your loudspeaker. -
Page 16: Setting The Correct Gain Structure
You’re now ready to establish the correct gain structure—the key to getting the best performance from the SD8, or from any mixer, for that matter. This is a simple procedure that ensures optimum input and output levels so that no unnecessary noise (caused by too low a signal) or overload distortion (caused by too high a signal) is created. - Page 17 SD8 Aux sends. As with the internal DSP, the idea is to drive these devices as hot as possible (short of overloading them) and then to use the Aux return Level to carefully adjust the amount of processed signal being blended with the dry signal.
-
Page 18: Suggested Performance Application
115V 50/60Hz SAMSON The main connections here involve connecting the SD8 speaker outputs to PA speakers and the Monitor output to the input of an external amplifier driving onstage monitors. Various microphones and line level signals are connected to channel mic and line inputs and a CD or tape player is connected to the CD/Tape input. An external signal processor is... -
Page 19: Grounding Techniques
AC/DC adapters If you’re using the SD8 or in a fixed location such as a recording studio, you may want to invest the time and money into creating a star ground network. This is by far the best technique for avoiding grounding problems. It involves using a formidable ground source such as a cold water pipe or a copper spike driven into the earth. -
Page 20: Using Equalization
Using Equalization One of the most exciting aspects to using a mixer such as the SD8 is having the ability to shape a sound, using a process called equalization. But there are few areas of audio engineering more misunderstood than equalization, and, just as good EQ can really help a sound, bad EQ can really hurt it, so read on... - Page 21 Using Equalization In most instances, the best way to approach equalization is to think in terms of which frequency areas you need to attenuate, as opposed to which ones you need to boost. (Boosting a frequency area also has the effect of boosting the overall signal; too much EQ boost can actually cause overload—with the accompanying Peak LED warning!) Be aware of the phenomenon of masking, where loud sounds in one frequency range obscure softer sounds in the same range;...
-
Page 22: Using The Aux Sends And Returns And Monitor Output
Using The Aux Sends and Returns and Monitor Output The two Aux sends provided by the SD8 allow you to combine the signal from multiple channels and send the resulting mix to the rear panel Monitor output jack, to the internal Zoom Digital Signal Processor (DSP), or to external devices such as effects processors. -
Page 23: Using The Internal Digital Signal Processor (Dsp)
Preset type. To quickly audition all the SD8 Presets, simply leave the Effect knob at “1” and rotate the Preset knob through its 16 different positions. For unusual custom effects, change the Effect setting. -
Page 24: Table Of Sd8 Effects
Table of SD8 Effects Preset # Description Effect settings Hall reverb - simulates a Alter the reverb time. Effect 1 (standard) is 2.2 seconds. medium-sized concert hall Larger Effect values increase the reverb time, from 1.0 second (Effect 2) to 3.8 seconds (Effect 16). -
Page 25: Specifications
Specifications Mixer / Pre Amp Section: Normal Limit Frequency Response (± 3 dB) Mic to Pre Out DC ~ 65 kHz 20 Hz - 50 kHz Line to Pre Out DC ~ 58 kHz 20 Hz - 50 kHz Aux Return to Pre Out DC ~ 70 kHz 20 Hz - 50 kHz Total Harmonic Distortion... - Page 26 Specifications Power Amp Section: Normal Limit Rated Output Power (per channel) (1% THD @ 1 kHz stereo, 4 ohm) 275 watt 250 watt Min Maximum Voltage Gain Amp In to Speaker Out (@ 1 kHz) 27.5 dB 28 dB ± Total Harmonic Distortion (20 Hz to 20 kHz with 30 kHz LPF) 0.02% 0.1% Max...
Need help?
Do you have a question about the SD8 and is the answer not in the manual?
Questions and answers