
Related Manuals for Honeywell Y9120H Sundial RF2 Pack 1


Summary of Contents for Honeywell Y9120H Sundial RF2 Pack 1
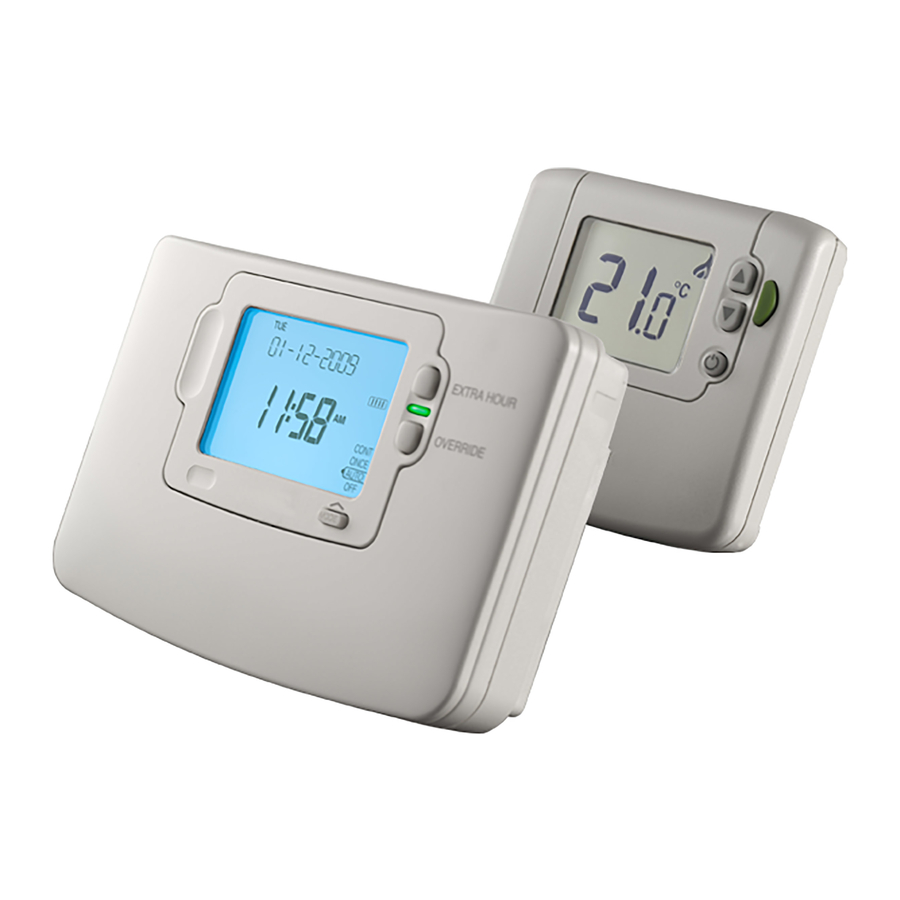
- Page 1 User Guide Y9120H Sundial RF Pack 1 How to use: ST9120C Wireless Enabled Timer DT92E Wireless Room Thermostat This document is to be left with the user and forms part of a Home Information Pack...
- Page 2 ST9120C CONTROLS LAYOUT EXTRA HOUR OVERRIDE NEXT COPY DAY/TIME PROGRAMME HOLIDAY NEXT ST9120C Time Display Slider LoT™ Technology Display Operating Mode Indicator Programme Time Markers Operating Mode Button Day of Week Indicator OK/Next Button RF Symbol Clock – and + Buttons ‘ON’...
- Page 3 DT92E CONTROLS LAYOUT ECO Mode Active OFF/Standby Indicator Frost Protect Indicator RF Communications Indicator ECO Countdown Indicator Battery Low Indicator Heating Demand Indicator Fault Indicator Setpoint Change Buttons Setpoint Indicator ECO Button Temperature Display OFF/Standby Button...
-
Page 4: Table Of Contents
Contents CONTROL OF YOUR SYSTEM General Description of Controls in Your System ..........4 The way to use a Timer ..................4 The way to use a Room Thermostat ..............5 Optimisation ......................5 GETTING STARTED WITH YOUR ST9120C Step 1: Setting the Date & Time ...............6 Step 2: Running a Built-in Programme .............7 PROGRAMMING YOUR ST9120C The Built-in Programmes / Your Personal Programme........8... -
Page 5: Control Of Your System
CONTROL OF YOUR SYSTEM General Description of Controls in Your System Your Honeywell ST9120C provides timing control for your central heating system, letting you set ON and OFF periods to suit your own lifestyle. The ST9120C does not directly control the temperature but works together with other temperature controls, such as room thermostats, to control your heating system in your home. -
Page 6: The Way To Use A Room Thermostat
CONTROL OF YOUR SYSTEM (CONT.) the heating is already on and you want it to stay on a little longer - just press EXTRA HOUR and, for that day only, an hour will be added to the end of the time at which heating normally goes off. -
Page 7: Getting Started With Your St9120C
GETTING STARTED WITH YOUR ST9120C Your ST9120C should have been set up to work correctly when it was installed. However, the following will show you how you can modify your settings to meet your particular lifestyle. To assist you with programming and everyday use your ST9120C will display text messages at every stage to help you get the most out of your central heating system. -
Page 8: Step 2: Running A Built-In Programme
GETTING STARTED WITH YOUR ST9120C d. The year digits will now be flashing and ‘SET THE YEAR’ will be displayed. To change the year, press the buttons until the correct year is shown. The message ‘IS YEAR OK?’ will be displayed. Press the green button to confirm the year is correct. -
Page 9: Programming Your St9120C
PROGRAMMING YOUR ST9120C The Built-in Programmes The built-in programmes give you a starting point that you can personalise to your own requirements. Your Installer should have selected one and ticked the box alongside it. If there is no tick, the product normally leaves the factory with Profile A installed, but it is a simple matter to select one of the other profiles (see Changing the Installer Parameters, page 15). -
Page 10: Reviewing The Programme Times
PROGRAMMING YOUR ST9120C Reviewing the Programme Times To review your programme, move the slider to the PROGRAMME position. To review the programme times, press the button repeatedly. The appropriate ON and OFF markers will be displayed to show you which time is being reviewed. Any of these times can be adjusted by using the buttons, and then confirmed using the... - Page 11 PROGRAMMING YOUR ST9120C Note: When pressing the button the next ON or OFF marker may start to flash. This indicates you have tried to set a time equal to one of the next programme times already in the memory. Similarly, when pressing the button the previous ON or OFF marker may start to flash.
-
Page 12: Disabling / Enabling Time Periods
PROGRAMMING YOUR ST9120C Exiting Programming Mode: To exit programming mode, move the slider to the RUN position. This can be done at any time during the programming process, and any changes made and confirmed with the button will have been saved. Note: If the unit is left in Programming mode for more than 10 minutes without the slider being moved or any buttons pressed, the message ‘MOVE SLIDER’... -
Page 13: Operating Your St9120C
OPERATING YOUR ST9120C Choosing the Operating Mode The operating mode may only be changed when the slider is set to the RUN position. symbol is displayed during a programmed heating on period. A green INDICATOR LAMP shows when the heating is switched ON. A MODE button is provided to select the Operating Mode and therefore how the heating is controlled. -
Page 14: The Extra Hour Function
OPERATING YOUR ST9120C The Extra Hour Function The EXTRA HOUR button allows you to switch the system ON for up to 3 extra hours without altering the programme. Pressing the button once will give one extra hour. The LoT™ Display will display the message ‘+ 1 HOUR’, to confirm the button has been pressed. -
Page 15: Enquiry Mode
OPERATING YOUR ST9120C Enquiry Mode As the heart of your system, the ST9120C has access to temperature information from the other system components, and allows you to enquire about this information. To enter Enquiry Mode, ensure the slider is in the RUN position, then press and hold the button for 4 seconds. -
Page 16: Fine Tuning Your St9120C
FINE TUNING YOUR ST9120C Changing from AM/PM Time Display to the 24 Hour Clock Your ST9120C can operate on the 12 hour AM/PM or 24 hour clock formats. To change the format, ensure the slider is in the RUN position then press and hold the buttons together for about 2 seconds. - Page 17 FINE TUNING YOUR ST9120C INSTALLER Parameter Default Options Description PARAMETER Number Value Optimum start 0, 1, 2 0 = no optimum start 1 = delayed start 2 = optimum start on * Optimum start limit 1, 2, 3 1 = 1 hour 2 = 2 hours 3 = 3 hours Optimum stop...
-
Page 18: Optimisation
FINE TUNING YOUR ST9120C e. Press to move to the next parameter available for editing. f. Keep pressing to step around the list of parameters, and use buttons to change the parameter value. g. Any parameter changes that have been confirmed with the button will be saved and used. -
Page 19: Boiler Service Reminder
BOILER SERVICE REMINDER If your house is rented, by Law, your gas boiler should be inspected once a year to ensure it is operating safely. Your ST9120C Timer has a range of features designed to help make sure this service is carried out at the correct time. These features will be programmed by your Installer, Maintenance Engineer, or Landlord. -
Page 20: Shut-Down
BOILER SERVICE REMINDER Shut-down If your ST9120C shows the words “SERVICE DUE” and “OFF” then your boiler service is overdue and the boiler has been automatically switched off to ensure your safety – you should arrange an immediate service visit. If set to do so, it may be possible to obtain limited use of the boiler by pressing the EXTRA HOUR button. -
Page 21: Switching Off / Display Updates / Heating Indicator / Frost Protection
OPERATING YOUR DT92E Switching Off Pressing the off/standby button will switch the DT92E into off/ standby mode. The symbol will show in the display, and the unit will control at the off setpoint, as set at the ST9120C. To switch back on, simply press button again. -
Page 22: Dt92E Operating Indicators
DT92E OPERATING INDICATORS Low Battery Indicator / Battery Replacement The battery symbol will start to flash if the battery power is running low. From this point, there will be a minimum of 4 weeks before the product will cease to function. 2 x LR6 AA Alkaline Batteries accessed... -
Page 23: Dt92E Energy Saving Eco Feature
DT92E ENERGY SAVING ECO FEATURE The ECO button allows you to change to a lower, energy saving set temperature for a period of your choice, from 1 to 24 hours. This temperature is pre-set in the DT92E Installer Mode, but you can adjust this to any temperature you want when ECO mode has been activated. -
Page 24: How To Exit Eco Mode
DT92E ENERGY SAVING ECO FEATURE How to Exit ECO Mode To exit ECO mode, simply press the green ECO button again. ECO will disappear from the display and the thermostat will control to its previous set temperature. FINE TUNING YOUR DT92E Changing the DT92E Installer Parameters The DT92E has a special Installer Mode where some features can be adjusted to suit your lifestyle or preferences –... - Page 25 FINE TUNING YOUR DT92E To Enter Installer Mode: a. Hold the button for 2 seconds until DT92E is in standby mode. b. Hold buttons for 3 seconds until the word ‘Inst’ appears on the display. c. Press the button. The first parameter is now ready to be changed. To Select a Parameter: Use the buttons to move from one parameter to...
-
Page 26: Faq And Troubleshooting
FAQ AND TROUBLESHOOTING How do I set the time only, if the ST9120C clock is not correct? Your ST9120C contains an accurate digital clock that is factory set. Should you ever need to change the time, just follow this procedure: a. -
Page 27: Room Thermostat
How reliable is 2-way RF communication? The 2-way RF communication (also known as wireless communication) used by Honeywell is extremely robust and reliable. When installed correctly the Signal Strength test feature allows the Installer to locate the system components where mutual signal reception is strong. -
Page 28: Troubleshooting Guide
FAQ AND TROUBLESHOOTING Troubleshooting Guide This is a quick guide to help you diagnose and cope with possible problems with your wireless control system. For further assistance, please contact your Installer. Symptom Possible Cause Remedy ST9120C has a blank No power to the Check that there is power to the LCD display heating system... - Page 29 FAQ AND TROUBLESHOOTING Troubleshooting Guide (cont.) Symptom Possible Cause Remedy ST9120C shows the Your DT92E Change the DT92E batteries (see message ‘SENSOR batteries are page 21 for how to do this) LOW BATT’ and a running low on flashing radiator power symbol DT92E shows a...
-
Page 31: Configuration & Service Data
CONFIGURATION & SERVICE DATA Configuration Data (to be completed by Installer) The tables below are for the Installer to complete to indicate how your ST9120C and DT92E have been configured. Configurable Features Options Factory Installer configured setting (tick box or note value) ST9120C Configuration 24hr or am/pm clock am/pm display... -
Page 32: Boiler & System Service Log
This product and its associated documentation and packaging are protected by various intellectual property rights belonging to Honeywell Inc. and its subsidiaries and existing under the laws of the UK and other countries. These intellectual and property rights may include patent applications, registered designs, unregistered designs, registered trade marks, unregistered trade marks and copyrights. -
Page 33: System Components
System Components This section is to be completed by the Installer Location ST9120C DT92E (typically in living room or hallway) Energy Efficiency and the Environment Home energy use is responsible for more than ¼ of the total UK carbon emissions which contribute to climate change. -
Page 34: What Is A Programmer
Nearby electric fires, televisions, wall or table lamps may prevent the thermostat from working properly. Honeywell Control Systems Ltd. Arlington Business Park, Bracknell Berkshire RG12 1EB 50047645-001 A Technical Help Desk: 08457 678999 www.honeywelluk.com © 2009 Honeywell International Inc.
Need help?
Do you have a question about the Y9120H Sundial RF2 Pack 1 and is the answer not in the manual?
Questions and answers