Table of Contents
Advertisement
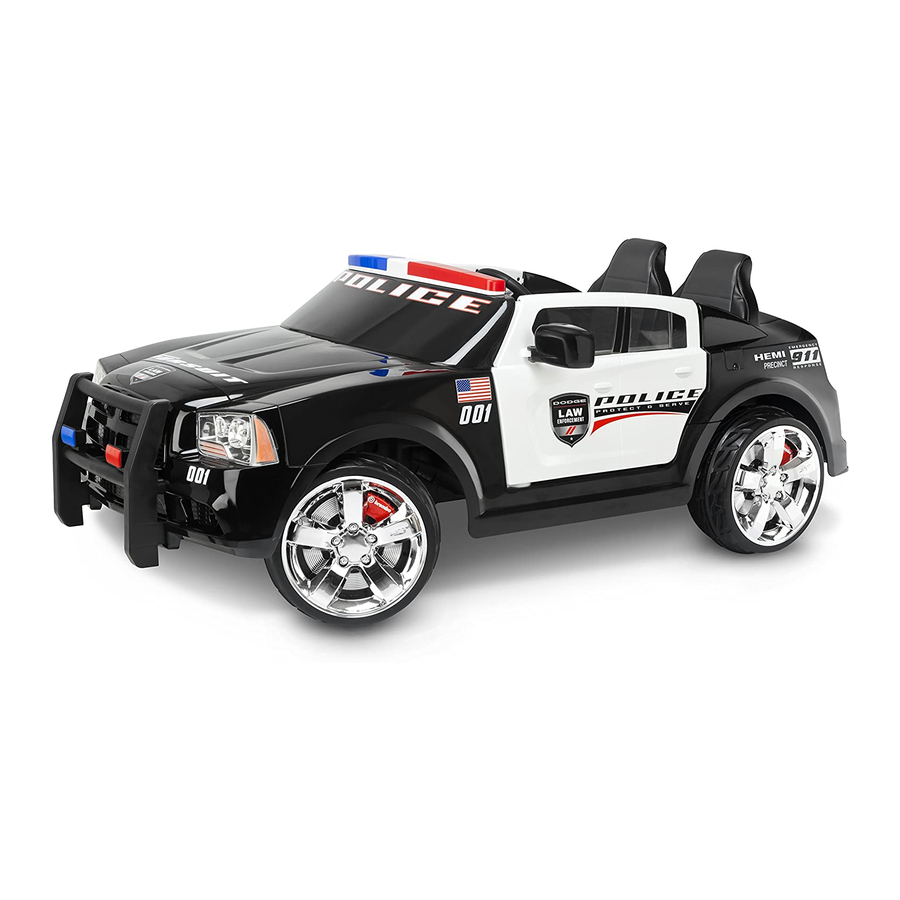
P olice Car Owner's Manual
replacement parts.
The Owner's manual contains assembly, use and maintenan
instructions. The K
adult who has read and understands the instructions in this
Keep the packaging away from children and dispose all pack
before use.
© 2009 Pacific Cycle Inc.
4902 Hammersley Rd.
Madison, WI 53711
United States of A
Phone:(877)741-6154
www.kidtraxtoys.com
id Trax P olice Car must be assembled by an
merica
Keep instructions for future reference.
Styles and Colors may vary
(877) 741-6154 for assistance and
Official Licensed Product
Dodge and HEMI are trademards of Chrysler
R
LLC. Dodge Charger and its trade dress are
used under license by Pacific Cycle Inc.
©
Chrysler LLC2009
Made in China
Advertisement
Table of Contents

Related Manuals for Kid Trax Toys Police Car


Summary of Contents for Kid Trax Toys Police Car
-
Page 1: Replacement Parts
P olice Car Owner's Manual Styles and Colors may vary Made in China (877) 741-6154 for assistance and replacement parts. The Owner's manual contains assembly, use and maintenan instructions. The K id Trax P olice Car must be assembled by an adult who has read and understands the instructions in this Keep the packaging away from children and dispose all pack before use. - Page 3 Thank You For purchasing the Kid Trax Police Car. With the Police Car your child will have fun and enjoyment for years to come. Please call us at Kid Trax Toys Consumer Relations at 877-741-6154 with comments or questions. Customer Service hours are 8AM - 5PM Monday thru Friday CST.
-
Page 4: Table Of Contents
Contents Safety........1 Parts ........2 Assembly . -
Page 5: Safety
Safety WARNING! The following safety hazards may result in serious injury or death to the user of the Police Car: • This product contains small parts that are for adult assembly only. Keep small children away when assembling. Remove and dispose of all protective material and poly bags before assembly. -
Page 6: Parts
Parts... -
Page 7: Parts List
12V12AH Parts List: 1. Dashboard 15. M5 x 25 Screw (2) (included in Side Mirrors) 2. Steering Wheel 16. M4.2 x 20 Screw (18) (included in one package) 3. Car Seats (2) 17. M5 x 57 Screw 4. Rear Section (included in Steering Wheel) 5. -
Page 8: Assembly
Use of a battery or charger other than the supplied Kid Trax Toys 12V rechargeable battery and charger may cause a fire or explosion. Only use the supplied Kid Trax Toys 12V rechargeable battery and charger with the vehicle. •... - Page 9 Always keep the charger housing closed. Important! Before using the Police Car for the first time the battery needs to be charged for a full 24 hours (no more than 30 hours). Only an adult who has read and understands the following safety warnings should handle, charge or recharge of the battery (see Maintenance).
-
Page 10: Charging The Battery
Charging the Battery 1. Plug the charger connector into the battery connector on the battery. Only use the Kid Trax Toys 12V charger included with the Police Car (Input: AC 120V, 60Hz Output: DC 12V). 2. Plug the charger into a standard 120V wall outlet. -
Page 11: Install The Front Grill
Install the Front Grill 1. Remove the medium M5 x 30 screw which is attached to the front end connector. 2. Align the connector over the square metal tubing on the car body. Push the metal tubing together until the two pieces meet inside the connector. -
Page 12: Install The Rear Wheels
Install the Rear Wheels (in clear poly bags) 1. Locate a rear wheel (marked “Rear” with gear-shaped protrusion). 2. Slide the wheel onto the axle with protrusion facing toward vehicle. 3. Fit the gear shaped protrusion into the gear box. 4. -
Page 13: Install The Front Wheels
Install the Front Wheels (in blue poly bags) 1. Slide a large washer onto the axle. Note: The Washer may already be on the axle. 2. Slide a wheel onto the axle with FRONT facing toward vehicle. 3. Slide a wheel cover onto the axle, fitting the three locating pins into the holes in the wheel. -
Page 14: Install The Left And Right Car Doors
Install the Left and Right Car Doors 1. Slide the bottom of the car door hinge into the car hinge pocket until the steel plate rests on the recessed area of the car body. 2. Align the holes of the steel plate with the screw holes on the recessed area on the car body. -
Page 15: Install The Dashboard Assembly
Install the Dashboard Assembly 1. Plug the Megaphone into the megaphone port located underneath the Dashboard. 2. Attach the connector under the Dashboard to the connector on the car body, located at the top of the black, middle stripe. Note: The connector’s may have slipped inside the Dashboard assembly during shipment, if so, gently pull the connector out. - Page 16 3. Slide the Megaphone onto the bracket. 4. Open the car doors. 5. Slide the tabs on the front of the Dashboard assembly into the slots on the car body. Note: Be sure the connector wires are not separated, pinched or crimped. 6.
-
Page 17: Install The Steering Rod And Steering Wheel
Install the Steering Rod and Steering Wheel 1. Place the vehicle on soft material that will protect it from scratching or damage. Carefully turn the vehicle onto its side. Note: It is helpful to have a second person assisting you with these steps. - Page 18 3. Attach the wiring harness connector from the Steering Wheel into the wiring harness connector in the Dashboard. 4. Remove M5 x 57 screw (part: #17) from the Steering Wheel. Insert the Steering Wheel onto the rod and slide it into the pocket on the Dashboard.
-
Page 19: Install The Rear Section
Install the Rear Section 1. Align the Rear Section over the four locators on the car body and lower the Rear Section into place. 2. Using the (7) M4.2 x 20 (part:#16) screws fasten the Rear Section to the car body. Do not over tighten the screws. Rear body Rear body locator... -
Page 20: Connect The Battery
Connect the Battery Important! Before using the Police Car for the first time the battery needs to be charged for a full 24 hours (see page 6 for battery charging instructions). 1. Fasten the Battery connector to the Main Harness. -
Page 21: Install The Car Seats
Install the Car Seats 1. Locate the bracket behind in the back of the car seat. 2. Align the car seat bracket with the car seat slot, and the plastic screw with the car seat screw hole. Lower the seat into place. 3. -
Page 22: Install The Mirrors
Install the Mirrors 1. Align the holes of the Mirror with the holes on the mirror hinge. 2. Insert a M5 x 25 screw (part:#15) through the mirror and mirror hinge holes. 3. Screw a small nut to the bottom of the screw. Do not over tighten. Install the Front Guard 1. -
Page 23: Use
Maintenance sections before use of the vehicle. User Requirements The suitable age range for a child using the Police Car is between 3 and 7 yrs old max. The maximum weight of the child (or children) is 130 lbs (59kg). -
Page 24: Vehicle Controls
Vehicle Controls 1. Power Switch: Turns the vehicle on and off. 2. Sound Effects: Pressing the button on the left side of the steering wheel will make a muscle car sound effects. Pressing the right side will make a police scanner sound effect. 3. -
Page 25: Maintenance
Water will damage the motor, electrical system and battery. • Kid Trax Toys recommends that you take the vehicle to an authorized service center for periodic maintenance and service. Call Kid Trax Toys Consumer Relations at 877-741- 6154 for an authorized service center. -
Page 26: Battery Storage
Check the battery and charger (supply chord, connector) for wear and damage before charging. Do not charge the battery if damage has occurred. Only replace with a Kid Trax Toys 12V rechargeable battery and charger. The battery should be charged after each use, or if not used regularly, once a month at a minimum. -
Page 27: Battery Replacement And Disposal
Do not throw the battery away with your regular household trash! 6. Replace the battery with a Kid Trax Toys 12V battery and reconnect the connectors. 7. Replace the metal battery bracket. -
Page 28: Battery Fuse
Battery Fuse The Kid Trax Toys 12V battery features a thermal fuse with a reset fuse that will automatically trip and cut all power to the vehicle if the motor, electric system or battery is overloaded. The fuse will reset and power will be restored after the unit is turned OFF for 5 Minutes and then turned ON again. -
Page 29: Troubleshooting Guide
The following are examples of potential problems. Completely read through this manual and the troubleshooting guide table before calling Kid Trax Toys Consumer Relations. If you still need help resolving the problem please call 877-741-6154. Kid Trax Toys recommends that you take the vehicle to an authorized service center for periodic maintenance and service. - Page 30 Problem Possible Cause Remedy Vehicle does not Battery is under Check that the battery run very long charged connectors are firmly plugged into each other when recharging (see Battery: Recharge Interval and Time) Battery is old Replace battery (see Battery: Replacement and Disposal) Vehicle runs Battery low on...
- Page 31 Problem Possible Cause Remedy Difficult shifting Attempting to shift Completely stop the from forward to while the vehicle is vehicle and shift (see Use: reverse or visa- in motion Manual Operation) versa Loud grinding or Motor or gears are Call Consumer Relations at 877-741-6154 for an clicking noises damaged...
-
Page 32: Services, Repairs And Parts
Services, Repairs and Parts Do not return this product to the place of purchase. If your Police Car needs service, repairs or replacement parts, call: Kid Trax Toys Consumer Relations Hours: 8:00am – 5:00pm (CST) Monday - Friday Phone: 877-741-6154 Email: customerservice@kidtraxtoys.com... -
Page 33: Fcc Information
FCC Information This device complies with part 15 of the FCC Rules. Operation is subject to the following two conditions (1) this device may not cause harmful interference, and (2) this device must accept any interference received, including interference that may cause undesired operation. -
Page 34: Warranty
To make a claim under this warranty you may contact us at www. kidtraxtoys.com; fax us at 1-800-858-2800, 24 hours a day; write to Kid Trax Consumer Relations Department, Kid Trax Toys, P.O. Box 344 Olney, IL 62450 or call 1-877-741-6154 from 8 a.m. to 5 p.m., Monday through Friday, CST. - Page 35 Limitation of Warranties and Warranty Terms Any implied warranties, including implied warranties of the merchantability and fitness for a particular purpose, shall be limited to the duration and terms of the express written warranty. Some states do not allow limitations as the exclusion or limitation of incidental or consequential damages, so the above limitation may not apply to you.
-
Page 36: Contact Information
Contact Information If you have any questions or comments please contact us at: In U.S.A. Pacific-Cycle Inc. 4902 Hammersly Rd. Madison, WI 53711 Customer Service: 877-741-6154 customerservice@kidtraxtoys.com www.kidtraxtoys.com © 2009 Pacific-Cycle Inc. Made in China...
Need help?
Do you have a question about the Police Car and is the answer not in the manual?
Questions and answers
how to use shifter on kid trax police car to go from low to high and reverse
The shifter on a Kid Trax Police Car includes both the forward/reverse and the high/low switches pre-installed. To use it:
1. Move the shifter to select forward or reverse.
2. Use the hi/low switch to choose between low and high speed.
This allows switching between low speed, high speed, and reverse driving modes.
This answer is automatically generated