Table of Contents
Advertisement
Advertisement
Table of Contents

Related Manuals for FujiFilm DIGITAL Q1


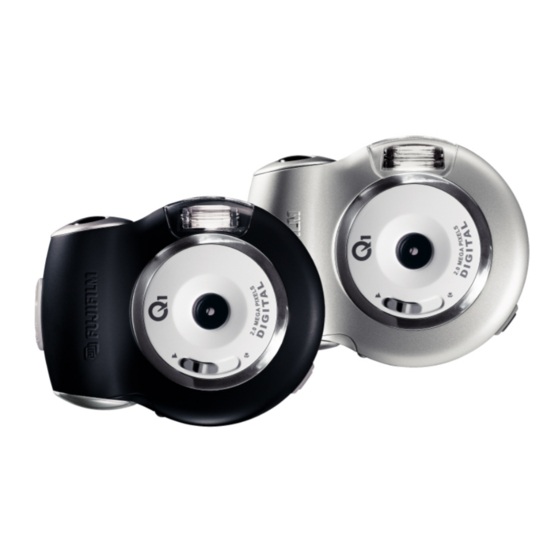
Summary of Contents for FujiFilm DIGITAL Q1
-
Page 2: Warning
WARNING To prevent fire or shock hazard, do not expose the unit to rain or moisture. CAUTION : TO REDUCE THE RISK OF ELECTRIC SHOCK. DO NOT REMOVE COVER (OR BACK). NO USER-SERVICEABLE PARTS INSIDE. REFER SERVICING TO QUALIFIED SERVICE PERSONNEL The graphical symbols are located on the bottom of the case. -
Page 3: Ec Declaration Of Conformity
Fuji Photo Film (Europe) G.m.b.H. Address : Heesenstrasse 31 40549 Dusseldorf, Germany declare that the product Product Name : FUJIFILM CAMERA DIGITAL Q1 is in conformity with the following Standards Safety : EN60950 EMC : EN55022 : 1998 Classe B... - Page 4 IMPORTANT Be sure to read this page before using the Software. NOTICE BEFORE OPENING THE PACKAGE OF CD-ROM PROVIDED BY SUPPLIERPLEASE READ THIS END USER LICENSE AGREEMENT CAREFULLY. ONLY IF YOU DO AGREE TO THIS AGREEMENT, YOU WILL BE ABLE TO USE THE SOFTWARE RECORDED ON THE CD-ROM. BY OPENING THE PACKAGE, YOU ACCEPT AND AGREE TO BE BOUND BY THIS AGREEMENT.
- Page 5 construed, expressly or implicitly, as transferring or granting any right, license, or title to you other than those explicitly granted under this Agreement. 5. Limited Warranty. Supplier warrants to you that Media is free from any defect in material and workmanship under normal use for ninety (90) days from the date of your receipt of Media.
-
Page 6: Table Of Contents
CONTENTS WARNING................................2 EC Declaration of Conformity...........................3 PREFACE................................7 CAMERA FEATURES and ACCESSORIES.......................8 NOMENCLATURE...............................9 ATTACHING THE STRAP...........................11 GETTING STARTED............................12 Loading the Batteries............................12 Inserting an xD-Picture Card.........................14 Switching ON and OFF..........................16 Setting the Date and Time..........................17 Selecting the Language..........................18 BASIC PHOTOGRAPHY...........................19 Taking Pictures..............................19 Setting the Image Resolution and Quality....................22 Selecting the Flash Mode..........................23 Digital Zoom..............................25... -
Page 7: Preface
PREFACE Test Shots Prior to Photography For particularly important photographs (such as weddings and overseas trips), always take a test photograph and view the image to make sure that the camera is functioning normally. The supplier cannot accept liability for any incidental losses (such as the costs of photography or the loss of income from photography) incurred as a result of faults with this product. -
Page 8: Camera Features And Accessories
CAMERA FEATURES and ACCESSORIES Camera Features 2.0 million total pixels High-resolution Fujinon lens. Maximum recording pixels of 1600 x1200 pixels (1.92million pixels) Compact and lightweight body Wide range of photography applications (includes Macro mode) Automatic white balance and AE functions built in Automatic high-precision flash built in with extensive flash control functionality 4x digital zoom photography and up to 4x zoom playback functions Easy operation using the 4-direction “... -
Page 9: Nomenclature
NOMENCLATURE 1. Shutter button 2. Lens 3. Macro selector switch 4. Flash 5. USB connector 1. POWER POWER button Status LED 2. LCD monitor 3. Battery cover switch 4. Battery cover 5. MODE MODE button 6. MENU MENU button 7. OK OK button Arrow button (up) Telephoto button... - Page 10 Nomenclature (Sample display) Example of LCD Monitor Text Display: Still Image Record mode 1. Still image record mode 2. Image resolution 3. Image quality 4. Card indicator 5. Number of remaining shots 6. Flash mode 7. Digital zoom 8. EV compensation (No indication with 0EV) 9.
-
Page 11: Attaching The Strap
ATTACHING THE STRAP... -
Page 12: Getting Started
GETTING STARTED Loading the Batteries Compatible batteries Use two AA-size alkaline batteries or two AA-size nickel-metal hydride (Ni-MH) batteries. Notes on Handling Batteries It is recommended that you use the same brand of alkaline batteries as those supplied with the camera. Do not use different types of batteries or old and new batteries together. - Page 13 4. Close the battery cover. 5. Rotate the battery cover to the “ LOCK”side. When you want to replace the batteries Check that the camera is switched off, open the battery cover and then remove the batteries. Take care not to drop the batteries when opening and closing the battery cover.
-
Page 14: Inserting An Xd-Picture Card
DPC-256 (256MB) DPC-512 (512MB) Operation of this camera is only guaranteed when it is used with FUJIFILM xD-Picture Card. Because xD-Picture Cards are small, they can be accidentally swallowed by small children. Be sure to store xD-Picture Cards out of the reach of small children. - Page 15 Do not open the battery cover while the camera is still switched on. This could damage the xD-Picture Card or corrupt the image files on the xD-Picture Card. 1. Rotate the battery cover to the “UNLOCK” side. 2. Twist the battery cover switch and the battery cover will automatically open.
-
Page 16: Switching On And Off
Switching ON and OFF To switch the camera on and off, press the POWER button. Notes on AUTO POWER OFF The power is automatically switched off to prevent battery wear when no operation is performed on the camera for a specific period of time. [1 MIN], [3 MIN], [5 MIN], [10 MIN]: Enable and set the auto power off time. -
Page 17: Setting The Date And Time
Setting the Date and Time The DATE/TIME screen will appear if/when: Camera is switched on for the first time. Camera is switched on after leaving the camera without batteries for an extended period of time. 1. Use to select Year, Month, Day or Time. 2. -
Page 18: Selecting The Language
Checking the remaining battery level Switch the camera on and check that battery level displayed on the LCD monitor. Battery indicator: - Full battery - Medium battery - Battery charge low. Replace or recharge the batteries as it will run out shortly. - The battery is dead. -
Page 19: Basic Photography
BASIC PHOTOGRAPHY You’ve read the chapter on getting ready and the camera is now set up and ready to take pictures.The Basic Photography section explains the three basic steps. Master the basic steps by actually trying them out on the camera as you go. - Page 20 3. Brace your elbows against your sides and hold the camera with both hands. 4. Take care to hold the camera so that your fingers or the strap do not cover the lens or flash. If the lens or flash is obscured by your fingers or the camera strap, you may not be able to obtain the correct brightness (exposure) for your shot.
- Page 21 6. When you press the shutter button, the camera emits a short beep and takes the picture. The data is then recorded. If the camera is inserted an xD-Picture Card, the images and video clips will be recorded on the xD-Picture Card;...
-
Page 22: Setting The Image Resolution And Quality
Setting the Image Resolution and Quality You can choose from 4 settings. Toggle the QUALITY button to select the desired image resolution/quality setting. 1600F 1600N 1280 When you change the image resolution/quality, the number of available shots also changes. Number of Available Shots The number of available shots is displayed on the LCD monitor. -
Page 23: Selecting The Flash Mode
Selecting the Flash Mode Use the flash mode that best suits your shot. Toggle the button to select the desired the flash mode setting. 3 modes: “ ”, “ ” and “ ” Effective flash range (in “ ”AUTO mode): About 1.2 m (3.9ft.) to 2.0 m (6.6ft.) If you use the flash in very dusty conditions or when it is snowing, white dots may appear in the image due to the flash reflecting off the dust particles or snowflakes. - Page 24 Red-eye Reduction Flash Mode Use this mode to ensure that the subject’s eyes appear natural when photographing people in low-light conditions. The flash fires automatically as required by the photography conditions. The flash fires a pre-flash just before the picture is taken and then fires again to take the actual picture.
-
Page 25: Digital Zoom
Digital Zoom Using digital zoom, images appear closer. Whereas digital zoom is a compelling feature, the more an image is enlarged (zoomed), the more pixilated (grainier) the image will appear. You may increase the magnification on your subject up to 4x by pressing button (“... -
Page 26: Macro (Close-Up) Photography
Macro (Close-up) Photography Selecting Macro mode allows you to take close-up shots. If the flash mode is set to “ ” Flash Auto mode or “ ” Red-eye Reduction Flash mode, it is automatically set to “ ” Flash-off mode. Effective Photography Range: About 0.6m (2.0ft.) to 1.2m (3.9ft.) 1. -
Page 27: Viewing Your Images (Playback)
Viewing Your Images (Playback) 1. Toggle the MODE button to 2. You can use to move forward and backward respectively through your images. When you set the MODE button to , the last image shot is displayed. -
Page 28: Multi-Frame Playback
Multi-frame Playback This function allows you to view nine thumbnail images, on the LCD monitor simultaneously so you may search for a particular image. 1. Toggle the OK button until the thumbnail screen appears on the LCD monitor. 2. Select a frame by using , , and to move the cursor (the red box) to the desired image. -
Page 29: Erasing Single Frame
Erasing Single Frame 1. Toggle the MODE button to 2. Press the MENU button to display the menu screen on the LCD monitor. 3. Select [ERASE] by using or . 4. To erase one image, select ERASE ONE by using and press the OK button. -
Page 30: Recording Movies (Video Clips)
Recording Movies (Video Clips) This mode allows you to record video clips without sound at a resolution of 320x240 pixels. Movie format: Motion JPEG 1. Toggle the MODE button to *The available shooting time is displayed on the LCD monitor. Select Macro mode for close-up shots ( p.26). - Page 31 3. During shooting, the recording indicator [ ] with the icon blinks on the LCD monitor with a counter showing the remaining time displayed in the top-right corner. Once the remaining time runs out (maximum recording time is 1 minute using the xD-Picture Card), movie recording automatically stops and the movie is recorded on the memory.
-
Page 32: Playing Back Movies (Video Clips)
Playing Back Movies (Video Clips) 1. Toggle the MODE button to 2. Use “ “ or “ ” to select the movie file. Indicated by the and shooting time icon. Movies cannot be played back using multi-frame playback. Use the OK button to revert to normal playback. 3. -
Page 33: Photography Menu Operation
PHOTOGRAPHY MENU OPERATION 1. Press the MENU button to display the menu screen. 2. Use to select the menu item and to change the setting. 3. Press the OK button to confirm the selection. Photography and Movie Menu Options This section introduces a range of camera functions that you can access by toggling the MODE button to Mode Sample LCD Monitor Display Accessible menu settings... -
Page 34: Ev & White Balance
EV & WHITE BALANCE EV (EXPOSURE COMPENSATION) Your camera adjusts the exposure of each scene automatically. However, if the subject is very dark, or very bright, you may override the camera’s automatic exposure determination to make the subject brighter or darker. This is called EV compensation.You can select the EV compensation you wish by using or . -
Page 35: Playback Menu Operation
PLAYBACK MENU OPERATION 1. Press the MENU button to display the menu screen. 2. Use to select the menu item and to change the setting. 3. Press the OK button to confirm the selection. Playback Menu Options This section introduces a range of camera functions that you can access by toggling the MODE button to Mode Sample LCD Monitor Display Accessible menu settings... -
Page 36: Copy To Card
COPY TO CARD This feature allows you to copy your images and video clips from the camera’s internal memory to a memory card. Of course, you can only do this if you have a memory card installed and some images on internal memory. Select the desired item by using and press the OK button. -
Page 37: Using Set-Up
USING SET-UP You can set the SET-UP in mode. 1. Press the MENU button to display the menu screen. 2. Press to select [SET-UP]. 3. Press the OK button. The SET-UP menu appears. 4. Press to select a menu option and then press to change the setting. - Page 38 Settings Display Factory Default Explanation AUTO 1 MIN, 3 MIN, 3 MIN If no operation is performed for a specific POWER OFF 5 MIN, 10 MIN, period of time, the power to the camera is CANCEL automatically switched off. This feature is useful to reduce battery consumption.
-
Page 39: Transferring Recorded Images And Video Clips To Your Computer
TRANSFERRING RECORDED IMAGES AND VIDEO CLIPS TO YOUR COMPUTER To transfer images/video clips from the camera to your computer, follow these steps: Step 1: Installing the USB driver (Windows 98 and Mac OS 8.6 users only) Step 2: Connecting the camera to your computer Step 3: Downloading images and video files System Requirements (Windows) System Requirements (Macintosh) - Page 40 Step 1: Installing the USB Driver Windows 98 computers The USB driver on the enclosed CD-ROM is exclusively for Windows 98 computers. Installing the USB driver on computers running Windows 2000/ME/XP is not necessary. 1. Insert the enclosed CD-ROM into your CD-ROM drive. The welcome screen appears.
- Page 41 Step 2: Connecting the Camera to Your Computer The images and video clips on an xD-Picture Card will be downloaded into your computer hard disk when the xD-Picture Card is inserted; otherwise, the images and video clips on the internal memory will be downloaded. 1.
- Page 42 Step 3: Downloading Images and Video Files The images and video clips on an xD-Picture Card will be downloaded into your computer hard disk when the xD-Picture Card is inserted; otherwise, the images and video clips on the internal memory will be downloaded. 1.
-
Page 43: Using The Camera As A Pc Camera
USING THE CAMERA AS A PC CAMERA Your camera can act as a PC camera, which allows you to videoconference with business associates, or have a real-time conversation with friends or family. To use the camera as a PC camera, follow these steps: Step 1: Installing the PC camera driver (same as USB driver) Step 2: Connecting the camera to your computer Step 3: Running your application software (i.e. - Page 44 Step 2: Connecting the Camera to Your Computer 1. Connect one end of the USB cable to an available USB port on your computer. 2. Connect the other end of the USB cable to the USB connector on the camera. 3.
- Page 45 Step 3: Running Your Application Software (i.e. Windows NetMeeting) To use Windows NetMeeting for videoconferencing: 1. Go to Start => Programs => Accessories => Communications => NetMeeting to launch the NetMeeting program. 2. Click the Start video button to view live video. 3.
-
Page 46: Installing Photosuite
INSTALLING PHOTOSUITE PC users will find that PhotoSuite is a very user-friendly image-editing program. With PhotoSuite, you can retouch, compose, and organize your images. It includes a variety of templates, such as photo frames, birthday cards, calendars and more. Get your images ready and explore this amazing program. To install PhotoSuite: 1. -
Page 47: Installing Photovista
INSTALLING PHOTOVISTA PC users will find that PhotoVista is an easy-to-use program that lets you create spectacular 360 panoramic images in a snap. When you view these panoramas, you get the experience of being totally immersed in a realistic environment. PhotoVista’s powerful engine quickly and automatically stitches images together, and its intuitive interface will let even a novice get great results in minutes. -
Page 48: Installing Acrobat Reader
INSTALLING ACROBAT READER The CD-ROM includes a PDF (portable document format) copy of the user’s manual. To view a PDF you must have Acrobat Reader installed in your computer. Acrobat Reader is included on the camera CD-ROM. Using Acrobat Reader, you can read the user’s manual and print sections of interest. 1. -
Page 49: User's Manual On Cd-Rom
USER’S MANUAL ON CD-ROM A copy of the user’s manual on is provided on the CD-ROM in PDF format. It is a backup copy of the printed manual. If you misplace the printed guide, you may print another copy from the CD-ROM. The only requirement for viewing the User’s Manual on the CD-ROM is that you have Acrobat Reader installed on your computer. -
Page 50: Uninstalling The Software
6. Open the [Local Disk (C:)]. 7. Double click [Program Files] folder. 8. Double click [FUJIFILM CAMERA DIGITAL Q1] folder and locate the [UNWISE.EXE] file. 9. Double click [UNWISE.EXE] file and follow the on-screen instructions to complete the uninstallation. For Mac users: 1. -
Page 51: System Expansion Options
SYSTEM EXPANSION OPTIONS By using this camera together with other optional FUJIFILM products, your system can be expanded to fill a wide range of uses. -
Page 52: Accessories Guide
The optional accessories (sold separately) can make taking pictures with this camera even easier. For information on how to attach and use the accessories, refer to the instructions provided with the accessory used. Visit the FUJIFILM web site for the latest information on camera accessories. http://home.fujifilm.com/products/digital/index.html xD-Picture Card These are separately available xD-Picture Card cards. -
Page 53: Notes On Using Your Camera Correctly
NOTES ON USING YOUR CAMERA CORRECTLY Be sure to read this information in conjunction with “Safety Notes” ( p.65), to ensure that you use your camera correctly. Safety Notes The enclosed disk is a computer CD-ROM. Never attempt to play this disk on an ordinary music CD player as it may produce extremely high noise levels that could damage your hearing or your audio equipment. - Page 54 If any soil remains, apply a small amount of lens cleaning liquid to a piece of FUJIFILM lens cleaning paper and wipe gently. Do not scratch hard objects against the lens or LCD monitor screen as these surfaces are easily damaged.
-
Page 55: Notes On The Power Supply
Notes on the Power Supply Applicable Batteries AA-size alkaline, Ni-MH (nickel-metal hydride) can be used with this camera. Do not use AA-size manganese, lithium or nickel-cadmium (Ni-Cd) batteries in your camera because the heat generated by the batteries could damage the camera or cause malfunctions. The operating lives of alkaline batteries vary between brands and the life of batteries you purchase may be shorter than the alkaline batteries provided with the camera. - Page 56 If any liquid at all leaks from the batteries, wipe the battery compartment thoroughly and then load new batteries. If any battery fluid comes into contact with your hands or clothing, flush the area thoroughly with water. Note that battery fluid can cause loss of eyesight if it gets into your eyes. If this occurs, do not rub your eyes.
- Page 57 The use of xD-Picture Cards is recommended with this camera. The camera quality cannot be guaranteed when cards other than those manufactured by FUJIFILM are used. The xD-Picture Card may feel warm when it is removed from the camera after extended periods of picture taking or image viewing.
-
Page 58: Specifications
When you format an xD-Picture Card in the camera and then shoot and record images, a directory (folder) is automatically created. Image data is then recorded in this directory. Do not change or delete the directory (folder) names or file names on the xD-Picture Card from your PC as this will make it impossible to use the xD-Picture Card in your camera. -
Page 59: Warning Displays
Replace the xD-Picture Card. The xD-Picture Card format is Format the xD-Picture Card using incorrect. the camera. Camera fault. Contact your FUJIFILM dealer. NO CARD There is no xD-Picture Card Insert an xD-Picture Card. inserted during the COPY to CARD or DPOF function. -
Page 60: Troubleshooting
TROUBLESHOOTING If you think the camera is faulty, check the following once more. Troubleshooting Possible causes Solutions No power. The battery is dead. Replace batteries. Power cuts out during The battery is dead. Purchase new batteries. operation. Battery runs out quickly. You are using the camera in Put the battery in your pocket extremely cold conditions. - Page 61 Troubleshooting Possible causes Solutions The image is blurred. The lens is dirty. Clean the lens. You photographed a distant Cancel Macro mode. subject with the macro selector switch set to “ ”. Can’t format the xD- The xD-Picture Card contact Wipe the xD-Picture Card contact Picture Card.
-
Page 62: Explanation Of Terms
EXPLANATION OF TERMS DPOF: Digital Print Order Format DPOF is a format used for recording information on a storage media (image memory card, etc.) that allows you to specify which of the frames shot using a digital camera are printed and how many prints are made of each image. -
Page 63: Specifications
SPECIFICATIONS System Model: FUJIFILM CAMERA DIGITAL Q1 Number of effective pixels: 1.92 million pixels CMOS sensor 1/2-inch square pixel CMOS Number of total pixels: 2.0 million pixels Number of recorded Pixels 1600 x 1200 pixels/1280 x 960 pixels/640 x 480 pixels File format Still image: JPEG (Exif Ver.2.1), DPOF-compatible... - Page 64 Input/Output Terminals (Special USB) socket USB (1) for image data output with a personal computer (ver.1.1) Power Supply and Others Power supply Use one of the following: 2AA-size alkaline batteries 2AA-size Ni-MH (nickel metal hydride) batteries (sold separately) Conditions for use Temperature: 0 C to +40 C (+ 32...
-
Page 65: Safety Notes
If water or foreign objects get inside the camera, switch the camera off, remove the batteries. Continued use of the camera can cause a fire or electric shock. Contact your FUJIFILM dealer. Do not place the camera on an unstable surface. - Page 66 Never attempt to take pictures while in motion. Do not use the camera while you are walking or operating a moving car or other vehicle.This can result in you falling down or being involved in a traffic accident. Do not heat, modify or attempt to disassemble the batteries. Do not drop or subject the batteries to impacts.
- Page 67 If an xD-Picture Card is allowed to fly out, it could hit someone and cause injury. Request regular internal testing and cleaning for your camera. Build-up of dust in your camera can cause a fire or electric shock. Contact your FUJIFILM dealer to request internal cleaning every 2 years.