Table of Contents
Advertisement
Advertisement
Table of Contents

Summary of Contents for Cinego D-1000
- Page 1 User’s Guide D-1000...
-
Page 2: Table Of Contents
Contents Contents aspect ratio ordering information Please read and save these instructions! using the projector setup menus ordering accessories display ordering replacement lamps features operating your projector image product specifi cations powering your projector language about DLP™ technology projector playing a DVD or Kodak Picture CD audio playable formats sub woofer... -
Page 3: Features
Digital Light Processing™ technology. reliability • CD • CD-R/RW • DVD-R • VCD Thank you for purchasing a Cinego The thousands of mirrors making up the projector. Cinego uses cutting-edge • SVCD • DVD-RW • DVD+RW • DVD+R* Digital Micromirror Device at the heart of DLP™... -
Page 4: What's Included
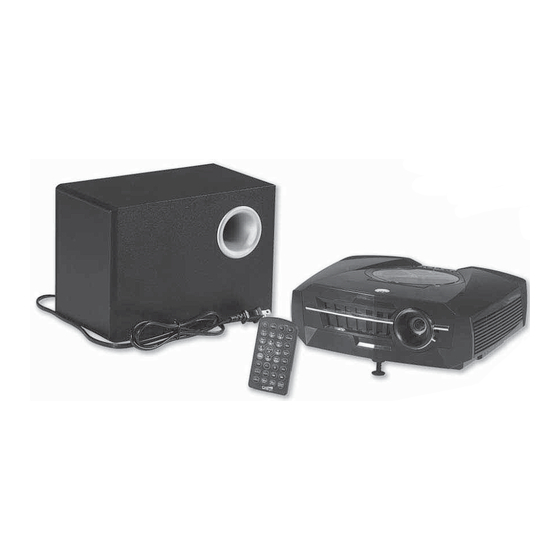
The Basics what’s included Projector Sub Woofer S-Video Remote Adapter Composite Component Video Adapter Video Adapter Sub Woofer Quick Start Cable Projector User’s Guide Power Cord Audio Adapter... -
Page 5: Remote
The Basics The Basics remote Button Name Function Button Name Function Button Name Function Press once to hold at present Power Turns the projector on and off. SOURCE Toggles source. Stop playing point. Press twice to stop playing. Skip MUTE Left/7 Turns off the audio. -
Page 6: Right/Front View
The Basics The Basics right/front view right view Skip Skip forward back (source) Play Stop Push to Open Power Zoom Ring AUDIO VIDEO Focus Ring Push to Speakers AUDIO adjust height Lens adjuster... -
Page 7: Bottom View
The Basics The Basics bottom view left view Height adjuster Lamp module compartment Rear leveling foot INPUT DOLBY 5.1... -
Page 8: Sub Woofer (Front)
The Basics The Basics sub woofer (front) sub woofer (back) Speaker output VOLUME Line In AC power BASS cord with polarized plug Power Switch... -
Page 9: Important Safety Instructions
The Basics The Basics important safety instructions Usage Notice to page 51 for instructions on how to change the lamp. Please read and follow these safety 7. Use only the power cord provided and instructions carefully. Inappropriate operation 1. Read these instructions. 12. -
Page 10: Setting Up Your Projector
The Basics The Basics setting up your projector connecting your projector connecting power fi nd the ideal location for your new projector Connect your projector to a standard AC wall outlet via the power cable. Before you use your projector, be sure you carefully consider where you are going to place it. -
Page 11: Operating Your Projector
The Basics The Basics operating your projector playing a DVD or Kodak Picture CD with the remote 1. Turn on the projector. Before operating your projector, remove the lens cap. 2. Open the DVD compartment and place your DVD inside. Close the DVD compartment. If a DVD is inside the compartment when you press power, the projector will 3. -
Page 12: Connecting Your Satellite Or Hdtv System
You can connect other devices, such as tuner, HDTV source, satellite system, gaming console, peripheral device’s audio cables. PC, or digital video camera to your Cinego. To prevent hum and other noise, use high-quality cables. Before you make any connections, ensure that the AC power cord is not plugged in. -
Page 13: Connecting A Digital Video Camera
Beyond the Basics Beyond the Basics connecting a digital video camera Composite Adapter: connect Connect your digital video camera to your projector via the composite cable adapter, as shown. directly to your device’s composite Your digital video camera must have composite outputs in order to connect to the cable. -
Page 14: Connecting External Computer Speakers
Beyond the Basics Beyond the Basics connecting external computer speakers advanced setup 1. Connect the projector to the subwoofer via the audio cable. 2. Connect your speakers to the subwoofer via audio cables, as shown below. fi nding the ideal height for your projector The size and location of your screen and projector will determine the proper height of the projector. -
Page 15: Determining The Ideal Distance From The Screen
Beyond the Basics Beyond the Basics determining the ideal distance from the screen adjusting your projector The size and location of your screen and projector will determine the proper height of the On Screen Display (OSD) Menus vary depending on what type of source you are using. projector. -
Page 16: Using The Projector Setup Menus
Beyond the Basics Beyond the Basics using the projector setup menus image Video Menu (IMAGE) Video menus will appear when you are using any source, except for PC. VGA menus will appear when your projector is connected to a PC. Press and then to access the... -
Page 17: Language
Beyond the Basics Beyond the Basics language audio Press and then to access the Press and then to access the LANGUAGE menu. AUDIO menu. to select your favorite to select volume, menu language. bass, treble, or to mute the projector. Press once to access another menu to make adjustments. -
Page 18: Management
Beyond the Basics Beyond the Basics management about The ABOUT menu contains information regarding your Cinego. Access this screen to see how many hours you have operated your projector and when the lamp needs to be changed. Press and then to access the MANAGEMENT menu. -
Page 19: Customizing Your System
Beyond the Basics Beyond the Basics customizing your system • S : Turn the screen saver ON CREEN AVER or OFF. In screen saver mode, the screen saver will turn on when the projector has using the system setup menus been set on pause for about 3 minutes. - Page 20 Beyond the Basics Beyond the Basics • R : Select the movie rating you would • D : Select to return to ATING EFAULT RESTORE like your projector to allow. Choose from default settings. the following: Security Rating allowed Level Kid Safe PG13 PG-R...
-
Page 21: Using The Language Setup Menus
Beyond the Basics Beyond the Basics using the language setup menus • OSD L : Select the language ANGUAGE you prefer for your on screen display menus. Press to access the LANGUAGE SETUP menu. to make your selection. See below for a description of each selection. -
Page 22: Using The Digital Setup Menus
Beyond the Basics Beyond the Basics • S : Select the language you using the digital setup menus UBTITLE prefer for subtitles. Press to access the DIGITAL SETUP menu. to make your selection. See below for a description of each selection. -
Page 23: Changing The Lamp Module
Beyond the Basics Beyond the Basics changing the lamp module • S : Determine how you TEREO would like the sound to be distributed. means different sounds will TEREO When the lamp has reached maximum lamp life (about 2000 hours), the projector will display come out of both speakers. -
Page 24: Changing The Remote Battery
Beyond the Basics Beyond the Basics changing the remote battery Pull out the lamp module. Replace it with the new one. Make sure the new module Your projector requires one CR2025 button-cell battery (supplied). snaps in place and fully seats inside compartment. -
Page 25: Caring For Your Projector
This device complies with Part 15 of the FCC Rules. Operation is subject to or tampering with your projector’s internal components can cause a malfunction and might Model D-1000 the following two conditions: invalidate its warranty and void your FCC authorization to operate it. -
Page 26: Warranty
Beyond the Basics Beyond the Basics warranty frequently asked questions Your projector is warranted by Innovation One against manufacturing defects in material and workmanship under normal use for two (2) years from the date of purchase from authorized Innovation One dealers. The lamp inside your I have just connected my TV or VCR. - Page 27 Beyond the Basics Beyond the Basics Why is the picture fuzzy? Why does my projector keep making noise after I turn it off? First, make sure the projector is at least 39 inches away from the screen. Then, try focusing it. The projector must complete its power down sequence.
- Page 28 Beyond the Basics Beyond the Basics ordering information product specifi cations projector sub woofer ordering accessories Picture format ..........True 16:9 Dimensions ....... 6.25“W X 10.625“L X 7.5”H Call 1-866-249-4042 to order a wide variety of accessories. Some examples are listed below. Color Reproduction ......
- Page 29 Please read this user’s guide before installing, setting up, or using your new product. Note: Actual product may vary from the images found in this document. Printed in Taiwan ©2004. Innovation One. D-1000 All rights reserved. Cinego is a trademark 12A04 licensed by Innovation One.
Need help?
Do you have a question about the D-1000 and is the answer not in the manual?
Questions and answers