Table of Contents
Advertisement
Advertisement
Table of Contents

Summary of Contents for Stone Computers Notebook
- Page 1 Notebook User Guide...
- Page 2 All Rights Reserved - Printed in Taiwan Notebook Computer User Guide Original Issue: 2007/11 This manual guides you in setting up and using your new notebook computer. Information in this manual has been carefully checked for accuracy and is subject to change without notice.
-
Page 3: European Notice
User Guide European Notice For the following equipment: Notebook PC Is herewith confirmed to comply with the requirements set out in the Council Directive on the Approximation of the Laws of the Member States relating to Electromagnetic Compatibility (89/336/EEC), Low voltage... - Page 4 otebook User Guide - European standards dictate maximum radiated transmit power of 100mW EIRP and frequency range 2.400-2.4835GHz; - In France, the equipment must be restricted to the 2.4465-2.4835GHz frequency range and must be restricted to indoor use." For DVD Players with both 525p and 625p progressive scan outputs: ‘CONSUMERS SHOULD NOTE THAT NOT ALL HIGH DEFINITION TELEVISION SETS ARE FULLY COMPATIBLE WITH THIS...
-
Page 5: About Your Notebook Computer
User Guide About Your Notebook Computer hank you for purchasing your new Notebook. This notebook incorporates the latest technologies available in the notebook industry. Your new notebook computer not only operates today’s multimedia applications but also is also ready for tomorrow’s exciting new software. -
Page 6: About Your User Guide
Notebook User Guide. This manual covers everything you need to know about how to use your new Notebook computer. This manual also assumes that you know the basic concepts of Microsoft® Windows® and how to use a P.C. -
Page 7: Table Of Contents
User Guide Table of Contents ABOUT YOUR NOTEBOOK COMPUTER.......... 5 ABOUT YOUR USER GUIDE..............6 INTRODUCTION................11 ..............12 EATURE IGHLIGHT ............14 NPACKING THE OMPUTER ............. 15 NSIDE OF THE OTEBOOK Notebook Status Icons ..............17 The Function of Easy Buttons............19 .......... - Page 8 UDIO YSTEM LAN P ..............62 SING THE LAN............63 SING THE IRELESS .............. 63 SING THE ODEM CARING FOR YOUR NOTEBOOK ..........67 ..........68 MPORTANT AFETY NSTRUCTIONS ............68 LEANING OMPUTER LCD Q ..........70 AINTAINING THE UALITY ..........
- Page 9 otebook User Guide Processor Unit................74 System Memory................74 LCD Display ................. 74 VGA System .................. 74 Storage..................75 Audio System ................75 ExpressCard ................. 75 Touchpad..................75 Keyboard ..................76 Flash BIOS ................... 76 I/O Ports ..................76 Wireless devices................76 AC/DC Power Supply Adapter .............
-
Page 11: Introduction
Your Notebook PC runs a wide range of business, professional, entertainment and personal applications. Your Notebook PC is an ideal choice for use in the office, the schoolroom, at home and on the road. -
Page 12: Feature Highlight
User Guide Feature Highlight Before we go to identify each part of your Notebook PC, we will first introduce you to other notable features of your computer. Processing Unit • Your notebook runs on Intel® Core 2 Duo processor that is integrated with 4MB L2 Cache. - Page 13 Power Options properties by pointing your mouse to Control Panel of Windows. • Closing the Notebook computer (lowering the cover) allows you to suspend the system operation instantly and resume at the press of the power button.
-
Page 14: Unpacking The Computer
Upon receiving your computer, open the carton and carefully remove the contents. In addition to this User Guide, the shipping carton should also contain the following items: The Notebook Computer An AC Adapter and AC Power Cord Li-Ion Battery Pack Driver CD containing Electronic-manual and Application CD’s... -
Page 15: The Inside Of The Notebook
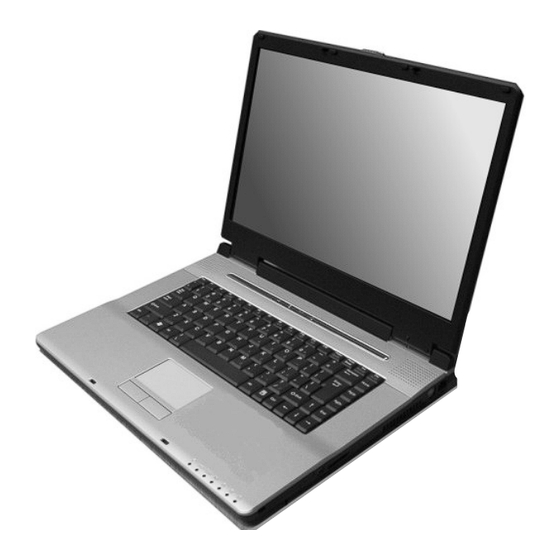
Introduction The Inside of the Notebook The notebook computer is compact with features on every side. First, look at the inside of the system. The following sections describe inside features. 1. Colour Widescreen LCD Display 2.7. Built-in Stereo Speaker 3. Keyboard 4. - Page 16 otebook User Guide features of the Colour LCD Display are summarized as follows: TFT Colour Widescreen 15.4” 1280x800 (Wide XGA) resolution ⇓ panels. Capable of displaying 16M Colours (32-bit true Colour) on either size ⇓ panels. LCD display control hot-keys allows you to adjust the brightness of ⇓...
-
Page 17: Notebook Status Icons
OTEBOOK TATUS CONS The Status LED Panel keeps you informed of the notebook’s current power and operating status. Each LED is marked with an icon to designate the system status. 1. Power Indicator 2. Battery Charging LED 3. - Page 18 otebook User Guide • Power Indicator Lets you know that power to the system is turned on. This LED is positioned so that you can see the power state whether the LCD panel is opened or closed. Lights green when the system is powered on. ⇓...
-
Page 19: The Function Of Easy Buttons
Introduction • Scroll Lock When LED in blue indicates that the Scroll Lock key on the keyboard is activated. The Scroll Lock key has different functions depending on the software you are using. • Num Lock When LED in blue light indicates that the Num Lock key on the keyboard is activated. - Page 20 otebook User Guide • Internet Button This technology is designed specifically for providing a very convenient way in connecting Internet only by pressing Internet button as shown in the graphics. Just Press this button to open the Internet Explorer directly. •...
-
Page 21: The Front Side Of The Notebook
The cover (LCD panel) is locked when it is closed. Slide the button right aside to release the latch for opening the cover of the computer. The Rear Side of the Notebook The system ports at the back of your notebook computer can connect various devices. Each port is described as followings. - Page 22 3.Kensington Lock Hole • USB 2.0 Ports The Universal Serial Bus (USB) port allows you to connect USB 2.0- compliant devices to your notebook computer. • VGA Port Lets you attach an external monitor or projector for wider display. You can run the LCD display and the external monitor simultaneously or switch it to monitor only using the display hot-key.
-
Page 23: The Left Side Of The Notebook
Introduction The Left Side of the Notebook The left side of your notebook computer provides the features shown in the following figure. 1. Modem Port 2. Optical Disk Drive 3. USB 2.0 Ports 4. Headphone Jack 5. Microphone Jack Modem Port A 56K internal fax/data modem is installed. -
Page 24: N Otebook
• USB 2.0 Ports The Universal Serial Bus (USB) port allows you to connect USB 2.0- compliant devices to your notebook computer. • Headphone Jack (with SPDIF out) Lets you plug in a stereo headphone, powered speakers, or earphone set with 3.5mm jack plug for personal listening. -
Page 25: The Right Side Of The Notebook
Introduction The Right Side of the Notebook The right side of the notebook computer offers the features shown in the following figure. 1. ExpressCard Slot 4 in 1 card slot 3. Air-Outlet Vent 4. DC Power Port 5. LAN Port Right Side Features •... -
Page 26: The Underside Of The Notebook
An internal 10Base-T/100Base-TX / 1000Base – TX Ethernet LAN allows connection to a LAN (Local Area Network) (Cable not supplied). The Underside of the Notebook The bottom of the notebook computer offers the following features. 1. Hard Disk Compartment 2. Battery Lock Latch 3. - Page 27 Introduction • Hard Disk Compartment Storage location for the built in Hard Disk Drive. • Battery Lock Latch Push the latch to the lock side to lock and secure the battery, or push the latch to the unlock side for unpacking the battery pack. •...
-
Page 28: Notebook Accessories
The AC adapter has an auto- switching design that can connect to any 100VAC ~ 240VAC power outlets. You just change the power cord if you are going to use your notebook in other countries with different connector outlets. (UK power cord supplied) When you connect the AC adapter, it charges the battery whether or not the notebook computer is powered on. -
Page 29: Notebook Options
Introduction 1.10 Notebook Options DVD/CD-RW Combo Device This device pack can write data to CD-R or CD-RW CD for you to backup the data and also can read DVD/CD titles. DVD dual (Dual Rewritable DVD combo) Device This device combines the following two standard formats. Using the suitable media. -
Page 31: Getting Started
This chapter describes the installation steps you should follow to get the notebook up and running as quickly as possible. Contact your supplier if they have pre-installed all the needed drivers to fully operate your computer or if there is an update on the driver installation of the notebook. -
Page 32: Using The Battery Pack
User Guide Using the Battery Pack The notebook is designed to operate with one of the following power sources: • With AC power using the AC adapter connected to an electrical outlet. • With a Lithium-Ion (Li-Ion) battery pack. -
Page 33: Installing The Battery Pack
Getting Started Installing the Battery Pack This notebook provides the most convenient way to install the battery pack into your computer. Ensure the battery is in the correct orientation before inserting. Removing the Battery Pack To remove the battery pack, slide the lock latch to the end of left side to... -
Page 34: Connecting The Ac Power Source
ExpressCard slots, the hard disk drives, and optical disk drive, your notebook might run out of charge much sooner than you expect. You should always respond to the battery low indication by connecting to AC power or turning off your notebook, or suspending your notebook to disk. - Page 35 Whenever possible, it is advisable to always have the AC adapter connected to the notebook and the battery pack installed. This ensures continuous power supply and prevents any data loss incurring from sudden power failure.
-
Page 36: Starting Your Computer
After the test has completed, your computer will start to search and boot up the operating system from your hard drive. The notebook computer normally comes with a Genuine Microsoft® Windows® operating system pre-installed... -
Page 37: Adjusting The Display Controls
The LCD brightness adjustment is controlled by <Fn> +<F8> and <Fn> + <F9> keys respectively. You need to press these hot-key controls after powering on your notebook to suit your viewing pleasure. The Brightness hot-key control adjusts the brightness on the LCD. The brightness hot-key control will not set the LCD completely dark or bright;... - Page 38 otebook User Guide This page is intended to be blank.
-
Page 39: Using Your Notebook
Using Your Notebook his chapter describes how to operate the standard Built-in features of the notebook that you normally would use in your day-to-day computer work. If you are new to computers and to your operating system, you also need to read the manual for the operating system on how to work with your computer. -
Page 40: Understanding The Keyboard Functions
Understanding the Keyboard Functions Your notebook computer is equipped with an 87 keys keyboard that provides all the functionality of a full-sized 101 or 102-key keyboard. Aside from the standard typewriter-layout keyboard of your computer, there are a number of extra features and function controls on the built-in keyboard including Windows system hot keys. - Page 41 Using Your Notebook Keyboard Key features and operations are described below: • Function Keys Function keys are application-driven, like F1 through F12 can be found on the keyboard. These keys work together with the Fn key to activate special functions. Some keys (printed in blue on keypad) are preprogrammed with dual functions.
-
Page 42: Basic Keyboard Functions
otebook User Guide ASIC EYBOARD UNCTIONS Keypad Function Description <Enter> key. Execute a command. Within many text editing application programs, the <Enter> key inserts a hard carriage return, just like what ordinary typewriter does. <Esc> key. Press this key to cancel or escape from a command or function. -
Page 43: Cursor Control Keys
Using Your Notebook Keypad Function Description <Ctrl> key. Known as the Control key. Used in most application program in combination with other keys to execute a certain command. <Alt> key. Known as the Alternate key. Used in most application program in combination with other keys to execute a certain command. -
Page 44: Screen Control Keys
Windows system. PECIAL UNCTION The notebook has special system function keys that activate key serving dual functions. When pressed in conjunction with the <Fn> key, these keys set specific system parameters and are sometimes referred to as "hot keys". -
Page 45: Using The Touchpad Pointing Device
Using Your Notebook Keypad Function Description Switches display between LCD, CRT, or LCD and CRT simultaneously. To shut down or resume the built-in system speaker volume. Increases the brightness of LCD display incrementally. Decreases the brightness of LCD display incrementally. - Page 46 otebook User Guide functions. To access these options, locate the Control Panel and double click on the Mouse icon. The options let you control the size and Colour of the cursor, cursor speed, the accepted double-click speed, and selection button orientation.
-
Page 47: Configuring Your Screen Display
Configuring Your Screen Display The VGA display function of your notebook is based on a high performance PCIe local bus controller and is fully VGA compatible. This controller offers a large set of extended functions and higher resolutions especially useful when... -
Page 48: Possible Display Configurations
User Guide This notebook computer model provides Wide screen 15.4” 1280x800 (Wide XGA) resolution panels. You would also probably want to set the amount of Colour output to display sharper images and photos. OSSIBLE ISPLAY ONFIGURATIONS The table below shows you the possible display resolution you can set when... -
Page 49: Knowing The Power Saving Features
RAM (Random Access Memory). This allows your notebook to wake up quickly, but a low level of power is required to maintain this suspended state. How quickly your system powers down into Standby mode is up to you by setting proper times in Power Options of Control Panel in Microsoft®... -
Page 50: Working With The Built-In Hdd
Enable Hibernate is selected, the Hibernation mode is enabled. Shutdown All power has been turned off from the notebook. This means that no power including external AC power source and battery power source will be consume by the notebook. -
Page 51: How To Access The Optical Drive
Using Your Notebook If you wish to replace your hard disk, contact your local dealer for more information about this dealer-installable device. How to Access the Optical Drive Your system ships with an optical disk drive installed on the left side of your computer. -
Page 52: Expresscard
otebook User Guide To remove the disc, press on the center spindle and pull up the disc from the side until the disc snaps out of the spindle lock. To close the combo drive, simply push the CD tray inside. The combo drive LED will activate when the disc is detected. - Page 53 Using Your Notebook Dimensions of ExpressCard Current CardBus PC cards are 54 millimeters wide. ExpressCard can be divided into two categories, based on width. Most designs will use the ExpressCard 34 design, which sets the width at 34 millimeters. For some applications, the wider ExpressCard 54 standard will be used to produce cards that can handle the higher thermal requirements of those applications.
-
Page 54: Inserting And Removing A Expresscard
otebook User Guide a bridge chip between the chipset and the socket. PCI Express and USB 2.0 are fully hot-pluggable. To support the broadest range of applications there are two sizes of module. Both are smaller that today's CardBus card. The smallest card, the ExpressCard/34 module, is almost half the size of a CardBus card. -
Page 55: Removing Expresscard
Using Your Notebook Locate the ExpressCard slot cover on the right side of the computer. Insert the side of ExpressCard with the 26-pin socket into the ExpressCard slot. The face label of the card should also be facing up. When the full length of the card is almost inside the slot, push firmly but slowly, to ensure full connection with the computer. -
Page 56: Using Flash Memory Cards
otebook User Guide Then you can remove the inserted ExpressCard, push the ExpressCard to the bottom to release the ExpressCard. When the ExpressCard has moved out a space out of the slot, hold the edges of the card and slowly slide it out. The power consumption of ExpressCard/54 is about 2.1W, while the consumption of ExpressCard/34 is about 1.3W. - Page 57 Using Your Notebook The 4 in 1 card slot is used by the following cards as SD, MS (Memory Stick ), MMC, and MS-Pro. For reference, only one card can be inserted into the 4 in 1 card or CF slot at...
- Page 58 otebook User Guide Removing Flash Memory Card It is similar to ExpressCard for removing a flash memory card from the slot. You should first disable the card setting in the system as described in the former section. To remove the flash memory card, you should only pull out the card by finger, there is no release button for flash memory slot.
-
Page 59: Connecting To Peripherals
Connecting to Peripherals Connecting to Peripherals his chapter describes how you attach peripheral devices to your notebook. You can attach a printer or mouse; connect an external monitor and keyboard, or any other peripheral device. You will learn how to use these peripheral devices with the... -
Page 60: Using The Usb Port
USB (Universal Serial Bus) is a hardware interface that enables you to connect multiple devices (such as printers, mice, keyboards, storage devices, joysticks, digital cameras, and video conference cameras, etc.) to your notebook computer, and up to 127 devices can be attached. Besides, USB’s hot swap capability allows everything to be plugged in and unplugged without turning the system off. - Page 61 Turn off your computer and make sure the monitor power switch is turned off. The notebook computer must be powered off or suspended while the monitor is being connected. Although you can connect the external Monitor without power off the computer and the external monitor, however, it is harmful to both devices and it shortens the life of these devices.
-
Page 62: Using The External Audio System
Using the LAN Port This notebook comes with an internal 10Base-T/100Base-TX/1000Base-TX LAN module that connects your computer to other computers/networks through a local area network (LAN) and supports data transfer rates at 10Mbps and can be up to 100Mbps. -
Page 63: Using The Wireless Lan
Connecting to Peripherals To connect the twisted-pair cable to your LAN port: Locate a suitable length Cat5e patch cable (not supplied). Each end of the cable has an RJ-45 connector. Connect one end of the cable into the network wall outlet or directly into a piece of active equipment (hub, switch, router etc). - Page 64 Locate the analog phone cable in the accessories box in notebook shipping carton. Each end of the cable has a RJ-11 connector. Connect the RJ11 end of the cable into the notebook modem connector. Connect the UK telephone plug end of the cable into a UK phone socket.
- Page 65 Connecting to Peripherals The analog phone cable is an industry standard cable. Longer cables are available at your local electronics store.
-
Page 67: Caring For Your Notebook
Caring for Your Notebook Caring for Your Notebook our Notebook PC requires little maintenance, however the next section will give advice on how to safely operate, clean and care for your Notebook PC and maintain allowing the longest life from your notebook PC. -
Page 68: Important Safety Instructions
Be careful of using power supply. The notebook computer has specific power requirements. • Use only a power adapter approved for use with this notebook computer. • The power adapter may have a 3-pin UK plug. This is an important safety feature. - Page 69 • All cautions and warnings on the notebook computer should be noted. • If the notebook computer is not in use for a long time, disconnect it from mains to avoid possible damage by transient over-voltage. • Never pour any liquid into openings as this may cause fire or electrical shock.
-
Page 70: Maintaining The Lcd Quality
Never use alcohol, petroleum-based solvents, or harsh detergents to clean the notebook. Also never spray any liquids directly on the computer case, keyboard, or screen. If the liquid-crystal display (LCD) screen has become smeared or dusty, clean the screen by first applying a mild glass cleaner to a soft, clean, lint-free cloth, and gently wipe the glass. -
Page 71: B Attery C Are G Uidelines
Caring for Your Notebook • Install a virus-detecting program to monitor virus that could tamper your files. • Use SCANDISK once in a while to correct any errors found in the directory and File Allocation Table. This will also free up space from any unused sectors. -
Page 72: Battery
otebook User Guide • Do not leave battery in storage for more than 2 months without recharging it to prevent over discharge. Over discharge will hurt the battery • Dispose dead battery properly to protect the environment. The batteries contain hazardous chemicals and should not be thrown out with household or office rubbish. -
Page 73: Appendix A System Specification
Designed with an advanced modular architecture, your Notebook PC also allows you for several levels of customization and expansion that are previously available only on desktop PCs. -
Page 74: Processor Unit
otebook User Guide ROCESSOR • Intel® Core 2 Duo processor T7000 sequence with Enhanced Intel® Speedstep® Technology • 4MB integrated L2 cache YSTEM EMORY • Two 200-pin memory slots • User-upgradeable to maximum 4GB using 200-pin SODIMM 512MB, 1024MB or 2048MB modules •... -
Page 75: Storage
System Specification TORAGE • 2.5” Format 9.5mm High SATA HDD Module; Bus Mastering, Ultra DMA ATA-150 Support for LBA Scheme • Support system boot from external USB device • DVD/CD-RW Combo or DVD Super-Multi optical disk drive • 4-in-1 (SD, MS, MMC, and MS_Pro) card reader UDIO YSTEM •... -
Page 76: Keyboard
otebook User Guide EYBOARD • Full-sized 87-keys keyboard with Windows systems hot-keys, inverted T- cursor keys, 6 hot keys, 12 function keys, and embedded numeric keypad • Provides international language keyboard BIOS LASH 512K Flash ROM BIOS for easy BIOS upgrade I/O P ORTS •... -
Page 77: Weight And Dimension
System Specification EIGHT AND IMENSION • 357(W) x 271(D) x 26 ~ 39(H) mm • Approximately 2.8 kg...
Need help?
Do you have a question about the Notebook and is the answer not in the manual?
Questions and answers