Cobra SLR 600 Operating Instructions
Cobra supercharged long-range radar/laser detectors
Hide thumbs
Also See for SLR 600:
- Operating instructions (3 pages) ,
- Operating instructions manual (14 pages)
Table of Contents
Advertisement
Quick Links
Thank you for purchasing Cobra
SLR 600 Radar/Laser Detector. Please familiarize yourself with the
capabilities your new detector can provide by reading this manual.
Also, please be careful when using your new detector while driving.
Powering Unit On/Off & Mounting Unit
Plug in the detector using the included cigarette lighter power cord.
Press the Power button momentarily to turn the unit On (or Off).
Note: To change display orientation, press and hold the Power
button for 2 seconds.
a. Windshield Mount
SLR 600
SLR 500
Models SLR 500/600
Power Jack
Operating Instructions
Power Button
Supercharged Long-Range
Lift lever on suction cup base before attaching to the windshield.
Once attached, push against windshield and lock the lever down.
Radar/Laser Detectors
Use the ball-joint adjustment and make sure the detector unit is
NOTE: These devices complies with part 15 of FCC rules: Operation is subject
aligned level and pointing straight ahead. The display can be in
to the following two conditions: (1) These devices may not cause harmful
interference, and (2) These devices must accept any interference received
fl ip-up or fl ip-down position to suit preferred mounting location,
including interference that may cause undesired operation.
CAUTION: Modifi cations or parts not approved by Cobra Electronics
and rotated to face directly toward you. Renew suction cup with
Corporation may violate FCC Rules and void authority to operate this equipment.
a damp cloth or by rinsing under tap water.
®
Vedetta
™
Series, Model SLR 500/
b. Dash Mounting
For dash mounting, use the enclosed hook & loop fastener
with double-sided tape. Simply attach it to the bottom of the
unit with display in fl ip-up position.
Touch-Point Controls
Volume
Left
Scroll
Attach to windshield
City/Highway
Mode
Select
Insert bracket
here
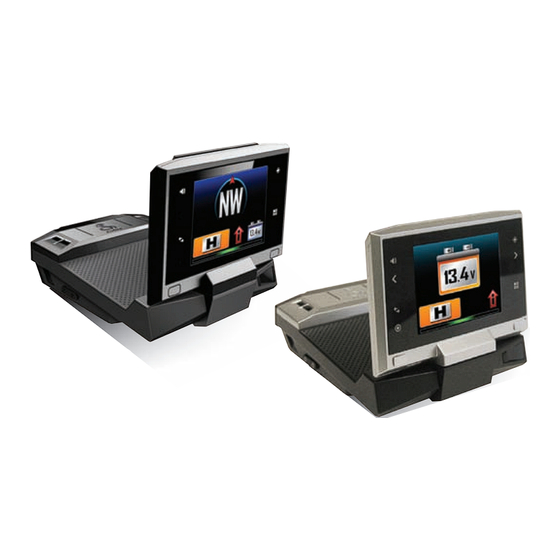
SLR 500 standby screen shown
Appropriate touch-point icons will light up automatically to
show you available options. Touch the touch-point icons to
activate corresponding function.
Touching Volume
touch-point while receiving an alert
will mute the audible alert. Touching Display Brightness
touch-point will turn off the display.
Types of Screens
1. Menu/Settings Screen
Alert Settings
Display
Brightness
User
Settings
Right
Scroll
Menu/Save
& Exit
User Settings:
For customizing settings for IntelliMute, Auto Mute, Voice/Tone
Alerts, Color Themes (SLR 600), Smart Power, Compass (SLR 600)
and Reset to Factory Default.
Alert Settings:
For customizing settings to turn on/off certain individual radar
bands and Low Car Battery Warning.
Navigate through Settings using the
scroll touch-point.
Press Select
to confi rm and Menu
to save and exit.
2. Standby Screen
3. Radar/Laser Alert Screen
Radar bands consist of X-band, K-band, Ka-band, and Ku-band.
With Radar signals, the signal strength meter shows signal strength
Compass
of the radar gun as well as relative proximity to the source. With
Heading
Ka-band, you will also be notifi ed of the actual Ka-band radar gun
Indicator
frequency being used.
City/Highway
Vehicle
Indicator
Battery
Signal Strength
Voltage
SLR 600 standby screen shown
Ka Band Alert
Compass Heading (SLR 600 Only):
See reverse side of this manual for information on how to calibrate
your compass.
City/Highway Indicator:
With Laser signals, you will always receive full alert and pulse rate
Shows curent fi ltering mode. See reverse side of this manual for
(PPS) of the corresponding laser gun being used. Laser PPS cur-
more information.
rently in use are: 100, 125, 130, 200, 238 and 340.
Vehicle Battery Voltage:
Displays your car battery voltage and automatically warns you if
this drops below 11.9V.
IntelliMute Indicator:
See reverse of this manual.
Frequency
Laser
Pulse
Rate
Advertisement
Table of Contents

Related Manuals for Cobra SLR 600


Summary of Contents for Cobra SLR 600
- Page 1 For customizing settings for IntelliMute, Auto Mute, Voice/Tone SLR 600 your compass. Insert bracket Alerts, Color Themes (SLR 600), Smart Power, Compass (SLR 600) here SLR 500 standby screen shown City/Highway Indicator: With Laser signals, you will always receive full alert and pulse rate and Reset to Factory Default.
- Page 2 RPMs of your engine, IntelliMute knows when you are at the Earth. It also detects magnetic fields produced by your ensure the fastest turn-around time on any repair. If Cobra asks that the product be sent to its factory, the product is utilized within the U.S.A.
Need help?
Do you have a question about the SLR 600 and is the answer not in the manual?
Questions and answers