Table of Contents
Advertisement
Available languages
Available languages
Advertisement
Chapters
Table of Contents

Subscribe to Our Youtube Channel
Summary of Contents for Artec Digital-to-Analog Converter Box
- Page 1 Digital-to-Analog Converter Box User Manual English Español...
- Page 3 English Digital-to-Analog Converter Box User Manual...
- Page 4 Preface About the User Manual This manual is designed to help you familiarize yourself with the operation of the Digital- to-Analog Converter Box. It also describes the features of the product and the remote control. Please read this manual carefully before using the Digital-to-Analog Converter Box.
-
Page 5: Important Safety Instructions
Preface Energy Star As an Energy Star Partner, this product meet the Energy Star guidelines for energy efficiency. Important Safety Instructions Keep this manual in a safe place where it is easy to get at for future references. For your personal safety and to protect the product, please use and install the product components properly in accordance with the instructions in this manual. -
Page 6: Table Of Contents
Contents Overview Product Features Package Contents Specification About the Digital-to-Analog Converter Box Front View Rear View About the Remote Control Remote Control Review Remote Control Battery Installation Start Connection Cables Power Cable Antenna Cable TV Cable Set Up Activate the Digital-to-Analog Converter Box... -
Page 7: Overview
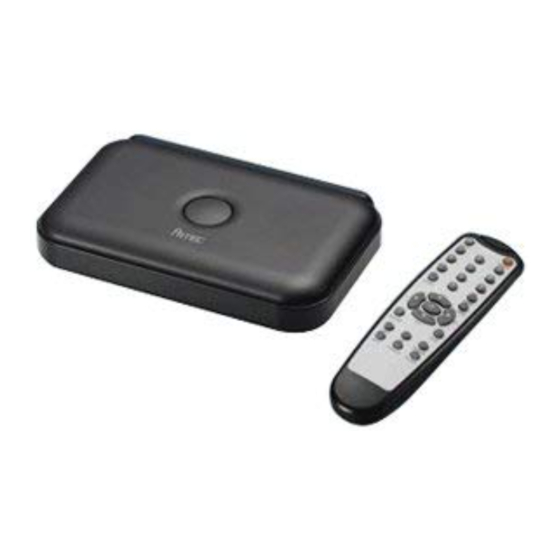
14. Full Operation by Remote Control Package Contents Check the following items from the list to make sure that all accessories are included, and no damage or loss found. Digital-to-Analog Converter Box Power adapter RF Cable Remote control (battery included) -
Page 8: Specification
Overview Specification Item Features Tuner Input Terminal: Female 75 Ohm F-Type Connector Receiving Frequency: 57 ~ 861 MHz RF Channel: 2~69 Bandwidth: 6 MHZ Demodulator 8VSB Video Processing MPEG-2 Video Decoding (MP@ML, MP@HL) Input Format: Supports 18 Modes (1080p/1080i/720p/480p/480i) Output Format: NTSC 720x480i Composite Video out Audio Processing Dolby AC-3 Audio Decoding... -
Page 9: About The Digital-To-Analog Converter Box
Overview About the Digital-to-Analog Converter Box Front View VOL- VOL+ Rear View Name Descriptions Directions key Changes channels, Adjusts the volume levels, Browses, Press direction keys on the box at the same time to display the OSD menu, Press direction keys on the box at the... -
Page 10: About The Remote Control
Overview About the Remote Control Remote Control Review MUTE: Mutes sound. POWER: Digital-to-Analog Converter Box ON / OFF. 0-9: Toggles among TV channels. AUDIO: DASH: Audio language. Sub-channel access. MENU: Displays the menu. DIRECTIONS: Confirms menus. Browses, Changes channels, Adjusts the volume levels. RETURN: Returns to the previous active channel. -
Page 11: Remote Control Battery Installation
Overview Remote Control Battery Installation Open the battery cover by using the button on the back of the remote control. Install 2 AAA batteries + and - aligned correctly. Replace the battery cover. -
Page 12: Start
1. Connect the DC jack to the backside of Digital-to-Analog Converter Box. 2. Connect the power adapter to AC outlet. Antenna Cable Connecting Antenna: 1. Connect the antenna cable to RF IN on the Digital-to-Analog Converter Box. Flat Antenna (optional) TV Cable... - Page 13 2. Connect the audio plug (white and red) of the AV cable to the corresponding jack on the TV (As shown in image 2). 3. Connect the other end of the AV cable to the corresponding jack on the Digital-to-Analog Converter Box (As shown in image 3). (image 2) (image 1)
-
Page 14: Set Up
3. After the TV is on, press POWER on the remote control or POWER on the top of the Digital-to-Analog Converter Box to turn on the Digital-to-Analog Converter Box. Initial Setup After the Digital-to-Analog Converter Box is turned on, it will automatically lead you to the Install Guide. 1. Press (Next) buttons to start installation. -
Page 15: Advanced Operation
Advanced Operation Menu Function Guide Press MENU on the remote control to enter the menu. You can perform the following setup tasks after entering the "MENU" : CHANNEL Channel Input 1. Select Channel Input from the CHANNEL and press OK. 2. -
Page 16: Option
Advanced Operation Channel Edit 1. Select Channel Edit from the CHANNEL and press OK. 2. Use the buttons to move the color block to define certain programs you wish to delete or add, press OK. Manual Scan 1. Select Manual Scan from the CHANNEL and press OK. -
Page 17: Audio Language
Advanced Operation Display Language 1. Select Display Language from the OPTION and press OK. 2. Use the buttons to select your desired Display Language. Audio Language 1. Select Audio Language from the OPTION and press OK. 2. Use the buttons to select your desired Audio Language. -
Page 18: Dcc View
Advanced Operation DCC View 1. Select DCC View from the OPTION and press OK. 2. Use the buttons to select the desired DCC View. Sleep Mode 1. Select Sleep Mode from the OPTION and press OK. 2. Use the buttons to select the desired time or Off sleep timer. -
Page 19: Lock
Advanced Operation LOCK 1. Select Lock and press OK. 2. Enter your Password number by pressing the NUMBER buttons on the remote control. Note: The default code is "0000". Lock System 1. Select Lock System from the LOCK and press OK. 2. -
Page 20: Movie Rating
Advanced Operation TV Rating-Children 1. Select TV Rating-Children from the LOCK and press OK. 2. Use the buttons to select the desired rating settings item, press OK. The rating settings window will appear. 3. Use the buttons to move the color block to define certain rating item that you want to Block or Unblock. -
Page 21: Other Function Guide
Advanced Operation Downloadable RRT 1. Select Downloadable RRT from the LOCK and press OK. 2. Before the US RRT 0x05 is downloaded to the system, the empty 'Region Rating Table' may appear. 3. If the US RRT 0x05 is downloaded, the Dimension list may appear as follows. -
Page 22: Appendixes
Appendixes Troubleshooting This section describes some frequently asked questions or malfunctions you may encounter during the course of using this Digital-to-Analog Converter Box. Q&A Question Solutions NO Power Check to make sure the power cord is plugged in securely to the wall outlet and is without damage. -
Page 23: Manual Del Usuario
Español Conversor Digital a Analógico Manual del usuario... - Page 24 Introducción Sobre el manual de usuario Este manual está diseñado para ayudarle con el funcionamiento del Convertidor Digital - Analógico. También describe las características del producto y del control remoto. Por favor, lea este manual cuidadosamente antes de utilizar del Convertidor Digital - Analógico.
- Page 25 Introducción PRECAUCIÓN: A fin de asegurar el cumplimiento continuado de FCC, los cambios o modificaciones que no hayan sido expresamente autorizados por la garantía de este dispositivo podrían anular la autoridad del usuario para operar con el equipo. Instrucciones de seguridad importantes Guarde este manual en un lugar seguro donde sea fácil localizar para el futuro.
- Page 26 Contenido Introducción Características del Producto Contenido del paquete Especificaciones Acerca del Convertidor Digital - Analógico Vista Frontal Vista Posterior Acerca del mando a distancia Revisión del mando a distancia Instalación de la batería del mando a distancia Inicio Conexión de los cables Cable de alimentación Cable de antena Cable de TV...
-
Page 27: Introducción
Introducción Características del Producto 1. Sintoniza y descodifica los 18 formatos de emisión aprobados ATSC DTV 2. Definición estándar NTSC 480i salida 3. EPG (Guía Electrónica de programas) 4. Bloqueo V - Chip (Control Paternal) 5. Subtítulos 6. Formato de pantalla 4:3 y 16:9 7. -
Page 28: Especificaciones
Introducción Especificaciones Referencia Características Sintonizador Terminal de entrada: Hembra F-Tipo conectador de 75 ohmios Recepción de Frecuencia: 57 ~ 861 MHz RF Canal: 2 ~ 69 Ancho de banda: 6 MHz Demodulador 8VSB Procesamiento de Descodificación de vídeo MPEG - 2 (MP@ML, MP@HL) vídeo Formato de entrada: Soporta 18 Modos (1080p/1080i/720p/480p/480i) -
Page 29: Acerca Del Convertidor Digital - Analógico
Introducción Acerca del Convertidor Digital - Analógico Vista Frontal VOL- VOL+ Vista Posterior Name Descriptions Teclas dirección Cambiar canales, Ajustar el nivel del volumen, Navegar, Pulse las teclas de dirección de en la caja al mismo tiempo para exhibir el menú de OSD, Pulse las teclas de dirección en la caja al mismo tiempo para confirmar. -
Page 30: Acerca Del Mando A Distancia
Introducción Acerca del mando a distancia Revisión del mando a distancia MUTE: Sonido de los mudos. POWER: Conectar o desconectar dispositivo. 0-9: Alternar canales 0-9. AUDIO: DASH: Idioma de audio. Acceso del subcanal. MENU: Mostrar menú. DIRECTIONS: Confirma menús. Navegar, Cambiar canal, Ajustar el nivel del volumen. -
Page 31: Instalación De La Batería Del Mando A Distancia
Introducción Instalación de la batería del mando a distancia Abre la cubierta de la bateria por medio del buton en la parte posteriora del mando a distancia. Instale 2 baterías del AAA + y - alineado correctamente. Substituya la cubierta de la batería. -
Page 32: Inicio
Inicio Conexión de los cables Cable de alimentación Conexión alimentación eléctrica: 1. Conecte el gato de la C.C. con la parte posterior de la caja de digital a analógico del convertidor. 2. Connect el adaptador de la energía al enchufe de la CA. Cable de antena Conexión de la antena: 1. - Page 33 Inicio Sistema de pesos americano de conexión del cable (con el conectador de RCA) 1. Conecte el conector de vídeo (amarillo) del cable AV a la conexión AV IN (color amarillo) de su TV (Como se indica En la imagen 1). 2.
-
Page 34: Configuración
Inicio Configuración Activación del Convertidor Analógico - Digital 1. Siga las instrucciones (indicados en la sección "Conexión por cable") para conectar el suministro de energía y otros dispositivos periféricos necesarios. 2. Asegúrese de que las pilas se han instalado correctamente en el control remoto. 3. -
Page 35: Funciones Avanzadas
Funciones Avanzadas Función de Menú Guía Pulse MENU en el control remoto para entrar en el Menú. Puede realizar las siguientes tareas de configuración después de entrar "MENU" : CANAL Canal Entrada 1. Seleccione Canal Entrada en CHANNEL y pulse OK. 2. -
Page 36: Opciones
Funciones Avanzadas Edición de Canales 1. Seleccione Edición de Canales en CHANNEL y pulse 2. Utilice las teclas para desplazarse por los bloques de color y definir ciertas los canales que desee eliminar o añadir, después pulse OK. Búsqueda Manual 1. - Page 37 Funciones Avanzadas Display Lenguaje 1. Seleccione Display Lenguaje en OPTION y pulse OK. 2. Utilice las teclas para elegir el idioma deseado. Audio Lenguaje 1. Seleccione Audio Lenguaje en OPTION y pulse OK. 2. Utilice las teclas para seleccionar el idioma de audio deseado.
- Page 38 Funciones Avanzadas DCC visión 1. Seleccione DCC visión en OPTION y pulse OK. 2. Utilice los teclas para seleccionar el subtítulo deseado. Mode De Espera 1. Seleccione Mode De Espera en OPTION y pulse OK. 2. Utilice las teclas para seleccionar el tiempo deseado de apagado automático.
-
Page 39: Bloqueo
Funciones Avanzadas BLOQUEO 1. Seleccione Lock y pulse OK. 2. Introduzca su número de Contraseña pulsando la tecla NUMBER de su control remoto. Nota: El valor del código por defecto es "0000". Sist. de Bloqueo 1. Seleccione Sist. de Bloqueo en LOCK y pulse 2. - Page 40 Funciones Avanzadas Clasif. Edad 1. Seleccione Clasif. Edad en LOCK y pulse OK. 2. Utilice las teclas para seleccionar la clasificación deseada y pulse OK. Los ajustes de valoración aparecerá en una ventana. 3. Utilice las teclas para desplazarse por los bloques de color y definir la clasificación que desee bloquear o desbloquear.
-
Page 41: Guía De Otras Funciones
Funciones Avanzadas V-Chip 2.0 1. Seleccione V-Chip 2.0 en LOCK y pulse 2. Antes de la descarga en el sistema US RRT 0x05, puede aparecer vacío el 'Tabla Clasificación Regional'. 3. Si el US RRT 0x05 está descargado, el aspecto de la lista pueden aparecer de la siguiente manera. -
Page 42: Apéndices
Apéndices Solución de problemas Esta sección describe algunas preguntas frecuentes o algún mal funcionamiento que puede encontrar durante la utilización de este Convertidor Analógico-Digital. Q&A Pregunta Soluciones No se enciende. Asegúrese de que el cable eléctrico esté enchufado con seguridad al enchufe de pared y que esté sin daño. No hay imagen o Compruebe si el cable de alimentación está... - Page 43 91M-0012-V50G01...
Need help?
Do you have a question about the Digital-to-Analog Converter Box and is the answer not in the manual?
Questions and answers