Plinius SA-REFERENCE Instruction Manual
Hide thumbs
Also See for SA-REFERENCE:
- Instruction manual (23 pages) ,
- Instruction manual (22 pages) ,
- Instruction manual (22 pages)

Related Manuals for Plinius SA-REFERENCE


Summary of Contents for Plinius SA-REFERENCE
- Page 2 We have designed and manufactured this amplifier to reproduce faithfully and accurately, your favourite music. With a little care and a full understanding of the operating recommendations in this manual, your Plinius SA-Reference Power Amplifier will provide years of high-quality, trouble-free performance. Serial Number: ................
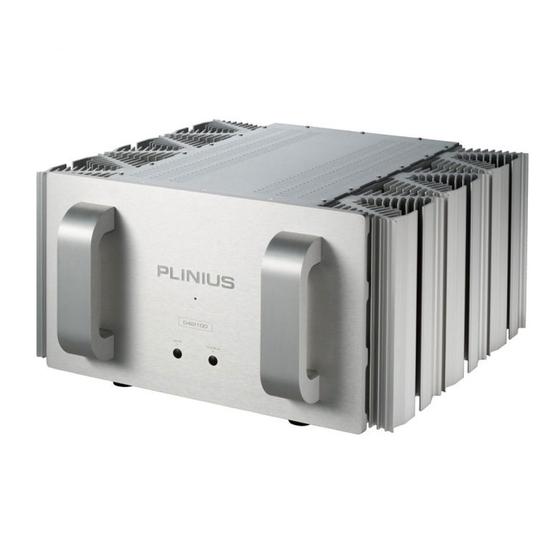
- Page 3 From a distance you can see that the design of the Plinius products is more than an applied styling exercise to the front panel. We have started from the ground up to produce a casing for our electronics that is unrivalled in its physical strength and visual simplicity. Wherever possible we have reduced the number of parts needed and then invested massively in refining and producing the remaining parts to the highest quality achievable with state of the art computer controlled machines allied with expert craftsman.
- Page 4 Installation and Operation ......................Page 12 Input/Output Connection ........................ Page 13 RCA Connection ..........................Page 14 XLR Connection ..........................Page 15 SA-Reference Features ........................Page 17 Loudspeaker Selection ........................Page 19 Why Class A is better ........................Page 20 Specifications ..........................Page 21 Index ............................
- Page 5 Please take special note of the following precautions before operating your new amplifier: • The Plinius SA-Reference Power Amplifier can be operated in mono mode delivering up to 1000 watts into 8 ohms. This amplifier is also capable of a very large peak current delivery.
- Page 6 (while the amplifier is not reproducing music). This unique feature allows you to leave the Plinius SA-Reference switched ON at all times, rendering the amplifier ready for use and requiring only a few minutes of warm-up in Class A before the very best of the...
- Page 7 This position provides Class A bias to the output stage therefore ensuring the optimum performance of the amplifier during all listening events. Class A amplifiers run hotter than Class AB amplifiers, hence our specially designed and distinctive heat sinks. Operating the amplifier in Class A necessitates two precautions that should be observed.
- Page 8 Please remember that your Plinius SA-Reference Power Amplifier is a high quality electronic instrument capable of an exceptional level of performance. Be sure that you understand your system’s requirements fully before you make any connection to this amplifier or adjust the ACS (Amplifier Configuration Selector).
- Page 9 Input terminals for your Plinius SA-Reference Power Amplifier are easily accessible and fitted to the top centre area of the rear panel. A brief summary of connection possibilities is listed below, while a more detailed explanation follows later in this instruction manual.
- Page 10 The terminal plug and socket are most commonly called RCA and can be found on your Plinius SA-Reference for use as the standard input terminals for both left and right inputs. Output connections for the loudspeakers are provided on the left and right hand side of the rear panel.
- Page 11 By connecting a processor with a remote trigger signal to these terminals, the SA-Reference can be put in and out of Class AB/mute by the processor to which it is connected. When in Class AB/mute the amplifier draws less current and will operate at minimum temperature.
- Page 12 Your Plinius SA-Reference is designed to operate at a moderately high temperature, even more so when used in Class A. The ideal location is on a rigid stand or floor mounted away from direct contact with any temperature sensitive materials or deep pile carpets. The flow of air around the amplifier should also be kept unimpeded, so ensure that the heat sinks (cooling fins) are not covered or restricted in any way to ensure adequate ventilation.
- Page 13 RIGHT INPUTS LEFT INPUTS RCA STEREO XLR BALANCED MONO RCA BRIDGED MONO XLR STEREO RIGHT OUTPUTS LEFT OUTPUTS ALL MONO/BRIDGE OPTIONS USE RIGHT INPUT AND LEFT + RIGHT+ OUTPUTS ONLY AMPLIFIER CONFIGURATION SELECTOR REFER TO OWNERS MANUAL FOR USAGE INSTRUCTIONS It is important that you connect your loudspeakers (outputs) and preamplifier (inputs) to the Plinius SA- Reference Power Amplifier correctly to ensure the amplifier is not damaged, and sounds it’s best with your system.
- Page 14 Connect your preamplifier or input signal to the two RCA inputs at the top of the amplifier back panel. Make sure you connect the red coded cable to the red RIGHT RCA input and the black (or white) cable to the black LEFT RCA input.
- Page 15 Bi-wiring uses two pairs of loudspeaker cables for each channel loudspeaker. You will notice that the rear panel of your Plinius SA-Reference has two pairs of output terminals for this purpose. When using bi- wires in a STEREO installation, connect each wire pair to a corresponding pair of binding posts (one cable to the top pair, one cable to the bottom) paying special attention to positive (+) red and negative (-) black polarity.
- Page 16 CD player etc. Signals for the LEFT channel should be wired in a similar fashion. Now that your Plinius SA-Reference Power Amplifier is configured to your system correctly, the mains cable can be plugged into the IEC connector on the back of the amplifier. Turn on the power switch on the rear panel.
- Page 17 Should the amplifier continue to exhibit rail fuse failure contact your dealer. The Plinius SA-Reference is also fitted with a microprocessor which monitors and performs the Bias and Mute functions. It is programmed to switch the amplifier back into Class AB if no signal has been present at the input for a predetermined time.
- Page 18 Your Plinius SA-Reference has an internal LED brightness control that will adjust all three front panel LED’s. A small flat bladed screwdriver can be used to adjust the brightness. The LED brightness control is a small multi turn potentiometer and is located on the front of the main circuit board within the top cavity of the amplifier, and is labelled VR3.
- Page 19 OUDSPEAKER Your Plinius SA-Reference Power Amplifier is designed for use with high fidelity loudspeakers. It should not be used to operate any other type of appliance or equipment. Choice of loudspeakers is one of personal taste, providing the chosen loudspeakers are suitable for use with your amplifier.
- Page 20 Class A has always been regarded as the perfect operating mode for audio amplifiers. Many leading amplifier designers and manufacturers world wide recognise that a well designed Class A circuit has inherently lower distortion than any other design. Class A circuit topology is one in which the total current the amplifier is capable of delivering, is kept flowing in the circuit regardless of demand.
- Page 21 : 1000 Watts RMS 20Hz to 20kHz into 8 ohms (Mono). : 1dB or greater at 8 ohms with music. : 20Hz to 20kHz ±0.2dB. 0dB at 0Hz and -3dB at 70kHz. : Typically <0.05% THD at rated power. 0.1% THD and IM worst case prior to clipping. : 130V per channel.
- Page 22 ACS (Amplifier Configuration Selector) ..................Page 9 Balanced Signal ........................Page 10 Bias Class A .........................Pages 7,20 Bias Class AB ..........................Page 7 Bias Switch..........................Page 7 Bi-wiring ..........................Page 15 Date of Manufacture ........................Page 3 Ecologic Control ........................Page 17 Error Detection..........................
- Page 23 All operational, technical and descriptive material published here is subject to change at any time without notice. For further product information or queries, please contact us at the address below. products are designed and manufactured by: 64 6 354 8583 64 6 354 8586 info@pliniusaudio.com www.pliniusaudio.com ©2005 Plinius Audio Ltd.
Need help?
Do you have a question about the SA-REFERENCE and is the answer not in the manual?
Questions and answers