Table of Contents
Advertisement
Quick Links
Advertisement
Table of Contents

Related Manuals for AB-COM AB IPBOX 400S


Summary of Contents for AB-COM AB IPBOX 400S
- Page 2 –––––––––––––––––––––––––––––––––––––––––––––––––––––––––––––––––––––––––––...
-
Page 3: General Information
0. GENERAL INFORMATION Thank you for purchasing the PVR (Personal Video Recorder). This PVR is the world 1st Twin Tuner PVR based on LINUX O/S. This product is fully compliant with the DVB standards and transmits digital broadcasting service directly to your TV through the various satellites and record those programs and enjoying trick play. -
Page 4: How To Move The Cursor
Symbol Explanation Represents Main Menu category. 1. MENU (Capital & Bold) Represents a sub-category of the main menu 1.1. Menu(Bold) 1.1.1. Menu Indicates a selectable option in a sub-category. Please do not open or change any part or option of this menu without full understanding or skillful installer's guidance. -
Page 5: Table Of Contents
CONTENTS 0. GENERAL INFORMATION ..........................1 1. SAFETY INFORMATION ..........................1 2.HOW TO USE THIS MANUAL ........................1 2.1 How to move the cursor ..........................2 2.2 How to select an option..........................2 2.3 How to use the virtual keyboard........................ 2 3. - Page 6 9. BEFORE SETTING ............................17 9.1 Menu Information............................17 9.2 Basic Key Control ............................. 17 10. GET STARTED FOR THE FIRST TIME ..................... 17 10.1 Switch your TV and PVR On........................18 10.2. Adjusting the local time......................... 18 10.3. LNB setting............................. 19 10.3.1.
- Page 7 11.9 Audio Setting ............................36 12. PVR OPERATION ............................36 12.1. Recording ............................... 37 12.2. Recorded file open..........................38 12.3. Record plan ............................39 12.4. Play back ..............................39 12.5. Trick play on live channels........................39 12.6 Book mark ............................... 40 12.7.
- Page 8 13.5.2. File transfer ............................45 13.6. HDD Management ..........................46 14. SYSTEM SETUP ............................47 14.1 TV Output..............................47 14.1.1. CH type ............................. 47 14.1.2. Channel............................. 47 14.1.3. Aspect Ratio............................48 14.2. LNB Setting ............................48 14.2.1. Connection............................49 14.2.2. Switch Type ............................49 14.2.3.
-
Page 9: Before You Begin
3. BEFORE YOU BEGIN 3.1 Advanced Features ■ Application and Expansion. LINUX O/S enables ultimate applications and expansions to fulfill the customer’s need. ■ Max. Two Channels Recording and One Prerecorded File Playback. Simultaneous Double Descrambling with Viaccess CAM. ■ Watching 1 Viaccess channel while recording another Viaccess channel with only 1 Viaccess CAM. -
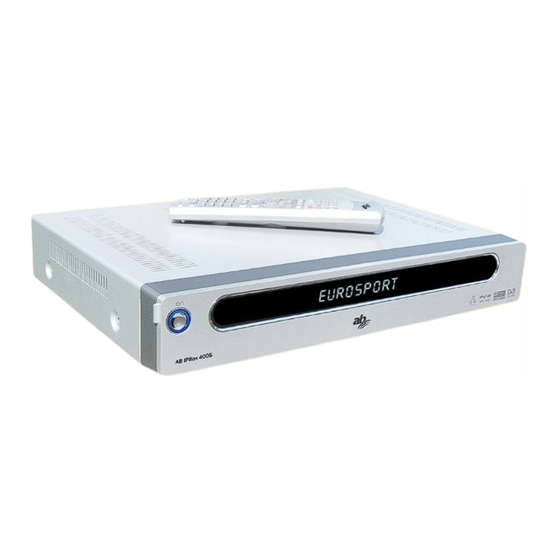
Page 10: The Contents Of The Box
4. THE CONTENTS OF THE BOX Please make sure that the following items are included in the Package. ■ PVR main unit ■ Remote Control Unit ■ 2 Batteries (size AAA) ■ Operation Manual 5. REMOTE CONTROL UNIT (UNIVERSAL TYPE) Switches the PVR Power On / Off For Mute To make the RCU to respond to TV set... - Page 11 Navigation-Buttons enable to make channel Up & Down on the live channels and move the cursor Up & Down in the OSD-menu. Also to make volume increased & decreased on the channels watching mode and move the cursor left & right in the OSD-Menu. To exit from the OSD-menu or to go back to previous menu.
-
Page 12: Programming The Remote Control For Your Tv Set
5.1. Programming the remote control for your TV set. This Universal type remote control works for both TV and PVR. There are two ways to program the remote control; Automatic Code Search and Direct Entry. 5.1.1 Using automatic code search 1. -
Page 13: Using Direct Entry Method
the LED blinks three times. 5.1.2. Using direct entry method 1. Turn on the component (TV) you want to control. 2. Locate the Code List (refer to code list on the page 59). Find your TV brand that you want to control. -
Page 14: Rear
■Two slots for the smart cards ■Two slots for CAM ■VFD (Vacuum Fluorescent Display) with door type front panel ■Displays channel number, error messages, current time and status and remote control commands ■Power On/ Stand by ■Push the button to eject CAM ■Manu Button ■EPG Button ■FILE Button... -
Page 15: Installation
①TV Aerial RF IN ②TV antenna RF OUT ③VCR Scart ④TV Scart ⑤Tuner 1(LNB IN) ⑥Tuner 2(LNB IN) ⑦Video RCA Video output ⑧Audio L/R RCA Audio outputs ⑨Digital Audio ⑩Serial RS232C ⑪USB To read and load the A/V data ⑫ Ethernet ⑬IF OUT ⑭IF OUT 8. -
Page 16: Connection To Tv, Vcr And Hi-Fi
8.1 Connection to TV, VCR and Hi-Fi 8.1.1 Connection to TV with SCART cable Connect the TV to the PVR with a SCART cable. One end of SCART cable goes into the TV SCART socket and the other end goes into to the SCART socket on the PVR. 8.1.2 Connection to VCR with RCA and SCART cable A. -
Page 17: Dish Connection
8.2 Dish Connection Most effective and common setting methods are suggested below. Please choose one of these ways to connect the dish-antennas and follow the instructions. Please carefully review the instructions before you install. 8.2.1 Installing the PVR with two separated antennas. In the LNB Setting menu, the connection type should be set to “separated.”... -
Page 18: Installing The Pvr With Twin Lnb Antenna
able to scan the channels. A Satellite antenna is installed with one single LNB. When the tuner is reserved for a recording, only the channels from same Polarity group can be watched. Caution) To descramble two channels simultaneously, 2 CI Modules are required 8.2.3 Installing the PVR with twin LNB Antenna In the LNB Setting menu, the connection type should be set to “separated”... -
Page 19: Before Setting
recorded. Caution) To descramble two channels simultaneously, 2 CI Modules are required. 9. BEFORE SETTING 9.1 Menu Information Selectable lines are generally activated (highlighted). No-activated lines are not selectable. Most of OSD- menus show short information at the bottom of the screen. 9.2 Basic Key Control With the UP/DOWN direction button you can move the cursor upwards and downwards in the OSD (On Screen Display)- menu. -
Page 20: Switch Your Tv And Pvr On
The HDD Preparing time is depends on HDD data size. If the power goes off unexpectedly, it may requires certain amounts of time to read HDD depends on the existing prerecorded program size on HDD. 10.1 Switch your TV and PVR On. The Local Time setting menu will appear automatically. -
Page 21: Lnb Setting
10.3. LNB setting. The LNB Setting menu will appear automatically right after adjusting Local Time. You can select Tuner 1 to set up by pressing LEFT/RIGHT button or RED and GREEN button. Select the right connection type of LNBs between Separated and Loop Thru as the tuner connected. Choose the Number of LNBs, then press OK button to setup each LNB. -
Page 22: Scanning The Satellites
You can setup Tuner 2 if Connection is separated. To copy the values of LNB 1 to LNB 2, just press BLUE button. Press YELLOW button to move to Channel Search menu. 10.4. Scanning the satellites. 10.4.1. Automatic This is to scan all channels in the satellites you setup in LNB Setting menu. Set Satellite Name, Network Search option and Search Method option by pressing LEFT/RIGHT button and press OK on SEARCH to start scanning. -
Page 23: Manual
10.4.2. Manual. This is to scan channels on specific TP. Set Satellite Name, Frequency, Symbol Rate, Polarity values. You can press OK to check the values on Frequency and Symbol Rate menu or press NUMERIC buttons to input values directly. Press OK on Manual Search to start scanning. -
Page 24: Mode
While watching TV or listening to Radio, you can get the ‘TV or Radio a Channel List by pressing OK button on the remote controller. Use the navigation-buttons to move the cursor up/down and left /right. When you reach a channel that you want to check, press OK button for a view. To move to a channel that you have chosen, press MENU button. -
Page 25: Sort
11.1.3. Sort It allows you to sort the channels by Default, A to Z, Z to A, FTA to CAS, CAS to FTA and Satellite. 11.1.4. Sort Move Highlight jumps accordingly as sorted (Mode, Channel, Sort), press up/down buttons on the RCU. -
Page 26: To Favorite
11.2.1. To Favorite Move to Favorite by using the navigation-buttons and press OK button to bring the favorite add list. The highlighted channel will be added to the one of categories on favorite group where you wish to save. Switch to TV or Radio list Change favorite Group category backward order (such as Sport, Drama, News, Movie and Music) Change favorite Group category forward order (such as Sport, Drama, News, Movie... -
Page 27: Hide
11.2.2. Hide Select the channel that you wish to hide by moving high-lights and press OK button. You will be asked to a password, by putting correct password the channel will be hidden. If you wish to bring the hidden channel back, Move to Main menu and select Lock control under User’s option and Switch Hide Channels OFF by entering PIN number. -
Page 28: Rename
11.2.4. Rename Change the selected channel name using virtual key board. Move to Rename option and press OK button then the virtual keyboard will appear. In the virtual keyboard the Capital letter and the small letter can be alternatively appear by pressing lock image key(Next to DEL key). -
Page 29: Favorite Channel Lists
11.3. Favorite Channel Lists While watching TV or listening to Radio, the favorite channel list is available anytime by pressing the FAV button on the remote controller. The default favorite groups are Sports, Drama, News, Movie and Music. 11.3.1. Make Fav. List Move to Make Fav. -
Page 30: Rename
11.3.3. Rename To rename a channel or favorite group, move to Rename and press OK button to bring virtual keyboard and rename the selected channel & fav group, then select ENTER to save changed name and exit from virtual keyboard. 11.3.4. -
Page 31: Electronic Program Guide
11.4. Electronic Program Guide Press the EPG button on the remote control, the TV electronic program guide (EPG) will appear. Search channels schedules by using the navigation-buttons up/down and left/right to move the highlights. To get more detailed EPG on specific channel, move high-lights to the channel then press OK button. -
Page 32: Mode
11.4.1. Mode Press the Red button, to switch into TV or Radio channel mode. 11.4.2. Channel Press the Green button at the button on the RCU, and select one of options from All, Favorite and SAT. It displays EPG information on your selection. 11.4.3. -
Page 33: Zoom
Sub Category: Select sub-category of programs (Adult movie / Romance / Comedy etc) Program name: Put in a specific program name by using virtual key board. Rating: Select Age limits on the programs. 11.4.4. Zoom Press The Blue button at the bottom of the RCU, select the time-grid of EPG display by 30 Min, 1 hour, 2 hours and date, or specific date is selectable up to maximum 7days. -
Page 34: Recording Reservation
If more than two channels are scheduled to be recorded at a time, a warning message will pop up. Readjust recording plan by canceling one to avoid conflicts on the reservation of recordings. 11.4.5. Recording reservation The PVR automatically turns on one minute before the recording starts, if you leave the PVR standby mode. -
Page 35: File List Management
If you don’t touch RCU for a minute when recording starts, it recognizes as there are no one in presence. It starts to record itself and after done recording, it turns off automatically. However if you touch or press any button on the RCU during recording, it recognize that there are someone in presence and it does not goes off automatically. -
Page 36: Channel Information
Detailed Recording plan information is available by pressing OK button. To move highlights, use the navigation- button. Recording option editing is also available in this OSD-Menu. To exit from FILE Management press EXIT button. 11.6. Channel Information Info bar appears by pressing the button. -
Page 37: Rcl
details Favorite Channel Channel name Age Limit Dolby Digital Start Time Subtitle Recording Channel Number Teletext Multi Audio Progress Bar 11.7 RCL To move back to the previous live channel, press this button. By pressing RCL button from a recorded channel, it will be switch into the live channel that you were watching previously. -
Page 38: Audio Setting
11.9 Audio Setting Press the AUDIO button on the remote controller; to select an audio language and sound mode. Mix / Mono Left / Mono Right, Audio languages are selectable by pressing Left/Right direction button. Press AUDIO or EXIT key to exit. While recording or Trick play, audio options are not selectable. -
Page 39: Recording
12.1. Recording To record a live channel, press button to record a channel that you are currently watching. In the channel list, a channel in yellow indicates the currently recording channel. Press button to stop recording. Select a channel name that you want to stop the recording then press OK button to confirm. -
Page 40: Recorded File Open
The default recording time is two hours, recording time can be set up to maximum 23h 59min. FILE-> Record plan->New-> Duration. The recording notice will pop-up two minutes before a recording starts. If the power is turned off, the PVR automatically goes on and performs /starts recordings when the scheduled recording time is 2 minutes left away. -
Page 41: Record Plan
12.3. Record plan Press Left/Right direction button and move to RESERVATION and select options 1. New New recording plan can be made in this section by selecting various selecting options. (Start times, Duration, Period, and Parental Lock are available options) 2. -
Page 42: Book Mark
12.6 Book mark Press the button, to make a book mark on the time bar where you want. If you want to move next book mark, press PLAY button to jump to next book mark To remove book mark on the time bar, press the button again. -
Page 43: Stop
If there are not any marked points, the whole section can be repeated instead of two points. To exit from the repeat function, press Repeat button one more time. 12.9. Stop Stop the watching prerecorded file and back to a live channel. 12.10. -
Page 44: Slow Motion And Frame By Frame
12.14. Slow motion and Frame by Frame Press the button 1~2secs then it will show slow motion. As you push the button, it shows speed such as x1/16, x1/8, x1/4, x1/2. Press the button less than 1sec, it shows still screen at first. As you press the button, it will show frame by frame. -
Page 45: Banner Time Out
13.1.1. Banner Time Out Select the time-out length for information banner from 2 to 10seconds. 13.1.2. Subtitle Select subtitle display ON/ OFF. 13.1.3. Switch Smart EPG/CAM Update All searched channels’ EPG will be saved automatically in side receiver when the power goes off. -
Page 46: System Lock
13.2.2. System Lock Switch System Lock ON or OFF. If you select ON, a password input box will appear. The default password is 0000. 13.2.3. Channel Lock Switch Channel Lock ON or OFF. Each channel can be locked on the channel list under channel edit mode. -
Page 47: Local Time
13.4. Local Time Select or change your Time Zone, Year, Month, Date, Hour, Minute and Daylight-saving time. To save changed settings, press EXIT button. 13.5. USB Mode 13.5.1. PC editor Use PC editor to edit searched channel data on your PC. To download existing channel data or edited data from PC to the PVR, the PVR has to be connected to PC by USB cable and the PVR has to be ready for PC editor mode. -
Page 48: Hdd Management
13.6. HDD Management Select HDD Format or HDD Exchange as you want. When you select Format, the system will be restarted and current HDD will be formatted. When you select exchange, current setting data and recorded files are saved for next use. -
Page 49: System Setup
☞ NOTICE We strongly recommend you to use A/V or CE HDD only. If you use the HDD made for PC use, we do not guarantee the best performance on the PVR. When you select Exchange, current setting data and recorded files are saved for next use. 14. -
Page 50: Aspect Ratio
14.1.3. Aspect Ratio Select 4:3 PS (Pan & Scan) or 4:3 LB (Letter Box) for Standard TV or 16:9 for wide screen TV. 14.2. LNB Setting Tuner 1, Tuner 2 Select Tuner 1 or Tuner 2 first. Make sure your tuner Connection is Separated or Loop Thru. In case of Loop through connection, tuner 2 is selectable for set up. -
Page 51: Connection
Hot Keys : To bring up Tuner 1 : To bring upTuner 2 : Copy LNB settings of Tuner 1 to Tuner 2 14.2.1. Connection In case the 2 tuners are connected to separately to Satellites, select separated. If the Tuners are connected by Loop through, select Loop Thru. 14.2.2. -
Page 52: The Signal Indicator
Once your setup is complete, press EXIT button to save and exit. 14.2.5. The Signal Indicator It displays Signal Strength(Green) and Signal Quality(Yellow) on top of this menu. When you see the Green and yellow bar on top, it means LNB Settings are correctly set. Yellow button: To go to Search channels Once LNB setting is completed, select Go to Search to move to Channel Search menu. -
Page 53: Manual
14.3.2. Manual Select specific Satellite Name, Frequency, and Symbol Rate, and Polarity and press Manual button to start searching the particular channels. 14.3.3. Advanced Search Video PID: Enter the correct VIDEO PID value by using numeric buttons on the RCU. Audio PID: Enter the correct AUDIO PID value by using numeric buttons. -
Page 54: Diseqc 1.2 Positioner
14.4. DiSEqC 1.2 positioner If you have a DiSEqC1.2 motorized system, then you can use the DiSEqC function. Select the satellite name first, and switch the DiSEqC Enable and put other required options. Select the right TP to catch the strong Signal Strength. 14.5 USALS setting USALS is very convenient motorized DiSEqC system that support DiSEqC 1.3 command and also can get the satellite position automatically if you know your geographical location. -
Page 55: Ip Setup
14.6. IP setup 14.6.1. Manual For the static IP address users. Use the Navigation-Buttons and numeric buttons to set the Values then press SUBMIT button. IP: Enter your IP address to specify the host IP address. Subnet mask: Enter the subnet mask here to find Host IP address in its Subnet. Gateway: Enter the gateway values. -
Page 56: Auto (Pppoe)
It detects values automatically. No need to enter any values here. After selecting Auto(DHCP), press submit button to have all settings show up automatically. If LAN cable is not properly connected, all settings might appear as “0.0.0.0.” In this case, check the cable connection and retry it. -
Page 57: Restore Factory Setting
14.7. Restore Factory Setting It removes Channel List, FAV List, LNB Settings and it restores original factory settings, but the files you recorded on the HDD will be remained in HDD. To restore factory settings, press ok. All settings will be deleted. 15. -
Page 58: Soft Ware Upgrade
1. Download the Flash tools on your PC 2. Connect PC and AB IPBox 400S by USB Cable 3. If relook is standby mode when it is connected by USB, skip the # 4, follow the # 5 to enter USB mode. -
Page 59: S/W Updating
Important) The order of this procedure is very important; please do follow the instruction step by step. When Driver is installed successfully, it is ready to download the latest image to relook (USB download instructions) 17.2. S/W Updating. 1. Relook and PC have to be connected by USB cable. 2. -
Page 60: Glossary Of Terms
18. GLOSSARY OF TERMS Conditional Access. A system to control Radio frequency (known as HF in some subscriber access to services/ programs. countries). Common Interface SCART DVB standard hardware and software A 21-pin connector used for connection of architecture for Conditional Access systems. the relook, VCR and TV. - Page 61 19. TROUBLE SHOOTING Problem Possible Causes What ToDo No display appeared on front Power cord is not plugged in. Check that power cord No Sound/ Picture Wrong Audio/ Video output Check Audio/ Video output connection between the connection between the receiver and TV set.
-
Page 62: Product Specifition
20. PRODUCT SPECIFITION Part Type Specification Type IBM’s PowerPC405 Speed 350 MIPS Data/Instruction Cache 16KB/16KB Input Connector 2 x IEC169-2 female Tuner (Twin) Loop through Connector 2 x IEC169-2 male & Channel Frequency Range 950MHz to 2150MHz Loop through Out Impedance 75 ohms nominal Band selection 22 KHz tone... -
Page 63: Tv Brand Code List
21. TV BRAND CODE LIST.
Need help?
Do you have a question about the AB IPBOX 400S and is the answer not in the manual?
Questions and answers