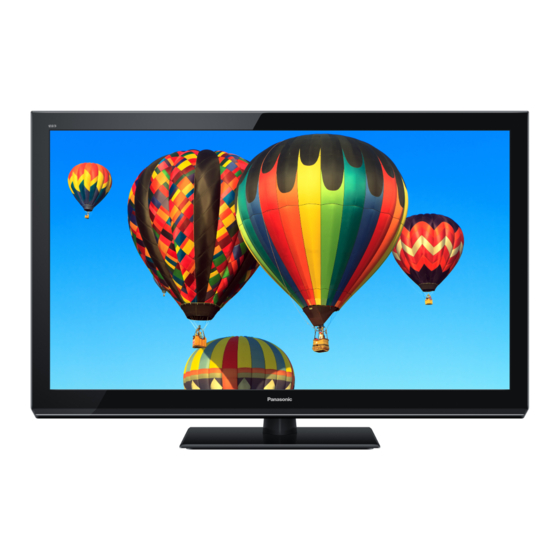
Panasonic Viera TX-L42U5E Operating Instructions Manual

Lcd television

Advertisement

Operating Instructions

LCD Television
Thank you for purchasing this Panasonic product.
Please read these instructions carefully before operating this product and retain
them for future reference.
The images shown in this manual are for illustrative purposes only.
Please refer to Pan European Guarantee Card if you need to contact your local
Panasonic dealer for assistance.
English
Model No.
TX-L42U5E
TX-L32C5E

Advertisement

Table of Contents
loading

Summary of Contents for Panasonic Viera TX-L42U5E

  • Page 1: Operating Instructions

    TX-L42U5E TX-L32C5E Operating Instructions LCD Television Thank you for purchasing this Panasonic product. Please read these instructions carefully before operating this product and retain them for future reference. The images shown in this manual are for illustrative purposes only. Please refer to Pan European Guarantee Card if you need to contact your local Panasonic dealer for assistance.
  • Page 2: Table Of Contents

    Mains plug ......................................4 Notice for DVB functions ....................5 Standard Accessories ...................... 6 Attaching the Pedestal ....................6 Installing Pedestal (TX-L42U5E) ..............................7 Uninstalling Pedestal (TX-L42U5E) ..............................7 Installing Pedestal (TX-L32C5E) ..............................7 Uninstalling Pedestal (TX-L32C5E) ..............................7 Wall-hanging (Not supplied) ................................8 PART NAMES AND FUNCTIONS..................
  • Page 3: Safety Precautions

    TV unstable, risking injury. Be sure to ask your local − Do not twist the lead, bend it excessively or stretch it. Panasonic dealer to perform the set up or installation. • − Do not pull on the lead. Hold onto the mains plug body U se approved pedestals / wall-hanging brackets.
  • Page 4: Caution

    Caution Maintenance When cleaning the TV remove the mains First, remove the mains plug from the socket plug outlet. • C leaning an energised TV may cause electrical shock. Display panel, Cabinet, Pedestal Remove the mains plug from the wall socket when TV is not in use for a prolonged period Regular care : of time...
  • Page 5: Notice For Dvb Functions

    C heck the latest information on the available services at the following website. (English only) http://panasonic.jp/support/global/cs/tv/ Panasonic does not guarantee operation and performance of peripheral devices made by other manufacturers; and we disclaim any liability or damage arising from operation and/or performance from usage of such other maker’s peripheral...
  • Page 6: Standard Accessories

    Do not use the pedestal if it becomes warped or physically damaged. • I f you use the pedestal while it is physically damaged, personal injury may result. Contact your nearest Panasonic dealer immediately. During assembly, use only screws supplied and make sure TX-L42U5E that all screws are securely tightened.
  • Page 7: Installing Pedestal (Tx-L42U5E)

    Installing Pedestal (TX-L42U5E) Installing Pedestal (TX-L32C5E) 1. Place the LCD TV screen facing down on a flat surface place 1. Place the LCD TV screen facing down on a flat surface place where maintained with soft materials (such as a blanket) where maintained with soft materials (such as a blanket) for protecting the display screen.
  • Page 8: Wall-Hanging (Not Supplied)

    Wall-hanging (Not supplied) Wall-hanging bracket (Optional) Please contact your nearest Panasonic dealer to purchase the TX-L42U5E recommended optional accessories. For additional details, please refer to the manual of the Wall-hanging Insets optional accessories. Warning Depth of screw : minmum 8 mm •...
  • Page 9: Part Names And Functions

    Common Interface (CI) Modules. Headphone • C onnect a headphone (stereo) to this jack and *1: HDMI 3 is only for TX-L42U5E model. the TV speaker out will be muted. Note: • The examples used throughout this manual are based on the TX-L32C5E C onnect USB memory stick to this terminal to model.
  • Page 10: Connections

    AV2 IN can accept Component or Video cable. DVD video equipment (such as DVD player or high-definition TV source) *1: HDMI 3 is only for TX-L42U5E model. Note: • D IGITAL AUDIO OUT: Connect an audio amplifier to this jack.
  • Page 11: Ac Power Cord Connection

    >PC< D ispose of used batteries according to the instructions. • *1: HDMI 3 is only for TX-L42U5E model. R emote control contains R03  AAA battery and must be Note: kept out of reach of small children to avoid accidental •...
  • Page 12: Remote Control

    Remote Control 7 INPUT (TV) • S witches to TV input source. MUTE • P ress to mute or restore the sound. TEXT • S witches to teletext mode. 10 MENU • O pen or close the On-Screen Menu. 11 R/G/Y/B (COLOUR BUTTON) •...
  • Page 13: Turning On/Off Lcd Tv

    [Auto] mode determines the best aspect ratio to fill the HDMI 2 screen. It does this using a three step process (WSS, Control HDMI 3 signal through SCART / HDMI terminal) to determine. *1: HDMI 3 is only for TX-L42U5E model.
  • Page 14: Initial Setup

    Initial Setup Initial Setup <On-Screen> <Remote / Operation> Initial Setup Welcome to use the Wizard for Initial Setup !! Please press [OK] to start the wizard. Language Setting <On-Screen> <Remote / Operation> Initial Setup Language EXIT Please select your language: Hrvatski Dansk Back...
  • Page 15 Initial Setup Country Setting <On-Screen> <Remote / Operation> Initial Setup Country EXIT Please select your country: Austria Belgium Back Select Switzerland Next Czech Republic Germany Back Select Next Exit Exit PIN Setting <On-Screen> <Remote / Operation> Initial Setup Please set PIN. “0000” is not a valid PIN New PIN Confirm PIN EXIT...
  • Page 16 Initial Setup Tuner Mode Setting <On-Screen> <Remote / Operation> Initial Setup Tuner Mode EXIT Please select your tuner mode: Aerial Cable Back Select Next Back Select Next Exit Exit Note: • W hen selecting Aerial, go to step 9 to start channel scan. •...
  • Page 17 Initial Setup Channel Scan <On-Screen> <Remote / Operation> Initial Setup Channel Scan EXIT First, please connect aerial. Start channel scan now ? If you skip this step, the channel scan could be performed in Menu. Back Select Scan Next Skip Scan Back Select Next...
  • Page 18: On-Screen Display

    On-Screen Display Colour • I ncreases or decreases the levels of colour according to your Picture personal preference. (0~100) Sharpness Main Menu • I ncreases or decreases the levels of sharpness according to Viewing Mode Normal your personal preference. (0~100) Contrast Brightness Tint...
  • Page 19: Sound

    DVI Input Settings Surround • C hanges the black level in the image for HDMI input mode • with DVI input signal manually. E nriches (expanding and deepening) the sound quality. • F or HDMI terminal with DVI input signal only. 3:2 Pulldown •...
  • Page 20: Timer

    Timer Setup Main Menu Main Menu Off Timer Tuning Menu Auto Standby Language 4 hours Display Settings Common Interface HDMI Control System Menu Child Lock Other Settings Select Select Access Access EXIT EXIT RETURN RETURN 1. Press MENU button and 1.
  • Page 21: Shipping Condition

    Analogue Manual Scan Common Interface • S earches and stores analogue TV channels manually. • • F or TV mode only. U ses include to watch encrypted channels. Note: HDMI Control TV will store scanned channels, even if the scanning for channels have not completed.
  • Page 22: Media Player

    Media Player Child Lock • L ocks a channel / AV input to prevent access to it. • Media Player W hen the locked channel / input is selected, a message appears; you need to enter the PIN number to watch the restricted content.
  • Page 23: Viewing Photos

    Music Option List • I n multi- media menu, you can press Blue colour key to Buttons Description select one of following options. • Blue O pens option menu. • Viewing photos • Yellow S elects Photo, Music, or Movie. •...
  • Page 24: Troubleshooting

    • A dedicated remote control is required for this model. Basically, the remote control of other brands (including Panasonic other models) cannot be used. • No image C heck the connection between the external equipment and LCD TV.
  • Page 25: Specifications

    SPECIFICATIONS TX-L32C5E TX-L42U5E Power Source AC 220-240 V, 50Hz Energy efficiency class On mode average 74 W 124 W power consumption Annual energy 108 kWh 181 kWh consumption Rated Power 105 W 181 W Consumption Standby Power 0.3 W 0.3 W...
  • Page 26: Input Signal Compatibility Chart

    Input Signal Compatibility Chart COMPONENT (Y, PB, PR), HDMI Signal name COMPONENT HDMI 525 (480) / 60i, 60p 625 (576) / 50i, 50p 750 (720) / 60p, 50p 1,125 (1,080) / 60i, 50i 1,125 (1,080) / 60p, 50p, 24p Mark : Applicable input signal PC (from D-sub terminal/ HDMI terminal) Signal name Horizontal frequency (kHz)
  • Page 27: Multi-Media Supported Specification

    Multi-media Supported Specification Photo Image resolution Format File extension Details / Restrictions (pixel) Baseline jpeg: DCF * and EXIF * 4 x 4 to 17,000 x10,000 standards JPEG .jpeg Progressive jpeg: Sub-sampling : 4:4:4, 4:2:2, 4:2:0 4 x 4 to 4,000 x 4,000 * 1 : Design rule for Camera File system - unified standard established by Japan Electronics and Information Technology Industries Association (JEITA) * 2 : Exchangeable Image File - image file format used by digital cameras...
  • Page 28: License

    LICENSE This product incorporates the following software or technology: (1) the software based in part on the work of the Independent JPEG Group, (2) the software developed by the Free Type Project. Dolby • M anufactured under license from Dolby Laboratories. Dolby and the double-D symbol are trademarks of Dolby Laboratories.
  • Page 30 Declaration of Conformity (DoC) Authorised Representative : Panasonic Testing Centre Panasonic Marketing Europe GmbH Winsbergring 15, 22525 Hamburg, Germany Customer’s Record The model number and serial number of this product may be found on its rear panel. You should note this serial number in the space provided below and retain this book, plus your purchase receipt, as a permanent record of your purchase to aid in identification in the event of theft or loss, and for Warranty Service purposes.

This manual is also suitable for:

Viera tx-l32c5e

Table of Contents