Table of Contents
Advertisement
Dear VISIONQUEST Customer,
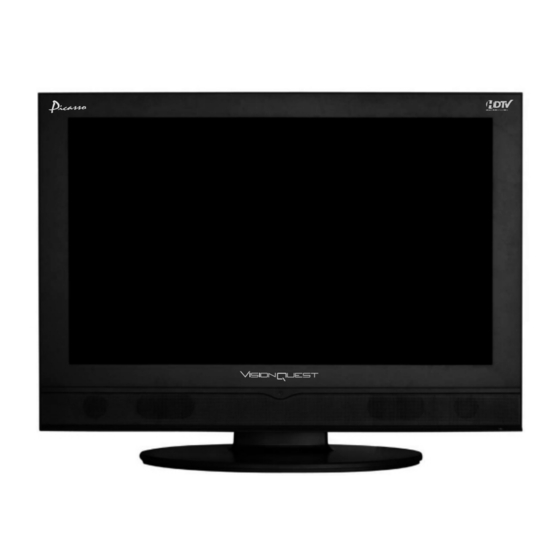
Congratulations on your new VISIONQUEST 37''HDTV purchase.
Thank you for your support. For maximum benefit of your set,
please read these instructions before making any adjustments,
and retain them for future reference. We hope you will experience
years of enjoyment from your new VISIONQUEST 37''HDTV.
For assistance, please call 1
We recommend you register your VISIONQUEST 37'' HDTV either at
our website
WWW.VISIONQUESTCE.COM or fill in your registration
card and mail it in. For peace of mind and to protect your investment
beyond the standard warranty, VISIONQUEST offers extended warranty
service plans. These plans give you additional coverage during the
standard warranty period. Visit our website or call us to purchase
a plan.
Write down your Serial Number located on the back of your 37''HDTV .
S/N:
Purchase Date
WWW.VISIONQUESTCE.COM
-877-851-2528.
D
D
D
D
1
Advertisement
Table of Contents

Related Manuals for VisionQuest HDTV

Summary of Contents for VisionQuest HDTV
- Page 1 These plans give you additional coverage during the standard warranty period. Visit our website or call us to purchase a plan. Write down your Serial Number located on the back of your 37''HDTV . S/N: Purchase Date WWW.VISIONQUESTCE.COM...
-
Page 2: Important Safety Instruction
IMPORTANT SAFETY INSTRUCTION 1.Read these instructions. 2.Keep these instructions. 3.Heed all warnings. 4.Follow all instructions. 5.Do not use this apparatus near water. 6.Clean only with dry cloth. 7.Do not block any ventilation openings. Install in accordance with the manufacturers instructions. 8.Do not install near any heat sources such as radiators, heat registers, stoves, or other apparatus (including Amplifiers) that produce heat. -
Page 3: Power Supply
IMPORTANT SAFETY INSTRUCTION CAUTION RISK OF ELECTRIC SHOCK DO NOT OPEN! CAUTION TO REDUCE THE RISK OF ELECTRIC SHOCK, DO NOT REMOVE COVER (OR BACK).NO USE-SERVICEABLE PARTS INSIDE. REFER SERVICING TO QUALIFIED SERVICE PERSONNEL. T h e s y m b o l i n d i c a t e s t h a t d a n g e r o u s v o l t a g e c o n s t i t u t i n g a r i s k o f e l e c t r i c s h o c k i s p r e s e n t w i t h i n t h i s u n i t . - Page 4 PREFACE Thank you very much for purchasing this TV. To enjoy your set to the finest from the very beginning, read this manual carefully and keep it handy for future reference. INSTALLATION Position the TV in the room where light does not strike the screen directly Total darkness or a reflection on the picture screen can cause eyestrain.
- Page 5 WARNINGS AND CAUTIONS Caution Carry the set requires two or more people. Caution Do not drop or push objects into the television cabinet slots or openings. Never spill any kind of liquid on the television receiver. Caution Do not insert anything in the ventilation holes. If metal or something flammable enters, it may result in fire or electric shock.
- Page 6 *Keep the product away from moisture. Do not expose this appliance to rain or moisture. If water penetrates into the product, unplug the power cord and contact VISIONQUEST. Continuous use in this case may result in fire or electric shock.
-
Page 7: Television Antenna Connection Protection
Note: In some countries or regions, the shape of the power plug and power outlet may sometimes differ from that shown in the explanatory drawings. However, the method of connecting and operating the unit is the same. Television Antenna Connection Protection External Television Antenna Grounding If an outside antenna/satellite or cable system is to be connected to the LCD TV, make sure that the antenna/satellite or cable system is electrically grounded to provide some protection against voltage... -
Page 8: Opening The Package
Opening the package Your VISIONQUEST 37''HDTV is packaged in a carton together with other standard accessories. Any optional accessories would be packed separately in another carton. The weight of the LCD display is approximately 36 lb. Due to the size and weight of the product, it is suggested that it be handled by a minimum of 2 persons. -
Page 9: Preparing Your Lcd Tv For Wall Mounting
Preparing Your LCD TV FOR Wall Mounting The VISIONQUEST 37''HDTV can either be kept on the stand base or mounted to the wall for viewing. If you choose to mount the 32''HDTV to the wall, please refer to the schematic drawing when hanging the TV on the wall.Take off the stand from the whole unit then assembly the TV on VESA standard wall mount... -
Page 10: Table Of Contents
1.3-Rear Panel Connections..................... 1.4-VISIONQUEST Remote Control Button Description............1.4.1-Insertion of Batteries in the Remote Control............ 1.4.2-Remote Control Range................. 1.4.3-Precautions for the VISIONQUEST Remote Control......... Chapter 2- Connecting Equipment 2.1-Which Video Connection Should I Use?............... 2.2-Connecting your DVD Player..................2.2.1-Using HDMI(Digital HD)................ -
Page 11: Chapter 1- Basic Controls And Connections
Chapter 1 -Basic Controls and Connections 1.1 - Front Panel Controls 1.2 - Side Panel Controls 1.CH(+/-)-These buttons increase or decrease the channels. When the OSD is active, these buttons are used to select OSD options. 2.VOL(+/-)- These buttons increase or decrease volume. When the OSD is active, these buttons adjust the OSD options. -
Page 12: Rear Panel Connections
1.3 - Rear Panel Connections Pb/Cb-2 Pr/Cr-2 AUDIO IN VIDEO IN DIGITAL HD DIGITAL AUDIO AUDIO 75Ù ANT. SERVICE AUDIO OUT AC IN HDMI2-IN HDMI1-IN VGA IN Pb/Cb-1 Pr/Cr-1 AUDIO IN S-VIDEO IN 1.AC IN - Power Input. 2.HDMI IN - Connect a DVD multimedia player, or set-top box and the audio through this connection. For users who want to connect a DVI enabled device, use an HDMI-DVI cable and use the Analog Audio output of the device connected to the L+R Audio here. -
Page 13: Visionquest Remote Control Button Description
1.4-VISIONQUEST Remote Control Button Description •POWER- Press this key to turn the TV on from standby mode. Press it again to return to the standby mode. •MUTE-This button turns the sound on and off. •SLEEP-This button allows the user to select the sleep options by adjusting the timer in10 minute increments up to120 minutes. - Page 14 •SOUND-Press repeatedly to select sound mode: Off, Rock, POP, Live, Dance, Techno, Classic, Soft. •PICTURE-Press repeatedly for different picture modes select: Normal/User/cinema/Sport/vivid/Hi-bright. •RETURN-Press it to return to the previous channel in TV mode. •MODE-Use this button to activate the PIP mode and select the mode by pressing repeatedly.
-
Page 15: 1-Insertion Of Batteries In The Remote Control
•The effective range of the remote control is approximately 37 feet(10 meters) from the front of the receiver window, 30° to the left and right, 20° up and down. 1.4.3-Precautions for the VISIONQUEST Remote Control •The remote control should be kept dry and away from heat sources. Avoid humidity. -
Page 16: Chapter 2- Connecting Equipment
Chapter 2 - Connecting Equipment 2.1- Which Video Connection Should I Use? The VISIONQUEST 37'' HDTV has five different ways to connect your video equipment from a basic connection to the most advanced for digital displays. Connection Quality Connector Description... -
Page 17: Connecting Your Dvd Player
2.2 - Connecting Your DVD Player You have several for connecting your DVD player to your new 37 ' ' HDTV-HDMI(Digital HD), Component (Analog HD), S-Video, and Composite (AV) inputs. Based on your home theater configuration, you decide which option is the right one for you. -
Page 18: For Dvd Players With Dvi
For DVD Players with DVI: Pb/Cb-2 Pr/Cr-2 DIGITAL HD AUDIO AC IN Pb/Cb-1 Pr/Cr-1 HDMI2-IN HDMI1-IN VGA IN 1.Turn off the power to the LCD TV and DVD player. 2.Using a HDMI-DVI cable, connect the DVI end to your DVD Player and the HDMI end to the HDMI input in the rear of your LCD TV. -
Page 19: 2-Using Component(Analog Hd) Video
2.2.2 - Using Component (Analog HD) Video Connecting DVD Player(Better): VIDEO EQUIPMENT with terminal To video To audio inputs inputs Pb/Cb-2 Pr/Cr-2 AUDIO IN VIDEO IN DIGITAL HD AUDIO AUDIO 75Ù ANT. SERVICE 1-IN VGA IN Pb/Cb-1 Pr/Cr-1 AUDIO IN S-VIDEO IN 1.Turn off the power to the LCD TV and DVD player. -
Page 20: 3-Using S-Video
2.2.3 - Using S-Video Connecting DVD Player (Good): Pb/Cb-2 Pr/Cr-2 AUDIO IN VIDEO IN DIGITAL AUDIO AUDIO 75Ù ANT. SERVICE AUDIO OUT Pb/Cb-1 Pr/Cr-1 AUDIO IN S-VIDEO IN To S-VIDEO To audio inputs inputs VIDEO EQUIPMENT with terminal Turn off the power button of the LCD TV and the DVD player 2.Connect the S-Video jack on the rear of your DVD player to the S-Video jack in the rear of your LCD TV. -
Page 21: 4-Using Composite(Av)Video
2.2.4 - Using Composite (AV) Video Connecting DVD Player (Good): VIDEO EQUIPMENT with terminal To audio To Video inputs inputs Pb/Cb-2 Pr/Cr-2 AUDIO IN VIDEO IN DIGITAL AUDIO AUDIO 75Ù ANT. SERVICE AUDIO OUT Pb/Cb-1 Pr/Cr-1 AUDIO IN S-VIDEO IN 1.Turn off the power to the LCD TV and DVD player. -
Page 22: Connecting Your Hdtv Set-Top Box
1.Turn off the power to the LCD TV and HDTV Set -Top Box. 2.Connect a HDMI cable to the HDMI output of your HDTV Set-Top Box and the other end to the HDMI input in the rear of your LCD TV. - Page 23 1.Turn off the power to the LCD TV and HDTV Set -Top Box. 2.Using a HDMI-DVI cable, connect the DVI end to your HDTV Set- Top Box and the HDMI end to the HDMI input in the rear of your LCD TV.
-
Page 24: 2-Using Vga Video
2.Connect a 15-pin D-Sub VGA cable to the RGB output of your HDTV Set-Top Box and the other end to the VGA input in the rear of your LCD TV. 3.Connect the Audio Out on your HDTV Set-Top Box to the Audio within the VGA group in the rear of your LCD TV. -
Page 25: Connecting Your Vcr Or Video Camera
2.4 - Connecting Your VCR or Video Camera Pb/Cb-2 Pr/Cr-2 AUDIO IN VIDEO IN DIGITAL AUDIO AUDIO 75Ù ANT. SERVICE AUDIO OUT Pb/Cb-1 Pr/Cr-1 AUDIO IN S-VIDEO IN To S-VIDEO To audio inputs inputs VIDEO EQUIPMENT with terminal 1.Turn off the power to the LCD TV and VCR or video camera. 2.Connect the S-Video jack on your VCR or video camera to the S-Video jack in the rear of your LCD TV. -
Page 26: Connecting Coaxial(Rf)
2.5 -Connecting Coaxial (RF) There are several options for connecting your antenna(or cable for TV) to your new 32''HDTV-directly to the TV or through your VCR. Based on your home theater configuration, you can decide which option is the right one for you. -
Page 27: 2-Using The Antenna Or Cable Through Your Vcr
2.5.2- Using the Antenna or Cable through Your VCR 1.Turn off the power to your LCD TV and VCR . 2.Connect the "Output to TV" (RF Out or Antenna Out) connector on the rear of your VCR to the TV CABLE/ AIR connector in the rear of your LCD TV. -
Page 28: Connecting An Amplifier Or Speakers
2.6-Connecting an Amplifier or Speakers VIDEO IN Pb/Cb-2 Pr/Cr-2 AUDIO IN DIGITAL AUDIO 75Ù ANT. SERVICE AUDIO OUT Pb/Cb-1 Pr/Cr-1 AUDIO IN S-VIDEO IN 1.Turn off the power to the LCD TV and Receiver /AMP. 2.Connect the optic audio connectors on the Receiver/Amp to the optic audio output connectors in the rear of your LCD TV. -
Page 29: Connecting A Computer
2.7 - Connecting a Computer Pb/Cb-2 Pr/Cr-2 DIGITAL HD AUDIO AC IN Pb/Cb-1 Pr/Cr-1 HDMI2-IN HDMI1-IN VGA IN 1.Turn off the power to the LCD TV and Computer. 2.Connect a 15-pin D-sub VGA cable to the VGA output of your computer and the other end to the VGA input in the rear of your LCD TV. -
Page 30: Chapter 3-Setting Up To Watch Tv
Chapter 3- Setting Up to Watch TV 3.1 - Basic LCD TV Start Up 1.Connecting the Power Cable Connect the power cord to the power cord connector on the back of your LCD TV, and then plug the power cord into an AC wall socket. 2.Connect Audio and Video Cables to the LCD TV 3.Turning Power On Once all the components are connected, press the Power button on the front of the TV, or press the Power... -
Page 31: Watching A Tv Program
3.2 - Watching a TV Program Before you start watching TV, please make sure that any cable, satellite, or off-air antenna connections are secure. Also, verify that the power cord is plugged into a correctly grounded electrical outlet or surge protector. -
Page 32: Using The On-Screen Display(Osd)
3.4-Using the On-Screen Display(OSD) The remote control or the bottom control keys on the front panel of the TV can control all the function settings. The on-screen display(OSD) allows you to adjust and save contrast, brightness and other settings. The TV will save changes made to the settings, even if the TV is turned off. 3.4.1-OSD Menu Operations The OSD consists of several menu options: Video, Audio, TV, Setup, Parental. - Page 33 TV- Adjust the channel related settings. Tuner Mode Antenna Adjust the audio language related settings. Auto Scan Range Scan Channel Skip TV page provides Tuner Mode, Auto Scan, Range Scan, Channel Audio Language English Skip, Audio Language, Location Code settings. Location Code ENTER Enter...
-
Page 34: 2-Video
3.4.2-Video Picture Mode User Available for the following input sources-Composite1,Composit2, Brightness S-Video, Component1, Component2, HDMI1,HDMI2, TV. Contrast Saturation 1.Press the MENU button to display the menu. Sharpness 2.Press the button to select the Video item Back Light Bright 3.Press the ENTER or button too display the sub.menu. -
Page 35: 3-Audio
VGA- Active when input source is VGA. Picture Mode User Brightness Contrast Auto Adjust- To auto adjust the VGA timing automatically. Back Light Bright H.Position- To adjust the horizontal position. Color Temperature V.Position- To adjust the vertical position. Advanced Video Phase- To adjust the phase. -
Page 36: 4-Tv
3.4.4-TV 1.Press the MENU button to display the menu. Tuner Mode Antenna 2.Press the button to select the TV item Auto Scan 3.Press the ENTER or button to display the sub.menu. Range Scan Channel Skip 4.Press the button to select the Sub item Audio Language English 5.Press the... -
Page 37: 5-Setup
3.4.5-Setup OSD Language English 1.Press the MENU button to display the menu. Screen Mode Normal 2.Press the button to select the Setup item Blue Mute DPMS 3.Press the ENTER or button too display the sub.menu. Time Setup 4.Press the button to select the Sub item Caption 5.Press the button to adjust the settings. -
Page 38: 6-Parental
3.4.6-Parental Parental page provides Parental page provides Channel Password Block, Program Block, Input Block, Change Password and Clean All functions setting. Press Menu button to display the menu. Press the button to select the parental item and then press the ENTER or button to display the sub.menu Enter the password, the factory default password is 0000, then the sub item will appear. - Page 39 Program Block- To lock a program by rating. Rating Enable-To adjust the rating enable selection: On and Off. Rating Enable U.S. TV Ratings-To adjust the U.S. TV Ratings. U.S. TV Ratings Age-Based Options U.S. Movie Ratings Y(all children) Canadian English Ratings Canadian French Ratings Y7(older children) Open V-Chip...
-
Page 40: 7-Channel Information
3.4.7-Channel Information When a channel is selected, an information header is shown over the picture for a few seconds, This information TV Program 58-2 English Stereo KLCS-DT 6:00 PM - 6:30 PM consists of the channel number and name, the format in 480i SD Cable Service 1... -
Page 41: Program Information
Press the INFO button again and only the channel number 58-1 and name will remain. Press the INFO button one more Cable time and this will disappear. IT'S THE RIGHT THING TO DO. 3.4.8 Program Information Antenna Monday,31-October-2005 6:11:39 PM Press the GUIDE button on the remote control and program 58-4 58-1 KLSC-DT... -
Page 42: 9-Picture-In-Picture(Pip)/Picture-By-Picture(Pop) Mode
3.4.9-Picture-in-Picture(PIP)/Picture-by-Picture(POP) Mode You can watch two pictures at the same time. by pressing the PIP button on your Remote Control, When PIP is turned on, One picture is displayed as the full screen (main screen) and the other picture is displayed in a small window(sub screen). -
Page 43: Chapter 4-Maintenance And Troubleshooting
Chapter 4- Maintenance and Troubleshooting 4.1-Maintenance Important 1.Make sure that the power cable is removed from the socket before cleaning the display. 2.Do not use volatile solvent(such as toluene, rosin and alcohol) to clean the display. Such chemicals may damage the housing, screen glass and remote control, and cause the paint to peel. Cleaning the Housing and the Remote Control 1.Use a soft cotton cloth for cleaning. - Page 44 Problem Solution The TV can not be turn ON. Check if the AC adapter is securely connected by plug it in to the TV and plug it in to the wall socket. Switch on the TV, the LED light on the front panel will turn blue;...
-
Page 45: Telephone And Technical Support
For more information on warranty service or repair, after the warranty period, please contact our Support Department at the number below. Quality service and consistent technical support are integral parts of VISIONQUEST's commitment to service excellence. VISIONQUEST's service representatives are dedicated to assist you with the utmost in customer satisfaction. -
Page 46: Compliance
4.4-Compliance Caution: Always use a power cable that is properly grounded. Please use the AC cords listed below for each area. Canada Germany Britain BASE/BS Japan Electric Appliance Control Act 4.5-FCC Class B Radio Frequency Interference Statement Note: This equipment has been tested and found to comply with the limits for a Class B digital device, pursuant to Part15 of the FCC Rules. -
Page 47: Specifications
Specifications Specifications Panel 37''Diagonal, Color TFT Active MatrixLCD Resolution 1366X768pixels (WXGA format) Colors 16.77 million colors Display Compatibility HDTV (720p) Native, 1080i,1080P Signal Compatibility 480i (SDTV), 480p(DVD/EDTV),720p(HDTV),1080i(HDTV), 1080P Response Time 8ms(typical) Brightness 600cd/m2 (typical) Contrast 1200:1(typical) Viewing Angle 178°(horizontal),178°(vertical) 1xRF, 2xHDMI1.1(HDCP 1.1)),... -
Page 48: Glossary-Standard Definitions
HDTV provides 900,000-2.1 million pixels. Integrated HDTV: An HDTV that has the digital tuner built into the set. It does not need a separate set-top box to receive over -the -air DTV signals. progressively scanned lines (480p) in 16x9 or 4x3 format. 480 interlaced (480i) is the quality of today's analog TV system.
Need help?
Do you have a question about the HDTV and is the answer not in the manual?
Questions and answers