Table of Contents
Advertisement
Quick Links
Advertisement
Table of Contents

Related Manuals for Panasonic DMP-BD87PX


Summary of Contents for Panasonic DMP-BD87PX
- Page 1 ORDER NO. DSD1203005CE Blu-ray Disc Player DMP-BD87PX Model No. DMP-BD77PH DMP-BD77PU DMP-BD77GA DMP-BD77GC DMP-BD77GJ DMP-BD77GN DMP-BD77GT DMP-BD77GW Colour (K)...Black Type © Panasonic Corporation 2012 Unauthorized copy- ing and distribution is a violation of law.
-
Page 2: Table Of Contents
TABLE OF CONTENTS PAGE PAGE 1 Safety Precautions -----------------------------------------------3 1.1. General Guidelines ----------------------------------------3 1.2. Leakage Current Cold Check ---------------------------3 1.3. Leakage Current Hot Check (See Figure 1.)--------3 2 Warning --------------------------------------------------------------4 2.1. Prevention of Electrostatic Discharge (ESD) to Electrostatically Sensitive (ES) Devices ----------4 2.2. -
Page 3: Safety Precautions
1 Safety Precautions 1.1. General Guidelines 1.3. Leakage Current Hot Check (See Figure 1.) 1. IMPORTANT SAFETY NOTICE There are special components used in this equipment 1. Plug the AC cord directly into the AC outlet. Do not use which are important for safety. These parts are marked by an isolation transformer for this check. -
Page 4: Warning
2 Warning 2.1. Prevention of Electrostatic Discharge (ESD) to Electrostatically Sensitive (ES) Devices Some semiconductor (solid state) devices can be damaged easily by static electricity. Such components commonly are called Elec- trostatically Sensitive (ES) Devices. The following techniques should be used to help reduce the incidence of component damage caused by electrostatic discharge (ESD). -
Page 5: Caution For Ac Cord (For
2.2.2.3. How to Replace the Fuse A replacement fuse cover can be purchased from your local Panasonic Dealer. 1. Remove the Fuse Cover with a screwdriver. If the fitted moulded plug is unsuitable for the socket outlet in your home then the fuse should be removed and the plug cut off and disposed of safety. -
Page 6: Precaution Of Laser Diode
2.3. Precaution of Laser Diode... -
Page 7: Static Electricity Protection Measures
2.4. Static Electricity Protection Measures • The laser diode in the traverse unit (optical pick-up) may break down due to potential difference caused by static electricity of clothes or human body. So, be careful of electrostatic breakdown during repair of the traverse unit (optical pick-up). 2.5. -
Page 8: Service Navigation
3 Service Navigation 3.1. Service Information This service manual contains technical information, which allow service personnel's to understand and service this model. Please place orders using the parts list and not the drawing reference numbers. If the circuit is changed or modified, the information will be followed by service manual to be controlled with original service manual. Note: The replacement parts of this model is supplied as block unit. - Page 9 3.2.2.2. Updating firmware using the USB device When updating firmware using USB device, perform following procedures. (When using CD-R instead of USB device, perform same procedures) 1. Download the latest firmware file of the unit The latest firmware required for version-up can be downloaded from “Support Information from NWBG/VDBG-PAVC” web-site in “TSN system”...
-
Page 10: Caution For Divx (For Ph/Pu/Ga/Gc/Gj/Gn/Gt/Gw)
3.3. Caution for DivX (For PH/PU/GA/GC/GJ/GN/GT/GW) Please will always pass the customer “Warning for Customers Who Use the DivX Video-on-Demand content.” with the product and get it when you unavoidably exchange DIGITAL P.C.B. including FLASH ROM (When the product is exchanged, it is the same.). You must use print attached to service part (DIGITAL P.C.B. -
Page 11: Specifications
4 Specifications Media: Playable disc: Power supply: AC 110 to 240 V, 50/60 Hz BD-Video (BD-LIVE): BD-ROM Version 2.4 (PX/PU/GA/GJ models) BD-RE: Version3(Single Layer / Dual Layer), AC 120 V, 60 Hz (PH model) JPEG AC 220 to 240 V, 50/60 Hz BD-R: Version2(Single Layer / Dual Layer), (GC model) -
Page 12: Others (Licenses)
4.1. Others (Licenses) -
Page 15: Location Of Controls And Components
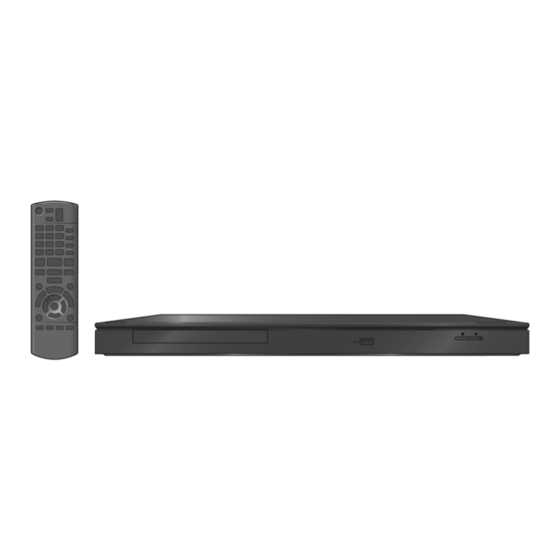
5 Location of Controls and Components Turn the unit on and off TV operation buttons You can operate the TV through the unit’s remote control. TV] : Turn the television on and off [AV] : Switch the input select VOL] : Adjust the volume Select title numbers, etc./Enter numbers Cancel Select audio... -
Page 16: Operating Instructions
6 Operating Instructions 6.1. Taking out the Disc from Drive Unit when the Disc cannot be ejected by OPEN/CLOSE button 6.1.1. Forcible Disc Eject 6.1.2. When the Disc Eject can not be done. 1. Turn off the power and pull out AC cord. 2. -
Page 17: Multiple Pressing Function
7 Multiple Pressing Function 7.1. About the Multiple Pressing of the Unit’s Remote Control The remote control which included this unit is possible pressing multiple buttons simultaneously (Multiple Pressing function), and can operate for the customer's initial settings and the Service Mode, etc. The Multiple Pressing function is not available for conventional models' remote control. - Page 18 7.2.1. Open Mode (Remote Cont. Buttons: [OK] [Yellow] [Blue])
- Page 19 7.2.2. Privately Mode 1 (Remote Cont. Buttons: [6] [7] [Yellow]) 7.2.3. Privately Mode 2 (Remote Cont. Buttons: [5] [9] [Red])
-
Page 20: Service Mode
8 Service Mode 8.1. About the Service Mode Informations necessary for service can be displayed. 8.1.1. How to enter the Service Mode 8.1.2. How to exit the Service Mode Press and hold the [Power] button (remote control or unit). • The Service Mode is terminated and automatically turns the unit off. -
Page 21: Service Mode List
8.2. Service Mode List The display of information to each command is as follows. Note: Do not use it excluding the designated command. -
Page 24: Troubleshooting Guide
9 Troubleshooting Guide 9.1. About Operation of Set... -
Page 25: About Circuit
9.2. About Circuit... -
Page 29: Wiring Connection And Voltage Data
10 Wiring Connection and Voltage Data... -
Page 30: Disassembly And Assembly Instructions
11 Disassembly and Assembly Instructions 11.1. Unit 11.1.1. Disassembly Flow Chart The following chart is the procedure for disassembling the casing and inside parts for internal inspection when carrying out the ser- vicing. To assemble the unit, reverse the steps shown in the chart below. 11.1.2. -
Page 31: Top Panel
11.1.3. Top Panel 11.1.4.2. Front Panel 1. Remove the 4 Screws (A). 1. Remove the connector (A) and (B). 2. Slide Top Panel rearward and open the both ends at rear (the connector (B) is installed DMP-BD87 only). side of the Top Panel a little and lift the Top Panel in the 2. -
Page 32: Back Panel
11.1.5. SW P.C.B. and Wireless P.C.B. 11.1.8. Digital P.C.B. 1. Unlock 2 tabs (A) to remove the SW P.C.B.. 2. [DMP-BD87 only] Unlock tab (B) to remove the Wireless P.C.B.. 1. Remove the connector (A) and FFC (A). 2. Remove the screw (A), the lift up the Digital P.C.B. 3. - Page 33 11.1.9. Mechanism Unit 1. Remove the 2 screws (A) then remove the Mechanism Unit. (When assembling, first set the Mechanism unit to tabs (A) then tighten the 2 screws (A).)
-
Page 34: When Replacing The Mechanism Unit And/Or Digital P.c.b
11.2. When Replacing the Mechanism Unit and/or Digital P.C.B. When replacing the mechanism unit, Digital P.C.B. or both, the drive adjustment is required. 11.2.1. List of Service Tools 11.2.1.1. Adjustment/Inspection Tools 11.2.1.2. Commercial Tools Required 11.2.2. How to adjust the Mechanism Unit/Digital P.C.B. -
Page 35: Exploded View And Replacement Parts List
12 Exploded View and Replacement Parts List 12.1. Casing Parts & Mechanism Section... -
Page 36: Packing & Accessories Section
12.2. Packing & Accessories Section... -
Page 37: Replacement Parts List
12.3. Replacement Parts List Notes: Safety Ref. Part No. Part Name & Pcs Remarks *Important safety notice: Description VHD2326 SCREW Components identified by mark have special character- VHD2330 SCREW istics important for safety. VHD2328 SCREW VHD2330 SCREW When replacing any of components, be sure to use only VHD2330 SCREW manufacture’s specified parts shown in the parts list.
Need help?
Do you have a question about the DMP-BD87PX and is the answer not in the manual?
Questions and answers