Table of Contents

Subscribe to Our Youtube Channel
Related Manuals for MAXTEK Solar Powered Charger

Summary of Contents for MAXTEK Solar Powered Charger
-
Page 1: User Guide
User Guide Solar Powered Charger Now you have purchased a MAXTEK® product you can rest assured in the knowledge that as well as your 3 year parts and labour warranty you have the added peace of mind of dedicated helplines and web support... -
Page 2: Table Of Contents
Contents Chapter 01. Contents 02. Welcome Section 03. General Information and Safety Instructions 04. Battery Handling and Usage 05. Accessories and Features 06. Controls 07. Charging The Solar Charger 08. Charging External Devices 09. Technical Speci cations 10. Warranty Card 11. -
Page 3: Welcome Section
MAXTEK. We want you to be completely satis ed with your purchase so this MAXTEK® product is backed by a comprehensive manufacturer’s 3 year warranty and an outstanding after sales service through our dedicated Helpline. We hope you will enjoy using your purchase for many years to come. -
Page 4: General Information And Safety Instructions
General Information & Safety Instructions Please read through the following safety information before rst use. The lightening ash and The exclamation mark within arrowhead within the triangle is the triangle is a warning sign a warning sign alerting you of alerting you of important safety dangerous voltage inside the instructions concerning the... -
Page 5: Battery Handling And Usage
Battery Handling and Usage Battery Safety • Never throw batteries into re or expose to excessive heat sources. • If batteries are swallowed, please seek immediate medical attention. • Do not recharge non-rechargeable batteries Disposal of Your Old Product Electric and electronic equipment (EEE) contains materials, parts and substances which can be dangerous to the environment and harmful to human health. -
Page 6: Accessories And Features
Accessories and Features Accessories • 5 x Phone Adaptors (iPod/iPhone, Nokia N70, 8210, Micro USB, Motorola V3) • USB Cable • Carry strap Features • Small and compact in size for portability. • LED charge indicator. • Aluminium casing. • High charging current. -
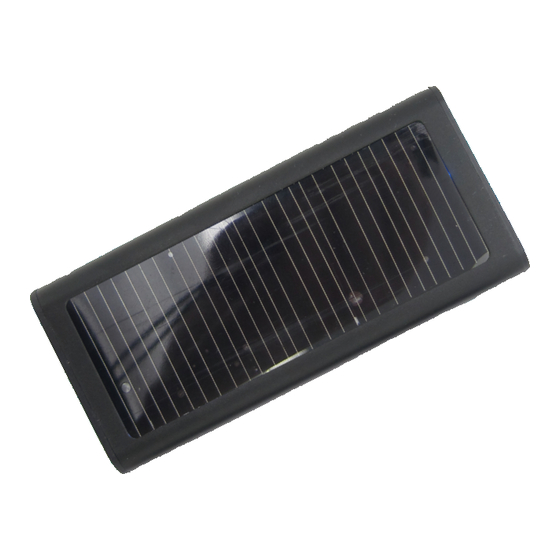
Page 7: Controls
Controls 1. Solar cell panel. 2. Aluminium case. 3. External energy source connection for the built-in battery. 4. Blue LED – indicates charging. 5. USB connection for charging mobile phones, MP3 players, digital cameras, etc. -
Page 8: Charging The Solar Charger
Charging The Solar Charger Before the solar charger is used for the rst time, the unit must be charged via a computer USB port or similar for at least 10 hours. 1. Connect the external charging source to the solar charger’s input (3) using the supplied cable. -
Page 9: Charging External Devices
1. Select the appropriate adaptor for your device and connect it to the charger using the USB cable. 2. Check your device to see if it is charging. If not, there may not be any charge remaining in the Solar Powered Charger. Please charge the the Solar Powered Battery Charger rst. -
Page 10: Technical Speci Cations
Technical Speci cation Solar Cell Panel 0.3W, 5.5V Battery 1200mAh lithium polymer battery Input Voltage 4.5 - 5.5V DC/350-650 mA Output Voltage 5.3V± 0.2V/650-750 mA Operating Environment -20 ºC - +50 ºC Storage Environment -20 ºC - +55 ºC USB charging time (90%) 0-2 hours Discharge time 0-85 minutes...
Need help?
Do you have a question about the Solar Powered Charger and is the answer not in the manual?
Questions and answers