
Related Manuals for Celestron 52212


Summary of Contents for Celestron 52212
- Page 1 IS70 model #52212 7 0 m m S P O T T I N G S C O P E A N D 3.1 M P D I G I TA L C A M E R A U S E R M A N U A L...
-
Page 2: Table Of Contents
Warranty ......16 INTRODUCTION Congratulations on your purchase of the Celestron VistaPix IS70 – the spotting scope with a built-in 3.1MP digital camera. -
Page 3: Quick Start Guide
QUICK START GUIDE Installing batteries Turn the spotting scope over and open the battery cover. Insert 2 AA Alkaline batteries into the compartment in the direction indicated by the diagrams inside, then press the Battery Compartment battery cover back in place until it clicks. Powering the IS70 1. -
Page 4: Parts Identification
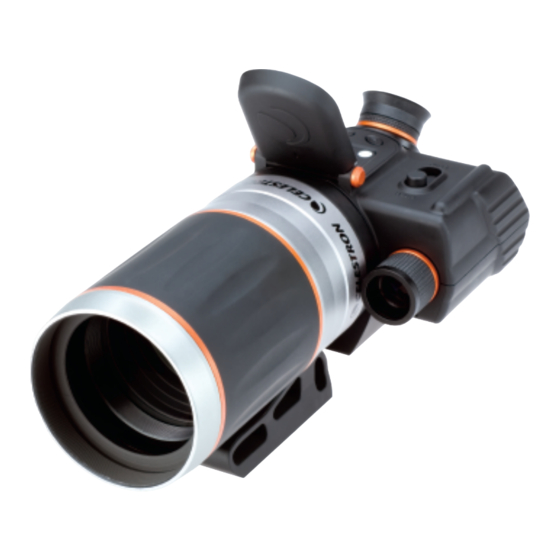
PARTS IDENTIFICATION 2” Color LCD Flip Screen Menu Navigation Keypad Spotter Focusing Knob USB/TV Out Ports View Objects Power and Exposure (Snap) Buttons Through Eyepiece at 14x Magnification Dual Power Imaging Switch SD Card/12v DC/Shutter Release Ports Spotting Scope Digital Camera Camera Focus Ring Rotating Tripod Adapter 70mm Objective Lens... -
Page 5: Navigation Pad Identification
NAVIGATION PAD IDENTIFICATION Menu Button: Open menu / Return to options MENU screen in playback mode Up Button: Move up / Start self-timer in photo mode / Open “delete” menu in playback mode Down/Mode Button: Move down / Switch to the options mode / Start &... -
Page 6: Movie Mode
3) MOVIE MODE: 1. Date 2. Battery Life 3. Remaining Time Period 4. Movie Mode 5. Image Quality 6. Frames Per Second 7. Exposure Value 8. Focus Meter 9. Zoom In / Zoom Out 4) MOVIE PLAYBACK MODE: 1. Date 2. -
Page 7: Taking Movies
Taking Movies 1. Make all the necessary set-up options. Press the “power button” to turn on the power and you will be in the “Photo mode”. Press the “down/mode button” to enter the screen with various mode options and choose “Movie”. Look through the spotting scope to center the object you wish to start the movie with. -
Page 8: Setup Menu Operation
SETUP MENU OPERATION Follow the arrows in checking each option and when complete push the “exit” or “ok” button. For VIDEO playback, select NTSC or PAL. These are the two main television systems used for playback of movies you take. NTSC is used throughout North America as well as in Japan, South Korea, and parts of South America. -
Page 9: Reset
SETUP MENU OPERATION (CONT.) Choose RESET when you want to restore all settings in this menu operation back to the factory default settings. Set the LANGUAGE that you will be using. There are eight languages to choose from. If you choose “on” for the PWR SAVE function, this will allow you to have the LCD screen turn off automatically in two minutes if... -
Page 10: Auto Shoot
PHOTO MENU OPERATION (CONT.) AUTO SHOOT allows you to take sequential images if you select a time interval. The time options are every 10 seconds, 30 seconds, 60 seconds, 3 minutes, 10 minutes, 30 minutes. If you make a selection, when you are in the photo mode you push the “snap” button and the images will continue to be taken at the selected time interval. -
Page 11: Frame
MOVIE MENU OPERATION (CONT.) FRAME is the setting of the frames per second. The more frames per second, the smoother motion appears on your movie or film clip. The higher quality selection is 30 FPS. EV means exposure value. Exposure is the total amount of light that falls on the image sen- sor during the process of taking an image. -
Page 12: Viewing Images On A Tv
Viewing Images/Movies on your TV To view photo images and/or watch your captured movie/video: 1. Attach the supplied video cable to the “TV Out” port on the IS70 and the “TV IN” port on the TV. 2. Select the “Line” channel on your TV. 3. -
Page 13: Driver Installation
Driver Installation Since VistaPix is a Mass Storage Device, you can access captured images just as if it is a hard drive, therefore no software driver is needed. • If you use VistaPix with an older version of Windows 98SE, it is necessary to install the software driver. -
Page 14: Downloading Photos/Movies
Downloading Photos Using PhotoBase 1. Connect the camera to your computer using the USB cable. Select and run PhotoBase in the “start” menu. 2. Select “Import from Removable Media…” in the menu of “File->Get Photo”. 3. Select photos in the pop-up window. Choose the saving path in “Save photos to”, press the button “OK”. -
Page 15: Specifications
VistaPix IS 70 Specifications Spotting Scope Specifications Optical Design Refractor Size of Objective Lens 70mm Magnification Focal length 210mm Field of View -- angular 4° Field of View -- linear 210ft @ 1000yds Coatings Fully Coated Near Focus 15ft (4.5m) Eye Relief 13mm Tripod Adaptable... -
Page 16: Warranty
Celestron shall use reasonable efforts to repair or replace any product covered by this warranty within thir- ty days of receipt. In the event repair or replacement shall require more than thirty days, Celestron shall notify the customer accordingly. Celestron reserves the right to replace any product which has been dis- continued from its product line with a new product of comparable value and function. - Page 17 – 17 –...
- Page 18 2835 Columbia Street • Torrance, CA 90503 U.S.A. • 310.328.9560 www.celestron.com Copyright 2006 Celestron • All rights reserved Product specifications or instructions may change without prior notice or obligation. Item #52212-INST $10.00 08-06...
Need help?
Do you have a question about the 52212 and is the answer not in the manual?
Questions and answers