
Summary of Contents for ACT Kern VT 1503
- Page 1 VT 1503 – VT 1704 – VT 1904 TFT-LCD MONITOR WITH VGA & VIDEO 15” – 17” – 19” USER’S MANUAL Rev. 2.0...
-
Page 2: Table Of Contents
CONTENTS 1. Introduction Page 2 Product Description……………………………………... Page 2 Package Contents………………………………………. Page 2 Product Features…………………………………….….. Page 2 Screen Cleaning Techniques…………………………… Page 2 Additional…………………………………………….…… Page 2 2. Control Functions Page 3 Function Selection……………………………………..Page 4 Function Adjustments……………………………….….. Page 4 3. Installation………………………………………………. Page 9 4. -
Page 3: Introduction
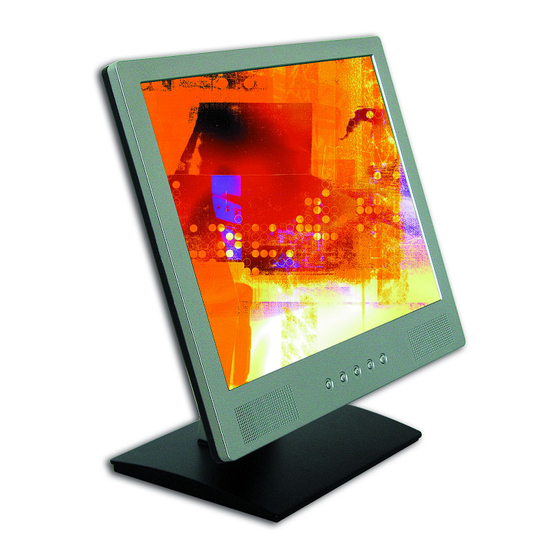
1. Introduction Product Description Congratulations on your purchase of the LCD monitor with VGA & Video Input out of our VT series. It incorporates high quality display into a small light-weighted module. It has power-saving capabilities and emits no radiation. You will certainly benefit from this monitor in lots of ways; to name some of them: comfort, safety, space-saving and environmental protection. -
Page 4: Control Functions
2. Power Use the type of power indicated on label. 3. Plugs DO NOT remove any of the prongs of the monitor’s three-pronged power plug. Disconnect the power plug from the AC outlet under following conditions: If you will not use it for an extended period time. When the power cord or plug is damaged or frayed. -
Page 5: Function Selection
Function Selection 1. Press the knob “MENU/SELECT” to show the OSD menu. Then use the “▲” and “▼” to select a function. Press the knob “AUTO/EXIT” to close the OSD menu. 2. With the knob “▲” and “▼”, you can adjust the speaker volume on the monitor. When you press the knop “▼”, the speakers are mute. - Page 6 Tint - Adjust the Tint level of the image Sharpness - Adjust the Sharpness level of the image Video Mode - Adjust the Video Mode for Normal/Nature/Cinema/Sport/Vivid Reset - Recall the factory setting of the Video menu.
- Page 7 Contrast - Adjust the difference in luminance between light and dark areas of the image. Brightness - Adjust the luminance level of the image. Sharpness - Adjust the Sharpness level of the image Color Temperature - Adjust Color Temperature Cool(9300k)/User/Warm(6500k)/Nature(7500k)
- Page 8 User RGB - Adjusting R/G/B level of the image Image Auto Tune - Adjust geometry of the image automatically. Position - Adjust the vertical & horizontal position of the image. Phase - Adjust the horizontal sync phase of signal. Clocks - Adjust the horizontal sync size of signal.
- Page 9 4. Feature Controls (Video & VGA) Sleep Timer - Select 10/20/30/40/50/60/70/80/90/Off Language -Select Language English/Fran/Deu/Esp/Ita OSD Controls -Select OSD Position /Rotation/Timer Factory Recall - Recall Factory setting...
-
Page 10: Installation
3. Installation Unpacking Open the shipping carton and check the package contents. If any items are missing or damaged, contact us immediately. The package should include the following items: TFT LCD monitor 15-pin-mini-D-Sub/VGA signal cable Audio cable AC power cord AC/DC power adapter User’s manual Installing the Monitor... -
Page 11: Signal Connector Pin-Outs
5. Signal Connector Pin-outs To connect VGA, 8514A or IBM-compatible graphics adapters, use a 15 pin mini D-type male connector. 15-pin Mini D-type Male Connector Pin Assignment 1 Red Video 6 Red Ground 11 Ground 2 Green Video 7 Green Ground 12 Serial Data/I/O 3 Blue Video 8 Blue Ground... -
Page 12: Product Specifications
7. Product Specifications 7.1 Product specifications: 15inch Model 1503 LCD Panel Size 15” Maximum viewable size 15 inch(38.1cm) Video Input Analog:15-pin, D-sub connector x1 S-Video x1, RCA composite x1 Display area 304mmx228mm Power supply (Universal) Input voltage 12V DC/2A Consumption 25watts maximum External controls Power-switch, VGA, Brightness, Contrast,... - Page 13 7.3 Product specifications: 19inch Model 1904 LCD Panel Size 19” Maximum viewable size 19 inch (48.3cm) Video Input Analog:15-pin, D-sub connector x1 S-Video x1, RCA composite x1 Display area 376mmx301mm(H×V) Power supply (Universal) Input voltage 12V DC / 3.3A Consumption 40watts maximum External controls Power-switch, VGA, Brightness, Contrast,...
-
Page 14: Windows Setup
8. Windows setup For the best display quality, please set the monitor type in Windows. Control Panel > Display > Settings > Advanced > List All Modes For 1280 ×1024, please set to “SXGA 1280 × 1024 @ 60Hz” [17”+19” Monitor] For 1024 ×768, please set to “XGA 1024 ×... -
Page 15: Trouble Shooting
For 800 ×600, please set to “SVGA 800 × 600 @ 60Hz” [12” Monitor] 9. Trouble Shooting 1) Power on but no picture → Make sure the VGA cable is tightly connected from the video output connector on the video card to the video input connector on the monitor. -
Page 16: Vendor
Play Monitor”. A quick way is to uninstall all the monitor drivers and then let Windows automatically detect the new hardware. (Right click on the monitor driver and select “Uninstall”). Restart your PC. 10. Vendor Richardson Electronics GmbH Division A.C.T. Kern Raiffeisenstraße 5 D-78166 Donaueschingen www.actkern.info...
Need help?
Do you have a question about the VT 1503 and is the answer not in the manual?
Questions and answers