
Summary of Contents for Option Audio OA110DVD
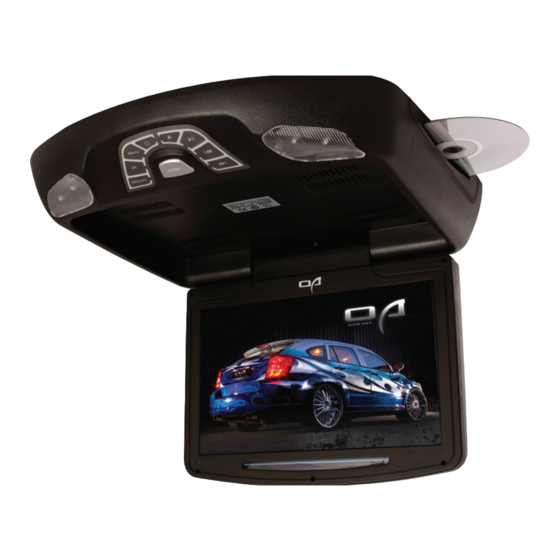
- Page 1 USER MANUAL OA110DVD/ OA110DVDB/ OA110DVDG 11” FLIP DOWN DVD LCD SCREEN www.optionaudio.com...
- Page 2 Welcome Thank you for choosing an Option Audio product! All Option Audio products have been designed with one thing in mind; offering you the highest quality products that are easy to use and great value for money. We manufacture a large range of In-Car Audio Visual products, Speakers, Subwoofers, Amplifiers, GPS and Reverse Camera Systems.
-
Page 3: Precautions
Precautions Do not try to repair the unit yourself. If you are experiencing any problems with this product, please turn power off immediately and inform your nearest retailer. The product is comprised of many electronic components. Attempting to repair or disassemble may cause the product to malfunction and void warranty. -
Page 4: Table Of Contents
Table of Contents Welcome...............................i Precautions............................ii DVD Explanations..........................1 Unit Functions & Features........................3 Unit Function Guide..........................4 Connecting with power and signal cable...................5 Installation............................5 Remote control panel..........................6 Activating Remote Control Battery.....................7 About Remote Control........................7 Inserting Discs............................12 Playing Discs............................12 DVD Setup Menu..........................13 Monitor Menu...........................16 Monitor Menu Options - Quick Reference..................16 FM Transmitter Setup.........................17 Simple Trouble Shooting........................18... -
Page 5: Dvd Explanations
Disc Information TYPE Record format MPEGII CD-DA MPEG4 Two layer on one side; One layer on on side; 650M 650M 650M 9.4GB, 4.5 hours 4.7GB, 2 hours Capability Two layer on both One layer on both sides; 74 Minutes 74 Minutes 74 Minutes sides;... - Page 6 Choosing guide for disc • All DVD discs and DVD players have their own word recognition code. DVD player only plays the responding DVD disc with same code. • Following are the DVD disc codes. Region Code Country or Region USA, Canada Europe, Japan, Middle East, South Africa West Asia (Includes Korea, Hong Kong &...
-
Page 7: Unit Functions & Features
Disc Maintenance Keep the disc away from magnetic materials, heat or direct sunlight. Do not expose disc to moisture or dust environments. Disc Cleaning Fingerprints and dust on the disc can cause poor picture quality and sound distortion. Before playing, clean the disc with a soft cloth. Wipe the disc from the centre out. Unit Functions &... -
Page 8: Unit Function Guide
Function Guide Eject Power On/Off Menu Brightness Open Play/ Pause Back Forward Swivel Point Infrared Receiver... -
Page 9: Connecting With Power And Signal Cable
Connecting power and signal cable FM OUTPUT A. Left audio input/ output (white jack) (Fuse box) 250V 3A (RED) +12V B. Right audio input/ output (red jack) C. Video input/ output (yellow jack) BLACKGND TV (ANT) INPUT Installation Disassemble the metal support bracket from the unit by loosening four screws on the bottom of unit body. -
Page 10: Remote Control Panel
Remote Control Panel Menu Key Power On/Off Channel Select Key Increase Volume AV/TV/DVD Shift Decrease Volume Channel Search Disc Play List Number Key Channel Select Mute Key Play/ Pause Repeat Eject Disc Stop Rewind Next Fast Forward Back DVD Menu Setup Enter Program... -
Page 11: Activating Remote Control Battery
Activating Remote Control Battery Remove clear plastic strip from base of remote by pulling outwards. Note: Do not press, drop or disassemble the remote control. Always use new batteries to replace the old set. Remove the battery when not in use for a long period of time. - Page 12 STOP Press STOP button to stop the DVD from playing, then press the PLAY button to play from the first track. Press STOP twice repeatedly and the screen will switch off. Press PLAY to start from the beginning. FAST FORWARD/ REWIND Press FAST FORWARD button repeatedly, the playing mode will increase in increments by 2, 4, 8 and 16 times the rate of normal play (for DVD disc).
- Page 13 TITLE MENU FUNCTION (MENU) While playing DVD, press MENU to enter the TITLE MENU. Menu items will display on screen. Press the arrow keys to navigate around menu, then press enter to confirm. Note: MENU button indicates RETURN when playing. ZOOM The image zooms in by increments of 2, 3 and 4 times when you press ZOOM button.
- Page 14 SLOW BACK Press the button while disc is playing. Unit plays back slowly by increments of four different speeds. Press the button to return to normal state. This function is not available for MP3 or CD plays. SINGLE STEP PLAY Press the button to pause in the state of playing, press to play step by step, press...
- Page 15 TITLE SELECT While playing DVD, press TITLE and the title menu is displayed. Use the arrow buttons to navigate and press ENTER to make a selection. R/L: There is multi-language feature while playing DVD disc. With this function, you can select the desired voice by pressing AUDIO.
-
Page 16: Inserting Discs
Inserting Discs Insert disc horizontally DVD disc label DVD disc under (shiny) Playing Discs Playing a disc (DVD/VCD/CD) Turn on the player, insert the disc - label facing up. Once inserted, the disc will automatically play. To stop the disc from playing, press the stop button (STOP). To pause the disc, press the play/ pause button (PLAY/ PAUSE). -
Page 17: Dvd Setup Menu
Playing a MP3 file Turn on the player, insert the disc - label facing up. Disc automatically plays. To stop, press the stop button (STOP) To stop temporarily, press the pause button (PLAY/ PAUSE) To resume again, press the play button (PLAY/PAUSE) To replay a song you want, press the button after choosing a song (track) you want by using arrow button. - Page 18 Language In this section, users can choose a language for OSD, AUDIO and SUBTITLE. Press the arrow buttons to navigate, then press ENTER button to confirm selection. Video In this section, users can select the screen format display that they prefer. Press the arrow buttons to navigate, then press ENTER button to confirm selection.
- Page 19 Scanning Scene/ Song While DVD/ CD is playing, press the BACK button. This will take you to the beginning of current chapter/ track. Then press the NEXT button. Moves to following chapter/ track. To scan DVD or CD fast Press button or button.
-
Page 20: Monitor Menu
Monitor Menu To Access Unit Menu Options Turn unit on by pressing POWER button on the unit or on the remote. Then press MENU on the unit. This will bring up COLOR menu. Press PLAY/ PAUSE button and this will bring up the OSD (On Screen Display) menu. -
Page 21: Fm Transmitter Setup
OSD (On Screen Display) Menu Options Language H Position V Position OSD Timeout Transparent Function Menu Options Display Ratio Sleep Blue Screen FM Send TCON FM Transmitter Turn on the unit. Press MENU on the unit and skip through to Function Menu. Drop down into menu options and select FM Send option. -
Page 22: Simple Trouble Shooting
Simple Trouble Shooting Unit does not turn on: • Please check that the cables have been connected properly. No picture: • Please check that the unit has been turned on and is connected properly. No sound: • Please check that the volume has been switched to ON, on the wireless headphones. •... -
Page 23: Warranty
Warranty Option Audio Pty Ltd, (OA) warrant all OA product to be free of defects in material and workmanship for a period of (1) year form the date of original purchase provided they are purchased from an authorized OA reseller in Australia. However, the effective warranty period will be two (2) years if the products were purchased from and installed by an Authorised OA Reseller. - Page 24 www.optionaudio.com...
Need help?
Do you have a question about the OA110DVD and is the answer not in the manual?
Questions and answers