
Summary of Contents for Zipsnip C-121-Pro
- Page 1 C-121-Pro D121-L D V D / C D D i s c D u p l i c a t o r U s e r s G u i d e ( R e v 2 . 4 )
-
Page 2: Table Of Contents
ZipSpin Table of Contents Chapter 1 Quick Start Guide Chapter 2 Product Information Chapter 3 Safety Information & Set Up Chapter 4 Control Panel Chapter 5 System Overview Chapter 6 Operation Guide 1. Making a Copy with AutoStart 2. Making a Copy with different burn Speed 3. -
Page 3: Quick Start Guide
ZipSpin Chapter 1. Quick Start Guide QUICK START GUIDE Step 1: Plug in power cord Step 2: Turn on power switch Step 3: Eject top tray and insert Master Disc. Close top tray. Step 4: Eject lower drive and insert Blank Disc. Close lower tray. - Page 4 "Troubleshooting" section or contact Technical Support for assistance. We strongly suggest you locate your ZipSpin C-121-Pro in a dust free environment. Dirty discs may cause duplication rejects or even total failure. Do not place unnecessary items on the unit.
- Page 5 ZipSpin Chapter 3. Safety Information and Set up Please be aware of the following installation and operation precautions. Read these instructions - All the safety and operating Do not defeat the safety purpose of the grounding-type instructions should be read before use of this system.
-
Page 6: Control Panel
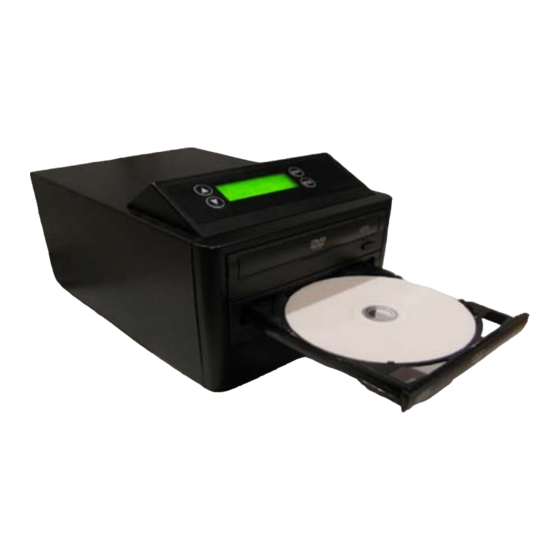
ZipSpin • The unit must not be placed in an area with direct sunlight, excessive dust, mechanical vibration or shock. Chapter 4. System Overview System Overview LCD Control Panel Reader Drive (for source disc) Writer Drive (for blank disc) Control Panel Overview ... - Page 7 ZipSpin (actual display layout may vary)
- Page 8 Show Burner: Provide information about Writer drive (manufacturer, model number and firmware version) Update BIOS: Update your duplicator’s firmware provided by ZipSpin tech support only. Machine Info : Provides information about duplicator. Set Up Parameters 1. AutoStart Time: Default is 5 Seconds. Adjust the length of time (1 to 99 seconds) for the system to start copying the disc automatically without pressing "GO".
-
Page 9: Operation Guide
“System Check”, and then switch to “1. Copy Disc” mode automatically. Insert the master disc in the top drive and blank disc in the lower drive. < < < ZIPSPIN > > > 1. Copy Disc B. The system will analyze the discs and then begin copying. During the copying, the LCD screen will display Master Source Disc’s data size and copying progress. -
Page 10: Making A Copy With Different Burn Speed
B. Return to copy function by pressing and Insert the master disc in the top drive and blank disc in the lower drive. < < < ZIPSPIN > > > 1. Copy Disc C. Press to select the different burn speed options:... -
Page 11: Making A Composite Cd (Copy Tracks)
This process will guide you to select audio tracks from various audio CDs and combine them into one customized Audio CD. Select function #3. Copy Track from main menu <<< ZIPSPIN>>> 3. Copy Track Insert an Audio CD with your favorite tacks in the Reader drive and Insert Blank CD-R disc into the writer drive. - Page 12 Audio Jacks A. Place the audio CD into the Reader Drive. B. Move , to 8. Music Player and Press ENT <<< ZIPSPIN >>> 8. Music Player C. The LCD will show All 1 2 3 4 5 6 7 D.
-
Page 13: Troubleshooting Guide And Faq's
ZipSpin Chapter 7. Troubleshooting Guide and FAQ’s *** Only DVD Model will read/copy both CD and DVD Discs. CD Model reads/copies CD disc only *** There are no end-user serviceable components that can be replaced in the CD/DVD Duplicator. Please contact your dealer for warranty repairs and service. - Page 14 PC, and create your own custom DVDs and CDs. How do I clean my ZipSpin duplicator? The best maintenance for your ZipSpin duplicator is preventive maintenance. Using a system in an area with excessive dust, smoke, or other contaminants is not recommended since it will increase error rates and reduce hardware life expectancy.
Need help?
Do you have a question about the C-121-Pro and is the answer not in the manual?
Questions and answers
It keeps telling me, Not blank disc and rejects it, I have been through a whole stack of new disc
If your Zipsnip C-121-Pro shows a "Not blank disc" error, try the following:
1. Use a different brand of blank discs, as disc quality may be poor.
2. Ensure the blank disc has enough capacity for the data being copied.
3. Check if the disc is truly blank; avoid using previously burned or partially used discs.
4. Make sure the disc's rated speed matches the duplicator's writing speed.
5. Try updating the duplicator's firmware or BIOS if issues persist.
If the problem continues, contact your dealer or technical support.
This answer is automatically generated