Table of Contents
Advertisement
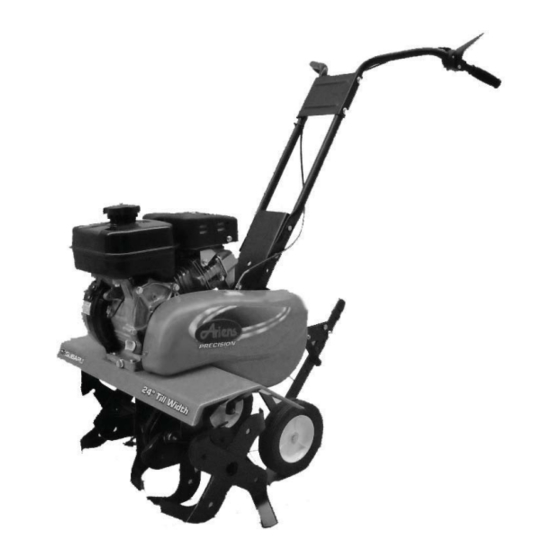
FRONT TINE TILLER
Owner's Manual
Models
902032 24" FRONT TINE TILLER
Gasoline containing up to 10% ethanol (E10) or up to 10% MTBE (methyl tertiary butyl
ether) is acceptable for use in this machine. The use of any gasoline exceeding 10%
ethanol (E10) or 10% MTBE will void the product warranty.
ENGLISH
445666 Rev. 1 (
12.08.11
21547993$)
Printed in USA
Advertisement
Table of Contents

Related Manuals for Ariens Front Tine Tiller


Summary of Contents for Ariens Front Tine Tiller
- Page 1 FRONT TINE TILLER Owner's Manual Models 902032 24" FRONT TINE TILLER Gasoline containing up to 10% ethanol (E10) or up to 10% MTBE (methyl tertiary butyl ether) is acceptable for use in this machine. The use of any gasoline exceeding 10% ethanol (E10) or 10% MTBE will void the product warranty.
-
Page 2: Safety Rules
SAFETY RULES Safe Operation Practices for Walk-Behind Powered Ro ta ry Tillers TRAINING • Keep children and pets away. • Do not overload the machine capacity by attempting • Read the Owner’s Manual care ful ly. Be thor ough ly fa mil iar with the controls and the proper use of the to till too deep at too fast a rate. -
Page 3: Table Of Contents
PRODUCT SPECIFICATIONS CUSTOMER RESPONSIBILITIES • Read and observe the safety rules. • Follow a regular schedule in maintaining, caring for Gasoline Capacity: 3.6 Quarts (3.4L) and using your tiller. Unleaded Regular • Follow instructions under “Maintenance” and “Stor age” Oil (API:SG-SL): SAE 10W-30(Above 32°F/0°C) sections of this Manual. -
Page 4: Assembly
ASSEMBLY Your new tiller has been assembled at the factory with exception of those parts left unassembled for shipping purposes. To ensure safe and proper operation of your tiller all parts and hardware you assemble must be tightened securely. Use the correct tools as necessary ensure proper tightness. - Page 5 ASSEMBLY UNPACK CARTON & INSTALL HANDLE INSTALL DEPTH STAKE AS SEM BLY (See Fig. 2) (See Fig. 3) • Loosen nut “A”. CAUTION: Be careful of exposed • Insert stake support between engine brack et halves sta ples when handling or disposing with stake spring down.
- Page 6 OPERATION KNOW YOUR TILLER READ THIS MANUAL AND SAFETY RULES BEFORE OPERATING YOUR TILLER. Compare the illustrations with your tiller to familiarize yourself with the location of various controls and adjustments. Save this manual for future reference. These symbols may appear on your Tiller or in literature supplied with the product. Learn and understand their meaning. FORWARD TINE CONTROL CHOKE CONTROL THROTTLE CONTROL...
- Page 7 OPERATION The operation of any tiller can result in foreign objects thrown into the eyes, which can result in severe eye damage. Always wear safety glasses or eye shields before starting your tiller and while tilling. We recommend a wide vision safety mask for over spectacles or standard safety glasses.
- Page 8 OPERATION TO TRANSPORT ADD GASOLINE • Fill to within 1/2 inch of top of fuel tank to prevent CAUTION: Before lifting or trans port ing, spills and to allow for fuel expansion. Do not overfill. allow tiller engine and muffler to cool. Use fresh, clean, regular un lead ed gasoline with a Disconnect spark plug wire.
- Page 9 OPERATION • Soil conditions are important for proper tilling. Tines will 6. After starting the engine, gradually open choke by not readily penetrate dry, hard soil which may con trib ute turning the choke lever and finally keep it fully opened. Do not fully open the choke lever immediately when to excessive bounce and difficult handling of your tiller.
-
Page 10: Maintenance
MAINTENANCE GENERAL RECOMMENDATIONS LUBRICATION CHART The warranty on this tiller does not cover items that have TINE CON TROL been subjected to operator abuse or negligence. To receive full value from the warranty, the operator must main tain tiller as instructed in this manual. Some adjustments will need to be made periodically to properly maintain your tiller. - Page 11 MAINTENANCE Disconnect spark plug wire before performing any maintenance (except car bu re tor adjustment) to prevent accidental start ing of engine. Prevent fires! Keep the engine free of grass, leaves, spilled oil, or fuel. Re move fuel from tank before tipping unit for maintenance.
-
Page 12: Spark Plug
MAINTENANCE SPARK PLUG COOLING SYSTEM (See Fig. 14) Replace spark plugs at the beginning of each tilling sea- Your engine is air cooled. For proper en gine performance son or after every 500 hours of use, whichever comes first. and long life keep your engine clean. Spark plug type and gap setting are shown in “PROD UCT •... -
Page 13: Service & Adjustments
SERVICE AND ADJUSTMENTS CAUTION: Disconnect spark plug wire from spark plug and place wire where it cannot come into contact with plug. MID-WIDTH TILLING - 22" PATH (See Fig. 17) TILLER • Assemble holes “A” in tine hubs to holes “C” in tine shaft. -
Page 14: Service And Adjustments
SERVICE AND ADJUSTMENTS TINE OPERATION CHECK (See Fig.19) TO REMOVE BELT GUARD (See Fig. 20) • Remove screws from side of belt guard. WARNING: Disconnect spark plug wire • Pull belt guard out and away from unit. from spark plug to prevent starting while checking tine operation. - Page 15 SERVICE AND ADJUSTMENTS ENGINE BELT REPLACEMENT • Install new V-belt to engine pulley first then to trans mis- TO AD JUST CARBURETOR sion pulley. Ensure belt is positioned on inside groove of both pulleys, inside all belt guides and rests on idler The carburetor has been preset at the factory and ad just ment pulley.
-
Page 16: Storage
STORAGE Immediately prepare your tiller for storage at the end of the ENGINE OIL season or if the unit will not be used for 30 days or more. Drain oil (with engine warm) and replace with clean oil. (See “ENGINE” in the Maintenance section of this man ual.) WARNING: Never store the tiller with gasoline in the tank inside a build ing where fumes may reach an open flame... -
Page 17: Troubleshooting
TROUBLESHOOTING POINTS PROBLEM CAUSE CORRECTION Will not start Out of fuel. Fill fuel tank. Engine not “CHOKED” properly. See “TO START ENGINE” in the Operation section. Engine flooded. Wait several minutes before attempting to start. Dirty air cleaner. Clean or replace air cleaner cartridge. Water in fuel. - Page 18 FRONT TINE TILLER – MODEL NUMBER 90203200 (MFG. ID. NO. 96086000103) HANDLE ASSEMBLY FT-handle_assy_9...
- Page 19 FRONT TINE TILLER – MODEL NUMBER 90203200 (MFG. ID. NO. 96086000103) HANDLE ASSEMBLY ITEM MFG. ARIENS PART NO. DESCRIPTION 137176X479 21546089 Bracket, Handle 72140512 21546771 Bolt, Carriage 5/16-18 x 1-1/2 165787 21546171 Grip, Handle 166376X479 21546175 Handle, L.H. 751153 21546908...
- Page 20 FRONT TINE TILLER – MODEL NUMBER 90203200 (MFG. ID. NO. 96086000103) BELT GUARD AND PULLEY ASSEMBLY...
-
Page 21: Parts
FRONT TINE TILLER – MODEL NUMBER 90203200 (MFG. ID. NO. 96086000103) BELT GUARD AND PULLEY ASSEMBLY ITEM MFG. ARIENS PART NO. DESCRIPTION 23230506 21546545 Screw Set 5/16-18 x 3/8 Patch 130812 21546079 Sheave, Engine 86777 21546830 Screw, Tap Hex Head... - Page 22 FRONT TINE TILLER – MODEL NUMBER 90203200 (MFG. ID. NO. 96086000103) WHEEL AND DEPTH STAKE ASSEMBLY...
- Page 23 FRONT TINE TILLER – MODEL NUMBER 90203200 (MFG. ID. NO. 96086000103) WHEEL AND DEPTH STAKE ASSEMBLY ITEM MFG. ARIENS PART NO. DESCRIPTION 9194R 21546837 Pin, Clevis 74760520 21546806 Bolt, Hex Head 5/16-18 x 1-1/4 74760512 21546804 Bolt, Hex Head 5/16-18 x 3/4...
- Page 24 FRONT TINE TILLER – MODEL NUMBER 90203200 (MFG. ID. NO. 96086000103) TINE ASSEMBLY...
- Page 25 FRONT TINE TILLER – MODEL NUMBER 90203200 (MFG. ID. NO. 96086000103) TINE ASSEMBLY ITEM MFG. ARIENS PART NO. DESCRIPTION 156926X479 21546140 Tine, Outer, R.H. 3146R 21546548 Retainer, Spring 156924X479 21546138 Tine, Inner, R.H. 156923X479 21546137 Tine, Inner, L.H. 156925X479 21546139 Tine, Outer, L.H.
- Page 26 FRONT TINE TILLER – MODEL NUMBER 90203200 (MFG. ID. NO. 96086000103) TRANSMISSION transmission_Subaru_2...
- Page 27 FRONT TINE TILLER – MODEL NUMBER 90203200 (MFG. ID. NO. 96086000103) TRANSMISSION ITEM MFG. ARIENS PART NO. DESCRIPTION 74760524 21546807 Bolt, Hex Head, Gr. 25/16-18 x 1-1/2 74780652 21546817 Bolt, Hex Head, 3/8-16 x 3-1/4 19131311 21546282 Washer 13/32 x 13/16 x 11 Ga.
- Page 28 FRONT TINE TILLER – MODEL NUMBER 90203200 (MFG. ID. NO. 96086000103) DECALS...
- Page 29 FRONT TINE TILLER – MODEL NUMBER 90203200 (MFG. ID. NO. 96086000103) DECALS ITEM MFG. ARIENS PART NO. DESCRIPTION 446795 21547990 Decal, Console 446661 21547991 Decal, Belt Guard 110613X 21546047 Decal, Tine Control 440227 21547609 Decal, Subaru Tine Shield 110614X 21546048...
- Page 30 SERVICE NOTES...
-
Page 31: Warranty
6. In the event you have a claim under this Warranty, you must return the product to an authorized service dealer. Should you have any unanswered questions concerning this Warranty, please contact: giving the model number, serial number and date of purchase of your product and the name and address of the Ariens 655 W. Ryan Street Brillion, WI 54110 1-877-257-6920 www.ariens.com... -
Page 32: Parts And Service
For parts and service, contact your local Ariens dealer. To find a dealer in your area, call 1-877-257-6920, or use the Dealer Locator on our web site, www.ariens.com. - Page 33 à malformations cancer, cause étant comme Californie l’État reconnus chimiques produits contient produit moteur ’échappement AVERTISSEMENT www.ariens.com/corporate/Pages/customerservice.aspx web: site notre à allez pièces, manuel Pour 1-877-257-6920 appelez technique: l'assistance Pour pièce Description manufacturer numéro modèle/Référence Numéro vous: près...
- Page 34 Cette vous. à s’applique ci-dessus énoncées exclusions restrictions pourrait conséquent, www.ariens.com 1-877-257-6920 54110 Brillion, Street Ryan Ariens implicite garantie d’une durée conséquents dommages restriction aucune permettent localités Certaines FABRICANT. EXPLICITES...
- Page 35 D’ENTRETIEN REMARQUES...
- Page 36 Décalcomanie, 21546720 423830 Main Décalcomanie, 21546048 110614X Fraise Garde Subaru, Décalcomanie, 21547609 440227 Fraise Contrôle Décalcomanie, 21546047 110613X Courroie Garde Décalcomanie, 21547991 446661 Panneau Décalcomanie, 21547990 446795 DESCRIPTION ARIENS FAB. D'OBJ. PIÈCE DÉCALCOMANIES 96086000103) (MFG. 90203200 MODÈLE AVANT- À MOTOBINEUSE...
- Page 37 DÉCALCOMANIES 96086000103) (MFG. 90203200 MODÈLE AVANT- À MOTOBINEUSE...
- Page 38 Support, 21546256 188195X479 Fraise Garde, 21547631 9056RX668 3/8-16 Écrou, 21546790 73900600 13/16 3/32 Rondelle, 21546282 19131311 3-1/4 3/8-16 Boulon, 21546817 74780652 1-1/2 25/16-18 Cat. Boulon, 21546807 74760524 DESCRIPTION ARIENS FAB. D'OBJ. PIÈCE TRANSMISSION 96086000103) (MFG. 90203200 MODÈLE AVANT- À MOTOBINEUSE...
- Page 39 transmission_Subaru_2 TRANSMISSION 96086000103) (MFG. 90203200 MODÈLE AVANT- À MOTOBINEUSE...
- Page 40 21546743 4929H (C.G.) Extérieur, Fraise, 21546139 156925X479 (C.G.) Intérieur, Fraise, 21546137 156923X479 (C.G.) Intérieur, Fraise, 21546138 156924X479 retenue Ressort 21546548 3146R (C.G.) Extérieur, Fraise, 21546140 156926X479 DESCRIPTION ARIENS FAB. D'OBJ. PIÈCE ENSEMBLE FRAISE 96086000103) (MFG. 90203200 MODÈLE AVANT- À MOTOBINEUSE...
- Page 41 ENSEMBLE FRAISE 96086000103) (MFG. 90203200 MODÈLE AVANT- À MOTOBINEUSE...
- Page 42 3/8-16 Écrou 21546787 73800600 5/16 Rondelle, 21546002 10040500 5/16-18 Écrou, 21546775 73220500 5/16-18 Boulon, 21546804 74760512 1-1/4 5/16-18 Boulon, 21546806 74760520 Epingle, 21546837 9194R DESCRIPTION ARIENS FAB. D'OBJ. PIÈCE ENSEMBLE DEUR JAUGE ROUE 96086000103) (MFG. 90203200 MODÈLE AVANT- À MOTOBINEUSE...
- Page 43 ENSEMBLE DEUR JAUGE ROUE 96086000103) (MFG. 90203200 MODÈLE AVANT- À MOTOBINEUSE...
- Page 44 21546185 170488 Courroie Garde 21546700 422920X428 2-1/2 1/4-20 Boulon, 21546198 17490440 5/16-24 Boulon, 21546813 74770508 21546830 86777 Moteur Poulie, 21546079 130812 5/16-18 21546545 23230506 DESCRIPTION ARIENS FAB. D'OBJ. PIÈCE ENSEMBLE POULIE PROTECTEUR COURROIE 96086000103) (MFG. 90203200 MODÈLE AVANT- À MOTOBINEUSE...
- Page 45 ENSEMBLE POULIE PROTECTEUR COURROIE 96086000103) (MFG. 90203200 MODÈLE AVANT- À MOTOBINEUSE...
- Page 46 21546806 74760520 Rondelle 21546281 19121414 5/16-18 Écrou, 21546908 751153 (C.G.) Poignée, 21546175 166376X479 Poignée Manche, 21546171 165787 1-1/2 5/16-18 Boulon, 21546771 72140512 Poignée Support, 21546089 137176X479 DESCRIPTION ARIENS FAB. D'OBJ. PIÈCE ENSEMBLE POIGNÉE 96086000103) (MFG. 90203200 MODÈLE AVANT- À MOTOBINEUSE...
- Page 47 FT-handle_assy_9 ENSEMBLE POIGNÉE 96086000103) (MFG. 90203200 MODÈLE AVANT- À MOTOBINEUSE...
- Page 48 carburateur. Réglez déréglé. carburateur gaz. commande réglage Vérifiez gaz. commande réglage Mauvais profond. moins labourage lors peine labourage pour profondeur jauge Réglez profond. trop Labourage mais marche Moteur commande. barre Engagez engagée. n’est commande barre trapézoïdale courroie Vérifiez/réglez trapézoïdale. courroie réglage Mauvais bouge...
- Page 49 utilisé. d'essence l'agent carburateur d’essence réservoir vidangez carburateur. d'atteindre permettre pour l'agent ajouté avoir après minutes moins pendant moteur tourner Laissez l'agent. bidon inscrit mélange dosage toujours Suivez carburant. bidon dans d’essence réservoir dans l’essence à l'agent Ajoutez l'entreposage. pendant carburant gomme dépôts...
- Page 50 S'IMPOSENT. RÉGLAGES EFFECTUER POUR NÉCESSAIRE ’EXPÉRIENCE ADÉQUAT ’ÉQUIPEMENT DISPOSE QUALIFIÉ RÉPARATION CENTRE AUTRE PRÈS PLUS SEARS MAGASIN AVEC COMMUNIQUEZ RÉGLÉE, ÊTRE DOIT RÉGULATEUR SUPÉRIEURE VITESSE PENSEZ VOUS USINE). ÉTABLI CELUI DESSUS (AU- ÉLEVÉ TROP RÉGIME À MOTEUR RÉGLER DANGEREUX ÊTRE PEUT MODIFIÉ.
- Page 51 fond. à serrés soient écrous tous fraise déflecteur boulon tête sous trouve courroie protecteur fond située l’encoche Assurez-vous ci-dessus. étapes inversant courroie protecteur Remettez • motobineuse. loin courroie protecteur Tirez • courroie. protecteur côté Enlevez • Fig. (Voir ROIE Fig. COUR- PROTECTEUR ENLEVER...
- Page 52 sol. fraises Fig. pour vers guidon poussez te), (hau (OFF) “ARRÊT” position frasies commande Avec • VEUX INTÉRIEURE “ARRÊT’’ POSITION VÉRIFICATION DERNIÈRE À ÉPINGLE COLLIER FRAISE câble. serrage collier encore serrez câble, l’extrémité à situé ressort tine_4 n’allongez vous attention faites mou, enlever...
- Page 53 d’auto. cire avec peintes surfaces Protégez • Fig. etc. l’huile, l’essence, enlevant, peintes surfaces roues propreté Conservez • D'AIR TAMIS étrangères. matières toutes etc. finition, roues, moteur, Nettoyez • motobineuse. votre durée réduit moteur niveau d’eau ’entrée d’eau. possible pénétration CIEUX toute contre...
- Page 54 Fig. D'HUILE REMPLISSAGE BOUCHON D'HUILE NIVEAU D'HUI CHON Fig. l'huile. vidanger pour motobineuse avant Penchez • vidange. bouchon Enlevez • ÉLÉMENT approprié. récipient dans l'huile Recueillez • chaude. elle facilement plus vidangera L'huile • plat. terrain stationnée soit motobineuse Vérifiez •...
- Page 55 MOTEUR. ENTRETIEN SECTION À RÉFÉREZ-VOUS 10W30 MOTEUR HUILE GALET-TENDEUR BRAS LUBRIFICATION TABLEAU portez lubrifiée. bien motobineuse votre Assurez LUBRIFICATION fixation. systèmes solidité Vérifiez • fraises. fonctionnement Vérifiez • moteur. d’huile niveau Vérifiez • UTILISATION CHAQUE AVANT temps. long plus durer fonctionner mieux moteur...
- Page 56 Fig. terre. conditionner mieux pour récolte saison d’une à terre labourer préférable être peut vent) (pluie climat Dépendant sol. enrichit herbes mauvaises tion dé herbes. mauvaises enlever à aussi aide motobineuse cm). à à labourage profondeur meilleure racines. croissance favorise 10).
- Page 57 l'achat. suivant jours trente dans utilisées ître peuvent quantilés achetez fraîche, soit utilisée l’essence Pour l’essence. avec l’huile mélangez pes.) dépannage. prolonge plomb d'oxyde calamine points consultez pas, démarre moteur REMARQUE: dépôts ré à tend plomb sans d’essence tion ’uti caler.
- Page 58 Fig. CARBURANT (RECUL) DÉMARRAGE ROBINET POINGNÉE désiré. l’endroit jusqu’à motobineuse tirez Poussez • sol. fraises soulever pour poignées Appuyez • jauge. ressort maintenue soit qu’elle COMMANDE jusqu’à devant vers profondeur jauge Penchez • COUR DANS réservoir. l’essence Vidangez d’allumage. bougie Débranchez ter.
- Page 59 bêche. motobineuse auquelle profondeur vitesse Commande PROFONDEUR JAUGE froid. teur carburateur. carburant réservoir entre passage ferme démarrer pour Employé L'ÉTRANGULEUR COMMANDE ouvre carburant soupape CARBURANT- SOUPAPE d’allumage. circuit neutralise permet moteur tateur moteur. vitesse commu- MOTEUR- MARCHE/ARRÊT COMMUTATEUR commander Permet COMMANDE MANETTE l'avant.
- Page 60 Fig. manuel.) Ré Révision section dans DENT” TION ’UTI TION “VE à (Référez-vous dents. tion l'uti- vérifiez motobineuse, votre usage primer Avant • DENTS UTILISATION MOTOBINEUSE manuel.) Réglages sion Ré tion POIGNÉES dans DENTS” “DISPOSITION à rez-vous fé (Ré POIGNÉE bou- demandes pour...
- Page 61 5/16-18 5/16 Frein 1-1/4 5/16-18 Écrous Rondelles Boulons Rondelles 5/16-18 Boulons PIÈCES CONTENU Fig. ’OPÉRATEUR POSITION guidon. derrière position l'utilisateur “gauche”, “droite” l'expression utilise Quand Fig. (Voir D’OPERATEUR POSITION DROITE GAUCHE 1/2" Clés Pince Tournevis usage tout à Couteau indiquées: sont clés sions...
- Page 62 10-12 ............ENTRETIEM ..CHANGE PIÈCES ’ENTRETIEN ........D’ENTRETIEN CALENDRIER ..............GARANTIE .............. UTILISATION 18-29 ........RECHANGE PIÈCES ..............MONTAGE ..........DÉPANNAGE GUIDE ........PRODUIT SPÉCIFICATIONS ............ENTREPOSAGE ......... CLIENT RESPONSABILITÉS 13-15 ........RÉGLAGES RÉVISION ..........SÉCURITÉ RÈGLES SOMMAIRE TÉ”. SÉ...
- Page 63 dangereux. sont d’échappement bâtiment. d’un l’intérieur à moteur démarrez • ques. élec moteurs d’alimentation cordon chez bran Dé moteur. accidentel démarrage éviter pour bougie loin maintenez-le d’allumage bougie câble débranchez Ensuite, arrêtées. soient mobiles parties réparations. toutes assurez-vous moteur coupez neuse, ments ajus...
- Page 64 É.-U. Imprimé 12.08.11 (21547993$) Rev. 445666 produit. garantie annulera MTBE d’éthanol plus contenant d’essence ’utilisation appareil. avec méthyl-tertiobutylique) (éther MTBE (E10) d’éthanol jusqu’à contenant l’essence utiliser pouvez Vous AVANT FRAISE À MOTOBINEUSE 24" 902032 Modèles Propriétaire Manuel AVANT FRAISE À MOTOBINEUSE...
Need help?
Do you have a question about the Front Tine Tiller and is the answer not in the manual?
Questions and answers