Table of Contents
Advertisement
Quick Links
Download this manual
See also:
Instruction Manual
Advertisement
Table of Contents

Subscribe to Our Youtube Channel
Related Manuals for Olympus PT-045


Summary of Contents for Olympus PT-045
- Page 1 PT-045 http://www.olympus.com/ ©2008 Printed in China VN053001...
-
Page 2: Introduction
Unauthorized copying of this manual in part or in full, except for private use, is prohibited. Unauthorized reproduction is strictly prohibited. OLYMPUS IMAGING CORP. shall not be responsible in any way for lost profits or any claims by third parties in case of any damage occurring from improper use of this product. -
Page 3: For Safe Use
For safe use This instruction manual uses various pictographs for correct use of the product and to prevent danger to the user and other persons as well as property damage. These pictographs and their meanings are shown below. This indicates contents for which the possibility of human WARNING death or severe injury in case of handling under disregard of this indication can be assumed. - Page 4 CAUTION 1 Do not disassemble or modify this product. This may cause water leakage or trouble. OLYMPUS IMAGING CORP. shall not be responsible for damage, lost profits, etc. caused by loss of image data because of disassembly, repair or modification of this product by people other than third parties specified by OLYMPUS IMAGING CORP.
- Page 5 Do not use adhesive for repairs or other purposes. When repair is required, please contact a dealer or a service station of OLYMPUS IMAGING CORP. 6 Jumping into the water with the Case in your pocket or in your hand, throwing the Case from a boat or ship into the water, and other rough handling may cause water leakage.
-
Page 6: Table Of Contents
Contents Introduction ................2 Please read the following items before use ......2 For safe use ................3 1. Preparations ..............8 Check the contents of the package........8 Names of the parts ..............9 Using the accesories............11 Install the strap ..............11 Installation and removal of the LCD hood ...... - Page 7 How to Apply Grease to the O-ring ........27 Install the O-ring..............28 Replace consumable parts ..........28 7. Appendix ................ 29 Specifications...............29 EN 7...
-
Page 8: Preparations
LCD hood Silicone grease (on the body) Optical fiber cable LCD hood adapter strap Silica gel (1g) Case body Lens cap Hand strap O-ring remover (Check that the O-ring is installed) PT-045 OLYMPUS distributor list Instruction manual (this manual) EN 8... -
Page 9: Names Of The Parts
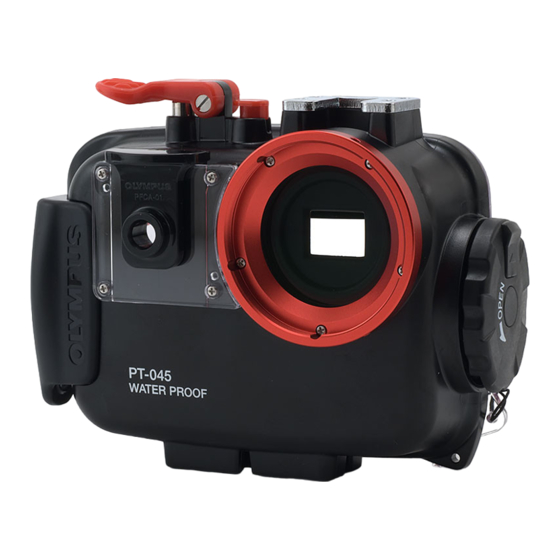
Names of the parts 1 Palm grip 6 Front lid a O-ring 2 Diffuser 7 Open/close dial b Tripod seat 3 Shutter lever 8 Lens ring c Light shield hood 4 ON/OFF button 9 Loading guide rails 5 Accessory mount 0 LCD inner hood EN 9... - Page 10 d & button/arrow pad *m AFL button (*1)/arrow *n DISP./E button e MENU button o LCD monitor window f Zoom buttons (*1) During Underwater Wide- g Mode dial knob Angle 1 or Underwater Macro h F button/arrow pad shooting mode, the down i q button arrow pad functions as the AF j # button/arrow pad...
-
Page 11: Using The Accesories
Using the accesories Install the strap Install the strap on the Case body. Installation illustration Installation completed Hand strap Hand strap ring How to use the hand strap Pass your hand through the hand strap and adjust the length with the stop button. -
Page 12: Installation And Removal Of The Lcd Hood
Installation and removal of the LCD hood Installation Strongly push the mounting projections of the LCD hood as shown in the figure into the guides above and below the LCD monitor window. Removal Remove the mounting projections of the LCD hood from the guides above and below the LCD monitor window by widening the LCD hood. -
Page 13: Using The Fiber Cable Adapter
Using the fiber cable adapter The fiber cable adapter is required when connecting the separately available UFL-1 underwater flash to the Case using an underwater optical fiber cable (optional: PTCB-E02). How to install 1 Remove the white diffuser while pulling it up, then attach the optical fiber cable adapter to the diffuser shown in the figure below. -
Page 14: Advance Check Of The Case
• Catching of the strap, silica gel, etc. when closing the Case Perform the test after the above causes have been eliminated. CAUTION: If a leak is detected in normal handling, do not use the Case and contact Olympus. EN 14... -
Page 15: Install The Digital Camera
3. Install the digital camera Check the digital camera Check the digital camera before loading it in the Case. 1. Battery Confirmation The flash is used very frequently during underwater shooting. Before diving, make sure that you have enough remaining battery power. 2. -
Page 16: Open The Case
Open the Case 1 Slide and hold the slide lock towards the arrow direction (1 of figure below) and turn the open/close dial counter clockwise (2 of figure below). 2 Turn the open/close dial to the position where it cannot be turned further. 3 Open the rear lid of the Case gently. -
Page 17: Load The Digital Camera
Load the digital camera 1 Confirm that the digital camera is OFF. 2 Gently insert the digital camera into the Case. 3 Insert 2 piling up silica gel bags (1g) between the bottom of the digital camera and the Case. The silica gel bag provided for prevention of fogging. -
Page 18: Seal The Case
Seal the Case 1 Close the rear lid of the Case gently. 2 Turn the open/close dial clockwise. • The Case is sealed when the dial is turned 180 degrees. Close CAUTION: • If the open/close dial is not fully turned, the Case will not be sealed. This will cause water leakage. -
Page 19: Perform The Final Checks
Perform the final checks Visual Inspection After sealing the Case, check the sealing part of front and rear lid visually to confirm that the O-ring is not twisted or out of the groove and that no foreign matter has been caught. Also check that the Case is not broken or cracked. -
Page 20: Water Leakage Test
Water Leakage Test The final test after loading the camera is explained below. Always perform this test. It can be performed easily in a water tank or a bathtub. The required time is about five minutes. Simple water leakage Explanatory Hints test image... -
Page 21: Taking Pictures Under Water
4. Taking Pictures Under Water Underwater shooting modes kUnderwater Wide-Angle 1 Suitable for shooting a scene that extends across a wide range such as a school of fish swimming through the water. Background blues are vividly reproduced. lUnderwater Wide-Angle 2 Suitable for shooting a large, fast moving subject such as a dolphin or manta ray. -
Page 22: How To Select The Shooting Scene
How to select the shooting scene 1 Set the mode dial to set the camera’s shooting mode to “SCN”. 2 Press the up/down arrow pad to select “Underwater Wide-Angle 1”, “Underwater Mode dial Wide-Angle 2” or “Underwater Macro”. knob 3 Press the OK button. MENU button Switching to a different Arrow pad... -
Page 23: Handling After Shooting
5. Handling After Shooting Wipe off any waterdrop After completing the shooting and returning to land or a ship, wash lightly in pure water and wipe off any waterdrop sticking to the Case. Use air or a soft cloth not leaving any fibers to thoroughly wipe any waterdrop etc. from the joint between the front and rear lid, the shutter lever, the palm grips, and the open/close dial. -
Page 24: Take Out The Digital Camera
Take out the digital camera Open the Case carefully and take the digital camera out. CAUTION: • When opening the Case, take sufficient care that no water will drip from your hair or body onto the Case and the camera. •... -
Page 25: Maintaining The Waterproof Function
6. Maintaining the Waterproof Function Whenever you open the rear lid of the Case, always be sure to perform the O-ring maintenance operation as described below. Perform at the location without sand or dust, after washing and drying your hands. Remove the O-ring 1 Insert the O-ring remover between the O-ring and the O-ring groove. - Page 26 Remove any foreign matter adhered to the O-ring groove using a lint-free clean cloth or cotton swab. Also remove any sand or dirt adhered to the O-ring contact surface on the front lid of the case. CAUTION: • Maintenance of the waterproof functions is required even before using this product underwater for the first time.
-
Page 27: How To Apply Grease To The O-Ring
How to Apply Grease to the O-ring Make sure that your fingers and the Apply the exclusive O-ring are free of dirt, and squeeze about lubricant to each 5 mm of lubricant onto a finger. (5 mm is O-ring. the most appropriate amount.) Apply the lubricant with three fingers and Spread the lubricant spread it over the ring. -
Page 28: Install The O-Ring
Note: • Please use genuine Olympus silicone grease, silica gel and O-ring. • Do not try to replace the O-ring by yourself. • We recommend to perform the check periodically. -
Page 29: Appendix
72.5 mm Weight 375 g (camera and accessories not included) * We reserve the right to change the external appearance and the specifications without notice. Supplied accessories for PT-045 O-ring: POL-041 Silica gel: SILCA-5S Silicone grease: PSOLG-2 LCD hood: PFUD-07... - Page 31 MEMO...
Need help?
Do you have a question about the PT-045 and is the answer not in the manual?
Questions and answers