Advertisement
Available languages
Available languages
Quick Links
All listed brands are trademarks of the corresponding companies. Errors and omissions excepted,
and subject to technical changes. Our general terms of delivery and payment are applied.
00057106bda.indd Abs1:2
00057106bda.indd Abs1:2
Hama GmbH & Co KG
D-86651 Monheim/Germany
www.hama.com
20.02.2008 14:12:20 Uhr
20.02.2008 14:12:20 Uhr
Advertisement

Subscribe to Our Youtube Channel
Related Manuals for Hama I 550


Summary of Contents for Hama I 550
- Page 1 Hama GmbH & Co KG D-86651 Monheim/Germany www.hama.com All listed brands are trademarks of the corresponding companies. Errors and omissions excepted, and subject to technical changes. Our general terms of delivery and payment are applied. 00057106bda.indd Abs1:2 00057106bda.indd Abs1:2 20.02.2008 14:12:20 Uhr...
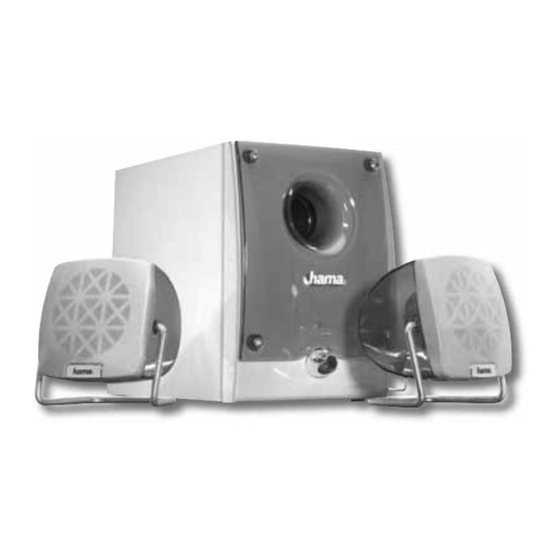
- Page 2 P C - H A R D W A R E 2.1 Subwoofer-System »I 550« 00057106 00057106bda.indd Abs2:1 00057106bda.indd Abs2:1 20.02.2008 14:12:23 Uhr 20.02.2008 14:12:23 Uhr...
- Page 3 d Bedienungsanleitung Soundcard Speaker S.BASS AUDIO INPUT POWER AUDIO OUTPUT AC 220-240V 50/60HZ POWER SOURCE 00057106bda.indd Abs2:2 00057106bda.indd Abs2:2 20.02.2008 14:12:25 Uhr 20.02.2008 14:12:25 Uhr...
- Page 4 Inhaltsverzeichnis Anschließen des Lautsprechersystems • Packungsinhalt Schließen Sie den grünen Klinkenstecker des • Positionierung Verbindungskabels an die Lautsprecherausgangsbuchse • Anschließen des Lautsprechersystems Ihrer Soundkarte und den anderen Klinkenstecker an den • Bedienung und Klangeinstellungen Audio-Eingang am Subwoofer an. • Einstellungen unter Windows XP •...
- Page 5 Einstellungen unter Windows XP Ihre Soundeinstellungen wurden damit für dieses Lautsprechersystem optimiert. Wenn Sie die Satelliten nicht wie beschrieben, im gleichen Abstand zu Ihrem Kopf positionieren konnten, können Sie jetzt noch die Lautstärke der Satelliten ausgleichen. Klicken Sie dazu bei ‚Lautsprechereinstellungen’ auf den Button ‚Lautstärke ...’.
- Page 6 Einstellungen unter Windows Vista Aktivieren Sie den Haken neben ‚Vorne links und rechts’. Klicken Sie auf ‚Weiter’ und im nächsten Fenster auf ‚Fertig stellen’. Ihre Soundeinstellungen wurden damit für dieses Laut- sprechersystem optimiert. Wenn Sie die Satelliten nicht wie beschrieben, im gleichen Abstand zu Ihrem Kopf positionieren konnten, können Sie jetzt noch die Lautstärke der Satelliten ausgleichen.
-
Page 7: Technische Daten
Sicherheitshinweise: • Verwenden Sie den Lautsprecher nur in trocknen und Subwoofer und Satelliten funktionieren nicht geschlossenen Räumen • Stellen Sie sicher, dass die Netzspannung 230 V / 50 Hz Stellen Sie sicher, dass der Netzschalter am Subwoofer beträgt auf ‚ON’ gestellt ist und die verwendete Steckdose unter •... - Page 8 Kontakt- und Supportinformationen: Bei defekten Produkten: Bitte wenden Sie sich bei Produktreklamationen an Ihren Händler oder an die Hama Produktberatung. Internet/World Wide Web Produktunterstützung, neue Treiber oder Produktinfor- mationen bekommen Sie unter www.hama.com Support Hotline – Hama Produktberatung: Tel. +49 (0) 9091 / 502-115 Fax +49 (0) 9091 / 502-272 e-mail: produktberatung@hama.de...
- Page 9 g Operating Instruction Soundcard Speaker S.BASS AUDIO INPUT POWER AUDIO OUTPUT AC 220-240V 50/60HZ POWER SOURCE 00057106bda.indd Abs3:8 00057106bda.indd Abs3:8 20.02.2008 14:12:31 Uhr 20.02.2008 14:12:31 Uhr...
-
Page 10: Package Contents
Contents Connecting the loudspeaker system • Package contents Connect the green jack plug of the connecting cable to • Placement the loudspeaker output socket on your sound card and • Connecting the loudspeaker system the other jack plug to the audio input on the subwoofer. •... - Page 11 Settings with Windows XP Your sound settings are now optimised for this loudspea- ker system. If you cannot place the satellites, as was described, so that they are at equal distances from your head, you can now balance the volume between the two satellites. To do this, click „Speaker volume...“...
- Page 12 Settings with Windows Vista Place a checkmark in the box next to „“Front left and right“. Click „Next“. In the next window, click „Finish“. Open „Sound“ from your control panel. Your sound settings are now optimised for this loudspeaker system. If you cannot place the satellites, as was described, so that they are at equal distances from your head, you can now balance the volume between the two satellites.
- Page 13 Safety notes: • Use the loudspeakers only in closed, dry spaces. The subwoofer and the satellites do not work. • Be sure that the mains power supply is 230 V/50 Hz. • Route that cable so that no one will walk on it or trip Be sure that the on/off on the subwoofer is set to „ON“...
- Page 14 Support and contact information If products are defective: Please contact your dealer or Hama Product Consulting if you have any product claims. Internet / World Wide Web: Product support, new drivers or product information can be found at www.hama.com Support Hotline – Hama Product Consulting: Tel.
- Page 15 Mode d‘emploi Soundcard Speaker S.BASS AUDIO INPUT POWER AUDIO OUTPUT AC 220-240V 50/60HZ POWER SOURCE 00057106bda.indd Abs5:14 00057106bda.indd Abs5:14 20.02.2008 14:12:35 Uhr 20.02.2008 14:12:35 Uhr...
- Page 16 Table des matières Raccordement du système de haut-parleur • Contenu de l´emballage Insérez la fi che mâle stéréo verte du cordon de liaison • Positionnement dans la sortie des haut-parleurs de votre carte son, puis • Raccordement du système de haut-parleur insérez l’autre fi...
- Page 17 Réglages sous Windows XP Si vous n´avez pas pu installer les satellites comme il est décrit, à savoir à la même distance par rapport à votre tête, vous pouvez également équilibrer le volume. Pour cela, veuillez cliquer sur „Réglages des haut-parleurs“...
- Page 18 Réglages sous Windows Vista Activez le crochet à côté de „Devant à gauche et à droite’. Veuillez cliquer ensuite sur „Suivant“ puis dans la fenêtre suivante sur „Achever’. Vos réglages du son ont donc été optimisés pour ce système de haut-parleur. Si vous n´avez pas pu installer les satellites comme il est décrit, à...
- Page 19 Questions fréquemment posées Mesures de sécurité : • Utilisez le haut-parleur uniquement dans des pièces Le caisson de graves et les satellites ne fonctionnent pas. fermées et sèches. • Vérifi ez que la tension en courant soit de 230 V / 50 Hz. Vérifi...
- Page 20 En cas d’appareil défectueux : En cas de réclamation concernant le produit, veuillez vous adresser à votre revendeur ou au département conseil produits de Hama. Internet / World Wide Web Notre support technique, les nouveaux pilotes et les informations produits sont disponibles sous : www.hama.com...
- Page 21 Gebruiksaanwijzing Soundcard Speaker S.BASS AUDIO INPUT POWER AUDIO OUTPUT AC 220-240V 50/60HZ POWER SOURCE 00057106bda.indd Abs7:20 00057106bda.indd Abs7:20 20.02.2008 14:12:40 Uhr 20.02.2008 14:12:40 Uhr...
- Page 22 Inhoudsopgave Aansluiten van het luidsprekersysteem • Inhoud van de verpakking Sluit de groene audiostekker van de verbindingskabel • Plaatsing aan op de uitgangspoort van de luidspreker van uw • Aansluiten van het luidsprekersysteem soundkaart en sluit de andere audiostekker aan op de •...
- Page 23 Instellingen onder Windows XP Op deze manier verbetert u de geluidsinstellingen voor uw luidsprekersysteem. Als u de satellieten niet zoals beschreven op dezelfde afstand ten opzichte van uw oren kunt plaatsen, kunt u nu nog het volume van de satellieten regelen. Klik daarvoor bij ‚Luidsprekerinstellingen’...
- Page 24 Instellingen onder Windows Vista Activeer het kastje naast ‚Links en rechts voor’. Klik op ‚Doorgaan‘ en in het volgende venster op ‚Voltooien‘. Op deze manier verbetert u de geluidsinstellingen voor uw luidsprekersysteem. Als u de satellieten niet zoals beschreven op dezelfde afstand ten opzichte van uw oren kunt plaatsen, kunt u nu nog het volume van de satellieten regelen.
- Page 25 Veiligheidsinstructies: • Gebruik de luidsprekers alleen in droge en gesloten Subwoofers en satellieten werken niet ruimtes Controleer of de voedingsschakelaar op de subwoofer op • Controleer of de voedingsspanning 230V/50Hz ‚ON’ staat en of er stroom staat op het stopcontact dat u bedraagt gebruikt.
- Page 26 Support- en contactinformatie Bij defecte producten: Neem bij klachten over het product contact op met uw verkoper of met de afdeling Productadvies van Hama. Internet/World Wide Web Productondersteuning, nieuwe drivers of productinformatie is verkrijgbaar onder www.hama.com Support Hotline – Hama productadvies: Tel.
Need help?
Do you have a question about the I 550 and is the answer not in the manual?
Questions and answers