Table of Contents
Advertisement
Quick Links
Advertisement
Table of Contents

Related Manuals for shanghai koolspace Vinage Keeper 500

Summary of Contents for shanghai koolspace Vinage Keeper 500
- Page 1 ASSEMBLY & OPERATION MANUAL...
- Page 2 LOCATING YOUR WINE CELLAR Provide 2 ” minimum clearance for both sides and back; keep the top clear. Never locate your wine cellar outdoors or in an area with extremes of temperature and humidity. These units must be placed/located/operated in air-conditioned environments which do not “trap” the warm air exhaust. Temperatures in surrounding area must not exceed 80 °F (25 °C) with relative humidity levels not to exceed 70% R.H..
-
Page 3: Connector Plates
HARDWARE ( OPEN ALL BOXES AND PACKAGES FIRST! ) DISCARD ! HINGES CONNECTOR PLATES Allen Key Hinge Washer Cooling Unit Bolt in cooling unit box Hook in cooling unit box Legs Shelves Brace x 26 Handle and Lock Spacer ~ 3 ~... - Page 4 REMOVE RIGHT CORNER ~ 4 ~...
- Page 5 ~ 5 ~...
- Page 6 TO TAB LIFT PUSH OR TAP AT BOTTOM SPACER ~ 6 ~...
- Page 7 INSTALL BOTTOM 2. REST BOTTOM ON SPACERS 4. PULL OUT SPACERS ~ 7 ~...
- Page 8 INSTALL BOTTOM CONNECTOR PLATES HAND PRESS IN ALL CONNECTOR PLATES IN BOTTOM TAP IN CONNECTORS TIGHTLY (NO GAP) WITH CLOSED HAND OR RUBBER MALLET LEAVE 1/4” SPACING ON ALL LEGS SCREW IN ALL LEGS 1/4”MIN NO GAP! ~ 8 ~...
-
Page 9: Repeat Step
REPEAT STEP ON PAGE 7 FOR TOP DO NOT INSTALL HINGES YET! INSTALL TOP CONNECTOR PLATES NO HINGE NO HINGE ~ 9 ~... - Page 10 INSTALL CENTER POSTS ~ 10 ~...
- Page 11 PLACE WASHERS FIRST INSTALL TOP HINGES TURN BOTH CENTER LEGS TO RAISE LEGS SLIGHTLY WASHER ON BOTTOM HINGES ONLY ~ 11 ~...
- Page 12 INSTALL BRACES 5 AND 6 ( HELPER NEEDED TO HOLD CABINET STEADY ) ALIGN TO TABS, PUSH DOWN BRACES 5 (X 2) AND 6 (X 2) ~ 12 ~...
-
Page 13: Install Shelves
INSTALL SHELVES TAB REFERENCE SHORTER FRONT LONGER START AT MIDDLE PRESS IN SIDES CLICK SHELF OVER TABS SHELF C E L L A R B O T T O ~ 13 ~... - Page 14 PLACE COOLING UNIT IN CABINET LEVEL TO OPENING CLEAR OPENING PUSH THROUGH GET HELPER TO FASTENING TIGHT! IN COOLING UNIT BOX. ~ 14 ~...
-
Page 15: Install Handle
CONNECT LIGHT AND HOOKS LED LIGHT : WARM WHITE GLOW FOR NATURAL LIGHTING, NO HEAT, ENERGY EFFICIENT USE HOOK TO HANG WINE LISTS OR BOTTLE OPENER INSTALL HANDLE ROUNDED EDGE OF NUT FACES WASHER ~ 15 ~... - Page 16 PLACE LOGO LEVEL CELLAR REMOVE VISIBLE STICKERS COMPENSATE FOR YOUR FLOOR ~ 16 ~...
- Page 17 LEVEL DOOR TIP: ADJUST LEGS TO HELP LEVEL DOOR ADJUST HINGES IF REQUIRED NEVER MOVE LOADED CABINET ! EMPTY FIRST ! ~ 17 ~...
-
Page 18: Connector Plate
DISASSEMBLY REMOVE COOLING UNIT AND SHELVES LAY CELLAR DOWN FULLY TIGHTEN LEGS PRY OFF ALL CONNECTOR PLATES WITH FLAT SCREWDRIVER REUSE LEG FOR TOP HINGES AND CENTER REAR TIGHTEN LEGS PRY OFF FULLY CONNECTOR PLATE ~ 18 ~... - Page 19 CONTROLS : PLUG IT IN and ENJOY! (wait one minute) FEATURES: DISPLAY: KEYS Default SET temperature 57º F/14º C (ideal for wine storage). Calibration option of the temperature sensor. Display of actual temperature by request. SET temperature range 52ºF-64ºF. Digital temperature sensor. Dual display Fº/Cº.
-
Page 20: Important Note
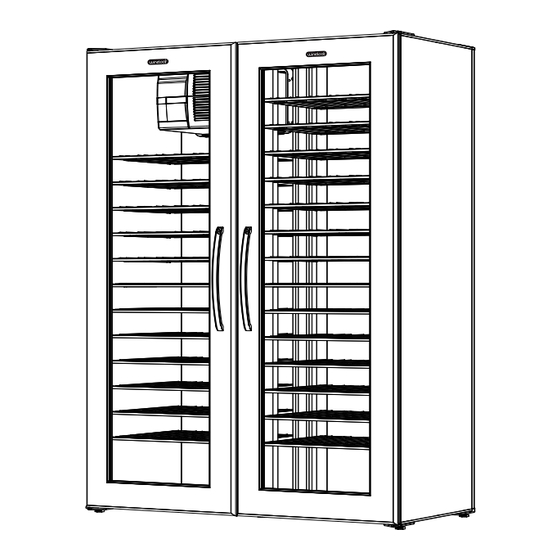
Odd sized bottles or Case storage Standard 750 ml bottles Maximum capacity 500 bottles Based on 10% (50 x 1/2 bottles) IMPORTANT NOTE The top shelf of the cabinet should have the coldest temperature and may be used as your “chilling” section. -
Page 21: Troubleshooting Guide
Every 3 to 4 months vacuum the cooling unit coils (check our website for more info). Be advised, also, that Koolr Products Inc. or Shanghai Koolspace Co. Ltd. cannot in any event be liable or responsible for incidental or consequential damages. - Page 22 (credit card authorization), we will promptly ship a replacement unit. The replace- ment may be a unit that has been reconditioned by Shanghai Koolspace Co. Ltd. The unit that needs service must be packed and returned to us, shipping prepaid.
- Page 23 ASSEMBLY & OPERATION MANUAL...
Need help?
Do you have a question about the Vinage Keeper 500 and is the answer not in the manual?
Questions and answers