Table of Contents
Advertisement
Advertisement
Table of Contents

Related Manuals for Grundig GDR 5500


Summary of Contents for Grundig GDR 5500
- Page 1 DVD-RECORDER GDR 5500 ENGLISH...
-
Page 2: Table Of Contents
CONTENTS ____________________________________________ GDR 5500 DVD Recorder Special features of your DVD recorder Disc formats Packing contents Set-up and safety 8-13 Overview The front of the DVD recorder Displays on the DVD recorder 10-11 The back of the DVD recorder 12-13... - Page 3 CONTENTS ____________________________________________ 36-39 Playback convenience functions Selecting titles and chapters Selecting functions in the playback menu Pausing and resuming playback Frame search Slow motion Frame-by-frame playback Selecting camera angles for scenes Enlarging and moving the screen section (zoom) Switching the dubbed language or the audio format Selecting and displaying subtitles Creating and playing a playlist Repeating a chapter, a title or a disc...
- Page 4 Special settings Tuning television channels automatically 68-69 Assigning channel positions manually Sorting television stations Setting the time and date Switching the DVD recorder to another Grundig remote control DivX Video registration © Resetting the DVD recorder to its original condition 72-74...
-
Page 5: Gdr 5500 Dvd Recorder
GDR 5500 DVD RECORDER ______________ Special features of your DVD recorder Your DVD recorder provides you with perfect digital video recording and playback in studio quality. It also provides superb cinema-quality audio playback – in stereo or with digital multi-channel sound – depending on the type of disc and audio system or stereo television. -
Page 6: Packing Contents
GDR 5500 DVD RECORDER ______________ Packing contents GDR 5500 DVD Recorder Remote control 2 Batteries, 1.5 V, Micro type EURO-AV cable Mains cable DVD+RW Antenna cable Digital cable (audio) Cinch cable (audio and video) Operating manual DISPL PROG MENU MENU... -
Page 7: Set-Up And Safety
SET-UP AND SAFETY ___________________________ Please note the following information when setting up your DVD recorder: This DVD recorder is designed to record and play back video and audio signals. Any other use is expressly prohibited. PROG. SOURCE PROG. SOURCE If the DVD recorder is subjected to a sudden change in temperature, for example if it is brought in from the cold to a warm room, connect it to the mains supply and let it stand for at least two hours before you insert a disc. -
Page 8: Overview
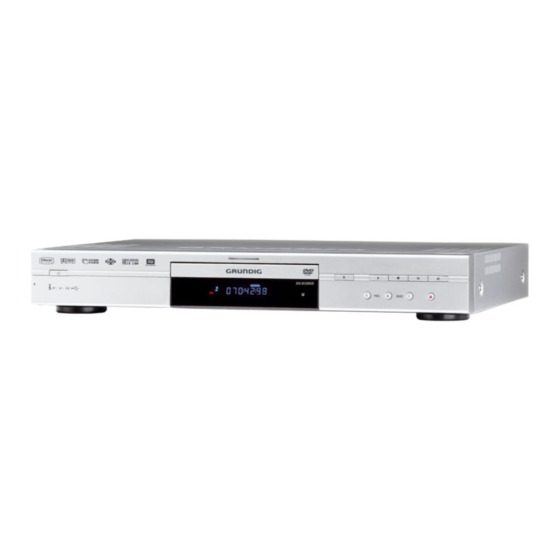
OVERVIEW ____________________________________________ The front of the DVD recorder PROG. SOURCE DV IN VIDEO IN AUDIO R VIDEO IN AUDIO R DV IN Switches the DVD recorder out of and back into stand-by mode. In stand-by mode, the current time and the day of the week appear on the display. -
Page 9: Displays On The Dvd Recorder
OVERVIEW ____________________________________________ Displays on the DVD recorder REPEAT ALL A–B CHANNEL DIGITAL REC ANGLE PROGRAM MP3 P N RANDOM SVCD 1 888 SuMoTuWe Th Fr Sa Repeat functions activated REPEAT ALL REPEAT A-B MP3 CD inserted PAL or NTSC standard is selected S-Video CD, video CD or audio CD inserted SVCD Playback... -
Page 10: The Back Of The Dvd Recorder
OVERVIEW ____________________________________________ The back of the DVD recorder VIDEO OUT ANTENNA VIDEO IN AUDIO OUT EURO AV 1 S-VIDEO OUT DIGITAL AUDIO OUT S-VIDEO IN ANTENNA VIDEO OUT AUDIO OUT VIDEO IN AUDIO IN EURO AV 2 DECODER ANTENNA Antenna input socket ANTENNA IN (for the rooftop antenna). - Page 11 OVERVIEW ____________________________________________ VIDEO IN VIDEO IN Video input socket for connecting a video recorder, DVD player or AV receiver with a cinch socket. Video input socket for connecting a S-VIDEO IN SVHS-video recorder or AV receiver with a S-Video socket. AUDIO IN Audio input sockets (left/right analogue channel) for connecting a video recorder,...
-
Page 12: The Remote Control
OVERVIEW ____________________________________________ The remote control Switches the DVD recorder out of and back into stand-by mode. In stand-by mode, the current time and day of the week appear in the display. Selects the info menu. DISPL DISPL For selecting and displaying subtitles* on the DVD during playback. - Page 13 OVERVIEW ____________________________________________ Interrupts and resumes playback; pressing twice switches to the stop position. Hold down to open or close the disc compartment. Closes the disc compartment. Starts playback. Select the previous/next chapter or section during playback. DISPL Switch to forwards/reverse picture search at various speeds during playback.
-
Page 14: Connection And Preparation
CONNECTION AND PREPARATION Note: Do not connect any other equipment while the device is swit- ched on. Switch off the other equipment as well before connec- ting it. Only plug the device into the mains socket after you have connected the external devices and the antenna. Connecting a rooftop antenna or cable feed ANTENNA VIDEO OUT... -
Page 15: Connecting A Television Or Flat Screen
Before you first switch on the device, please check whether your television, flat screen or projector is suitable for this use. GRUNDIG accepts no liability for damage resulting from negligent usage. Notes: If you connect the DVD recorder using the »EURO AV1... - Page 16 CONNECTION AND PREPARATION Connect the television or flat screen – using a cinch cable (Progressive Scan) AUDIO INPUT ANTENNA VIDEO OUT VIDEO IN AUDIO OUT EURO AV 1 S-VIDEO OUT DIGITAL AUDIO OUT S-VIDEO IN ANTENNA VIDEO OUT AUDIO OUT VIDEO IN AUDIO IN EURO AV 2...
- Page 17 CONNECTION AND PREPARATION Connecting a television or flat screen using a EURO-AV (Scart) cable ANTENNA VIDEO OUT VIDEO IN AUDIO OUT EURO AV 1 S-VIDEO OUT DIGITAL AUDIO OUT S-VIDEO IN ANTENNA VIDEO OUT AUDIO OUT VIDEO IN AUDIO IN EURO AV 2 DECODER Plug a standard EURO-AV cable into the...
-
Page 18: Connecting An Audio System With Analogue Two-Channel Stereo Sound
CONNECTION AND PREPARATION Connecting a television or flat screen using cinch cables VIDEO ANTENNA VIDEO OUT VIDEO IN AUDIO OUT AUDIO INPUT EURO AV 1 S-VIDEO OUT DIGITAL AUDIO OUT S-VIDEO IN ANTENNA VIDEO OUT AUDIO OUT VIDEO IN AUDIO IN EURO AV 2 DECODER Plug a standard cinch cable into the... -
Page 19: Connecting A Digital Multi-Channel Amplifier Or Digital Two Channel
CONNECTION AND PREPARATION Connecting a digital multi-channel amplifier or digital two-channel audio system A multi-channel audio/video amplifier (Dolby* digital decoder or DTS** – Digital Theatre System) decodes the digital multi-channel sound of the DVD to provide optimum sound quality. OPTICAL DIGITAL ANTENNA VIDEO OUT... -
Page 20: Connecting The Mains Cable
CONNECTION AND PREPARATION Connecting the mains cable Plug the mains cable supplied into the »110-240 V~« socket on the back of the DVD recorder. Plug the mains cable into the wall socket. Caution: The only way to disconnect the DVD recorder from the mains is to pull the plug. -
Page 21: Initial Setup
INITIAL SETUP ______________________________________ Switching on the DVD recorder Switch the DVD recorder to stand-by mode by pressing » « on the device and press » « on the remote control to switch on from stand-by . – Display: »HELLO« flashes. Initial setup When you first switch on the DVD recorder, the »Initial Setup«... -
Page 22: Setting The Time And Date
INITIAL SETUP ______________________________________ Setting the time and date If the time and date are correct, select »NEXT« by pressing »OK«. Entering a new time and date Select the date line with » « or » « and press »OK« to Initial setup activate it. -
Page 23: Setting The Tv System (Video Output Format)
INITIAL SETUP ______________________________________ Setting the TV system (video output format) The colour norm of the DVD recorder’s screen menus has to be adapted to the format of your television or flat screen. Select »NTSC« for televisions with the NTSC standard, or »PAL« for those with the PAL standard. -
Page 24: Menus And Menu Directions
INITIAL SETUP ______________________________________ Menus and menu directions The various menus of your DVD recorder are directly accessible through a main menu, but also through individual keys on the remote control. Call up the »Select mode« main menu of the DVD recorder by Select mode pressing »i«. -
Page 25: Before Playback
BEFORE PLAYBACK _____________________________ Preparation Switch on the television and select the preset channel for the DVD recorder. If an audio system or an AV receiver is connected to the DVD recorder, switch it on and select the audio input for the DVD recorder. -
Page 26: Playback
PLAYBACK _____________________________________________ DVD playback DVD features You can recognise a DVD by the logo on the label. Depending on the content of the DVD, the discs contain one or more titles. Each title may contain one or more chapters. You can control and direct playback of a DVD using the menu of the DVD recorder on the television screen. -
Page 27: Dvd+Rw/+R/-Rw/-R Playback
PLAYBACK _____________________________________________ DVD+RW/+R/–RW/–R playback DVD+RW/+R/–RW/–R features You can recognise the discs by the logo on the label. If programmes were recorded on the discs, your DVD recorder can play them back. If you want to play a DVD+R/–R or a DVD-RW on a DVD player, it must first be finalised. -
Page 28: Vcd/Vcd Playback
PLAYBACK _____________________________________________ S-VCD/VCD playback S-VCD/VCD features You can recognise S-VCD/VCDs (video CDs) by the logo on the label. Depending on the contents of the S-VCD/VCD (films, music videos etc.), the discs may carry one or more tracks. S-VCDs/VCDs can be created using the PBC (playback control) sys- tem for track navigation. -
Page 29: Playback Audio/Video Files
PLAYBACK AUDIO/VIDEO FILES _____________ Playback audio/video files Features of the DivX VIDEO CD © DivX Video is an encoder/decoder, based on the MPEG-4 com- © pression system, which is used to encrypt and display compressed video data. This enables the DVD player to play back videos compressed in the DivX format. - Page 30 PLAYBACK AUDIO/VIDEO FILES _____________ Playback After the disc compartment has closed and the data CD has File play - STOP 0:00:00 / 0:00:00 been scanned, the file browser (contents menu) of the CD is dis- FILES & DIRECTORY played. DAY_AFTER_TOMORROW.AVI RAY.AVI Select the folder or track with »...
- Page 31 PLAYBACK AUDIO/VIDEO FILES _____________ © Frame search (DivX Video CD only) You can select different speeds. Select the desired playback speed during playback with » « or » «. Press » « to resume normal playback. Enlarging the picture – zoom ©...
- Page 32 PLAYBACK AUDIO/VIDEO FILES _____________ Selecting and showing subtitles © (DivX Video CD only) DivX © Video CDs provide two types of subtitles. There are the familiar subtitles available as on a conventional DVD, and also subtitles shown as a separate file in the browser. Select the subtitles file in the browser (the file name has an extension such as .TXT), then press »OK«.
-
Page 33: Picture Data Cd Playback
PLAYBACK _____________________________________________ Picture data CD playback JPEG CD features JPEG stands for Joint Picture Experts Group. This process was designed to compress picture files. JPEG files can be burned onto a CD along with other file types. These CDs are known as file CDs or mixed-mode CDs. For example, the CD could contain MP3 files (audio) and JPEG files (for example to display album covers). -
Page 34: Kodak Picture Cd Playback
PLAYBACK _____________________________________________ KODAK picture CD playback KODAK picture CD features This method was developed for archiving analogue photographs. After they are developed, small photographs are scanned with a resolution of 1536 x 1024 pixels and burnt onto a CD in JPEG format. -
Page 35: Audio Cd Playback
PLAYBACK _____________________________________________ Audio CD playback Audio CD features You can recognise audio CDs by this logo. Audio CDs only contain sound recordings. They can be played in the normal manner on an audio system. The individual tracks are stored in a sequence. There are no folders. Playback Playback starts automatically when a CD is inserted. -
Page 36: Playback Convenience Functions
PLAYBACK CONVENIENCE FUNCTIONS The sound is muted during the frame search, slow motion and free- ze-frame functions. Depending on the disc, some functions cannot be selected. Selecting titles and chapters If there are several titles or chapters on a disc, you can select them. Selecting titles and chapters step by step During playback, select the title or chapter by pressing »... -
Page 37: Frame Search
PLAYBACK CONVENIENCE FUNCTIONS Frame search Several different speeds are available. Select the required playback speed for rewind or fast forward during playback by repeatedly pressing » « or » «. Press » « to resume normal playback. Slow motion Different (forward) playback speeds are available. Press »... -
Page 38: Switching The Dubbed Language Or The Audio Format
PLAYBACK CONVENIENCE FUNCTIONS Switching the dubbed language or the audio format These settings allow you to listen to a dubbed language other than the default one, if the DVD provides alternatives. Press »d« during playback. – Display: for example »AUDIO: 02/03 ENG«, the current audio language is displayed. -
Page 39: Repeating A Chapter, A Title Or A Disc
PLAYBACK CONVENIENCE FUNCTIONS Repeating a chapter, a title or a disc Depending on the type of disc, you can repeat chapters, titles, fold- ers or the entire disc. To repeat the chapter, press »b« during playback until » C- RPT« appears in the display. –... -
Page 40: Recording
RECORDING _________________________________________ Recording options – One touch recording, in which you select the required channel on the DVD recorder and start recording immediately. – Delayed recording – by entering data for the TV channel. With option 2, you can enter the recording date for eight programmes in a time span of one year, or record programmes at the same time every week or every day. -
Page 41: Recording Quality And Time
RECORDING _________________________________________ Recording quality and time You can set the quality of the recording. The table below shows the relationship between quality and recording time: Quality Time HQ – Very high quality 60 minutes on a 4.7 GB blank DVD –... -
Page 42: One Touch Recording
ONE TOUCH RECORDING _________________ Preparing for recording Switch on the television and select the preset channel for the DVD recorder. Switch the DVD recorder to stand-by with » « and switch the remote control out of stand-by with » «. Inserting a disc Press »... -
Page 43: Manually Recording Television Programmes From The Satellite Receiver
ONE TOUCH RECORDING _________________ Manually recording television programmes from the satellite receiver Switch on the satellite receiver. Select the required satellite station on the satellite receiver. Select the channel position for the satellite receiver on the DVD recorder by pressing »SOURCE« or by pressing »0« (AV). Press »Q-SET«... -
Page 44: Delayed Recording
DELAYED RECORDING ________________________ Programming recording by entering the data for the television programme Notes: The time and date on the DVD recorder must be accurate. If all the timer positions are occupied you must delete one, as described in the section on deleting recording data on page 47. - Page 45 DELAYED RECORDING ________________________ Select »Date« with » « or » « and press »OK« to Item editor confirm. Source P001 ARD Use »1…0« to enter the six-digit date for the recording and Quality Once Mode press »OK« to confirm. Date 23.08.05 Start 18:00...
-
Page 46: Messages During Or After Programming A Recording
DELAYED RECORDING ________________________ Messages during or after programming a recording »A timer recording is about to start. Press OK to switch off and wait for it to execute. « A programmed recording is due to start shortly. Press » « on the remote control to switch off the DVD recorder to standby. -
Page 47: Checking, Modifying Or Deleting Recording Information
DELAYED RECORDING ________________________ Checking, modifying or deleting recording information Preparation Switch on the television. Select the »AV« channel on the television for the DVD recorder. Checking recording data Open the »Timer list« menu by pressing » « (green). – The »Timer list« menu appears, displaying the current data. Press »... -
Page 48: Managing Recording Data
MANAGING RECORDING DATA ______ The index screen of the DVD+R and DVD+RW or DVD-R and DVD- RW show the title (if provided by the broadcaster), length, quality and date of the recording. The first frame of the recording is also displayed. -
Page 49: Deleting Chapter Markers
MANAGING RECORDING DATA ______ Deleting chapter markers You can delete individual chapter markers or all the chapter markers on the disc. Select » Chapter marker« with » « or » « and press » « EDIT MODE Title 1/01 to confirm. Chapter: 01/04 To delete the current chapter marker, select »... -
Page 50: Editing The Names Of Recordings
MANAGING RECORDING DATA ______ Splitting titles in two (Only DVD+RW/DVD-RW) You can split a title into two. You can then delete these two titles separately, so that you can use the memory space on the disc again. Select » Title« with » «... -
Page 51: Deleting Titles (Recordings) From The Disc
MANAGING RECORDING DATA ______ Deleting titles (recordings) from the disc Put a DVD+R, DVD+RW or DVD-RW in the disc compartment. – The index screen appears. s 1. TITLE 30/09/2004 10:05:12 SP 01:15:00 Note: 2. TITLE 30/09/2004 12:30:00 If the index screen does not appear, press » «. -
Page 52: Overwrite Disc
MANAGING RECORDING DATA _______ Press » « or » « to select the station. Press » « to start recording. – The available recording time is displayed. The recording stops automatically at the end of the title. Overwrite disc This function allows you to overwrite the disc from the start to the end of the recording. -
Page 53: Entering The Name Of The Disc
MANAGING RECORDIND DATA _______ Entering the name of the disc You can enter a name for each disc; the name is shown on the index MY DVD screen. 30/09/2004 10:05:12 Put a DVD+R, DVD+RW or DVD-RW in the disc compartment. –... -
Page 54: Deleting The Content Of The Disc (Dvd+Rw/-Rw)
MANAGING RECORDIND DATA _______ Deleting the content of the disc (DVD+RW/–RW) Put a DVD+RW/–RW in the disc compartment. – The index screen appears. MY DVD Note: 30/09/2004 10:05:12 If the index screen does not appear, press » «. EDIT Select the disc information »MY DVD« with » «... -
Page 55: Finalising Title Editing
MANAGING RECORDIND DATA _______ Finalising title editing If you have edited titles or chapters, a DVD player may not be able to display this properly. This function allows you to eliminate this problem. MY DVD If » Make compatible« does not appear in the menu, the disc is 30/09/2004 10:05:12 already compatible and the setting is not necessary. -
Page 56: Finalising A Disc (Dvd+R/-R Or Dvd-Rw Only)
MANAGING RECORDIND DATA _______ Finalising a disc (DVD+R/–R or DVD-RW only) If you want to play a DVD+R/–R or DVD-RW on a DVD player, you must first finalise it. The DVD recorder can play unfinalised discs. Note that after a disc is finalised, no changes or any new record- ings can be made on it. -
Page 57: Connection And Preparation
COPYING ______________________________________________ Note: Do not connect any other equipment while the device is switched on. Switch off the other equipment as well before connecting it. Only plug the device into the mains socket after you have connected the external devices and the antenna. Connection and preparation Connecting a camcorder DV IN... -
Page 58: Recording From External Devices
COPYING ______________________________________________ Connecting a video recorder, DVD player or set-top box ANTENNA VIDEO OUT VIDEO IN Pb/Cb AUDIO OUT EURO AV 1 S-VIDEO OUT DIGITAL AUDIO OUT S-VIDEO IN S VIDEO OUT VIDEO OUT Pr/Cr ANTENNA VIDEO OUT AUDIO OUT VIDEO IN AUDIO IN EURO AV 2... -
Page 59: Using A Decoder
USING A DECODER _____________________________ Connection and preparation A decoder is necessary when the DVD recorder receives encoded programs from a private broadcaster. Ask your dealer about the decoder. PAY-TV ANTENNA VIDEO OUT VIDEO IN AUDIO OUT EURO AV 1 S-VIDEO OUT DIGITAL AUDIO OUT S-VIDEO IN ANTENNA... -
Page 60: Recording Pay Tv Programmes
USING A DECODER _____________________________ Recording PAY TV programmes Preparation Switch on the television. Select the »AV« channel on the television for the DVD recorder. Put a DVD+R, DVD+RW, DVD-R or DVD-RW in the disc compart- ment. Recording Press »SOURCE« to select the input source (for example, TV). –... -
Page 61: Usb Operation
USB-OPERATION _________________________________ Connection and preparation To connect a digital camera or an external storage medium, switch the DVD recorder into stand-by with » « and switch it on only after connecting. Even when you undo the USB connection, the DVD recorder must first be switched to stand-by, otherwise files can be damaged. -
Page 62: Archiving Contents From External Data Devices On The Dvd Recorder
USB-OPERATION _________________________________ Select the desired folder using » « or » « and open with »OK«. Press » « or » « to select the file you want and press »OK« or » « to start playback. Archiving content from external data devices on the DVD recorder This function allows you to copy files from an external data device onto a DVD+R or DVD+RW or DVD-R and DVD-RW and thus to... -
Page 63: Child Lock
CHILD LOCK __________________________________________ Authorising the contents of a DVD Films on DVD may be wholly or partially unsuitable for children. These DVDs contain information which marks the content or scenes. They are assigned access levels 1 to 8, which may differ from coun- try to country. -
Page 64: Audio Settings
AUDIO SETTINGS _________________________________ Selecting the digital output Here you select whether the audio signal is emitted from the »DIGITAL AUDIO OUT« sockets in the original data format (All) or in PCM format (Pulse Code Modulation). Press »SETUP« to open the setup menu. SYSTEM SETUP –... -
Page 65: Personal Settings
PERSONAL SETTINGS _________________________ Language settings You can choose between various languages. SYSTEM SETUP – LANGUAGE Press »SETUP« to open the setup menu. OSD language English Menu language English Select » « with » « or » « and press »OK« to Subtitle language confirm. -
Page 66: Switching The Screen Saver On/Off
PERSONAL SETTINGS _________________________ Switching the screen saver on/off When this function is activated, the screen saver starts when no function has been selected on the DVD recorder for some time. Press »SETUP« to open the setup menu. SYSTEM SETUP – GENERAL Select »... -
Page 67: Recording Settings
PERSONAL SETTINGS _________________________ Recording settings Press »SETUP« to open the setup menu. SYSTEM SETUP – RECORD Select » « with » « or » « and press »OK« to Auto chapter marker 5 minutes confirm. Default source Tuner Default quality Note: Erase disc The rest of the process is described in the following sections,... -
Page 68: Special Settings
SPECIAL SETTINGS ______________________________ Tuning television channels automatically Press »SETUP« to open the setup menu. SYSTEM SETUP – CHANNEL SCAN Select » « with » « or » « and press »OK« to Scan channels SCAN confirm. Modify channel information EDIT Sort channel order SORT Select »... -
Page 69: Sorting Television Stations
SPECIAL SETTINGS _______________________________ If you want to skip a channel when using the » « or » « buttons, select »Skip« with » « or » « and press »OK« to confirm. Press » « or » « to select »Yes« and press »OK« to Modify channel information confirm. -
Page 70: Setting The Time And Date
Enter the time in six digits with »1…0« and press »OK« to confirm. Press »SETUP« to finish the setting. Switching the DVD recorder to another Grundig remote control You can adjust the DVD recorder so that it can be operated with a remote control from another Grundig device. -
Page 71: Divx Video Registration
SPECIAL SETTINGS _______________________________ DivX VIDEO registration © Press »SETUP« to open the setup menu. SYSTEM SETUP – CLOCK Select » « with » « or » « and press »OK« to con- Date (dd/mm/yy) 03.06.05 firm. Time (hh:mm:ss) 11:30:36 Remote control type DVD Recorder Select »Reset regstration code«... -
Page 72: Information
INFORMATION _____________________________________ Technical data This product fulfils the European directives 89/336/EEC, 73/23/EEC and 93/68/EEC. This device conforms to the safety regulation DIN EN 60065 (VDE 0860) and therefore the interna- tional safety regulation IEC 60065. Never open up the DVD recorder. The manufacturer will not accept any liability for damage resulting from improper handling. -
Page 73: Troubleshooting
INFORMATION _____________________________________ Troubleshooting Not every picture or sound problem is caused by a defect in your DVD recorder. Impairment can also be caused by leads having been accidentally pulled out, damaged DVDs/CDs and worn-out batteries in the remote control. If the following measures do not do not rectify the problem, consult an authorised dealer. Problem Possible cause/remedy DVD recorder does not respond... -
Page 74: Environmental Note
Software information We wish to point out explicitly that only operating software authori- sed by GRUNDIG is permissible for the DVD recorder. This opera- ting software is available from specialist dealers or will be available shortly on the Grundig web sites www.grundig.com and www.grun- dig.de. -
Page 75: Additional Information For Units Sold In The Uk
INFORMATION _____________________________________ Additional Information for units sold in the UK. Units sold in the UK are suitable for operation from a 240V ac, 50Hz mains supply. The range of multi-system receivers is built to work in most European coun- tries. However, the mains plug and socket system for the UK differs from many European countries. - Page 76 Grundig Multimedia B.V. • De Boelelaan 7 • NL-1083 HJ Amsterdam • http://www.grundig.com 39/05...
Need help?
Do you have a question about the GDR 5500 and is the answer not in the manual?
Questions and answers