Garmin GPSMAP 182 Owner's Manual
Garmin chartplotting receiver
Hide thumbs
Also See for GPSMAP 182:
- Owner's manual (96 pages) ,
- Specifications (2 pages) ,
- Declaration of conformity (1 page)

Related Manuals for Garmin GPSMAP 182


Summary of Contents for Garmin GPSMAP 182
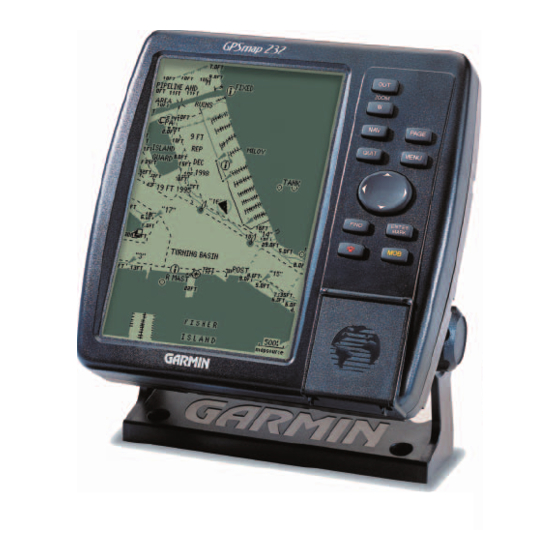
- Page 1 GPSMAP 182/182C/232 chartplotting receivers owner’s manual reference guide (GPSMAP 232 and 182C shown)
-
Page 3: Introduction
Information in this manual is subject to change without notice. Garmin reserves the right to change or improve its products and to make changes in the content without obligation to notify any person or organization of such changes. -
Page 4: Software License Agreement
Part Two is divided into sections that provide detailed references to the advanced features and opera- tions of the GPSMAP 182/182C/232. This allows you to concentrate on a specifi c topic quickly and look up detailed information about the GPSMAP 182/182C/232. -
Page 5: Warnings And Precautions
– and, as always, the user is responsible for their prudent use. Use the GPSMAP 182/182C/232 at your own risk. To reduce the risk of unsafe operation, carefully review and understand all aspects of this Owner’ s Manual—and thoroughly practice operation using the simulator mode prior to actual use. -
Page 6: Warranty And Serial Number
Garmin retains the exclusive right to repair or replace the unit or software or offer a full refund of the purchase price at its sole discretion. SUCH REMEDY SHALL BE YOUR SOLE AND EXCLUSIVE REMEDY FOR ANY BREACH OF WARRANTY. -
Page 7: Capabilities
Designed for detailed electronic charting capability, the Garmin GPSMAP 182/182C/232 is a pow- erful navigation device that can give you the information you need: Precision Performance • 16-color TFT display with backlighting (GPSMAP 182C only) • High-contrast, ten-level gray, LCD screen with backing (GPSMAP 182/232 only) •... -
Page 8: Packing List
Introduction Packing List Before installing and getting started with your unit, please check to see that your package includes the following items. If any parts are missing, please contact your Garmin dealer immediately. Standard Package: • GPSMAP 182/182C/232 Unit • GA 29 Remote Antenna and 30’ cable* •... -
Page 9: Table Of Contents
Introduction ......i-viii Foreword ......i Preface/Registration/Software License . -
Page 10: How To" Index
Turn the unit on or off ........4, 6, 17 Initialize the GPS receiver (fi rst time use) ......4-5 Adjust screen backlighting . -
Page 11: Keypad Usage
ZOOM IN Key The ZOOM IN/IN key adjusts the map scale to display a smaller area with more detail. (Zooms in) ZOOM OUT Key The ZOOM OUT/OUT key adjusts the map scale to display a larger area with less detail. (Zooms out) NAV Key The NAV key displays the Go To and Follow navigation menu. -
Page 12: Selecting Options
fi eld. How To Select Options and Enter Data Before moving ahead into the features of the GPSMAP 182/182C/232, you will need to learn basic operations. You can select and activate options and enter data to customize the GPSMAP 182/182C/ 232 to fi... -
Page 13: Entering Data
Naming a waypoint or placing any sort of data that has not been predefi ned requires the use of both the ARROW KEYPAD and the ENTER/MARK key. To enter a name or number in a data fi eld: 1. Once you have accessed a page with programmable data fi elds (i.e. ‘ Waypoint Edit’) you can use the ARROW KEYPAD to move the cursor (Highlight) to fi... -
Page 14: Initializing The Receiver
GPSMAP 182/182C/232. Initializing the Receiver The fi rst time you power up your new GPSMAP 182/182C/232, the receiver must be given an opportunity to collect satellite data and establish its present position. To ensure proper initialization, the GPSMAP 182/182C/232 is shipped from the factory in AutoLocate mode, which will allow the receiver to “fi... - Page 15 The GPSMAP 182/182C/232 will now begin searching for the appropriate satellites for your region and should acquire a fi x within a few minutes. When viewing the ‘GPS’ tab on the Main Menu, a signal strength bar for each satellite in view will appear on the bottom of the page, with the appropriate satel- lite number under each bar.
-
Page 16: Power On/Screen Backlighting
The GPS Information Page will appear as the receiver begins acquiring satellites. From this or any other page, you may also adjust the screen backlighting. The GPSMAP 182/182C/232’ s adjustable screen backlighting is controlled with the POWER key, and may be adjusted at any time from any page. The backlight can cycle through minimum, user- defi... -
Page 17: Simulator Mode
While in Simulator mode, a ‘Running Simulator’ message will appear after 2 minutes of inactivity. Now you’re ready to continue the rest of the simulated tour. Keep in mind that the GPSMAP 182/182C/232 does not track satellites in simulator mode, and this mode should never be used for actual navigation. - Page 18 Map Page The Map Page is one of six main pages used in the GPSMAP 182/182C/232’ s system. The six main pages are the Map Page, Sonar Page (If equipped with GSD 20. For GSD 20 sonar related operations, refer to “GSD 20 Sounder Module with Garmin Chartplotters”...
-
Page 19: Using The Map Cursor
This will also give you an opportunity to see how the GPSMAP 182/182C/232’ s keypad and ENTER/MARK key are used for data entry and changing the waypoint name and symbol. -
Page 20: Marking Waypoints
The waypoint is now stored in memory. Note that waypoints may also be created graphically from the map display or by manually entering position coordinates. Each of these techniques is described in the reference section of the manual and/or on your GPSMAP 182/182C/232 Quick Reference Guide. -
Page 21: Using The Nav Key
For our simulated trip, you’re going to select a pre-programmed tour route using the fi rst method. This will also show how the MENU key is used throughout the GPSMAP 182/182C/232 system to provide tab style options and functions. Let’ s start by changing the position to where the practice route is located. -
Page 22: Simulated Tour
Getting Started Simulated Tour You can also Invert a route to follow it in reverse. The Set Position, Track Control, Track and Speed fi elds will only show while in simulator mode. To activate the practice route stored in memory for navigation: 1. -
Page 23: Reviewing/Creating Map Waypoints
You’ll now have a clearer picture of the route you are navigating. Keep in mind that whenever you do exceed the usable range of the built-in database or the optional MapSource or BlueChart data in use, the range fi eld will display ‘OVERZOOM’ to indicate that you should exercise extreme caution using the map data. - Page 24 Numbers Page split numbers Now that we’re navigating to an actual destination, let’ s move on to the GPSMAP 182/182C/232 navigation pages by pressing the PAGE key. The Compass Page provides graphic steering guidance to a destination waypoint, with an emphasis on the bearing to your destination and current direction of travel.
-
Page 25: Highway Page
Highway Page as your primary navigation page (in lieu of the Compass Page) when your main concern is following a defi ned course. Whenever the GPSMAP 182/182C/232 is in simulator mode, you can also adjust your speed and course from the Highway Page using the ARROW KEYPAD. As you head toward each waypoint in the tour route, try adjusting your boat speed and course to get a feel for how the highway works. - Page 26 As you’ve seen, the primary pages provide map and navigation information. The tour’ s last page is the Main Menu page, which allows access to the GPSMAP 182/182C/232’ s waypoint, route and planning functions, as well as various operational and navigation setup features, and celestial and tide data.
- Page 27 2. When the screen is blank, release the POWER key. The next section of the manual describes the pages and functions of the GPSMAP 182/182C/232 in detail. If you are unable to locate a specifi c option or function, please refer to the index on pages 90-92.
-
Page 28: Section Two: Reference
• When suffi cient map coverage is not available to keep the boat centered, the boat icon will move toward the edge of the display. When the ARROW KEYPAD is pressed, the GPSMAP 182/182C/232 will enter cursor mode. In cursor mode: •... -
Page 29: Map Page Cursor
• When the cursor is stationary, a fi xed coordinate position will appear in the position fi eld. Note that the distance and bearing will change as the boat’ s position changes. • Whenever you zoom in cursor mode, the cursor will be centered on screen. •... - Page 30 The scale value represents the distance from one end of the scale bar to the other. The GPSMAP 182/182C/232’ s system has a built-in worldwide database to 20 mi, with more detailed coverage available through the use of the optional BlueChart or MapSource data. The GPSMAP 182/182C/232 will display cartography as long as there is chart information available for the range you’ve selected.
-
Page 31: Map Page Options
Map Page Options Many features of the GPSMAP 182/182C/232 are menu driven. Each of the main pages have an options menu, allowing you to custom tailor the corresponding page to your preferences and/or select special features that specifi cally relate to that page. The data window, located at the top of the main pages provides a user-selectable layout of various types of useful data. - Page 32 Reference Map Page Options Highlight the fi eld you wish to change Choose the type of data you wish to display. • Change Numbers — allows you to specify the type of data displayed in each data fi eld used on the map display.
- Page 33 • TOTAL TRIP TIME – Total travel time of trip, stopped and moving • TRACK – Current compass direction of travel • TRIP ODOMETER – Trip Odometer • TURN – Directional amount of turn needed to match bearing • VELOCITY MADE GOOD – Velocity Made Good to destination •...
-
Page 34: Map Page Confi Guration
Reference Map Page Options Main Menu— Map Confi guration Tab General Tab (182C shown) • Set Up Map— allows you to confi gure the map display to your preferences, including map detail, map orientation, automatic zoom, and various map items and points. The map set up option uses a ‘fi le tab’... - Page 35 Some types of data will only show up to certain zoom scales. Navaids Tab— Symbol Set— Auto, GARMIN, NOAA, International: controls the desired navaid symbol set. Auto - BlueChart maps are drawn using symbols similar to the NOAA/NIMA standard.
- Page 36 Reference Map Page Options Navaids Tab Nav Line Tab Track Tab Other Tab Map Setup Menu Options NOAA - All maps are drawn using a symbol set similar to NOAA/NIMA. International - All maps are drawn using a symbol set similar to the IALA symbol set. Text Size—...
-
Page 37: Compass Page And Options
Once you start moving, the pointer will be correct. The GPSMAP 182/182C/232’ s Compass Page features a menu page that provides access to layout and data fi eld options. The data window, located at the top of the page, provides a user-selectable layout of various types of useful data. -
Page 38: Numbers Page
1. Press the IN or OUT key to select the desired setting. The GPSMAP 182/182C/232’ s Highway options page allows you to defi ne the data fi elds and select which waypoints and track are displayed on screen. The data window, located at the top of the page,... -
Page 39: Highway Page Options
The data window layout may also be changed to display additional data fi elds and change the actual size of the data displayed. The GPSMAP 182/182C/232’ s Highway Page features a menu options page that provides access to functions and features relating to the Highway Page and the layout options. -
Page 40: Waypoints
Creating and Using Waypoints The Garmin GPSMAP 182/182C/232 stores up to 3000 alphanumeric waypoints with a user- defi ned icon, comments and depth available for each waypoint. Waypoints can be created using two basic methods: • ENTER/MARK key– used primarily for marking your present position, the ENTER/MARK key also provides options that allow you to select a map position or map item from the map display. -
Page 41: Creating Waypoints Graphically
5. To enter optional comments or a depth, highlight the “Comments” or “Depth” fi eld to the right of the position coordinates and press the ENTER/MARK key, then use the ARROW KEYPAD to enter a value and press ENTER/MARK. 6. To manually enter a set of coordinates, highlight the coordinates and press the ENTER/MARK key, then use the ARROW KEYPAD to enter the new coordinates and press ENTER/MARK when done. -
Page 42: Reviewing And Editing
Reference Editing Waypoints Submenu Tabs Waypoint List Symbol Name Comment Coordinates Depth Waypoint Edit Page Reviewing and Editing Waypoints Once you have created and stored a waypoint, it may be modifi ed, reviewed, renamed, moved or deleted at any time through the Waypoint Edit page. The Waypoint Edit page is available for any stored waypoint by highlighting the desired waypoint from the map display or selecting it from the waypoint lists under the ‘Points’... -
Page 43: Editing Waypoints
QUIT. Point Submenus The GPSMAP 182/182C/232’ s Main Menu Page features two waypoint submenu tabs, ‘User’ and ‘Proximity’, that let you manage a large number of waypoints quickly and effi ciently. The submenu tabs also provide a continuously updated proximity waypoint alarm function that can be used to defi ne an alarm circle around submerged hazards, shallow waters, etc. -
Page 44: Waypoint Options
Reference Waypoint Options Submenu Tabs Options Menu Point List Status Once a waypoint is deleted from the list, it cannot be recovered from the unit. It is advisable to backup important waypoints to a computer using an optional PC cable and interface software or record them down manually. -
Page 45: Proximity
2. Use the ARROW KEYPAD to highlight ‘Delete All’ and then press ENTER/MARK. 3. Highlight the ‘OK’ prompt and press ENTER/MARK to confi rm. Proximity Waypoint List The second waypoint submenu list available from the ‘Points’ tab is the ‘Proximity’ list, which lets you defi... - Page 46 Reference Proximity Waypoint List Proximity Waypoint List Icon appears when proximity alarms triggers. Proximity Waypoint Proximity Circle A dashed circle will appear showing the alert boundary for the proximity waypoints. The following options are available from the ‘Proximity’ submenu of the ‘Points’ tab: •...
-
Page 47: Going To A Destination
(roads, rivers, cities, navaids, etc.), or a new map point (non-map item). If you are selecting a map item as the ‘Go To’ destination, the GPSMAP 182/182C/232 will auto- matically use the name of the map item, but the point will not be stored in the waypoint list. See page , then press ENTER/MARK. -
Page 48: Tracback
31 for creating waypoints using map items. If you are selecting a new map point (non-map item) as the ‘Go To’ destination, the GPSMAP 182/182C/232 will automatically create or move a waypoint named ‘MAP’ at the cursor position. -
Page 49: Tracback Navigation
ENTER/MARK. Once a TracBack has been activated, the GPSMAP 182/182C/232 will take the track log currently stored in memory and divide it into segments called ‘legs’. Up to 50 (254 on 182C) temporary ‘turns’... -
Page 50: Mob
For more information on setting up the Track options and saved tracks, see pages 59-60. The GPSMAP 182/182C/232’ s Man OverBoard function (MOB) lets you simultaneously mark and set a course to a position for quick response to emergency situations. -
Page 51: Routes
Routes The last way to navigate to a destination is to create a user-defi ned route. The Garmin GPSMAP 182/182C/232 system lets you create and store up to 50 reversible routes (numbered 1-50), with up to 50 (254 on 182C) waypoints each. Routes can be created and modifi ed in two ways. The fi rst way to the ‘Edit on Map’... - Page 52 Reference Creating Routes Choose the category you want to add a route point from. Choose a waypoint from either the ‘By Name’ or ‘Nearest’ tab list. To create a route using text from the Route Review page: 1. Press the MENU key twice to display the Main Menu page. 2.
-
Page 53: Route List Page
Route List Page The GPSMAP 182/182C/232 Route List page displays all the routes currently stored in memory, along with a descriptive name for each route. Once a route has been created, it can be activated and used for navigation with the NAV key. A route may be followed in the same sequence as it was originally created, or you can invert the route and navigate from the end waypoint back to the begin- ning waypoint. -
Page 54: Route Review Page
Reference Route Review Page Route Name Data Fields Route Points Data Totals Route Review Options Menu Route Review Page Once you have created a route, the Route Review page allows you to review and modify the route displayed. To get to the Route Review page: 1. -
Page 55: Editing Routes
Route Review Menu Options Menu options available from the Route Review page are Edit on Map, Add Before, Remove and Trip Planning. Edit on Map— this option allows you to review and modify the route displayed for each point (waypoint or map item) on a map page. You may also use the cursor to insert a new route point on a route leg, review the waypoint or map item. - Page 56 The GPSMAP 182/182C/232’ s route edit mode also allows you to insert a new route waypoint in any route leg using the map cursor. To insert a new waypoint between two existing route waypoints: 1.
- Page 57 Trip Planning— The Route Review and Active Route pages also display trip-planning information for each leg or the entire route. Available information includes Course, ETA, Fuel (to point), Leg Distance, Leg Fuel, Leg Time, Sunrise and Sunset (at point location) and Time To (point). To use the Trip Planning feature: 1.
-
Page 58: Active Route Page
Menu Options Active Route Page Whenever you have activated a route in the GPSMAP 182/182C/232 system, the Active Route page shows each point (waypoint or map item) of the active route, with the point name, distance and choice of Course, ETA, Fuel to point, Leg Distance, Leg Fuel, Leg Time, Sunrise and Sunset at point location, or Time To point for each point from your present position. -
Page 59: Find Function
Find Function The FIND key allows you to search the units for user waypoints, map items and any optional BlueChart or MapSource information loaded on a data card. By pressing the FIND key, the unit will search for items from your current location by default or you may also search from other locations. When you press FIND, a list of available items to search from will appear. -
Page 60: Find Options
Reference Find Options Find Menu Options Additional Information Tabs Distance, Bearing, Coordinates of item Additional Option Buttons Additional Information Window Find Options Using the Find options, you may search from various map data and utilize variety of nearest criteria for all items, except waypoints. Available Find options are: •... -
Page 61: Main Menu Page
Main Menu Page The GPSMAP 182/182C/232’ s Main Menu Page provides access to various waypoint, system, naviga- tion and interface management, and setup menus in an easy to use “tab” format. The Main Menu page is available from any page in the system, and is accessed through the MENU key. See pages 2-3 for additional instructions changing settings and entering data. -
Page 62: Gps Tab
As soon as the GPSMAP 182/182C/232 has collected the necessary data from the best satellites in view to calculate a fi x, the status fi eld will indicate a 2D or 3D status. The unit will then update the position, date and time. - Page 63 WAAS satellites will be numbered 33 or higher when viewing the sky view on your GPSMAP 182/182C/232. Initial reception of the WAAS signal may take up to 15-20 minutes, then 1-2 minutes afterwards. When WAAS differen- tial correction has been received for GPS satellites (numbers 32 or below), a ‘D’...
- Page 64 DGPS signal being received. If no optional DGPS receiver is used with the GPSMAP 182/182C/232, the ‘DGPS Rcvr’ fi eld will display ‘Off. The SNR will depend upon the mount- ing of your DGPS receiver and the distance from the DGPS transmitting station.
- Page 65 Any elevation entered will be automatically calculated when the GPS is in 3D mode. Note: If a DGPS receiver is attached to the unit and Garmin DGPS, RTCM In/NMEA Out, or Other DGPS is enable on Port 2, WAAS will be automatically disabled (WAAS Off). It is not possible for the GPSMAP 182/182C/232 to receive WAAS and DGPS corrections at the same time.
-
Page 66: Main Menu: Tide Tab
Reference Main Menu: Tide Tab Station Name Date Tide Chart Event Times Tide Tab You can select from a list of nearest stations. Tide Tab— shows a graphical chart which displays tide station information in a 24 hour span starting at midnight station time. -
Page 67: Tide Tab
To select the nearest tide station from you current location: 1. From the “Tide” tab, highlight the ‘At’ fi eld and press ENTER/MARK. 2. Highlight the desired station of the list and press ENTER/MARK twice. If you are not within this range, you will see a message “None Found”. Use the ‘Nearest To Other’ Find option and select a location closer to a tide station. -
Page 68: Trip Tab
Reference Main Menu: Trip/ Celes (Celestial) Tab Position Date/Time Skyview Sun/Moon Window Event Times Moon Position Moon Phase Sun Position Overhead (90°) 70° 45° Horizon (0°) You may also change the sky- view from ‘North Up’ to ‘Track Up’. Celestial Tab Menu Trip Tab—... -
Page 69: Track Tab
Track Tab— lets you specify whether or not to record a track log (an electronic ‘breadcrumb trail’ recording of your path), defi ne how it is recorded, or save track log data for future use. The Track Logs Page also provides an indicator of the memory used for the active track log and options to clear the track memory or start a TracBack route. - Page 70 (GPS) technologies to transmit and receive location information. DSC is used by mariners to assist them in two major areas: Distress Calls and Position Reporting. See Appendix B for more information on DSC and using it with your GPSMAP 182/182C/232.
-
Page 71: Time Tab
Time Tab— displays the current time and date, allows you to adjust the 12 or 24 hour time format, enter a time zone and adjust for daylight savings to show correct local time. The following options are available: • Time Format— choose from 12 or 24 hour (military) time format. •... -
Page 72: System Tab
• System Information— displays the unit’ s software, basemap version and electronic serial number. Press MENU for the following options: • Defaults— restores settings on Systm page to default values. • All Unit Defaults— restores all settings to Garmin’ s original setup values for the entire unit. -
Page 73: Units Tab
If you are using a map or chart in conjunction with your GPS, make sure the settings under the ‘Units’ tab of the GPSMAP 182/182C/232 match that of the map or chart. This information should be displayed somewhere on the map or chart. -
Page 74: Communication Tab
Comm (Communications) Tab— lets you control the input/output format used when connecting your GPSMAP 182/182C/232 to a GSD 20 Sonar Module, external NMEA devices, a DGPS beacon receiver, a personal computer, another Garmin GPSMAP 182/182C/232, etc. Note: If a DGPS receiver is used, WAAS capability will automatically be turned to ‘Off’. -
Page 75: Comm Tab
2. Use the ARROW KEYPAD elect the desired setting and press ENTER/MARK. To select a transfer mode: 1. Use the ARROW KEYPAD to select ‘GARMIN Data Transfer’ in the ‘Serial Data Format’ fi eld. 2. Highlight the ‘Transfer Mode’ fi eld and press ENTER/MARK. - Page 76 To have the unit automatically scan for a frequency: 1. With the unit set to ‘GARMIN DGPS’ or ‘RTCM In/NMEA Out’, use the ARROW KEYPAD to highlight the “Beacon” fi eld and press ENTER/MARK.
-
Page 77: Alarm Tab
Alarm Tab— allow you to defi ne the alarm settings. The Alarm tab is divided into three submenu tabs: System alarms, Nav alarms and Sonar alarms. System Tab: • Clock— provides an alarm for the system clock. Enter a time in the time fi eld and turn the alarm on and off from the control fi... -
Page 78: Appendix A: Loran Td
Appendix A Loran TD You may change to Loran TD from the Units Tab on the Main Menu. Loran TD System LORAN C is a radio navigation aid operated and maintained in the United States by the United States Coast Guard. The name LORAN is an acronym for “LOng RAnge Navigation”. The LORAN system covers the entire United States and the U.S. -
Page 79: Setup Loran Td
Because of this the unit can navigate to a TD coordinate anywhere in the world. For more information on Loran TDs, you may download Garmin’ s “Loran TD Position Format Handbook” from the Garmin web site at http://www.garmin.com/support/userManual.html. -
Page 80: Appendix B: Dsc
Distress Call. In order to to obtain a Maritime Mobile Service Identity (MMSI) number, users must register their VHF radio with the FCC (Form 605). Garmin does not supply this number! Information to obtain this number can be found on the next page. - Page 81 For more information regarding MMSI’s visit: http://www.navcen.uscg.gov/marcomms/gmdss/ mmsi.htm. HOW CAN GARMIN HELP YOU WITH DSC? To receive Distress Calls or Position Reports, the user must have a DSC-equipped chartplotter as well as a VHF radio with DSC support. During normal, non-emergency Position Report communication, Channel 70 (156.525 MHz) has been set aside as the VHF/DSC digital call channel.
-
Page 82: Distress Call
(on sea or land) within range can receive the call. When the Garmin GPSMAP 182/182C/232 is connected to a VHF with DSC support, the GPS unit displays a Call List, Log, and a Directory available to store incoming information received from another user’... -
Page 83: Dsc Directory
DSC Call List The DSC Call List displays the current calls received. The GPS can manage up to 50 calls. When ‘calls’ are received, they are updated constantly to give the most current information, even if the unit is left unattended. Any entry from the Call List can be selected to show an Entry Review. DSC Log When DSC calls are received, they are automatically stored in the Log, with the latest call at the top. -
Page 84: Dsc Setup
MMSI numbers to other DSC users. DSC Setup Garmin chartplotters have the ability to turn DSC ‘On’ or ‘Off’. This option is benefi cial for us- ers who have more than one GPS chartplotter. If the user wants only DSC to display on a particular chartplotter, turn DSC off on the remaining Garmin chartplotters that support DSC. - Page 85 ful for practice before connecting to the real system. The Distress Call simulator also helps to check if alarms are working properly. To run a simulation: 1. Place the chartplotter into simulation (see pg. 7). 2. From the Main Menu, select the DSC tab, then highlight the Setup tab. 3.
-
Page 86: Appendix C: Time Offsets
Appendix C Time Offsets A simple way to determine your local time offset is how many hours you are behind or ahead of UTC (also called ‘Greenwich’ or ‘zulu’ time). Example: EST (Eastern Standard Time) is 5 hours behind UTC, so your offset would be -5. Adding one hour for daylight savings would make EDT (Eastern Daylight Time) - 4. -
Page 87: Appendix D: Messages
The GPSMAP 182/182C/232 uses an on-screen pop-up message system to alert you to unit operat- Appendix D ing characteristics. Press the ENTER key to acknowledge and return to the page you were viewing. Alarm Clock— The alarm clock has sounded. - Page 88 Appendix D Proximity Overlaps Another Proximity Waypoint—The alarm radius specifi ed overlaps the area specifi ed for another proximity waypoint. Adjust distance. Route Already Exists: <route name>— You have entered a route name that already exists in memory. Messages Modify route name or delete the previous route name. Route Does Not Exist: <route name>—...
-
Page 89: Appendix E: Map Datums
Adindan Adindan- Ethiopia, Mali, Senegal, Sudan Afgooye Afgooye- Somalia AIN EL ABD ‘70 AIN EL ANBD 1970- Bahrain Island, Saudi Arabia Anna 1 Ast ‘65 Anna 1 Astro ‘65- Cocos I. ARC 1950 ARC 1950- Botswana, Lesotho, Malawi, Swaziland, Zaire, Zambia, Zimbabwe ARC 1960 Kenya, Tanzania Ascnsn Isld ‘58... -
Page 90: Map Datums
Appendix E Map Datums Johnston Island Johnston Island Kandawala Kandawala- Sri Lanka Kerguelen Islnd Kerguelen Island Kertau 1948 West Malaysia, Singapore L. C. 5 Astro Cayman Brac Island Liberia 1964 Liberia 1964- Liberia Luzon Mindanao Luzon- Mindanao Island Luzon Philippine Luzon- Philippines (excluding Mindanao Isl.) Mahe 1971... -
Page 91: Appendix F: Navigation Terms
Appendix F Avg Speed— The average of all second-by-second speed readings since last reset. Bearing (BRG)— The compass direction from your present position to a destination waypoint. Navigation Terms Course— The desired course between the active ‘from’ and ‘to’ waypoints. Distance (Dist)—... - Page 92 Appendix F Odometer— A running tally of distance travelled, based upon the distance between second-by-second position readings. Navigation Terms Off Course— The distance you are off a desired course in either direction, left or right. Also referred to as ‘cross-track error’ or ‘course error’. DESTINATION Speed—...
-
Page 93: Appendix G: Specifi Cations
Position*: <15 meters (49 feet), 95% typical* Velocity: 0.05 meters/sec steady state DGPS (USCG) Accuracy: Position: 3-5 meters (10-16 feet) with optional Garmin DGPS receiver, 95% typical* Velocity: 0.05 meters/sec steady state DGPS (WAAS) Accuracy: Position: <3 meters (10 feet), 95% typical* Velocity: 0.05 meters/sec steady state... -
Page 94: Appendix H: Installation
3. Once the GPSMAP 182/182C/232 unit has been installed, connect the cable to the antenna con- nector on the back of the display unit. Make sure that you turn the antenna cable connector 1/4... -
Page 95: Unit Installation
2. Mark and drill the four mounting holes for the fastener you are using. 3. Fasten the bracket to the surface using the appropriate fastener. 4. Insert the GPSMAP 182/182C/232 into the mounting bracket. The bracket is designed for a tight fi t to provide additional support when swiveling the unit. - Page 96 Figure 2 Figure 3 The GPSMAP 182/182C/232 with external antenna can be fl ush mounted on a fl at panel of .08- .52” thickness using the cam lobe feature on its gimbal mounting bracket. When fl ush mounting the GPSMAP 182/182C/232, be sure to choose an appropriately sized location for the unit (see unit dimen- sions pg.
-
Page 97: Connecting The Power/Data
20 Sonar Module and Differential GPS (DGPS), NMEA 0183 version 2.3 (3.01 on GPSMAP 182C software version 5.20 & GPSMAP 182/232 4.20 and higher) , RTCM SC-104 input (version 2.0). The following are the sentences for NMEA 0183, version 2.3 and later output: Approved sentences—... -
Page 98: Installing And Removing Data Cards
If you insert a data card and get a ‘card format not recognized’ message, try removing the card and reinserting it. If the card is still not recognized, contact Garmin Support or your Garmin dealer for assistance. Data cards are not waterproof, should not be exposed to moisture or excessive static charges, and should be stored in the case supplied with the card. - Page 99 The clamp should not need to be replaced under normal use. Please contact your Garmin dealer or Garmin Support if you have any questions or require a replacement fi lter clamp.
-
Page 100: Appendix I: Index
Appendix I Index Accuracy ......5 3 Accuracy Circle ...26 Active Route Page ...16, 29, 48 Active Route Page Options ...48 Alarms ...67 Anchor Drag Alarm ...67... - Page 101 Installation ...84-89 Interface Formats ...65 Interfacing ...65, 87 Jump To Page ...61 Keypad Usage ...1 Land Mode ...24 Language Selection ...62 Light Sectors ...26 Local Time Offset ...61, 76 Loran TD ...68-69 Loran TD Setup ...69 Main Menu ...51-57 Main Menu Page ...51 Map Confi...
- Page 102 Appendix I Index Routes- Inverting ...43, 48 Routes- Naming ...44 Routes- Trip Planning ...47 Routes- Remove Points ...45-46 Routes- Reviewing Points ...43-45 Satellite Sky View ...5, 52 Serial Data Format ...65 Serial Number ...iv Shallow Water Alarm ...67 Show Numbers ...21 Signal Strength Bars ...5, 52 Simulator ...7, 62 Simulator Speed ...62...
- Page 104 For the latest free software updates (excluding map data) throughout the life of your Garmin products, visit the Garmin web site at www.garmin.com © 2003 Garmin Ltd. or its subsidiaries Garmin International, Inc. 1200 East 151 Street, Olathe, Kansas 66062, U.S.A.
Need help?
Do you have a question about the GPSMAP 182 and is the answer not in the manual?
Questions and answers