Table of Contents
Advertisement
Quick Links
Advertisement
Table of Contents

Related Manuals for Cowon Auto Capsule AE1

Summary of Contents for Cowon Auto Capsule AE1
- Page 1 User Guide ver. 1.1...
-
Page 2: Copyright Notice
+ All the other product(s) and service(s) listed in this manual are registered trademark and service of the corresponding copyright owner(s). + All rights to this program are reserved by COWON SYSTEMS Inc. and protected under copyright law. + This manual is based on the specifications of the product available at the point of publishing it. -
Page 3: Table Of Contents
COWON AE1 CONTENTS Before You Start Precautions for Product Handling Package Components Names of Parts and Functions Installation Connection of Uninterruptible Power Cable Basics Getting Started Live View Main Menu Recording Mode Switch File Playback Settings... - Page 4 COWON AE1 CONTENTS Basic Functions LED Status Indicator Button Operation Protection From High Temperature File Management Additional description Product Specification Troubleshooting...
-
Page 5: Before You Start
Precautions for Product Handling This section regards precautions to prevent users from compromising safety or experiencing property damage. Please read the followings carefully before use. (Company has nothing whatsoever to do with any accident caused by a user who failed to conform to warning and precautions.) + Changing the installation location of the product may result in a change in the camera angle. -
Page 6: Basics
+ Do not spray water or wax directly onto the product when cleaning the inside of a car. It may cause mechanical failure or electric shock. + Always use the genuine products and parts from COWON SYSTEMS, Inc. COWON SYSTEMS, Inc. shall not be held accountable whatsoever for failures or accidents caused by using the product and parts from other sources. - Page 7 Precautions for Product Handling ■ + Before removing the memory card from the product, press the button for more than three seconds. Removing the memory card without doing this, it may cause recording errors or product malfunction. + If storage space on the memory card is insufficient, previously-recorded files can be deleted in a pre-set order.
- Page 8 Package Components ■ Product holder Cigar jack MicroSD card Auto Capsule AE1 Uninterruptible power MicroSD card reader Double-coated tape Manual & PC viewer cable CD, Quick Guide (UP3, Optional) External GPS receiver Cable holder clips (Optional) (3EA) The product holder may come with double-coated tape already attached.
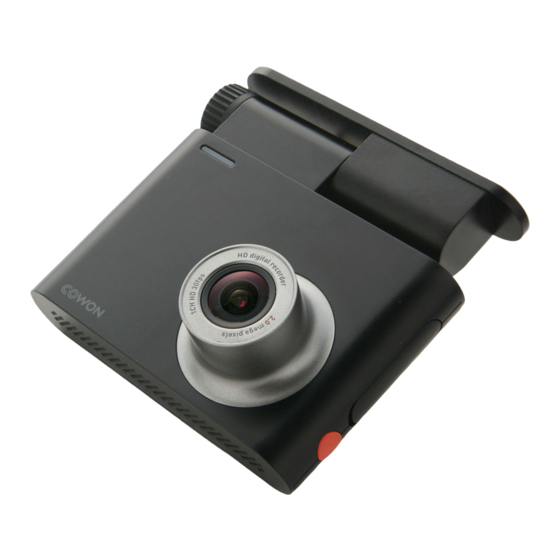
- Page 9 Press and hold - allows safe removal of memory card. Product holder Secures COWON AE1 to your vehicle. Screw Secures COWON AE1 firmly onto the product holder. Shows video being recorded or menu with which users can operate the black box. Power terminal Connects with cigar jack cable or with uninterruptible power cable.
- Page 10 Installation ■ Open the protective lid as shown in the Insert the memory card into the product. figure. Push and close the protective lid. Place AE1 in the product holder. Before You Basic Additional Basics Start Functions description...
- Page 11 Installation ■ Remove the release paper from one side of Attach the side that removed release paper the double-coated tape. onto the holder. Select a location and install Select the position carefully as removing the product to reposition it will cause it to be significantly loose. Double-check the chosen position before fixing the Remove the remaining release paper on the product.
- Page 12 Installation ■ Purple Connect cigar jack cable. Adjust the direction of the A purple LED turns red and camera lens. recording starts. Direction can be easily adjusted while looking through the LCD screen. Adjust the camera lens to make about 10-20% of your vehicle’s hood to be appeard on the recording screen.
- Page 13 Connection of Uninterruptible Power Cable ■ When connected with uninterruptible power cable, recording continues even when the vehicle is parked and the engine is turned off. Be sure to fully understand how to set up uninterruptible power before connecting the device. Each wire must be fixed to a specific dedicated location.
-
Page 14: Getting Started
Getting Started Booting When the car is started or the power button on the right-hand side of the product is pressed, the black box’s power turns on. As soon as booting is completed, the product automatically switches into driving mode recording. -
Page 15: Live View
Live View ■ Screen Indicator Blinks in red during recording session. Recording indicator Displays recording mode. REC: driving mode recording EVT: an event occurred Parking: parking mode recording GPS connection indicator Flashes in green when connected with GPS; light goes off when disconnected. Time indicator Displays current recording time. -
Page 16: Main Menu
Screen Off Touch the Screen Off button to turn the LCD screen off. Touch the LCD screen to reactivate the Live View screen again. Settings Touch Settings to go Settings screen of COWON AE1. Before You Basic Additional Basics Start... -
Page 17: Recording Mode Switch
Recording Mode Switch ■ This screen appears when the Recording Mode Switch button on the Menu screen is touched. Driving Recording Initiates driving mode recording. Recorded files are stored as normal files or event files. Parking Recording When the value of the G-sensor or the voltage of the vehicle battery falls below a certain level due to reduced vehicle motion, the product’s driving mode recording stops and switches into standby mode. -
Page 18: File Playback
File Playback ■ This screen appears when the Recording Mode Switch button on the Menu screen is touched. Previous/Next buttons When there are many recorded files, touch these buttons to move to the previous or next page. Displayed as current page/total pages. Playlist The list shows recorded files in consecutive order. - Page 19 File Playback ■ When the name of a file on the play is touched, that video file will be played immediately. Video playback screen Recorded video is played back on the LCD screen. When playback of the current file is over, the next file is played back. Recording button Touch the Recording button to move to Live View screen.
- Page 20 File Playback ■ A control button appears when the screen is touched during video playback. Name of file Displays the name of the video file currently being played. Play previous file Skips to the previous file. Play/Pause The video file currently being played can be paused or then playback can be resumed.
- Page 21 File Playback ■ Touch the name of the image file on the playlist and the image will appear immediately. Name of file Shows the name of the image file on display. View previous/next image Flick the screen left or right to view the previous or next image. Before You Basic Additional...
- Page 22 Settings ■ A Settings Screen appears when the settings button is touched on Main Menu. Screen Setting You can set brightness, Live View OSD Auto Concealment, Screen Saver, and Coordinate Setting. Sound Setting Sound Recording, Beep, and Volume can be set. Auto Capsule setting You can set Battery Discharge Setting, Battery Discharge Time Setting, Impact Sensitivity, LCD off, Recording Quality, and Auto Parking Switch.
-
Page 23: Screen Settings
Settings ■ Screen settings Brightness Setting Four stages of brightness can be selected for the LCD screen. Live View OSD Auto Concealment Hides the recording status indicator displayed on the top of the Live View screen. When auto-hide function is activated, Live View’s on-screen display (OSD) disappears after ten seconds. - Page 24 Settings ■ Voice settings Sound Recording You can decide whether or not to include voice recording during video recording. When voice recording is deactivated, only video is recorded. Beep Set whether or not to activate sound when the screen is touched. Volume The speaker volume (e.g.
-
Page 25: Basic Functions
Settings ■ Product settings Battery Discharge Setting When the vehicle’s battery voltage falls below the pre-set voltage value, the product’s power shuts down. Battery Discharge Time Setting Time limit for parking mode recording can be set. This function operates only during parking mode recording, and when the pre-set time is up, the product’s power shuts down. - Page 26 Settings ■ Time Settings Select calendar to go to date settings Select clock to go to time settings Touch the save button every time necessary changes are made so that the changes are applied. Can set time zone of each region. Before You Basic Additional...
-
Page 27: Memory Card Settings
Settings ■ Memory Card Settings Formatting Formatting function is provided to enhance the memory card’s stability. Formatting Reservation Memory card can be scheduled to re-format every two weeks for stability. Self Examination Notifies you when two weeks have passed since the last re-formatting to ensure formatting when necessary. -
Page 28: Led Status Indicator
LED Status Indicator Category Operating mode Color Blinking cycle Driving mode recording Slow blinking Standby during parking mode Stays solid driving Recording Event Fast blinking Motion Blinks Booting; no memory card Purple Stays solid Firmware upgrade Purple Stays solid Formatting Purple Blinks System... -
Page 29: Button Operation
Button Operation ■ Press and hold the button: power ON/OFF Press the button briefly: manual event Press and hold the button: safe removal of memory card Before You Basic Additional Basics Start Functions Description... -
Page 30: Protection From High Temperature
Protection From High Temperature ■ LCD protection In high temperature environments, the product records without turning on the LCD screen to protect the LCD. When this function is activated, the LED indicator will blinks in purple alongside the voice message: “Operating with LCD screen off to protect against high temperature.” If the temperature goes down, the LCD screen will turn back on automatically. -
Page 31: File Management
File Management ■ Recorded files are stored in the Recordings folder and the Images folder inside the AUTOCAPSULE folder of the memory card. The Recordings folder includes the Normal folder for normal and motion files and the Event folder for event files. The Images folder stores files of captured images. Folder Type Name of file... -
Page 32: Product Specification
Product Specification Item Specification Note Lens 6 glass structure F2.0 Image sensor 2.0 megapixel CMOS Image sensor 1/3.2” 2.8” wide viewing angle, full touch LCD 320X240 Recording 1280 X 720P, 30fps resolution Recording angle 120˚ Video encoding H.264 (MPEG-4 AVC) Recording file Normal file, event file, motion file 1) type... -
Page 33: Troubleshooting
Troubleshooting ■ Video is not recorded. Check memory card. Since memory cards have a limited life span, they may not operate normally if they are used beyond their lifespan. Periodic re-formatting is recommended for memory cards. Voice is not recorded. Check if voice recording is disabled. - Page 34 Troubleshooting ■ Image is shaky while driving. Make sure the device holder is secured firmly. If the device is shaky, use a transparent double-coated tape to secure it firmly. The screen is dark. The screen may appear dark due to the level of glass tint on your car. If this is the case, install the black box in a lightly tinted area or adjust the brightness of your screen on the Settings menu on the LCD screen.
Need help?
Do you have a question about the Auto Capsule AE1 and is the answer not in the manual?
Questions and answers