
Subscribe to Our Youtube Channel
Related Manuals for Garmin 2610/2650


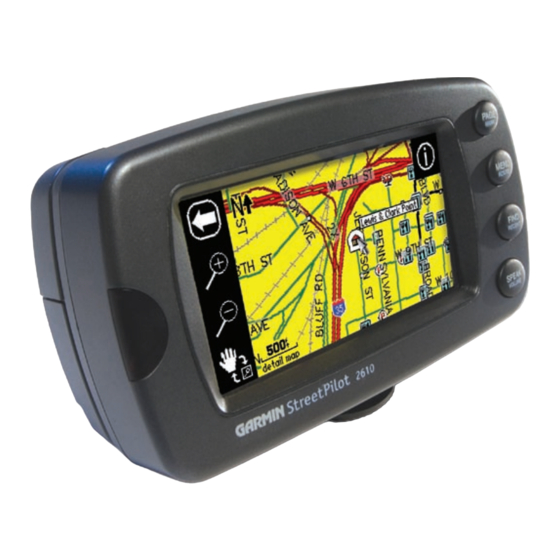
Summary of Contents for Garmin 2610/2650
- Page 1 StreetPilot portable car navigation owner’s manual 2610/2650 ® StreetPilot 2610 pictured StreetPilot 2650 not shown...
- Page 2 Information in this document is subject to change without notice. Garmin reserves the right to change or improve its products and to make changes in the content without obligation to notify any person or organization of such changes or improvements.
-
Page 3: Customer Service Product Registration
Help us better support you by completing our online registration today! Have the serial number of your StreetPilot 2610/2650 handy and connect to our Web site (www.garmin.com). Look for the Product Registration link on the Home page. Also, be sure to record your serial number in the right-hand column for a quick reference. -
Page 4: Packing List
• Setup Guide Optional Accessories: • Remote GPS Antenna (GA 27C) and antenna mounts • Deluxe Carrying Case • 128 and 256 MB CompactFlash® Memory Cards Visit our Web site at www.garmin.com for a complete list of StreetPilot 2610/2650 accessories. -
Page 5: Table Of Contents
WHERE DO I BEGIN? ...iv A Tutorial: Finding and Routing to a Restaurant ...vi Manual Conventions ...viii INTRODUCING THE STREETPILOT 2610/2650 ...1 Front and Rear View of the StreetPilot ...1 Caring for your StreetPilot ...2 Turning the StreetPilot On and Off ...3 Using the Keypad ...3... -
Page 6: Getting Started
In addition to your StreetPilot, you will need the following items that are included in the StreetPilot package: • Setup Guide. This is located in the plastic bag that also contains the StreetPilot 2610/2650 owner’ s manual and the MapSource owner’ s manual. - Page 7 StreetPilot! Further Recommendations: Read the StreetPilot 2610/2650 owner’ s manual to learn how to create routes that include multiple destinations, how to specify areas or road segments to avoid when calculating routes, and how to use a variety of other exciting features.
-
Page 8: Where To Find It
Introduction Where to find it • To learn how to attach your vehicle adapter to your StreetPilot, see page 64. • Learn how to create and customize routes, beginning on page 28. • Learn more about GPS navigation beginning on page 56. •... - Page 9 Step 3: Touch the Food & Drink icon located on the Find menu (from Step 2). The list of restaurants in your area will appear on a page similar to the one shown below: Step 4: Scroll down the list of restaurants by tapping the down arrow on the scroll bar, shown above.
-
Page 10: Manual Conventions
See page 4 to learn how to use it. OPERATE YOUR STREETPILOT IN “SAFE MODE” WHILE DRIVING NOTE: If you have previously registered a Garmin product purchase, we invite you to re-reg- ister using our online system. Many services provided by our new product registration system are now being automated and re-registering your purchase ensures you the best possible support from Garmin. -
Page 11: Introducing The Streetpilot 2610/2650
Introducing the StreetPilot 2610/2650 Front and Rear View of the StreetPilot Internal Patch Antenna Infrared Window Receives signals from GPS Receives signals from satellites to determine remote control. Do position. Do not block. not block. StreetPilot 2650 Front View 8-Bit Color LCD Touchscreen... -
Page 12: Maintenance
Introduction Cleaning the Case and Remote Control The StreetPilot 2610/2650 case and remote are constructed of high quality materials and do not require Maintenance user maintenance other than cleaning. Clean the unit’ s outer casing (except for the touchscreen) using a cloth dampened with a mild detergent solution and then wipe dry. -
Page 13: Turning The Streetpilot On And Off
Turning the StreetPilot On and Off Toggle the power switch on the right side down to turn the unit ON and up to turn it OFF. When turned on, the Welcome screen appears briefly, followed by the Map Information and Copyright page. Touch OK on the screen to acknowledge, or wait briefly until the Safe Driving Warning Message page appears. -
Page 14: Remote Usage
‘Enable Remote.’ Using the Touchscreen The StreetPilot 2610/2650’ s touchscreen features allow you to make menu selections, position the map pointer, scroll through menu selections, and enter data with the touch of your finger. To use the touchscreen control, touch the desired object on the screen with your finger, applying just enough pressure to activate the function. -
Page 15: Adjusting The Speaker Volume
• THUMB STICK — Selects menu options, changes settings, and enters data. Also it controls movement of the map pointer on the Map page. Press in (or down) on the thumb stick to select or activate a highlighted item or to begin data entry. Move the thumb stick from side to side for moving around the Map page. -
Page 16: Using The Map Page
Reference Using the Map Page NOTE: Your StreetPilot unit cannot acquire satellites from inside a build- ing. Thus, you may want to consider setting your unit to ‘Use Indoor’ status. To do this, press the MENU key on your unit. You will see a Menu page that includes a variety of setup options. -
Page 17: Using The Map Page Features
Using the Map Page Features The Map page comes with many useful features that can help you as you view cities or places, and as you navigate routes. If you are a new StreetPilot owner, practice using these features while your vehicle is stationary. - Page 18 Reference ‘North Up’ versus ‘Track Up’ The presence of the arrow shown at right indicates that the map tools bar is activated. Touch the arrow, and the map tools bar disappears. Map page showing map tools bar An orientation icon will appear.
- Page 19 (or vice versa) by touching the orientation icon. Note that the map tools bar must be hidden before you can Reference change these icons. Map Scale Using the Map Scale A map scale appears on the lower left of the Map page. It shows you the current zoom level showing on the Map page (such as 500 miles, .8 miles, or 200 feet) as well as what map your StreetPilot is using to create the current image.
-
Page 20: Information Icon
Reference Information Icon When multiple Points of Interest appear at one point (shown above) a selection list will display (shown below). Information Icon “i” As was discussed earlier in this section, you can pan across the Map page by using the touchscreen with your finger or by using your remote control. - Page 21 From the information page, you can also touch Go To to create a route to the Arch. A Route Preference window will appear. Once you select a preference, your StreetPilot will create a route to the Arch. (See Creating your own Routes, page 28, for more information on creating routes) Waypoints As was discussed on the previous page, an “i”...
-
Page 22: Viewing The Map Page While Driving
Reference Viewing the Map Page Map page in driving mode Map page in routing mode Although the information varies slightly between a Map page in driving mode and one in routing mode, you can use the features discussed in this section for both Map page types. -
Page 23: Viewing The Map Page
Both types of Map pages display a vehicle icon which indicates your present position and direction of movement as a triangular icon in the center of the map. Depending upon your map scale setting, you can see a variety of geographic detail such as lakes, rivers, highways, and towns. If you would like to see more detail at your current driving position, or if you would like to see a broader view of the area, you can change the Map scale to zoom in to or out of your current position as the Map page continues to follow the vehicle icon. -
Page 24: Next Turn Page
Reference Next Turn Page Your StreetPilot safely navigates you through roundabouts, interstate traffic, and all other types of road navigation. The NEXT TURN page announces the same instructions for an upcoming turn 3 times: · Immediately after you make a turn, the Next Turn page announces the next upcoming turn, as well as the distance to that turn. -
Page 25: Current Route Page
An added bonus to the Next Turn feature is that the StreetPilot “voice” announces upcoming turns. Thus, if you cannot safely view the Next Turn page, you can hear the directions. The Next Turn page above disappears after a few seconds and then the page which you were previously viewing will reappear. -
Page 26: Trip Information Page
Reference Trip Information Page Access the Trip Information page anytime during an active route by pressing PAGE on your StreetPilot. Select from different Mileage Logs. Trip Information Page While navigating a route, you can access yet another page, the Trip Information page. If you are making a long trip, you may find the Trip Information page to be very useful. - Page 27 StreetPilot has been tracking your location since the Trip Computer was last reset. Total Time The total length of time that the StreetPilot has been tracking your location since the Trip – Computer was last reset. This is always equal to Driving Time plus Stopped Time. To reset the Trip Computer or the Maximum Speed: 1.
-
Page 28: Driving With Dead Reckoning (2650 Only)
A special dead reckoning cable is connected to your vehicle’ s speedometer and backup lights (it must be professionally installed by an authorized Garmin installer). Thus, when you lose GPS reception, your StreetPilot can acknowledge your turns as well as your distance travelled while you are driving. -
Page 29: Finding Places
Finding Places Use the FIND feature on your StreetPilot unit (or remote) to take the guess work out of locating a city street, restaurant, or hotel. You can even use FIND to see what rest areas are approaching as you near an exit on the Interstate. - Page 30 Reference Finding Places If your search returns a large list of cities, you can narrow the search by touching the Filter tab. For example, if you are looking for Fort Collins, Colorado, type “Fort” on the Filter page and touch OK. The list will include names like Fort Morgan and Fort Collins, Colorado, but it will also include names like Glen Comfort.
-
Page 31: Finding An Address Or Intersection
Finding an Address or Intersection Touch the Addresses or Intersections icon from the Find menu. In both cases, a page appears that allows you to enter pertinent street information To enter the number or street name, touch the black text field that appears to the right of the Number and Street fields. - Page 32 Reference Finding Places While navigating a route, select Food & Drink from the Find menu to view a list of eating places near your current position. The Near Current Route tab will display places that are located along your entire route. To adjust how far off-route your StreetPilot will...
-
Page 33: Finding An Exit
In addition to the Near Current Route tab, here are additional tab options for finding places: • Near Here: Whereas Near Current Route lists places along your entire route, Near Here finds places that are near your current physical location. •... -
Page 34: Finding A Waypoint
Reference Finding Places You can narrow the number of exits by touching the down arrow (▼) on the All Exits tab to view only a list of Exits with Services, Rest Areas, or Other Exits such as weigh stations and Welcome centers. If you want to see what exits are available on upcoming highways or intersections, touch the down arrow (▼) on the On [Current Interstate/Hwy] tab and touch Change Highway. -
Page 35: Advanced Find Features
When you find the name of the waypoint you seek (no matter which search method you used), touch the waypoint name and a Waypoint Review page will appear, displaying the longitude and latitude coordinates of the waypoint. Touch Show Map if you want to see the waypoint on the Map page, or Go To if you want your StreetPilot to navigate to the waypoint. -
Page 36: Planning A Trip
Reference Finding Places 1. Find the city which you plan to visit. See ‘Finding a City’ in this section of this manual for more instructions if necessary. Touch the name of the city so that the information about it will appear. In our example, Fraser, CO is chosen. 2. -
Page 37: Finding "Recently-Found" Places
Finding “Recently-Found” Places Your StreetPilot keeps track of the places you find and stores the 30 most recent finds in its memory. Thus, if you want to create a route to a place you have recently found, touch Recent Finds from the Find menu. Or, press down and hold the FIND key on your StreetPilot or remote control. -
Page 38: Creating Your Own Routes
Reference Creating Routes Access the Route Menu above by pressing and holding down on the MENU/ROUTE key from your StreetPilot or remote control. The first time you access this menu, you will see limited options. Your first step, then, is to select New to create a route. -
Page 39: Creating Your First Route
New – Allows you to create and activate an entirely new route. Route List – Selects a route to start from a list of saved routes. Save – Saves the active route, or the last route you activated. Creating your First Route Creating routes are fast and easy once you become familiar with and understand the various steps and options. -
Page 40: Setting A Home Waypoint
Reference Creating Routes The appearance of the Route menu depends on if you are currently navigating a route (top) or if you have recently completed a route (bottom). Find — Choose this option if you want to find a known place such as a restaurant, hotel, waypoint, or an address. -
Page 41: Saving A Route
To set a HOME Waypoint: 1. Press down and hold the MENU key from your StreetPilot or remote control. A ‘Route Menu’ page appears. (As an alternative, simply press your StreetPilot’s FIND key two times. Then, go to Step 3 below.) 2. -
Page 42: Deleting Or Renaming A Saved Route
Reference Creating Routes View your list of saved routes by selecting Route List from the Route Menu. Touch a route to highlight its information, as shown above. You can then rename, delete, or activate the route, as shown in the example below. change the name of the route to something more meaningful to you by touching the route’... -
Page 43: Modifying A Route
Modifying a Route After you have practiced creating and saving simple routes, then you are ready to learn how to modify them to suit more specific needs. Recalculating a Route If you decide to temporarily part from your current route, you can select Recalculate from the Route menu to calculate a new route from your current location to your destination. - Page 44 Reference Creating Routes You can add a via point in order to add an extra stop to your route. Select the Add/Edit Vias icon from the Active Route menu shown above. An Edit Vias page will appear (below) that lists your final destination. Adding Via Points Via points are extra stops you’d like to make on your way to a final destination.
-
Page 45: Creating Routes
Arranging Via Points If you add more than one via point, you may want to arrange the order of the stops (or points) on the route to minimize route length. In the example at right, numerous stops have been added to a trip to the Kansas Speedway. -
Page 46: Measuring Distances Between Two Places
Reference Measuring Distances You can use the Measure Distance feature to do straight-line distancing for places that are miles away from your current location. In the example above, the current location is Olathe, Kansas, and the new point is Albuquerque, New Mexico. Measuring Distances Between Two Places You can get an idea of how far two points are from each other by using the Measure Distance feature. -
Page 47: Measuring Distances
To move the thumb tack to the new location (Bistro), touch the check mark at the top right of the Map page. The on-screen pointer (blue thumb tack) will appear at the new location. In our example below, then, the Bistro becomes the current point. You can measure distances from the Bistro to other locations: To stop measuring points, press the MENU key and then select the Stop Measuring icon. -
Page 48: Customizing Your Streetpilot 2610/2650
Customizing your StreetPilot 2610/2650 If you’ve experimented with creating routes and finding places using your StreetPilot, you may feel you’re ready to customize it to suit your navigational needs. Take a moment to look at the options in this section and decide which features you’d like to customize. -
Page 49: Customizing Your Map Page
Customizing your Map Page You can customize they way information appears on the Map page in order to make your viewing experience more pleasurable. For example, you can change the color of the Map page, show more or less detail on the Map page, or even prevent items such as railroads from appearing on the Map page. Many of your changes to the Map page can be made by pressing the Map Setup icon on the Menu page. - Page 50 Reference Customizing the Map Page The Map Setup page shown above shows the Line tab settings. You can change one or all of the settings. To restore them to their original settings, press your StreetPilot’s MENU key. A Menu page will appear, as shown below.
-
Page 51: Hiding/Showing Data Tabs On Your Map Page
Menu page, select the Reset Settings icon. All settings for that tab will reset to its original settings. Select the Reset All Settings icon if you want to restore every original setting on the Map Setup page. Hiding/Showing Data Tabs on your Map Page As you have discovered while using your StreetPilot, the data tabs on the Map page display offer a variety of useful information. - Page 52 Reference Hiding/Showing Data Tabs Your StreetPilot includes three tab styles that contain pre-set information that will appear in each data tab. Note the difference between information displayed in the ‘Wide Tabs’ setting above and the ‘Narrow Tabs’ setting below. Your StreetPilot includes three tab styles that contain pre-set information that will appear in each data tab (see the examples at left).
- Page 53 Possible Data Tab Customizations The following types of navigational data can be displayed on the Mapping and Routing data tabs: Address – Street address at your current location. Elevation, Feet or Elevation, Meter – Elevation of your current location. Heading – Current direction of travel. Next Turn –...
-
Page 54: Customizing The Overall Setup Of Your Streetpilot
Reference Customizing the Overall Setup Select the Options icon from the Menu page to display a System Setup Options page. Access the Menu page by pressing your unit’s MENU key. The System Setup Options page features a variety of customizable tabs. To bring hidden tabs into view, or to scroll left or right, touch the arrows at the top of either side of the System Setup Options page. -
Page 55: Customizing The Overall Setup
Tabs Included on the System Setup Options Page The tab headings and associated subheadings on the System Setup Options page are: General Color Scheme, Units, Voice, Touchscreen Tone, Attention Tone, Keypress Tone – Guidance Off-Route Recalculation, Next Turn Pop-Up – Routing Route Preference, Ask Me My Preference, Calculation Method, Calculate Routes for –... - Page 56 Reference Customizing the Overall Setup The Attention Tone field determines whether voice prompts are preceded by a chime. Select Both on the Guidance tab, and the Next Turn page will automatically appear as you approach a turn. If you wish to hear the instructions again, press the unit’s SPEAK key.
-
Page 57: Routing Tab
• SPEAK Key Only: The Next Turn page will only appear when you press the SPEAK key. • Automatic Only: The Next Turn page will automatically appear as you approach a turn. • Both: The Next Turn page will automatically appear as you approach a turn, and if you wish to hear the instructions again, you can press the unit’... -
Page 58: Calculation Method
Reference Customizing Route Settings Using the ‘Calculate Routes for’ option allows you to take full advantage of the routing information contained in the City Navigator mapping software for planning the most efficient route for your type of vehicle. The following options are available: •... - Page 59 • Avoid Road: Choose this option if you want to map out a few sections of a road or even an entire road to avoid. A Map page appears, enabling you to mark a “start point” on a road. Simply move the map pointer onto the beginning section of a road you wish to avoid and touch the check box in the top right-hand corner of the page.
- Page 60 Reference Customizing Route Settings You can specify which roads or areas you would prefer not to take when navigating a route. Go to the Avoidance tab on the Routing Setup page. The example above shows two parts of a road that the driver wishes to avoid.
- Page 61 Once entered, your StreetPilot will avoid these roads/areas unless no other roads are available or until you remove them from the Avoid List or uncheck them. Custom Road Preferences button The Custom Road Preferences button appears on the Routing tab and allows you create a customized preference for route calculation.
- Page 62 Reference Customizing the Overall Setup Many time zones are pre-programmed into your StreetPilot, which makes displaying the local time simple. If the desired time zone is not pre-programmed, select Other and enter the offset from UTC to the local time. Time tab Time Format Allows you to choose either a 12- or 24-hour time format.
-
Page 63: Language Tab
Track Log tab The StreetPilot automatically records a history of your locations in the Track Log, creating an electronic “bread crumb” trail of the path you have traveled. Once the log is full, new track points replace the oldest track points. The beginning of the track contains the earliest point while the end contains the most recent ones. - Page 64 The Interface tab only appears on the StreetPilot 2650 with Dead Reckoning (DR) sensors. Most of the information included in this tab is provided for and should be used only by authorized Garmin installers who must install the Dead Reckoning (DR) cable for your StreetPilot 2650. If necessary, you can customize the bottom-row settings on this tab (USB Format and Serial Format).
-
Page 65: Obtaining The Latest Software Upgrades
Info page will appear. Select the System Info icon and the System Info page will appear. Software updates for your StreetPilot can be found periodically at our Web site at www.garmin.com. Always check to make sure the version you wish to download is more current than the one you are presently using. -
Page 66: Gps Info Page
StreetPilot’ s Map page. A GPS receiver must be locked on to the signal of at least three satellites to calculate a 2D position (latitude and longitude) and track movement. With four or more satellites in view, the receiver can determine your 3D position (latitude, longitude and altitude). -
Page 67: Sky View And Signal Strength Bars
A signal strength bar appears for each satellite in view; the satellite’ s number appears beneath each bar. The progress of satellite acquisition is shown in three stages: • No signal strength bar: The GPS receiver in your StreetPilot is looking for the satellite(s) indicated. The corresponding number(s) on the sky view is not highlighted. -
Page 68: Satellite Status
Satellite Status As soon as the GPS receiver in your StreetPilot has collected the necessary data to calculate a fix, the status field indicates a 2D or 3D status (for 2D, you may need to enter your elevation). Satellite Status is indicated at the top left corner of the page. -
Page 69: Gps Information Page Options
‘Poor Satellite Reception’ Menu If no satellites are received for several minutes (or if too few satellites are received to determine a position fix), a Poor Satellite Reception message appears. You can: turn off the GPS for using the unit indoors for practice;... - Page 70 fixed position over the equator. The information is compatible with the basic GPS signal structure, which means any WAAS- enabled GPS receiver can read the signal. View the GPS Information page to see which GPS satellites are receiving position corrections from the WAAS satellites.
-
Page 71: Appendix A: Vehicle Installation
Vehicle Installation The StreetPilot 2610/2650 is portable, allowing you to easily carry the unit from vehicle to vehicle or take it with you once you reach your destination. A permanent dash mount (consisting of a mounting base and adhesive pads) is included with the StreetPilot. Also included is a non-skid friction mount which is designed for convenient temporary mounting for your StreetPilot. - Page 72 Appendix Vehicle Installation...
- Page 73 Attaching the StreetPilot to the Base These steps apply to both the non-skid friction mount base and the adhesive dash mount. 1. Slide the locking lever on the mounting base, to the left (unlocked position). 2. Attach the StreetPilot to the mounting base by sliding the disk on the bottom of the StreetPilot into the base until it clicks into place.
-
Page 74: Vehicle Installation
Simply unscrew the black, round end piece and remove/replace the fuse. Attaching the Vehicle Adapter to the StreetPilot 2610/2650 Your vehicle adapter is a 12/24 volt DC adapter with an external speaker system. This adapter is your StreetPilot’ s power source when you are in a vehicle (the StreetPilot does not use batteries). Use the AC adapter (included) when using the StreetPilot indoors. -
Page 75: Appendix B: Dr Cable Wiring (2650 Only)
DR Cable Wiring - For Dealer Installation Only (StreetPilot 2650 only) The StreetPilot 2650 includes Dead Reckoning (DR) cable connections that must be installed by a Garmin- authorized licensed installer. The DR connection consists of a 2-wire harness that connects to the VSS (Vehicle Speed Sensor) and Reverse Light Switch on the bare wire end, and connects to the StreetPilot’... -
Page 76: Appendix C: Using Diacritical Marks
An information page will appear. Using Diacritical Marks The European version of the StreetPilot 2610/2650 supports diacritical marks commonly used in many European languages. Diacritical marks are added to letters to indicate a special phonetic value that distinguishes it from an otherwise identical letter. The following letter/diacritic combinations, and special characters, are supported in your StreetPilot: À... - Page 77 Using Diacritical Marks Other special characters appear on the European ver- sion of your StreetPilot 2610/2650. To save a city or point of interest as a waypoint, select the flag icon located on the lower left side of the page.
-
Page 78: Appendix D: Compactflash® Data Cards
Removing and Installing the CompactFlash® (CF) Storage Card The StreetPilot 2610/2650 supports Type I and II CompactFlash® (CF) storage cards. The top of the card should always face towards the FRONT of the unit when inserting. Type I cards have a slight ridge on the bottom of the card that aids with removal. -
Page 79: Appendix E: Adding Maps To Your Streetpilot
Adding New Mapping Software to your StreetPilot You can purchase additional MapSource mapping software from Garmin such as City Navigator Europe or MetroGuide Canada. Information from these maps will appear on the StreetPilot’ s Map page just like the City Navigator maps you initially installed in your unit. Follow the instructions that came with your new mapping software to ensure proper installation of the maps to your computer and StreetPilot. - Page 80 Appendix Select Enable All Maps or Disable all Maps to display or hide detail map information on your Map page. Select Show Map Families to display a list of smaller maps that make up a map family. If information for a particular search is indeed available in another map family, a Select Map icon will appear on the Menu page.
-
Page 81: Appendix F: Messages
The StreetPilot 2610/2650 uses an on-screen message system to notify you of important information. Appendix To acknowledge a message, press IN on the remote’ s thumbstick or simply touch the message on the touchscreen. Data Transfer Complete – Transfer of data to the unit from the PC software has been completed. - Page 82 Route Waypoint Memory is Full – The unit has no more space for map-based route waypoints (used for Appendix turns). Safe Mode is Turned On – The action attempted is disabled while moving to prevent distractions from driving. Appendix F: Messages Storage Card Temperature Out of Range –...
-
Page 83: Physical Specifications
Physical Specifications Size: 5.6”W x 3.2”H x 2.0”D (14.3 x 8.0 x 5.0 cm) Weight: .93 pounds (420 g) Display: 3.3”W x 1.7”H (8.4 x 4.4 cm), (305 x 160 pixels), automotive-grade 8-bit, 256-color LCD with automatic dimming backlight and touchscreen; compatible with polarized sunglasses Case: Rugged;... - Page 84 CompactFlash® data cards are widely available over the counter, and you may purchase additional cards at many different retailers. Because Garmin does not manufacture these cards, it is possible that CompactFlash cards by certain manufacturers may generate radio frequency signals that interfere with the operation of your StreetPilot. These circumstances are beyond Garmin’...
-
Page 85: Appendix H: Product Safety And Regulatory Information
FCC Compliance The StreetPilot 2610/2650 complies with Part 15 of the FCC interference limits for Class B digital devices FOR HOME OR OFFICE USE. These limits are designed to provide more reasonable protection against harmful interference in a residential installation, and are more stringent than “outdoor” requirements. -
Page 86: Warnings And Cautions
CAUTION: Use the StreetPilot 2610/2650 at your own risk. To reduce the risk of unsafe operation, Appendix carefully review and understand all aspects of this owner’ s manual. Thoroughly practice operation using the simulator mode prior to actual use. When in actual use, carefully compare indications from the StreetPilot... - Page 87 Do not mount the StreetPilot 2610/2650 over air bag panels or in the field of air bag deployment. Air bags Warnings and Cautions expand with a rapid force that can propel objects in their path toward the driver or passengers causing possible injury.
-
Page 88: Software License Agreement
CONDITIONS OF THE FOLLOWING SOFTWARE LICENSE AGREEMENT. PLEASE READ THIS AGREEMENT CAREFULLY. Garmin grants you a limited license to use the software embedded in this device (the “Software”) in binary Software License Agreement executable form in the normal operation of the product. Title, ownership rights, and intellectual property rights in and to the Software remain in Garmin. -
Page 89: Limited Warranty
Garmin retains the exclusive right to repair or replace the unit or software or offer a full refund of the purchase price at its sole discretion. SUCH REMEDY SHALL BE YOUR SOLE AND EXCLUSIVE REMEDY FOR ANY BREACH OF WARRANTY. - Page 90 Index Symbols 2D Navigation 58 3D Navigation 58 Acquiring Sats 58 AC Adapter 64 Address 43 Addresses, Finding 21 Antenna, External Remote 61 Antenna, Internal 1 Area Tab 40 Arrival Distance 43 Arrival Time 43 Ask Me My Preference 47 Attention Tone 46 AutoLocate 58 AutoZoom 40...
- Page 91 Waypoints 24 FIND Key 3 Friction Mount 61 Installing 62 Fuse, Vehicle Adapter 64 Garmin Web Site 79 General Tab 45 Getting Started Tutorial vi GPS Info Page 56, 57, 58, 59, 60 GPS is Off 58 Guidance Tab 46...
- Page 92 Index Reset 17 Select 17 Mini Keyboard, Using 11 Near [Destination] Tab 20, 23, 24 Near Current Route Tab 22 Near Here Tab 19, 23, 24 Near Map Pointer Tab 20, 23, 24 Near Other Tab 19 New Elevation 60 New Location 59 Next Turn Page 14, 43, 46 North Up 8, 39, 59...
- Page 93 Vehicle Icon 8 Vehicle Installation 61 Via Point 28 Adding 34 Arranging 35 Voice 45 Volume, Adjusting 5 VOLUME Key 3 WAAS 60 Warnings and Cautions 76 Warranty 79 Waypoints 11 Finding 24 HOME 30 Web Site, Garmin 79 Zoom Icons 7...
- Page 95 For the latest free software updates (excluding map data) throughout the life of your Garmin products, visit the Garmin Web site at www.garmin.com. Copyright 2004, 2005 Garmin Ltd. or its subsidiaries Garmin International, Inc. 1200 East 151 Street, Olathe, Kansas 66062, U.S.A.
Need help?
Do you have a question about the 2610/2650 and is the answer not in the manual?
Questions and answers