
Subscribe to Our Youtube Channel
Related Manuals for Garmin 155XL


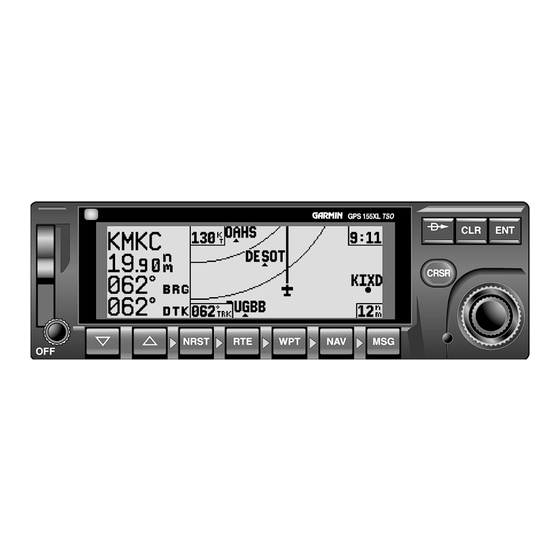
Summary of Contents for Garmin 155XL
- Page 1 Garmin International 1200 E. 151 Street Olathe, KS 66062 USA 190-00067-25 (Rev D) April 1999...
- Page 2 Except as expressly provided herein, no part of this manual may be reproduced, copied, transmitted, disseminated, downloaded or stored in any storage medium, for any purpose without the express prior written consent of GARMIN Corporation. GARMIN Corporation hereby grants permission to download a single copy of this manual and of any revision to this manual onto a hard...
-
Page 3: Table Of Contents
Control Display Unit—CDU ... 1-3 1.3.2 Main Board Assembly ... 1-3 1.3.2.1 CPU Board... 1-3 1.3.2.2 CPU Power Supply Circuits... 1-4 1.3.3 GPS Receiver ... 1-5 1.3.4 Interface Board and Data Cards... 1-6 1.3.5 Altitude Decoder Board ... 1-6 2.1 INTRODUCTION ... 2-1 2.2 SPECIAL TOOLS AND TEST EQUIPMENT ... - Page 4 Removing the Altitude Decoder Chassis Subassembly... 4-2 4.3.4 Interface Board Removal ... 4-2 4.3.5 CPU Board Removal... 4-3 4.3.6 GPS Receiver Assembly Removal and Disassembly ... 4-3 4.3.7 Power Switch Assembly Removal ... 4-4 4.3.8 Rotary Switch Assembly Removal ... 4-4 4.3.9 Display Module Assembly ...
- Page 5 6.1 INTRODUCTION ... 6-1 7.1 INTRODUCTION ... 7-1 190-00067-25 Rev D TABLE OF CONTENTS (Continued) Section 6 REPLACEABLE PARTS Section 7 ASSEMBLY DRAWINGS...
- Page 6 Figure GPS 155XL BLOCK DIAGRAM ... 1-2 GPS 155XL CONTROL/DISPLAY UNIT BLOCK DIAGRAM ... 1-3 GPS 155XL MAIN BOARD ASSEMBLY BLOCK DIAGRAM ... 1-4 GPS 155 XL GPS RECEIVER BLOCK DIAGRAM... 1-5 TEST HARNESS/TEST SETUP J2 ... 2-2 TEST HARNESS/TEST SETUP J1/J5 ... 2-3 CPU BOARD POWER SUPPLY TEST POINTS (TOP VIEW) ...
-
Page 7: Description And Operation
DESCRIPTION AND OPERATION INTRODUCTION This manual provides assembly-level repair information for the GARMIN GPS 155XL. If necessary, the GPS 155XL can be returned to GARMIN for all service work. Contact GARMIN at the following address for further service information: GENERAL DESCRIPTION The GPS 155XL is an aircraft rack-mounted GPS receiver that meets TSO-C129a (Al) requirements for Instrument Flight Rules (IFR) enroute, terminal, and non-precision approach operations. -
Page 8: Detailed Description
DETAILED DESCRIPTION Internally, the GPS 155XL is divided into six printed circuit boards: Main GPS Receiver Altitude Decoder Interface Display Keypad Circuit Figure 1-1 shows the block diagram for the GPS 155XL. Figure 1-1. GPS 155XL Block Diagram 190-00067-25 Rev D... -
Page 9: Control Display Unit-Cdu
All components are housed in a die cast bezel with a dual concentric rotary switch and knobs. There are two LED’s behind each keycap, providing backlighting for nighttime use. Figure 1-2. GPS 155XL Control/Display Unit Block Diagram 1.3.2 Main Board Assembly... -
Page 10: Cpu Power Supply Circuits
Serial communication lines for omni bearing indication (OBI) (clock/data/sync), ARINC 429, and RS-232 (two channels) are also included. Figure 1-3 shows the Main Board block diagram. Figure 1-3. GPS 155XL Main Board Assembly Block Diagram 1.3.2.2 CPU Power Supply Circuits... -
Page 11: Gps Receiver
BNC connector. The GPS supplies +5 V to the antenna’s preamplifier through this BNC connector. The block diagram in Figure 1-4 shows the interaction between components on the GPS Assembly. Figure 1-4. GPS 155XL GPS Receiver Block Diagram 190-00067-25 Rev D... -
Page 12: Interface Board And Data Cards
When servicing the GPS 155XL, user-defined waypoints, routes, settings, etc., may be saved on a user data card (768 kilobytes of Flash Memory; P/N 010- 10032-03). Refer to the GPS 155XL Pilot’s Guide for additional information on using the data card. -
Page 13: Special Tools And Test Equipment
SPECIAL TOOLS AND TEST EQUIPMENT INTRODUCTION This section identifies the special tools and test equipment necessary to repair the GPS 155XL. Standard equipment is not listed. For any questions regarding special tools and test equipment, contact the GARMIN Customer Service Department listed on Page 1-1. - Page 14 Figure 2-1. J2 Test Setup/Test Harness Diagram 190-00067-25 Rev D...
-
Page 16: Troubleshooting Equipment
7. 60 MHz Oscilloscope SELF-TEST FAILURES The GPS 155XL monitors many of its internal functions and displays a message to alert the user if a failure occurs. Table 3-1 shows the recommended repair for each self-test failure message. When multiple repair actions are listed, the most probable failure is listed first. -
Page 17: Self-Test Failures
Replace GPS receiver board (see section 4.3.6) Replace CPU board (see section 4.3.5) Turn unit off and then back on again Verify connection between CPU board and GPS receiver board Replace GPS receiver board (see section 4.3.6) Replace CPU board (see section 4.3.5) Replace CPU board (see section 4.3.5) -
Page 18: Initial Troubleshooting
Remove the NavData card before disassembling the unit. The first step in troubleshooting the GPS 155XL is to remove the top and bottom covers (see paragraph 4.3.1). Next, verify the unit is being properly powered and the internal clock is functional. -
Page 19: Cpu Board Power Supply Test Points (Top View)
Figure 3-1. CPU Board Power Supply Test-Points (Top View) 190-00067-25 Rev D... -
Page 20: Cpu Board Test Points (Bottom View)
Figure 3-2. CPU Board Test-Points (Bottom View) 190-00067-25 Rev D... - Page 21 TROUBLESHOOTING Table 3-2 contains problem/action information to aid in troubleshooting the GPS 155XL Perform the actions in the sequence they are listed. PROBLEM Unit will not power on Unit will not power off Display has horizontal or vertical lines Display has missing or dark pixels...
- Page 22 This process may take 5-10 minutes. CAUTION: All user waypoints/settings will be lost if the unit is reset, save to User Data Card. The GPS 155XL will eventually perform an AutoLocate minutes to the normal lock-on time.
-
Page 23: External Connectors
EXTERNAL CONNECTORS The GPS 155XL provides interfaces to various General Aviation Instruments via a 37 pin connector, J1, and a 26 pin connector, J2. Tables 3-3 and 3-4 provide pinout information to aid in troubleshooting. J1 PIN NUMBER Table 3-3. J1 Pinout Information... - Page 24 J2 PIN NUMBER 190-00067-25 Rev D Table 3-4. J2 Pinout Information PIN DEFINITION RESERVED RESERVED RESERVED RESERVED RESERVED RESERVED RESERVED RESERVED RESERVED RESERVED RESERVED RESERVED SEQUENCE HOLD LOW ALTITUDE D4 ALTITUDE A1 ALTITUDE A2 ALTITUDE A4 ALTITUDE B1 ALTITUDE B2 ALTITUDE B4 ALTITUDE C1 ALTITUDE C2...
-
Page 25: Interconnect Diagram
INTERCONNECT DIAGRAM Figure 3-3 shows the GPS 155XL interconnect diagram to aid in troubleshooting. Figure 3-3. GPS 155XL Interconnect Diagram 3-10 190-00067-25 Rev D... -
Page 26: Introduction
DISASSEMBLY AND REASSEMBLY The GPS 155XL contains static sensitive components. Observe proper anti-static procedures while repairing the unit. To avoid damaging the GPS 155XL’s circuit boards and assemblies, carefully follow the procedures in this section. Remove the NavData card before disassembling the unit. - Page 27 1. Remove the Covers as described in paragraph 4.3.1. 2. Remove the two Screws (9), which connect the Casting (10) to the GPS Receiver. 3. Slightly loosen Screw (11). The Main Assembly can now be hinged opened by lifting up on the Casting (10) while holding the Main Assembly down.
- Page 28 I501 Regulator to main chassis. 5. Remove screw (14), and remove GPS Receiver Assembly from main chassis. 6. For steps 6-13, refer to Figure 7-2. Remove eleven screws (1) that secure GPS receiver outer cover to casting. 7. Remove four screws (2) holding GPS receiver inner cover to assembly. Lift screws out along with spacers (3).
- Page 29 11. Unsolder BNC connector from GPS Receiver Board. 12. To remove BNC connector from casting, remove four screws (5) from casting and pull connector out. 13. Remove GPS Receiver Board from casting. 4.3.7 Power Switch Assembly Removal (Figure 7-3) 1. Remove Covers as described in paragraph 4.3.1.
- Page 30 Chassis frame. 2. Ensure that the Power/Volume Switch is in the ‘OFF’ position. 3. Attach the GPS Receiver to the Main Chassis Assembly by reversing the steps followed in paragraph 3.3.6. 4. Mount the CPU Board Subassembly on the Chassis by reversing the steps followed in paragraph 4.3.5.
- Page 31 This page intentionally left blank. 190-00067-25 Rev D...
-
Page 32: Test Equipment
The test procedures can be performed before troubleshooting is started or they can be used as a “return to service” test after replacements of assemblies have been made. All tests can be performed without accessing the inside of the unit. The GPS 155XL contains static sensitive components. Observe proper anti- static procedures when testing the unit. TEST EQUIPMENT Test Fixtures/Test Harnesses are User Supplied. -
Page 33: Memory Battery Replacement
MEMORY BATTERY REPLACEMENT The GPS 155XL uses a built-in lithium battery to maintain user waypoints/settings stored in RAM. This battery has an operational life of up to five years. Should the battery require replacement, as indicated by the ‘Memory Battery Low’ message, disassembly of the unit will be required to access the battery. When replacing the memory battery, all user waypoints/settings may be lost, and if this occurs, the message ‘Stored Data Lost’... -
Page 34: Cdi Deflection Test Page
TESTING 5.4.1 Test Setup 1. Before connecting a test harness to the unit, set the power supply to +13.8 VDC 0.1 V at J1-25, and set current limiter to 3A. 2. Turn power supply OFF. 3. Connect a test harness (figures 2-1 and 2-2) to the unit and turn the power supply ON. 5.4.2 Test Procedure Test Mode Activation/Display Test 1. - Page 35 7. Rotate the inner function knob clockwise to select FULL LEFT. Verify the DMM voltage is +150 ±15 mV. CDI To/From Flag Test 1. Rotate the outer function knob clockwise. 2. Measure voltage across J1-2 and J1-4. 3. If necessary, rotate the inner function knob to select FLAG. Verify the DMM voltage is 0 ±15 mV. 4.
-
Page 36: Obi Test Page
OBI Output Test 1. Press the CRSR key. 2. Rotate the outer function knob clockwise until the OBI Test Page is displayed (Figure 5-2). 3. Press the CRSR key once. 4. Rotate the outer function knob clockwise until VALUE is selected. 5. -
Page 37: I/O Test Page
4. Rotate the inner function knob to turn the front panel annunciators ON. Verify that all five annunciators on the GPS 155XL are illuminated. 5. Rotate the inner knob to turn the front panel annunciators OFF. Verify that all five annunciators on the GPS 155XL are off. -
Page 38: External Switches Test Page
8. With the MSG annunciator OFF, verify the DMM voltage is greater than 4.5 VDC. 9. Rotate the inner function knob to turn the MSG annunciator ON. Verify the DMM voltage is less than 0.3 VDC. 10. Measure voltage across J1-12 and J1-22. 11. -
Page 39: Altitude Decoder Test Page
1. Press the CRSR key. 2. Rotate the outer function knob until the External Switches Test Page is displayed (Figure 5-5). 3. Activate APPR SELECT (J1-9). The External Switches Test Page should display ‘APPR ON.’ 4. Deactivate APPR SELECT (J1-9). The External Switches Test Page should display ‘APPR OFF.’ 5. -
Page 40: Obs Selected Course Test Page
3. Press the CRSR key. 4. Press the ENT key on the GPS 155XL to calibrate the unit. There will be a brief delay while the unit performs the calibration. Verify that the input course is now 150º ±0.2º. -
Page 41: Display Intensity Test Page
2. Rotate the outer function knob until the following Receiver Test Page is displayed (Figure 5-10). 3. Terminate the GPS receiver’s antenna connection into a 50-ohm load. 4. The “sgnl” number represents the receiver noise level. Verify this number is between 1450 and 1750. - Page 42 Satellite Tracking Test The Satellite Tracking Test ensures that the GPS 155XL has current almanac information and is able to lock onto a sufficient number of satellites to provide a position. This test also verifies that the signal strength of the satellites received is at an acceptable level.
- Page 43 Allow the unit to lock onto satellites. If the unit has current almanac data, it will list the visible satellites on the row labeled SAT and will begin acquiring satellites in a period of a few minutes. If the unit indicates SEARCH SKY instead of ACQUIRING, it must search the sky for available satellites and collect almanac data.
-
Page 44: Replaceable Parts
INTRODUCTION Table 6-1 list assemblies and parts of the GPS 155XL that may be replaced (ordered from GARMIN). PART NUMBER 010-10032-03 010-10074-00 011-00107-04 011-00108-10 011-00183-01 011-00230-00 011-00231-00 011-00296-01 012-00067-01 012-00092-00 012-00205-50 115-00060-00 115-00061-00 125-00009-02 125-00027-00 145-00056-00 145-00107-02 145-00107-03 145-00107-04 145-00107-05... - Page 45 145-00108-01 145-00108-03 145-00108-04 145-00114-00 145-00130-01 210-00021-00 211-00030-00 211-00037-00 212-20004-00 212-20011-00 213-00013-00 232-30032-00 233-00017-00 250-00002-00 250-00035-00 250-00056-00 252-00004-00 253-00014-00 320-00003-00 320-00003-02 320-00088-00 335-00026-01 360-00009-00 362-00014-00 430-00002-00 430-00013-00 430-00014-00 470-00030-00 Table 6-1. Replaceable Parts Con’t. PMP, Keycap, Upper, Enter PMP, Keycap, Upper, Clear PMP,Keycap,Upper,Direct to PMP, Light Pipe PMP, Keycap, Oval, Paint/Ltring...
-
Page 46: Assembly Drawings
The following drawings are included in this section: Figure 7-1—GPS 155XL Assembly Figure 7-2—GPS 155XL GPS Receiver Assembly—For reference only, contains no replaceable parts. Figure 7-3—GPS 155XL Main Chassis Assembly Figure 7-4—GPS 155XL CDU Assembly Figure 7-5—GPS 155XL Remote Battery Pack... - Page 47 This page intentionally left blank. 190-00067-25 Rev D...
Need help?
Do you have a question about the 155XL and is the answer not in the manual?
Questions and answers