Table of Contents
Advertisement
Quick Links
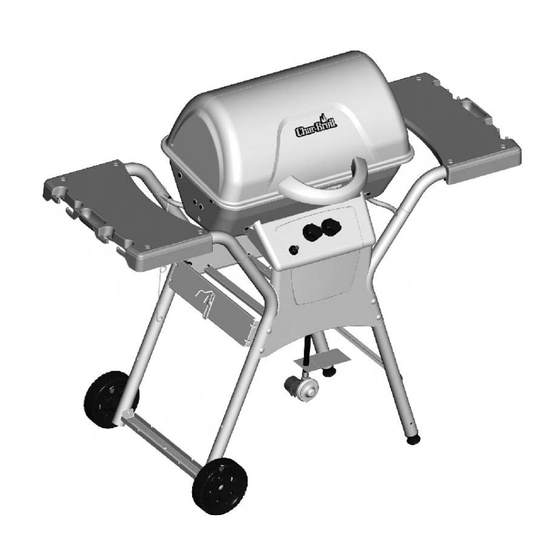
MODEL 463666508 • PRODUCT GUIDE
THIS GRILL IS FOR OUTDOOR USE ONLY.
CAUTION:
Read and follow all safety statements, assembly
instructions, and use and care directions before
attempting to assemble and cook.
INSTALLER/ASSEMBLER:
Leave this manual with consumer.
CONSUMER:
Keep this manual for future reference.
If you have any questions or need assistance during assembly, please call 1-800-241-7548.
To insure your satisfaction and for follow-up service, register your grill online at www.grillregistration.com
WARNING:
Failure to follow all manufacturer's instructions
could result in serious personal injury and/or
property damage.
CAUTION:
Some parts may contain sharp edges –
especially as noted in the manual! Wear
protective gloves if necessary.
463666508 • 80013142 • 07-30-07
Advertisement
Table of Contents

Related Manuals for Char-Broil Quickset 463666508


Summary of Contents for Char-Broil Quickset 463666508
- Page 1 MODEL 463666508 • PRODUCT GUIDE THIS GRILL IS FOR OUTDOOR USE ONLY. CAUTION: WARNING: Read and follow all safety statements, assembly Failure to follow all manufacturer’s instructions instructions, and use and care directions before could result in serious personal injury and/or attempting to assemble and cook.
- Page 2 Installation Safety Precautions DANGER • Use grill only with LP (propane) gas and the regulator/valve assembly supplied. • Grill installation must conform with local codes, or in their FOR YOUR SAFETY absence with National Fuel Gas Code, NFPA 54 / ANSI If you smell gas: Z223.1 and Natural Gas and Propane Installation Code, CSA B149.1.
-
Page 3: Table Of Contents
TABLE OF CONTENTS For Your Safety ........2 To insure your satisfaction Grill Service Center. - Page 4 LP Cylinder USE AND CARE • The LP cylinder used with your grill must meet the following requirements: • Use LP cylinders only with these required measurements: 12" DANGER (30.5cm) (diameter) x 18" (45.7 cm) (tall) with 20 lb. (9 kg.) capacity maximum.
-
Page 5: For Your Safety
LP Cylinder Exchange Connecting Regulator to the LP Cylinder 1. LP cylinder must be properly secured onto grill. (Refer to • Many retailers that sell grills offer you the option of replacing your empty LP cylinder through an exchange service. Use only assembly section.) those reputable exchange companies that inspect, precision fill, 2. -
Page 6: Grill Service Center
Leak Testing Valves, Hose and Regulator 1. Turn all grill control knobs to OFF. 2. Be sure regulator is tightly connected to LP cylinder. 3. Completely open LP cylinder valve by turning hand wheel counterclockwise. If you hear a rushing sound, turn gas off immediately. - Page 7 Only use the pressure regulator and hose assembly supplied with this grill. Replacement pressure regulator and hose assemblies must be specified or supplied by Char-Broil, LLC. If you have a grill problem see the "Troubleshooting Section". If the regulator frosts, turn off grill and LP cylinder valve immediately.
- Page 8 Burner Flame Check Ignitor Lighting • Remove cooking grates and flame tamers. Light burners, rotate Do not lean over grill while lighting. knobs from HI to LO. You should see a smaller flame in LO Turn all burner control valves. position than seen on HI.
-
Page 9: Spider Alert
Cleaning the Burner Assembly CAUTION Follow these instructions to clean and/or replace parts of burner assembly or if you have trouble igniting grill. 1. Turn gas off at control knobs and LP cylinder. SPIDER ALERT! Remove cooking grate and vaporiser b Under grill remove grease cup, disconnect ignitor wire and GAS COLLECTOR clips from burner. - Page 10 Food Safety How To Tell If Meat Is Grilled Thoroughly • Meat and poultry cooked on a grill often browns very fast on the Food safety is a very important part of enjoying the outdoor cooking experience. To keep food safe from harmful bacteria, outside.
-
Page 11: Parts List
Design®, Sierra®, and TruFlame® are registered Trademarks of the W.C. Bradley Company. Thermos® is a registered trademark of the Thermos Company and its affiliates. Artisan Collection by Char-Broil ™, C3 and Design™, Char-Broil and Design™, Flame Design™, FlavorTents™, Grill 2 Go™, Grillin’ Stick™, Keeper of the Flame™, Keepers of the Flame™, Natural Grip™, Outdoor Cooking Collection and Design™, Patio Bistro™, PrecisionFlame™, Pro-Check™, QuickSet Grills and Design™, SmokerTents™, The Big Easy™, The Minute Grill™, The Edge™, The Tuscan... -
Page 12: Parts Diagram
PARTS DIAGRAM – Model No. 463666508 12 • 463666508... - Page 13 ASSEMBLY – Model No. 463666508 Position leg assemblies as shown below, making sure assembly with leg extenders is on right side. Attach front panel and side support braces to legs using four 1/4-20x2” carriage bolts and four 1/4-20 tee knobs. Front panel 80013189 1/4-20 Tee Knob...
-
Page 14: Assembly
Turn assembly upside-down. Insert axle bolts into wheels. Facing the back, position tank support bracket between left legs. Insert axle bolt through leg and bracket and secure with hitch pin. Wheel 80012751 Tank support 1” Hitch Pin bracket Qty. 2 80013187 “Cone”... - Page 15 Place cart in the upright position. Place firebox assembly onto cart, making sure that regulator hose hangs inside cart and control panel overlaps front panel. Secure firebox to cart using four #10-24x1¼” carriage bolts, fiber washers and #10-24 wing nuts. Firebox assembly Control...
- Page 16 Slide shelf arms into leg assemblies and secure with one push fastener per arm. Attach side shelves to shelf arms using four 1/4-20x2” carriage bolts and four 1/4-20 tee knobs per shelf. Side shelf 80012749 1/4-20 Tee Knob Qty. 8 Shelf arm 1/4-20x2”...
- Page 17 Attach handle to front of lid using two insulation washers, fiber washers and Handle 80013191 #10-24 wing nuts. Attach upper lid hinges to back of lid using two 1/4-20x1/2” machine screws, fiber washers, and 1/4-20 flange nuts per hinge. Hinges should curve downward when properly installed.
- Page 18 Place vaporiser bar onto V-shaped bar rests inside firebox. Place cooking grate onto firebox. NOTE: The vaporiser Cooking grate 80012776 bar must be inserted into firebox at an angle in order to fit beneath cooking grate supports. Vaporiser bar 80012775 Insert ends of SwingAway pivot wire into holes in sides of grill lid.
- Page 19 Hang grease clip from bottom of firebox and place grease cup into grease clip. CAUTION Failure to install grease clip and cup will cause hot grease to drip from bottom of grill with risk of fire or Grease clip property damage. 80000271 Grease cup 80000270...
- Page 20 LP CYLINDER IS SOLD SEPARATELY. Fill and leak check the cylinder before attaching to grill and regulator (see Use & Care section). Once cylinder has been filled and leak checked, place cylinder into notches in tank support bracket. Make sure cylinder valve is facing front of grill. Slide tank retainer wire over cylinder collar and tighten tee knob. Regulator See Use &...
-
Page 21: Limited Warranty
In addition, in the state of California only, you may take the product to the retail establishment selling this product in order to obtain performance under this limited warranty. If you wish to obtain performance of any obligation under this limited warranty, you should write to: Char-Broil Consumer Relations P. O. Box 1240 Columbus, GA 31902-1240 Consumer returns will not be accepted unless a valid Return Authorization is first acquired by calling 1-800-241-7548 and then clearly marked on the outside of the package and the package is shipped freight/postage pre-paid to the address above. -
Page 22: Troubleshooting
EMERGENCIES: If a gas leak cannot be stopped, or a fire occurs due to gas leakage, call the fire department. Emergencies Possible Cause Prevention/Solution Gas leaking from • Damaged hose. • Turn off gas at LP cylinder or at source on natural gas systems. If cracked/cut/burned anything but burned, replace valve/hose/regulator. - Page 23 Troubleshooting (continued) Problem Possible Cause Prevention/Solution PIEZO PUSH-BUTTON AND ROTARY: Burner(s) will not light using ignitor. • Push-button sticks at bottom. • Replace ignitor. • Rotary knob rotates without clicking. • Replace knob. • Sparking between ignitor and electrode. • Inspect wire insulation and proper connection. Replace wires if insulation is broken.
- Page 24 Please register your grill online at: WWW.GRILLREGISTRATION.COM (If you register online, you do not need to send in this registration card.) La parrilla estaba ensamblada Chimenea / Envíelo a: 24 • 463666508...
- Page 25 This page intentionally blank 463666508 • 25...
- Page 26 This page intentionally blank 26 • 463666508...
- Page 27 This page intentionally blank 463666508 • 27...
- Page 28 Always ensure control knobs are in OFF position and regulator is attached to tank BEFORE opening tank valve to avoid low flames. Perform leak test regularly. Thank You for Your Purchase! Char-Broil, LLC • 2007 Columbus, GA 31902 • Printed in China...
Need help?
Do you have a question about the Quickset 463666508 and is the answer not in the manual?
Questions and answers