Fujitsu LIFEBOOK AH532 User Manual
Hide thumbs
Also See for LIFEBOOK AH532:
- Operating manual (83 pages) ,
- Manual (18 pages) ,
- Datasheet (3 pages)

Related Manuals for Fujitsu LIFEBOOK AH532


Summary of Contents for Fujitsu LIFEBOOK AH532
- Page 1 User’s Guide Learn how to use your Fujitsu LIFEBOOK AH532 notebook Guide Découvrez comment utiliser votre ordinateur portable d’utilisation Fujitsu LIFEBOOK AH532...
- Page 2 User’s Guide Learn how to use your Fujitsu LIFEBOOK AH532 notebook...
- Page 3 © Copyright 2012 Fujitsu America, Inc. All rights reserved. No part of this publication may be copied, reproduced, or translated, without prior written consent of Fujitsu. No part of this publication may be stored or transmitted in any electronic form without the written consent of Fujitsu.
- Page 4 Telephone: (408) 746-6000 Declares that product: Base Model Configuration: LIFEBOOK AH532 notebook Complies with Part 15 of the FCC Rules. This device complies with Part 15 of the FCC rules. Operations are subject to the following two conditions: (1) This device may not cause harmful interference, (2) This device must accept any interference received,...
- Page 5 IMPORTANT SAFETY INSTRUCTIONS This unit requires an AC adapter to operate. Use only UL Listed I.T.E. Class II Adapters with an output rating of 19 VDC, with a current of 3.42 A (65 W). AC adapter output polarity: When using your notebook equipment, basic safety precautions should always be followed to reduce the risk of fire, electric shock and injury to persons, including the following: •...
- Page 6 * To order a new battery for your Fujitsu mobile computer, go to the Fujitsu shopping site at in the US or www.shopfujitsu.com in Canada. www.fujitsu.ca/products/notebooks ** RBRC is an independent third party to which Fujitsu provides funding for battery recycling; RBRC is in no way affiliated with Fujitsu.
-
Page 7: Table Of Contents
Conventions Used in the Guide ....... . 7 Fujitsu Contact Information ........8... - Page 8 Keyboard........... . 23 Using the Keyboard.
- Page 9 Power Management ......... . 40 Power/Suspend/Resume Button .
- Page 10 Device Ports ..........61 Internal LAN (RJ-45) Jack .
- Page 11 Chapter 6 System Specifications Specifications ..........94 Microprocessor .
- Page 12 Configuration of the WLAN Device....... 121 Configuring the WLAN Using Windows ......121 Connection to the network .
-
Page 13: About This Guide
Preface About This Guide The LIFEBOOK AH532 notebook from Fujitsu America provides desktop performance with the 3rd Generation Intel® Core™ processor family. Your notebook has a built-in 15.6” WXGA high-definition color display. This system brings the computing power of a desktop personal computer to a portable environment. -
Page 14: Fujitsu Contact Information
OR YOUR FILES LEASE READ ALL WARNING INFORMATION CAREFULLY Fujitsu Contact Information Service and Support You can contact Fujitsu Service and Support in the following ways: • Toll free: 1-800-8Fujitsu (1-800-838-5487) • Website: USA: us.fujitsu.com/solutions Canada: www.fujitsu.ca Before you place the call, you should have the following information ready so that the customer support representative can provide you with the fastest possible solution: •... - Page 15 Fujitsu Software Download Manager (FSDM) utility. The FSDM utility is available to allow you to download the latest drivers, utilities, and applications from the Fujitsu Support site. If you have a Windows 7 or Windows 8 operating system, you will need to go to the Support Site (http://support.fujitsupc.com/CS/Portal/support.do?srch=DOWNLOADS).
-
Page 16: Getting To Know Your Lifebook
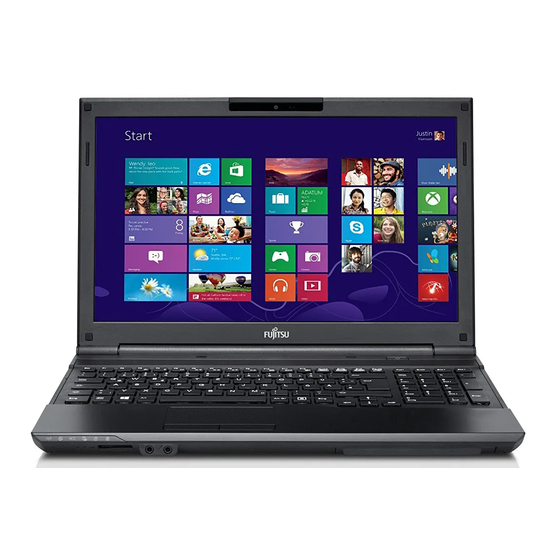
Getting to Know Your LIFEBOOK Overview This section describes the components of your Fujitsu LIFEBOOK AH532 notebook. We strongly recommend that you read it before using your notebook – even if you are already familiar with notebook computers. Figure 1. Fujitsu LIFEBOOK AH532 notebook... -
Page 17: Locating The Controls And Connectors
Digital Microphone Display Panel Stereo Speaker Touchpad Pointing Device Power/Suspend/ Resume Button Stereo Speaker Status Indicator Keyboard Panel Microphone SD Card Slot Jack Headphone Jack Figure 2. LIFEBOOK AH532 notebook with display open 11 - Locating the Controls and Connectors... -
Page 18: Top Components
Top Components The following is a brief description of your LIFEBOOK notebook’s top components. Display Panel The display panel is a color LCD panel with back lighting for the display of text and graphics. HD Web Camera The HD web camera (1200x768 pixel) allows you to take pictures of yourself to send over the internet. For information on using the microphone and web cam, see the documentation associated with the CyberLink YouCam application. - Page 19 Secure Digital (SD) Card Slot The Secure Digital (SD) card slot allows you to install a media card for data storage. This media allows you to transfer data from a variety of different digital devices. See “Secure Digital Cards” on page 56. Status Indicator Panel The Status Indicator Panel displays symbols that correspond with a specific component of your LIFEBOOK notebook.
-
Page 20: Left-Side Panel Components
Air Vents External Video Jack ExpressCard Slot HDMI Jack USB 3.0 Ports* * The USB port on the right above provides Anytime USB Charge capability. Figure 3. LIFEBOOK notebook left-side panel Left-Side Panel Components The following is a brief description of your LIFEBOOK notebook’s left-side components. Air Vents The air vents allow air to circulate through the system to cool down the components. - Page 21 ExpressCard Slot The ExpressCard Slot allows you to install an ExpressCard. See “Using ExpressCards” on page 54. USB 2.0 / 3.0 Ports The USB ports allow you to connect Universal Serial Bus devices. There are three USB 3.0 ports on the left side of the system and one USB 2.0 port on the right.
-
Page 22: Right-Side Panel Components
USB 2.0 Port Optical Drive Optical Drive Release Button Emergency Tray Release DC-In Jack Figure 4. LIFEBOOK notebook right-side panel Right-Side Panel Components The following is a brief description of your LIFEBOOK notebook’s right-side components. USB 2.0 / 3.0 Ports The USB ports allow you to connect Universal Serial Bus devices. -
Page 23: Back Panel Components
DC Power Jack The DC power jack allows you to plug in the AC adapter to power your LIFEBOOK notebook and charge the internal Lithium ion battery. Optical Drive Release Button The optical drive release button opens the optical drive. Anti-Theft Lock Slot LAN (RJ-45) Jack Figure 5. -
Page 24: Bottom Components
Hard Disk Drive Cover Memory Upgrade Compartment Air Vents (multiple locations) Lithium ion Battery Latch Battery Latch Battery Bay Figure 6. LIFEBOOK notebook bottom panel Bottom Components The following is a brief description of your LIFEBOOK notebook’s bottom panel components. Memory Upgrade Compartment Your notebook comes with high speed Double Data Rate 3 Synchronous Dynamic RAM (DDR3 SDRAM). -
Page 25: Battery Latches
Hard Disk Drive Cover The hard disk drive cover is secured over the system hard disk drive. Under normal circumstances, you should not open this compartment Lithium ion Battery Bay The battery bay contains the internal Lithium ion battery. It can be opened for the removal of the battery when stored over a long period of time or for swapping a discharged battery with a charged Lithium ion battery. -
Page 26: Status Indicator Panel
Figure 7. Status Indicator Panel Status Indicator Panel The Status Indicators display symbols that correspond to specific components of your Fujitsu LIFEBOOK notebook. The LEDs below each symbol tell you how each of those components is operating. Wireless Status Indicator •... -
Page 27: Power Status Indicator
Power Status Indicator • Blue, solid: AC adapter and battery are available and system is fully charged, or AC adapter is plugged in but battery is not installed. • Blue, blinking: AC adapter and battery are available and the system is in sleep mode. •... -
Page 28: Hard Drive/Optical Drive Access Indicator
Hard Drive/Optical Drive Access Indicator The Hard Drive/Optical Drive Access indicator glows green when your internal hard drive is being accessed. Note that flickering is normal. NumLk Indicator The NumLk indicator glows when the integral keyboard is set in ten-key numeric keypad mode. CapsLock Indicator The CapsLock indicator glows when your keyboard is set to type in all capital letters. -
Page 29: Keyboard
Figure 8. Keyboard Using the Keyboard Your Fujitsu LIFEBOOK notebook has an integral 103-key keyboard, including Windows keys, special function keys, and an integrated numeric keypad. This section describes the following keys. • Numeric keypad: Your notebook has an integrated numeric keypad which allows you to perform numeric/mathematical and navigational functions. - Page 30 • Function keys: The keys labeled [F1] through [F12], are used in conjunction with the [Fn] key to produce special actions that vary depending on what program is running. • Windows keys: These keys work with your Windows operating system. These keys switch between desktop and Modern Start screen modes and open the Application bar on the bottom of the screen.
- Page 31 • [Fn+F6]: Pressing [F6] repeatedly while holding [Fn] will lower the brightness of your display. • [Fn+F7]: Pressing [F7] repeatedly while holding [Fn] will increase the brightness of the display. • [Fn+F8]: Pressing [F8] repeatedly while holding [Fn] will decrease the volume of your LIFEBOOK notebook. •...
-
Page 32: Touchpad Pointing Device
Figure 9. Touchpad pointing device The Touchpad pointing device comes built into your Fujitsu LIFEBOOK notebook. It is used to control the movement of the pointer to select items on your display panel. The Touchpad is composed of a cursor control, a left button and a right button. -
Page 33: Double-Clicking
LIFEBOOK N EXTERNAL MOUSE CAN BE CONNECTED TO THE PORTS ON YOUR NOTEBOOK AND USED SIMULTANEOUSLY WITH THE OUCHPAD OWEVER IF YOU BOOT THE SYSTEM WITH AN EXTERNAL MOUSE CONNECTED THE OUCHPAD WILL BE DISABLED OR ENABLED DEPENDING ON THE See “BIOS Setup Utility”... - Page 34 Figure 12. Double-clicking with button Figure 13. Double-clicking with Touchpad Dragging Dragging means pressing and holding the left button, while moving the cursor. To drag, move the cursor to the item you wish to move. Press and hold the left button while moving the item to its new location and then release it (Figure 14).
-
Page 35: Navigating Using Gestures
Navigating Using Gestures The touchpad allows you to use gestures to zoom in or out on a page, scroll quickly through large documents, toggle the charms, toggle the application commands bar, and switch to last application. Scrolling Up/Down: To scroll up or down, slide two fingers up or down (Figure 16). Scrolling Right/Left: To scroll right or left, slide two fingers right or left (Figure 16). -
Page 36: Touchpad Control Adjustment
Figure 16. Scroll Figure 17. Zoom Figure 18. Toggle charms Figure 19. Toggle apps Figure 20. Last app Touchpad Control Adjustment The Control Panel allows you to customize your Touchpad with selections made from within the Mouse Properties dialog box. To change the settings or actions for the touchpad: From the Modern Start screen, press [Windows}+[X], then select Control Panel from the menu. -
Page 37: Volume Control
Volume Control Your Fujitsu LIFEBOOK notebook has multiple volume controls which interact with each other. NY SOFTWARE THAT CONTAINS AUDIO FILES WILL ALSO CONTAIN A VOLUME CONTROL OF ITS OWN F YOU INSTALL AN EXTERNAL AUDIO DEVICE THAT HAS AN INDEPENDENT VOLUME CONTROL... -
Page 38: Getting Started With Your Lifebook
Chapter 2 Getting Started with Your LIFEBOOK DC In AC Adapter AC Cable Figure 21. Connecting the AC Adapter... -
Page 39: Power Sources
Power Sources Your Fujitsu LIFEBOOK notebook has three possible power sources: a primary Lithium ion battery, an AC adapter or an optional Auto/Airline adapter. Connecting the Power Adapters The AC adapter or optional Auto/Airline adapter provides power for operating your notebook and charging the batteries. -
Page 40: Display Panel
Figure 22. Opening the Display Panel Display Panel Your Fujitsu LIFEBOOK notebook contains a display panel that is backlit for easier viewing in bright environments and maintains top resolution through the use of active-matrix technology. Opening the Display Panel To open the display, simply lift the display backwards, being careful not to touch the screen, until it is at a comfortable viewing angle. -
Page 41: Using The Keyboard
Using the Keyboard • [Fn+F6]: Pressing repeatedly will lower the brightness of your display. • [Fn+F7]: Pressing repeatedly will increase the brightness of the display. Using the Power Options To change the brightness using the Power Options utility, open the Control Panel and select either Large icons or Small icons in the View by: Double-click Power Options. -
Page 42: Starting Your Lifebook Notebook
Starting Your LIFEBOOK Notebook Power On Power/Suspend/Resume Button The Power/Suspend/Resume button is used to turn on your LIFEBOOK notebook from its off state. Once you have connected your AC adapter or charged the internal Lithium ion battery, you can power on your LIFEBOOK notebook. LIFEBOOK HEN YOU TURN ON YOUR NOTEBOOK... -
Page 43: Boot Sequence
This information is in the BIOS program. Each time you power up or restart your notebook, it goes through a boot sequence which displays a Fujitsu logo until your operating system is found. During booting, your notebook is performing a standard boot sequence including a Power On Self Test (POST). When the boot sequence is completed without a failure and without a request for the BIOS Setup Utility, the system displays the operating system’s opening screen. -
Page 44: Bios Setup Utility
When you turn on your notebook for the first time, it will display a Fujitsu logo on the screen. If you do nothing the system will load the operating system, and then the Windows Welcome will begin. -
Page 45: Starting Windows The First Time
Registering your LIFEBOOK with Fujitsu You can register your notebook by going to our website at: http://www.us.fujitsu.com/computers. You will need to be set up with an Internet Service Provider (ISP) to register online. 39 - Starting Your LIFEBOOK Notebook... -
Page 46: Power Management
Power Management Your notebook has many options and features for conserving battery power. Some are automatic and need no user intervention. However, others depend on parameters you set to best suit your operating conditions, such as those for the display brightness. Internal power management can be controlled by settings made in the operating system, power management application, or settings made in BIOS setup utility. -
Page 47: Hibernation (Save-To-Disk) Feature
• Allowing the battery to reach the Dead Battery Warning condition. System memory typically stores the files on which you are working, open application information, and any other data required to support operations in progress. When you resume operation from Sleep, your system will return to where it left off. -
Page 48: Windows Power Management
Windows Power Management The Power Options icon in the Control Panel allows you to configure some of the power management settings. For example, you can use Power Options to set the timeout values for turning off the display and hard disks whether you are running the notebook on battery or one of the adapters. Restarting the System If your system is on and you need to restart it, be sure that you use the following procedure. -
Page 49: Energy Star® Compliance
Energy saving benefits: Fujitsu ENERGY STAR qualified mobile PCs use about half as much electricity as standard equipment – saving half in utility costs. But more than that, ENERGY STAR also makes a difference for the environment. Did you know that the average house can be responsible for twice the greenhouse gas emissions as the average car? That’s because every... -
Page 50: User-Installable Features
Chapter 3 User-Installable Features Lithium ion Battery Your LIFEBOOK notebook has a Lithium ion battery that provides power for operating your notebook when no external power source is available. The battery is durable and long lasting, but should not be exposed to extreme temperatures, high voltages, chemicals or other hazards. -
Page 51: Recharging The Batteries
• CTUAL BATTERY LIFE WILL VARY BASED ON SCREEN BRIGHTNESS APPLICATIONS FEATURES POWER MANAGEMENT SETTINGS BATTERY CONDITION . CD-ROM DVD W AND OTHER CUSTOMER PREFERENCES DRIVE ULTI ORMAT RITER OR HARD DRIVE USAGE MAY ALSO HAVE A SIGNIFICANT IMPACT ON BATTERY LIFE HE BATTERY CHARGING CAPACITY IS REDUCED AS THE BATTERY AGES F YOUR BATTERY IS RUNNING LOW QUICKLY SHOULD REPLACE IT WITH A NEW ONE... - Page 52 DVD/CD-RW/CD-ROM SING HEAVY CURRENT DEVICES OR FREQUENT ACCESSES MAY PREVENT CHARGING COMPLETELY Low Battery State When the battery is running low, a low battery notification message will appear. If you do not respond to the low battery message, the batteries will continue to discharge until they are too low to operate. When this happens, your notebook will go into Standby mode.
-
Page 53: Replacing The Battery
Replacing the Battery With the purchase of an additional battery, you can have a fully charged spare to swap with one that is not charged. There are two ways to swap batteries, cold-swapping and hot-swapping: Cold-swapping Batteries To cold-swap batteries in your battery bay follow these easy steps: Have a charged battery ready to install. - Page 54 Figure 23. Battery lock and latch Figure 24. Removing the battery 48 - Lithium ion Battery...
-
Page 55: Optical Drive
Media Tray Eject Button Media Holder Tray Emergency Tray Release Figure 25. Optical Drive Optical Drive Your system contains a Dual-Layer Multi-Format DVD Writer. This drive lets you access movies, audio DVD/CDs, and software, and read and write to CD-R, CD-RW, DVD-R, DVD+R, DVD-RW, DVD+RW, and DVD RAM discs. The dual-layer architecture allows you to record up to 8.5 GB of data on DVD+R discs. - Page 56 Gently pull the tray out until a media disc can easily be placed in the tray. • OU SHOULD PERIODICALLY CHECK THE UJITSU WEBSITE AT US FUJITSU COMPUTERS FOR THE MOST CURRENT DRIVERS LIFEBOOK DVD • PLAYERS ARE SET TO PLAY...
-
Page 57: Removing Media
Removing Media Push and release the eject button on the front of the optical drive. This will stop the drive and the holder tray will come out of the LIFEBOOK notebook a short distance. Gently pull the tray out until the disc can easily be removed from the tray. Carefully remove the media disc from the holder tray. -
Page 58: Using Media Player On Battery Power
N ADDITIONAL CHARGED BATTERY IS HIGHLY RECOMMENDED IF YOU WILL BE WATCHING MOVIES ON BATTERY POWER F YOU DON T HAVE 1-800-8FUJITSU. AN ADDITIONAL BATTERY YOU MAY PURCHASE ONE ONLINE AT HTTP COMPUTERS FUJITSU COM OR BY CALLING 52 - Optical Drive... - Page 59 To Watch a Movie on Battery Power: Have an additional full-charged battery or your AC adapter ready for use. Start watching your DVD movie. When the low battery warning occurs, immediately stop the movie and exit the media player. LIFEBOOK F YOU DO NOT STOP THE MEDIA PLAYER QUICKLY AND THE NOTEBOOK ATTEMPTS TO AUTO SUSPEND...
-
Page 60: Using Expresscards
ExpressCard (34 mm) ExpressCard Slot Figure 28. Installing/Removing ExpressCard Using ExpressCards Your LIFEBOOK notebook supports 34 mm ExpressCards , which can perform a variety of functions depending on which type of card you install. Some available ExpressCards: • Gigabit Ethernet Local area network (LAN) cards •... -
Page 61: Removing Expresscards
’ OU MAY BE REQUIRED TO LOG ON AS DMINISTRATOR OR A MEMBER OF THE DMINISTRATOR ROUP TO COMPLETE THIS PROCEDURE F YOUR COMPUTER IS CONNECTED TO A NETWORK NETWORK POLICY SETTINGS MAY ALSO PREVENT YOU FROM COMPLETING THIS PROCEDURE See your ExpressCard manual for instructions on the installation of your card. -
Page 62: Secure Digital Cards
SD Card Slot SD Card Figure 29. Installing a Secure Digital Card Secure Digital Cards Your LIFEBOOK notebook supports Secure Digital (SD), Secure Digital High Capacity (SDHC), and Secure Digital eXtended Capacity (SDXC) cards on which you can store and transfer data to and from a variety of digital devices. These cards use flash memory architecture, which means they don’t need a power source to retain data. -
Page 63: Installing Sd Cards
Installing SD Cards SD Cards are installed in the SD Card slot located on the front of the system to the left of the headphone jack (Figure 29). To install a card, follow these steps SD C LIFEBOOK ’ NSTALLING OR REMOVING AN ARD DURING YOUR NOTEBOOK S SHUTDOWN OR BOOTUP PROCESS MAY DAMAGE THE CARD AND... -
Page 64: Memory Upgrade Module
Dynamic RAM (DDR3-1600 SDRAM factory installed. To increase your notebook’s memory capacity, you may install an additional or larger memory upgrade modules. The memory upgrade must be a dual-in-line (DIMM) SDRAM module. To ensure 100% compatibility, purchase the SDRAM module only from the Fujitsu web store at www.shopfujitsu.com •... - Page 65 Figure 30. Removing the Memory Cover Screws Figure 31. Removing the Memory Cover Insert the memory upgrade module at a 45° angle. Press the connector edge of the module firmly down and into the connector until it lodges under the retaining clip. You’ll hear a click when it is properly in place. Replace the cover and reinstall the screws.
-
Page 66: Removing A Memory Upgrade Module
Removing a Memory Upgrade Module Perform steps 1 through 4 of Installing a Memory Upgrade Module. Pull the clips sideways away from each side of the memory upgrade module at the same time. While holding the clips out, remove the module from the slot by lifting it up and pulling it away from your notebook. -
Page 67: Internal Lan (Rj-45) Jack
Device Ports Your Fujitsu LIFEBOOK notebook comes equipped with multiple ports to which you can connect external devices including: disk drives, keyboards, printers, etc. Internal LAN (RJ-45) Jack The internal LAN (RJ-45) jack is used for a 10/100/1000 Gigabit Ethernet LAN connection. You may need to configure your notebook to work with your particular network. -
Page 68: Headphone/Line-Out Jack
UE TO THE ONGOING CHANGES IN TECHNOLOGY AND STANDARDS NOT ALL DEVICES AND OR DRIVERS ARE GUARANTEED TO WORK USB 3.0 Port with * The Anytime USB Charge feature can be enabled and Anytime USB Charge disabled from the BIOS Setup Utility (See “BIOS Setup capability* Utility”... -
Page 69: Microphone/Line-In Jack
Microphone/Line-In Jack The microphone/line-in jack lets you connect an external mono microphone. The microphone must be equipped with a 1/8”(3.5 mm) stereo mini-plug to fit into the microphone jack of your notebook. To connect a microphone, align the connector with the port and push the connector into the port until it is seated. External Video Port The external video port allows you to connect an external monitor or LCD projector. -
Page 70: Hdmi Port
HDMI Port The High-Definition Multimedia Interface (HDMI) port is a digital audio/video interface over which uncompressed streams can be transmitted. HDMI is used to connect compatible digital devices with your computer (such as big- screen TVs and video recorders). To connect an HDMI device: Align the connector with the port opening. -
Page 71: Troubleshooting
Chapter 4 Troubleshooting Your LIFEBOOK Troubleshooting There may be occasions when you encounter simple setup or operating problems that you can solve on the spot, or problems with peripheral devices that can be solved by replacing the device. The information in this section helps you isolate and resolve some of these straightforward issues and identify failures that require service. - Page 72 If you have tried the solutions suggested in the Troubleshooting Table without success, contact your support representative: Toll free: 1-800-8Fujitsu (1-800-838-5487) Web site: http://solutions.us.fujitsu.com/www/content/support/contact/index.php. Before you place the call, you should have the following information ready so that the customer support representative can provide you with the fastest possible solution: •...
-
Page 73: Specific Problems
Specific Problems Using the Troubleshooting Table When you have problems with your LIFEBOOK notebook, try to find the symptoms under the Problem column of the troubleshooting table for the feature giving you difficulty. You will find a description of common causes for that symptom under the column Possible Cause and what, if anything, you can do to correct the condition under Possible Solutions. - Page 74 Problem Possible Cause Possible Solutions Audio Problems There is no sound coming The volume is turned too low. Adjust the volume control on your notebook and operating system. Use the [Fn+F9] from the built-in speakers. key combination on your keyboard. Pressing [F9] repeatedly while holding [Fn] increases your notebook volume.
- Page 75 Problem Possible Cause Possible Solutions Drive access indicator on The Windows auto insertion This is normal. However, you may disable this feature. the Status Indicator Panel function is active and is check- blinks at regular intervals ing to see if a disc is ready to with no disc in the tray or run.
- Page 76 Problem Possible Cause Possible Solutions See “Power On Self Test Messages” on System Properties screen You have a memory failure. Check for Power On Self Test (POST) messages. page 76. doesn’t show correct installed memory amount. (continued) USB Device Problems You have installed a USB The device is not properly Remove and re-install the device.
- Page 77 Problem Possible Cause Possible Solutions You turn on your LIFEBOOK The battery is completely dis- Check Status Indicator Panel to determine the presence and condition of the battery. notebook and nothing charged or there is no power See “Status Indicator Panel” on page 20. Install a charged battery or a power adapter. seems to happen.
- Page 78 The system powers up, and The boot sequence settings of Set the operating source by pressing the [ESC] key while the Fujitsu logo is on screen displays power on informa- the setup utility are not com- or use the [F2] key and enter the setup utility and adjust the source settings from the See “BIOS Setup Utility”...
- Page 79 Problem Possible Cause Possible Solutions The system powers up, and You have a secured system Make sure you have the right password. Enter the setup utility and verify the Security See “BIOS Setup Utility” on page 38. displays power on informa- requiring a password to load settings and modify them as accordingly.
- Page 80 Problem Possible Cause Possible Solutions The display goes blank by The notebook has gone into Press any button on the keyboard, or move the mouse to restore operation. If that fails, itself after you have been Video timeout, Standby, or push the Power/Suspend/Resume button.
- Page 81 Problem Possible Cause Possible Solutions See “External Video Port” on page 63. You have connected an Your external monitor is not Reinstall your device. external monitor and it properly installed. does not display any infor- Your operating system is not Check your device and operating system documentation and activate the proper driver.
-
Page 82: Power On Self Test Messages
*Real time clock error - Check date and time settings Real-time clock fails BIOS test. May require board repair. Contact your support representative. *Fan error, system shutdown in 30s. Contact Fujitsu tech support Fan error occurred. Please contact your sales representative. -
Page 83: Restoring Your System Image And Software
Restoring Your System Image and Software It is very important that you create DVD copies of your Factory Image and Bootable Disc before beginning to use your system. To do so, follow the instructions in the “Saving Your Factory Image” and “Creating Backup Images of Factory Image and Discs”... - Page 84 To make a copy of the Factory Image to DVD discs, you will need four or five blank discs (DVD-R or DVD+R discs are recommended) to create the copy. After creating the copy, be sure to label the discs and keep them in a safe place to ensure they do not get damaged.
-
Page 85: Backing Up A System Image
Backing Up a System Image Optional Step: Launch the Fujitsu Bonus Apps utility from your desktop, and select the components you wish to install. (Alternatively, you can access Bonus Apps by opening Charms panel from Modern Start screen and searching for "Fujitsu BonusApps".) - Page 86 On the “Step 2: Name your backup images” screen that appears, you can enter up to 300 characters of information about the backup file. This information will help you to identify the image at a later date. On “Step 3: Backup the entire C: drive image” verify your backup settings and click [Next]. Click [OK] on “Step 4: Please confirm the following before starting your backup”...
- Page 87 Click [Finish] on “Step 5: Copy completed. Confirm the results” screen. Selecting “Delete” option On “Step 1: Please select your target data” screen select location of a backup file. A list of backup files will appear. Select the file(s) you wish to delete and click [Next]. Click [Start] on “Step 2: Delete backup data”...
- Page 88 Disc” if <Recovery and Utility> is unavailable. Running Recovery and Utility from hard disk Turn on or reboot your system. When the Fujitsu logo appears, press the [F12] key. Cursor down to <Recovery and Utility> and press the [Enter] key.
-
Page 89: Recovery And Utility Tools
Select CD/DVD boot mode: UEFI Mode) and press [Enter]. While the files are being loaded from the disc, the Fujitsu logo screen will appear followed by a progress bar screen at the bottom of the screen. Recovery and Utility tools Diagnostics tool: The Diagnostics tool is designed for use by IT professionals. -
Page 90: To Restore Full Hard Drive
partition, restore backup image(s) created by you or images stored on DVD discs, and perform a full hard drive recovery. Please refer to instructions above for details on how to create Factory Image Recovery DVDs, user backup DVDs and system image backup. To recover from D: drive or external storage device: Click [User System Backups] The progress bar screen is followed by EULA screen. -
Page 91: Recovering Factory Image Using Recovery/Utility
Insert the bootable disc in your DVD drive, then click [OK]. Select CD/DVD boot mode: UEFI Mode and press [Enter]. While the files are being loaded from the disc, Fujitsu logo screen will appear followed by a progress bar screen at the bottom of the screen. -
Page 92: Downloading Driver Updates
The Fujitsu Software Download Manager (FSDM) utility is available to allow you to download the latest drivers, utilities, and applications from the Fujitsu Support site. If you have a Windows 8 or Windows 7 operating system, you will need to go to the Support Site (http://support.fujitsupc.com/CS/Portal/support.do?srch=DOWNLOADS). -
Page 93: Caring For Your Lifebook Notebook
Chapter 5 Care and Maintenance Caring for your LIFEBOOK Notebook If you use your Fujitsu LIFEBOOK notebook carefully, you will increase its life and reliability. This section provides some tips for looking after the notebook and its devices. (ESD). T •... -
Page 94: Cleaning Your Lifebook Notebook
If your notebook will not boot after it has dried out, call your support representative. • Do not use your Fujitsu LIFEBOOK notebook in a wet environment (near a bathtub, swimming pool). • Always use the AC adapter and batteries that are approved for your notebook. -
Page 95: Storing Your Lifebook Notebook
Cleaning guidelines using recommended off-the-shelf cleaners Computer exterior, computer keyboard To clean the exterior and keyboard, use one of the following off-the-shelf products: • Office Depot® #154-616 Notebook Cleaning Kit • Meridrew Enterprises Klear_Screen® Wipes • 3M CL563 Cleaner Wipes Note: After cleaning with one of these products, polish with a dry, soft, lint-free cloth until solution is no longer visible. -
Page 96: Traveling With Your Lifebook Notebook
• Store your notebook and batteries separately. If you store your LIFEBOOK with a battery installed, the battery will discharge, and battery life will be reduced. In addition, a faulty battery might damage your LIFEBOOK. • Store your Fujitsu LIFEBOOK in a cool, dry location. Temperatures should remain between 13ºF (-25ºC) and 140ºF (60ºC). -
Page 97: Batteries
• It is recommended that you carry your notebook with you while traveling, rather than checking it in as baggage. • Never put your notebook through a metal detector. Have your notebook hand-inspected by security personnel. You can however, put your notebook through a properly tuned X-ray machine. To avoid problems, place your notebook close to the entrance of the machine and remove it as soon as possible or have your notebook hand- inspected by security personnel. -
Page 98: Media Care
Media Care Caring for your Media (DVD/CD/CD-R) Media discs are precision devices and will function reliably if given reasonable care. • Always store your media disc in its case when it is not in use. • Always handle discs by the edges and avoid touching the surface. •... -
Page 99: Expresscards/Sd Cards
ExpressCards/SD Cards Caring for your Cards Media are durable, but you must treat them with care. The documentation supplied with your card will provide specific information, but you should pay attention to the following points: • To keep out dust and dirt, store cards in their protective sleeves when they are not installed. •... -
Page 100: Specifications
Chapter 6 System Specifications Specifications This section provides the hardware and environmental specifications for your Fujitsu LIFEBOOK notebook. Specifications of particular configurations will vary. Microprocessor 3rd Generation Intel® Core™ processor family Chipset • Mobile Intel HM76 Express Memory System Memory •... -
Page 101: Video
Video Built-in color flat-panel TFT active matrix high-definition LCD display with simultaneous display capability. Video Color and Resolution 15.6" Crystal View Wide XGA: • Internal: 1366 x 768 pixel resolution, 16M colors • External: 1920 x 1200 pixel resolution, 16M colors •... -
Page 102: Features
Features Integrated Pointing Device Touchpad pointing device Communications • LAN: Internal wired 10/100/1000 Giga LAN • Wireless LAN: Intel® Centrino® Wireless-N 2230 • Bluetooth: Bluetooth V4.0+HS device for wireless personal area network communication is located on the Wireless LAN module Theft Prevention Lock Lock slot for use with security restraint systems. -
Page 103: Keyboard
Keyboard Built-in keyboard including integrated 10-key keypad • Total number of keys: 103 • Integrated 10-key keypad • Function keys: [F1] through [F12] • Feature extension key: Fn • Two Windows keys: one Start key and one Application key • Key pitch: 18.4 mm / Key stroke: 2.0 mm +0.2 mm •... -
Page 104: Environmental Requirements
Operating: 20% to 85%, relative, non-condensing Non-operating; 20% to 80%, relative, non-condensing Popular Accessories For ordering or additional information on Fujitsu accessories please visit our Web site at www.shopfujitsu.com or call 1-800-FUJITSU. Included Software Depending on your pre-installed operating system, your notebook comes with software for playing audio and video files of various formats. -
Page 105: Learning About Your Software
Learning About Your Software Tutorials All operating systems and most application software have tutorials built into them upon installation. We highly recommend that you step through the tutorial before you use an application. Manuals Included with your notebook you will find manuals for your installed operating system and other pre-installed software. - Page 106 Roxio Creator LJ Roxio Creator lets you burn CDs and organize, edit and share digital photos, music, data, or videos. CyberLink PowerDVD CyberLink PowerDVD allows you to view DVDs on your computer. CyberLink PowerDirector CyberLink PowerDirector allows you to edit and enhance your videos, and add special effects to them. CyberLink YouCam CyberLink YouCam allows you to capture photos or movies on the embedded webcam, add special effects to them, and share them in a variety of formats or via social networks.
-
Page 107: Glossary
Glossary AC Adapter A device which converts the AC voltage from a wall outlet to the DC voltage needed to power your LIFEBOOK notebook. Access point Wireless network device used to bridge wireless and wired network traffic. ACPI Advanced Configuration and Power Interface Active-Matrix Display A type of technology for making flat-panel displays which has a transistor or similar device for every pixel on the screen. - Page 108 Auto/Airline Adapter A device which converts the DC voltage from an automobile cigarette lighter or aircraft DC power outlet to the DC voltage needed to power your LIFEBOOK notebook. BIOS Basic Input-Output System. A program and set of default parameters stored in ROM which tests and operates your LIFEBOOK notebook when you turn it on until it loads your installed operating system from disk.
- Page 109 CMOS RAM Complementary metal oxide semiconductor random access memory. This is a technology for manufacturing random access memory which requires very low levels of power to operate. Command An instruction which you give your operating system. Example: run a particular application or format a floppy disk. Configuration The combination of hardware and software that makes up your system and how it is allocated for use.
- Page 110 Disk Drive The hardware which spins the disk and has the heads and control circuitry for reading and writing the data on the disk. Direct Memory Access. Special circuitry for memory to memory transfers of data which do not require CPU action. Desktop Management Interface.
- Page 111 Federal Communication Commission. Gigabyte. One billion bytes. Hard drive A spinning platter of magnetic data storage media where the platter is very stiff. Input/Output. Data entering and leaving your notebook in electronic form. I/O Port The connector and associated control circuits for data entering and leaving your notebook in electronic form. Intelligent Drive Electronics.
- Page 112 Infrastructure A name of a wireless LAN configuration. This type of communication uses an access point. Another type of communication is called Ad Hoc. IP Address An identifier for a computer or device on a TCP/IP network. Networks using the TCP/IP protocol route messages based on the IP address of the destination.
- Page 113 Liquid Crystal Display. A type of display which makes images by controlling the orientation of crystals in a crystalline liquid. Lithium ion Battery A type of rechargeable battery which has a high power-time life for its size and is not subject to the memory effect as Nickel Cadmium batteries.
- Page 114 Network key Data that is used for encrypting data in data communication. The personal computer uses the same network key both for data encryption and decryption, therefore, it is necessary to set the same network key as the other side of communication.
- Page 115 Pitch (keyboard) The distance between the centers of the letter keys of a keyboard. Pixel The smallest element of a display, a dot of color on your display screen. The more pixels per area the clearer your image will appear. POST Power On Self Test.
- Page 116 Reset / Restart The act of reloading the operating system. A reset erases all information stored in RAM. Resume To proceed after interruption. In your notebook this refers to returning to active operation after having been in one of the suspension states. Read Only Memory.
- Page 117 Status Indicator A display which reports the condition of some portion of your hardware. On your LIFEBOOK notebook this is an LCD screen just above the keyboard. Stereo (audio) A system using two channels to process sound from two different sources. Subnet mask TCP-IP network is controlled by being divided into multiple smaller networks (subnets).
- Page 118 Wired for Management is Intel’s broad-based initiative to reduce the total cost of ownership (TCO) of business computing without sacrificing power and flexibility. Wi-Fi Compatible Wi-Fi (Wireless Fidelity) Identifies that the product has passed the interoperability test, supplied by the WECA (Wireless Ethernet Compatibility Alliance), which guarantees the interoperability of wireless IEEE 802.11 LAN products.
-
Page 119: Regulatory Information
Regulatory Information Notice Changes or modifications not expressly approved by Fujitsu could void this user’s authority to operate the equipment. FCC NOTICES Notice to Users of Radios and Television This equipment has been tested and found to comply with the limit for class B digital devices, pursuant to parts 15 of the FCC Rules. -
Page 120: Regulatory Notes And Statements
Appendix A: WLAN User’s Guide FCC Regulatory Information Please note the following regulatory information related to the optional wireless LAN device. Regulatory Notes and Statements Wireless LAN, Health and Authorization for use Radio frequency electromagnetic energy is emitted from Wireless LAN devices. The energy levels of these emissions, however, are far much less than the electromagnetic energy emissions from wireless devices such as mobile phones. - Page 121 by the manufacturer. It is the responsibility of the user to correct any interference caused by such unauthorized modification, substitution or attachment. The manufacturer and its authorized resellers or distributors will assume no liability for any damage or violation of government regulations arising from failure to comply with these guidelines.
-
Page 122: Canadian Notice
(1) this device may not cause harmful interference, and (2) this device must accept any interference received, including interference that may cause undesirable operation. Modifications not expressly authorized by Fujitsu America may invalidate the user's right to operate this equipment. -
Page 123: Before Using The Wireless Lan
Before Using the Wireless LAN This manual describes the procedures required to properly setup and configure the optional integrated Wireless LAN Mini Card device (referred to as “WLAN device” in the rest of the manual). Before using the WLAN device, read this manual carefully to ensure its correct operation. -
Page 124: Wireless Lan Modes Using This Device
Wireless LAN Modes Using this Device Ad Hoc Mode “Ad Hoc Mode” refers to a wireless network architecture where wireless network connectivity between multiple computers is established without a central wireless network device, typically known as Access Point(s). Connectivity is accomplished using only client devices in a peer-to-peer fashion. That is why Ad Hoc networks are also known as peer-to-peer networks. - Page 125 Access Point (Infrastructure) Mode Infrastructure mode refers to a wireless network architecture in which devices communicate with wireless or wired network devices by communicating through an Access Point. In infrastructure mode, wireless devices can communicate with each other or with a wired network. Corporate wireless networks operate in infrastructure mode because they require access to the wired LAN in order to access computers, devices, and services such as file servers, printers, and databases.
-
Page 126: Wireless Network Considerations
How to Handle This Device The WLAN device is an optional device that may come pre-installed in your mobile computer. Under normal circumstances, it should not be necessary for you to remove or re-install it. The Operating System that your mobile computer comes with has been pre-configured to support the WLAN device. -
Page 127: Activating The Wlan Device
Activating the WLAN Device Activation of the WLAN device can be accomplished using the same methods as the deactivation process • Using the [Fn]+[F5] key combination • In Windows, by right-clicking the WLAN icon then clicking “Connect to a network” Configuration of the WLAN Device The optional WLAN device can be configured to establish wireless network connectivity using the software that is built into Windows. -
Page 128: Troubleshooting The Wlan
Troubleshooting the WLAN Troubleshooting Table Causes and countermeasures for troubles you may encounter while using your wireless LAN are described in the following table. Problem Possible Cause Possible Solution Unavailable Incorrect network name Ad hoc connection: verify that the network names (SSID’s) and network keys network (SSID) or network key (WEP) of all computers to be connected have been configured correctly. - Page 129 Problem Possible Cause Possible Solution Unavailable RF interference from The use of identical or overlapping RF channels can cause interference with network Access Points or other the operation of the WLAN device. Change the channel of your Access Point to connection wireless networks a channel that does not overlap with the interfering device.
-
Page 130: Wlan Specifications
WLAN Specifications Item Specification Type of network The integrated Intel Centrino Wireless-N 2230 device conforms to 802.11b/g, and 802.11n, Wi-Fi based*. Transfer rate (Automatic switching) 150 Mbps (IEEE802.11n) maximum data rate. • 802.11n: 2.4 GHz Active frequency • 802.11b/g: 2400~2473 MHz •... -
Page 131: Using The Bluetooth Device
Using the Bluetooth Device The Bluetooth 4.0+HS module is located on the Integrated Intel® Centrino® Wireless LAN module. What is Bluetooth Bluetooth technology is designed as a short-range wireless link between mobile devices, such as laptop computers, phones, printers, and cameras. Bluetooth technology is used to create Personal Area Networks (PANs) between devices in short-range of each other. - Page 132 Users are not authorized to modify this product. Any modifications invalidate the warranty. This equipment may not be modified, altered, or changed in any way without signed written permission from Fujitsu. Unauthorized modification will void the equipment authorization from the FCC and Industry Canada and the warranty.
-
Page 133: Using The Wireless Display Technology
Using the Wireless Display technology Intel® Wireless Display (WiDi) is a new technology that is available as an option on selected Fujitsu LIFEBOOK computers. If you have Intel WiDi on your system, please read these instructions and information regarding its use. -
Page 134: Starting The Widi Application
• F YOU PURCHASED A SYSTEM WITH AN NTEL WIRELESS AND OPTIONAL NTEL I TECHNOLOGY I APPLICATION MAY OR MAY ). S NOT BE PRE INSTALLED DEPENDING UPOON YOUR SYSTEM CONFIGURATION YSTEMS WITH NTEL I PRE INSTALLED WILL HAVE A I ICON LOCATED ON THEIR DESKTOP LAN. - Page 135 Index BIOS Bluetooth About This Guide Built-in Speakers adapter plug adapters Camera Air Vents CapsLock Anti-theft lock slot Clicking Auto/Airline Adapter Cold-swapping Configuration Label Connecting the Power Adapters Battery Controls and Connectors alarm Conventions Used in the Guide Cursor care Cursor Keys Charge/DC-In Indicator cold-swapping...
- Page 136 Error Messages cursor keys ExpressCard function keys installing numeric keypad problems problems Slot Windows keys using LAN (RJ-45) Jack Fujitsu Contact Information Line-In Jack Function Key Line-Out Jack Lithium ion Battery Media Player battery power care Control Panel loading removing Software...
- Page 137 Specifications Audio NumLk Chipset Dimensions and Weight Environmental Requirements Optical Drive Keyboard Modular Multi-Format DVD Writer Mass Storage Device Options release button Memory tray release Microprocessor Power Video Power Status Indicator Panel AC adapter Stereo Speakers Auto/Airline adapter failure management Touchpad buttons controls...
- Page 138 Wireless LAN activating Ad Hoc Mode Before Using the Wireless LAN characteristics configuring connection to the network deactivating disconnecting Infrastructure Mode modes Specifications Troubleshooting Wireless LAN Glossary...
- Page 139 Guide d’utilisation Découvrez comment utiliser votre ordinateur portable Fujitsu LIFEBOOK AH532...
- Page 140 La société Fujitsu America a fait tous les efforts possibles pour vérifier l’exactitude des informations figurant dans ce document et s’assurer qu’il n’y manque rien. Cependant, puisque nos produits font continuellement l’objet d’améliorations, nous ne pouvons garantir l’exactitude de tout le contenu de ce document.
- Page 141 (408) 746-6000 Déclare que le produit : Configuration du modèle de base : Ordinateur portable LIFEBOOK AH532 est conforme aux exigences de la partie 15 des règles de la FCC. Cet appareil est conforme aux exigences de la partie 15 des règles de la FCC. L’utilisation est sujette aux deux conditions suivantes :...
- Page 142 CONSIGNES DE SÉCURITÉ IMPORTANTES Pour fonctionner, cet appareil nécessite un adaptateur secteur. Utilisez uniquement un adaptateur de classe 2 pour équipement informatique, homologué UL I.T.E., avec une sortie nominale de 19 V c.c. et un courant de 3,42 A (65 W). Polarité...
- Page 143 Pour commander une nouvelle batterie compatible avec votre ordinateur portable Fujitsu, allez sur (États-Unis) ou www.shopfujitsu.com www.fujitsu.ca/products/notebooks (Canada). ** La RBRC est une organisation indépendante dont Fujitsu finance une partie des activités de recyclage ; la RBRC n’est en aucune façon affiliée à Fujitsu.
- Page 144 Conventions utilisées dans ce guide ......7 Coordonnées pour contacter Fujitsu ......8 Chapitre 1 Présentation de votre ordinateur LIFEBOOK...
- Page 145 Clavier ............23 Utilisation du clavier .
- Page 146 Mode veille prolongée (enregistrement sur le disque)....42 Gestion de l’alimentation dans Windows......42 Redémarrage du système.
- Page 147 Prise micro/entrée de ligne ........65 Port vidéo externe.
- Page 148 Puce ............101 Mémoire .
- Page 149 Configuration de la carte réseau sans fil......129 Configuration de la carte de réseau local sans fil sous Windows ..129 Connexion au réseau .
-
Page 150: À Propos De Ce Guide
Le texte contient plusieurs renvois vers des pages contenant des informations supplémentaires sur un sujet quelconque. « Voir Procédure d’installation en page 43 » Exemple : ( Les éléments des menus à l’écran sont indiqués en caractères gras. Exemple : « Cliquez sur Menu Fujitsu, puis faites votre sélection. » L’... -
Page 151: Coordonnées Pour Contacter Fujitsu
OU VOS FICHIERS EUILLEZ LIRE ATTENTIVEMENT TOUS LES AVERTISSEMENTS Coordonnées pour contacter Fujitsu Service et assistance Plusieurs façons s’offrent à vous pour contacter l’équipe de service et assistance de Fujitsu : • Appel sans frais : 1-800-8Fujitsu (1-800-838-5487) • Site Internet : •... - Page 152 à votre disposition pour télécharger les plus récentes versions des pilotes, utilitaires et applications depuis le site d’assistance Fujitsu. Si vous avez un système d’exploitation Windows 7, vous devez vous connecter au site d’assistance (http://support.fujitsupc.com/CS/Portal/support.do?srch=DOWNLOADS). Si vous avez un système d’exploitation Windows XP, l’utilitaire FSDM est inclus dans votre image d’origine.
-
Page 153: Présentation De Votre Ordinateur Lifebook
Cette section décrit les composants de votre ordinateur portable Fujitsu LIFEBOOK AH532. Nous vous suggérons de la lire avant de commencer à utiliser l’ordinateur, même si vous avez déjà utilisé des ordinateurs de ce type. Figure 1. Ordinateur portable Fujitsu LIFEBOOK AH532... -
Page 154: Emplacement Des Commandes Et Des Connecteurs
Haut-parleur stéréo Pavé tactile Touchpad Bouton d’alimentation/ veille/reprise Haut-parleur stéréo Tableau de voyants d'état Clavier Fente pour Prise Microphone cartes SD Prise Écouteurs Figure 2. Ordinateur portable LIFEBOOK AH532 avec écran ouvert 11 - Emplacement des commandes et des connecteurs... -
Page 155: Composants Supérieurs
Composants supérieurs Voici une courte description des composants se trouvant sur le dessus de votre ordinateur LIFEBOOK. Écran L’ordinateur est équipé d’un écran à cristaux liquides couleur avec rétro-éclairage, permettant d’afficher des textes et des images. Caméra Web HD La caméra web HD (1200x768 pixels) permet de transmettre sur Internet des images de vous-même. Pour de plus amples informations concernant l’utilisation du microphone et de la caméra web, consultez la documentation accompagnant l’application CyberLink YouCam. - Page 156 Fente mixte pour cartes Memory Stick/Secure Digital (MS/SD) La fente pour cartes Memory Stick/Secure Digital (MS/SD) permet d’introduire une carte mémoire pour la conservation des données. Ce support vous permet de transférer des données à partir d’une grande variété de périphériques numériques.
-
Page 157: Composants Sur Le Côté Gauche De L'ordinateur
Grilles de ventilation Port vidéo externe Fente pour carte ExpressCard Ports USB 3.0* Prise HDMI * Le port USB sur la droite offre une capacité de charge USB en tout temps. Figure 3. Côté gauche de l’ordinateur portable LIFEBOOK Composants sur le côté gauche de l’ordinateur Voici une courte description des composants se trouvant sur le côté... - Page 158 Fente pour carte ExpressCard Permet de brancher une carte ExpressCard. Voir « Utilisation des cartes ExpressCards » en page 55. Ports USB 2.0 / 3.0 Les ports USB permettent de connecter des périphériques USB. Il y a trois ports USB 3.0 sur le côté gauche du système et un port USB 2.0 sur le côté...
-
Page 159: Composants Sur Le Côté Droit De L'ordinateur
Ouverture d’urgence Port USB 2.0 Lecteur optique du plateau Bouton d’ouverture Prise d’alimentation c.c. du lecteur optique Figure 4. Côté droit de l’ordinateur portable LIFEBOOK Composants sur le côté droit de l’ordinateur Voici une courte description des composants se trouvant sur le côté droit de votre ordinateur LIFEBOOK. Ports USB 2.0/3.0 Les ports USB permettent de connecter des périphériques USB. -
Page 160: Composants De La Face Arrière
Prise d’alimentation c.c. La prise d’alimentation c.c. sert à brancher l’adaptateur secteur, lequel permet d’alimenter l’ordinateur LIFEBOOK et de charger la batterie interne au lithium. Bouton d’ouverture du lecteur optique Ce bouton sert à ouvrir le compartiment du lecteur optique. Fente pour dispositif antivol Prise de réseau local (RJ-45) Figure 5. -
Page 161: Composants Sous L'ordinateur
Couvercle du disque dur Compartiment de mémoire additionnelle Grilles de ventilation (divers emplacements) Compartiment de la Loquet de batterie Loquet de batterie batterie au lithium Figure 6. Dessous de l’ordinateur portable LIFEBOOK Composants sous l’ordinateur Voici une courte description des composants se trouvant sous votre ordinateur LIFEBOOK. Compartiment de mémoire supplémentaire Votre ordinateur est équipé... - Page 162 Couvercle de disque dur Le couvercle de disque dur est fixé sur le disque dur du système. Normalement, vous ne devriez pas avoir à ouvrir ce compartiment. Compartiment de batterie au lithium Le compartiment de batterie contient la batterie interne au lithium. Le couvercle de ce compartiment peut être ouvert pour enlever la batterie lorsque l’ordinateur doit être entreposé...
-
Page 163: Tableau De Voyants D'état
Figure 7. Tableau de voyants d’état Tableau de voyants d’état Les voyants d’état affichent des symboles correspondant à divers composants de votre ordinateur LIFEBOOK Fujitsu. Les diodes électroluminescentes (DEL) sous chaque symbole vous renseignent sur le fonctionnement des composants correspondants. -
Page 164: Voyant D'état De L'alimentation
Voyant d’état de l’alimentation • Bleu continu : L’adaptateur secteur et la batterie sont disponibles et le système est entièrement chargé ou l’adaptateur est branché mais la batterie n’est pas installée. • Bleu clignotant : L’adaptateur secteur et la batterie sont disponibles et le système est en mode sommeil. •... -
Page 165: Voyant D'accès Au Disque Dur/Lecteur Optique
Voyant d’accès au disque dur/lecteur optique Le voyant vert d’accès au disque dur/lecteur optique révèle si le disque dur interne est en cours d’utilisation. Remarque : Le clignotement est normal. Voyant de verrouillage du pavé numérique Le voyant Verr num s’allume lorsque le clavier intégré est en mode de pavé numérique à dix touches. Voyant de verrouillage des majuscules Le voyant Verr maj s’allume lorsque le clavier est configuré... -
Page 166: Clavier
Clavier Touches de fonction Pavé numérique Touche Démarrer Touche Fn Touche d’application Touches de défilement Figure 8. Clavier Utilisation du clavier Votre ordinateur portable LIFEBOOK comporte un clavier intégré à 103 touches, dont des touches Windows, des touches de fonctions spéciales ainsi qu’un pavé numérique. Cette section décrit les touches suivantes. •... - Page 167 • Touches de fonction : Les touches [F1] à [F12] s’utilisent avec la touche [Fn] pour exécuter des actions spéciales, selon le programme en cours d’utilisation. • Touches Windows : Ces touches fonctionnent avec le système d'exploitation Windows. Elles permettent de passer du mode d'affichage Bureau au mode d'affichage Modern Start et d’ouvrir la barre d'applications dans le bas de l'écran.
- Page 168 • [Fn+F3] : Maintenez [Fn] enfoncée et appuyez sur [F3] pour activer ou désactiver la fonction Silence. • [Fn+F4] : Maintenez [Fn] enfoncée et appuyez sur [F4] pour activer ou désactiver le pavé tactile Touchpad. Veuillez prendre note que la combinaison de touches [Fn+F4] fonctionne uniquement lorsque le paramètre Manual Setting (Configuration manuelle) est sélectionné...
-
Page 169: Pavé Tactile Touchpad
Pavé tactile Touchpad Commande de curseur Bouton gauche Bouton droit Figure 9. Pavé tactile Touchpad Votre ordinateur portable LIFEBOOK possède un pavé tactile Touchpad intégré. Ce dispositif permet de commander le déplacement du pointeur et de sélectionner des éléments affichés à l’écran. Le pavé tactile Touchpad est composé d’une commande de curseur, d’un bouton gauche et d’un bouton droit. -
Page 170: Double-Cliquer
’ LIFEBOOK NE SOURIS EXTERNE PEUT ÊTRE BRANCHÉE À UN PORT DE L ORDINATEUR PORTABLE ET ÊTRE UTILISÉE EN MÊME TEMPS QUE LE PAVÉ TACTILE OUCH EPENDANT SI VOUS DÉMARREZ VOTRE ORDINATEUR AVEC UNE SOURIS EXTERNE DÉJÀ CONNECTÉE LE PAVÉ TACTILE OUCHPAD BIOS. -
Page 171: Glisser
Figure 12. Double-cliquer à l’aide du bouton Figure 13. Double-cliquer à l’aide du pavé Touchpad Glisser Glisser signifie enfoncer le bouton gauche, sans le relâcher, en déplaçant le curseur. Pour faire glisser un élément, placez d’abord le curseur sur cet élément. Ensuite, enfoncez et tenez le bouton gauche tout en déplaçant l’élément à son nouvel emplacement, puis relâchez (Figure 14). -
Page 172: Naviguer Avec La Commande Gestuelle
Naviguer avec la commande gestuelle Le pavé tactile vous permet de faire des agrandissements et rétrécissements sur une page, ou de parcourir rapidement des documents volumineux. Défilement en haut/bas : Pour faire défiler le document vers le haut ou vers le bas, mettez le doigt sur le côté droit du pavé tactile et déplacez-le en avant ou en arrière. -
Page 173: Réglage Des Commandes Du Pavé Touchpad
Figure 16. Défilement Figure 17. Figure 18. Passage d'un Figure 19. Passage d'une Figure 20. Retour à la Agrandissement charme à l'autre application à l'autre dernière application Réglage des commandes du pavé Touchpad Le panneau de configuration vous permet de personnaliser votre pavé tactile TouchPad avec divers paramètres disponibles dans la boîte de dialogue Propriétés de la souris. -
Page 174: Réglage Du Volume
Réglage du volume Votre ordinateur LIFEBOOK Fujitsu est doté de plusieurs commandes de volume fonctionnant en interaction. ES APPLICATIONS POUVANT REPRODUIRE DES FICHIERS AUDIO PROPOSENT ÉGALEMENT LEUR PROPRE COMMANDE DE VOLUME COMMANDE ). S ’ LOGICIELLE I VOUS INSTALLEZ UN PÉRIPHÉRIQUE AUDIO EXTERNE DOTÉ D UNE COMMANDE DE VOLUME INDÉPENDANTE... -
Page 175: Première Mise En Marche De Votre Ordinateur Portable Lifebook
Chapitre 2 Première mise en marche de votre ordinateur portable LIFEBOOK Prise c.c. Adaptateur secteur Câble secteur Figure 21. Connexion de l’adaptateur secteur... -
Page 176: Sources D'alimentation
Sources d’alimentation Votre ordinateur portable LIFEBOOK Fujitsu peut utiliser trois sources d’alimentation différentes : une batterie au lithium principale, un adaptateur secteur et un adaptateur auto/avion. Connexion des adaptateurs L’adaptateur secteur et l’adaptateur auto/avion disponible en option permettent tous deux de faire fonctionner votre ordinateur portable et de charger les batteries. -
Page 177: Écran
Figure 22. Ouverture de l’écran Écran Votre ordinateur portable LIFEBOOK Fujitsu comporte un écran à rétro-éclairage permettant une lecture facile dans les environnements à forte luminosité. Cet écran offre également une excellente résolution grâce à une technologie de matrice active. -
Page 178: Utilisation Du Clavier
Utilisation du clavier • [Fn+F6] : Appuyez plusieurs fois sur cette combinaison de touches pour diminuer la luminosité de votre écran. • [Fn+F7] : Appuyez plusieurs fois sur cette combinaison de touches pour augmenter la luminosité de votre écran. Utilisation des options d’alimentation Pour changer la luminosité... -
Page 179: Démarrage De Votre Ordinateur Portable Lifebook
Démarrage de votre ordinateur portable LIFEBOOK Mise sous tension Bouton d’alimentation/veille/reprise Lorsque votre ordinateur portable LIFEBOOK est éteint, le bouton d’alimentation/veille/reprise permet de l’allumer. Pour allumer votre ordinateur portable LIFEBOOK, vous devez avoir connecté votre adaptateur secteur ou disposer d’une batterie au lithium chargée. LIFEBOOK, ’... -
Page 180: Procédure D'amorçage
Ces informations se trouvent dans le programme BIOS. Chaque fois que vous démarrez ou redémarrez votre ordinateur, il exécute une procédure d’amorçage et l’écran affiche le logo Fujitsu jusqu’à ce que le système d’exploitation soit chargé. Cette procédure comporte diverses opérations dont un auto-test de mise sous tension. -
Page 181: Utilitaire De Configuration Du Bios
Pour ouvrir l’utilitaire de configuration du BIOS, exécutez les opérations suivantes : Allumez ou redémarrez votre ordinateur portable LIFEBOOK. Pour accéder à l’utilitaire, appuyez sur la touche [F2] lorsque le logo Fujitsu apparaît à l’écran. Le menu principal de l’utilitaire de configuration du BIOS s’affichera avec les paramètres courants. -
Page 182: Premier Démarrage De Windows
Cela est normal. DURANT CETTE PÉRIODE, VOUS NE DEVEZ PAS TENTER D’ÉTEINDRE LE SYSTÈME. Pendant que l’écran est vide, le système se configure et plusieurs fichiers importants sont installés. Lors du premier démarrage, vous devrez lire et accepter les contrats de licence d’utilisation de Microsoft et Fujitsu. •... -
Page 183: Gestion De L'alimentation
Gestion de l’alimentation Votre ordinateur portable possède plusieurs dispositifs permettant d’économiser l’énergie de la batterie. Certains d’entre eux sont automatiques et ne nécessitent donc aucune intervention. Cependant, d’autres dépendent de paramètres que vous pouvez configurer en fonction de vos conditions d’utilisation, notamment en ce qui concerne la luminosité... -
Page 184: Mode Sommeil (Veille)
Mode sommeil (veille) Lorsque le mode sommeil est activé, Windows conserve le contenu de votre mémoire de système durant la période d'inactivité en maintenant l'alimentation de certains composants critiques. Ce mode éteint l'unité centrale, l'écran, le disque dur et tous les autres composants internes sauf ceux qui sont nécessaires pour conserver la mémoire du système et permettre son redémarrage. -
Page 185: Mode Veille Prolongée (Enregistrement Sur Le Disque)
Mode veille prolongée (enregistrement sur le disque) Le mode veille prolongée enregistre le contenu de la mémoire du système sur le disque dur, ce qui fait partie du mode alimentation/veille/reprise. Cette fonction peut être activée et désactivée. Activation et désactivation de la fonction de veille prolongée Dans la configuration par défaut, cette fonction n’est pas activée. -
Page 186: Mise Hors Tension
Dans un contexte où les coûts énergétiques et le réchauffement climatique sont parmi les premières préoccupations des consommateurs, Fujitsu s’engage à proposer des solutions pour les aider à préserver l’énergie et à améliorer la qualité de notre environnement. - Page 187 Pour de plus amples informations sur cet important programme ENERGY STAR, visitez : www.energystar.gov. Pour en apprendre plus sur la façon dont Fujitsu soutient la Gestion durable et d’autres activités de protection de l’environnement, visitez la page Internet de Fujitsu Corporate Citizenship à : http://www.computers.us.fujitsu.com/www/content/aboutus/environmental/environment.php...
-
Page 188: Options Installables Par L'utilisateur
Chapitre 3 Options installables par l’utilisateur Batterie au lithium Votre ordinateur portable LIFEBOOK possède une batterie au lithium qui en permet le fonctionnement lorsque vous n’avez pas accès à une source d’alimentation externe. Cette batterie est robuste et durable, mais elle ne doit pas être exposée à... -
Page 189: Recharge Des Batteries
• L’ ’ AUTONOMIE RÉELLE DE LA BATTERIE PEUT VARIER SELON LA LUMINOSITÉ DE L ÉCRAN SELON LES APPLICATIONS LES FONCTIONS ET LES PARAMÈTRES ’ ’ ’ DE GESTION DE L ALIMENTATION QUE VOUS UTILISEZ SELON L ÉTAT DE LA BATTERIE ET SELON D AUTRES PRÉFÉRENCES QUE VOUS POUVEZ CONFIGURER L’... - Page 190 L’ DVD/CD-RW/CD-ROM UTILISATION DE PÉRIPHÉRIQUES ÉNERGIVORES COMME LES LECTEURS DE PEUVENT EMPÊCHER LE CHARGEMENT COMPLET DE LA BATTERIE Batterie faible Lorsque la batterie est faible, le système affiche un avis de batterie faible. Si vous ne prêtez pas attention à cet avis de batterie faible, la batterie continuera à...
-
Page 191: Remplacement De La Batterie
Remplacement de la batterie Si vous achetez une batterie supplémentaire de rechange, vous pourrez remplacer la batterie principale si elle vient à se décharger complètement. Deux méthodes s’offrent à vous pour remplacer votre batterie : le remplacement hors tension et le remplacement sous tension. Remplacement hors tension de la batterie Pour remplacer la batterie alors que le système est hors tension, exécutez les opérations suivantes : Trouvez une batterie chargée, prête à... - Page 192 Figure 23. Verrou et loquet de la batterie Figure 24. Retrait de la batterie 49 - Batterie au lithium...
-
Page 193: Lecteur Optique
Plateau du lecteur multimédia Touche d'éjection du lecteur multimédia Ouverture d’urgence du plateau Figure 25. Lecteur optique Lecteur optique Votre système est doté d’un graveur de DVD multiformat double couche. Ce lecteur vous permet d’accéder à des films, des DVD/CD audio, des logiciels, ainsi que de lire et d’écrire sur des disques CD-R, CD-RW, DVD-R, DVD+R, DVD-RW, DVD+RW et DVD-RAM. -
Page 194: Installation D'un Disque Dans Votre Lecteur
Tirez doucement le plateau de chargement jusqu’à ce qu’un disque puisse y être déposé facilement. • ’ ISITEZ RÉGULIÈREMENT LE SITE EB DE UJITSU À L ADRESSE US FUJITSU COMPUTERS POUR OBTENIR LES MISES À JOUR DE PILOTES LES PLUS RÉCENTES • DVD LIFEBOOK... -
Page 195: Retrait D'un Disque
Retrait d’un disque Appuyez et relâchez la touche d’éjection située à l’avant du lecteur optique. Le lecteur s’arrêtera et le plateau sortira légèrement de l’ordinateur LIFEBOOK. Tirez doucement le plateau jusqu’à ce le disque puisse en être facilement retiré. Retirez doucement le disque du plateau de chargement. Fermez le plateau de chargement en le poussant doucement jusqu’à... -
Page 196: Utilisation Du Lecteur Multimédia Avec Alimentation Par Batterie
NE BATTERIE SUPPLÉMENTAIRE CHARGÉE EST FORTEMENT RECOMMANDÉE SI VOUS PRÉVOYEZ REGARDER DES FILMS AVEC UNE ALIMENTATION PAR BATTERIE I VOUS NE POSSÉDEZ PAS UNE BATTERIE SUPPLÉMENTAIRE VOUS POUVEZ VOUS EN PROCURER UNE SOIT 1-877-372-3473. LIGNE À HTTP COMPUTERS FUJITSU SOIT EN APPELANT AU 53 - Lecteur optique... - Page 197 Pour regarder un film avec une alimentation par batterie : Ayez à votre disposition une batterie supplémentaire chargée à fond ou un adaptateur secteur. Commencez la lecture du film DVD. Lorsque le voyant de batterie faible s’allume, arrêtez immédiatement le film et quittez le lecteur multimédia. ’...
-
Page 198: Utilisation Des Cartes Expresscards
Carte ExpressCard (34 mm) Fente pour carte ExpressCard Figure 28. Installation/Retrait d’une carte ExpressCard Utilisation des cartes ExpressCards Votre ordinateur portable LIFEBOOK accepte les cartes ExpressCard de 34 mm, lesquelles peuvent exécuter de nombreuses fonctions différentes selon le type de carte que vous insérez. Voici quelques cartes ExpressCard disponibles : Cartes de réseau local Ethernet Gigabit •... -
Page 199: Installation D'une Carte Expresscard
Installation d’une carte ExpressCard Il existe deux largeurs différentes de cartes ExpressCard : 34 mm et 54 mm. Votre système est compatible uniquement avec les modèles de 34 mm. • L’ ’ ’ ’ INSTALLATION OU LE RETRAIT D UNE CARTE XPRESS ARD PENDANT LE DÉMARRAGE OU L ARRÊT DE L... -
Page 200: Retrait D'une Carte Expresscard
Retrait d’une carte ExpressCard Le guide d’utilisation de votre carte ExpressCard vous indiquera comment la retirer. Certaines cartes pourraient nécessiter que votre ordinateur portable LIFEBOOK soit en mode veille ou qu’il soit éteint pendant que vous les retirez. • ’ INDOWS OFFRE UNE PROCÉDURE D ARRÊT POUR LES CARTES XPRESS... -
Page 201: Cartes Mémoire Secure Digital
Fente pour cartes Memory Stick/SD Carte SD Carte Memory Stick Figure 29. Installation d’une carte Memory Stick ou SD Cartes mémoire Secure Digital Votre ordinateur portable LIFEBOOK peut accueillir des cartes Memory Stick, Memory Stick Pro, Secure Digital (SD) et Secure Digital High Capacity (SDHC) sur lesquelles vous pouvez stocker et transférer des données vers et à partir de divers dispositifs numériques. -
Page 202: Installation D'une Carte Memory Stick Ou Sd
Installation d’une carte Memory Stick ou SD Les cartes SD s’installent dans le lecteur de carte prévu à cet effet et situé sur le devant de l’ordinateur, à gauche de la prise d’écouteurs (figure 29). Pour insérer une carte, exécutez les opérations suivantes : I VOUS INSÉREZ OU RETIREZ UNE CARTE PENDANT LE PROCESSUS D ARRÊT OU DE DÉMARRAGE DE VOTRE ORDINATEUR PORTABLE... -
Page 203: Module De Mémoire Additionnelle
La mémoire additionnelle doit être un module SDRAM (DIMM) à double rangée de connexions. Pour vous assurer d'avoir une compatibilité à 100 %, achetez le module SDRAM uniquement auprès de la boutique virtuelle Fujitsu, à l'adresse suivante : www.shopfujitsu.com •... - Page 204 Figure 30. Retrait des vis du couvercle du module de mémoire Figure 31. Retrait du couvercle du module de mémoire Insérez le module de mémoire additionnelle en oblique, à 45°. Poussez fermement le bord du connecteur du module vers le bas et appuyez sur le connecteur jusqu’à ce qu’il se loge sous la clé de serrage. Vous entendrez un clic lorsque celui-ci sera bien en place.
-
Page 205: Retrait D'un Module De Mémoire Additionnelle
Retrait d’un module de mémoire additionnelle Exécutez les étapes 1 à 4 de la section « Installation d’un module de mémoire additionnelle ». Tirez les attaches latérales en les orientant vers les côtés pour les éloigner du module. En maintenant les ergots écartés, retirez la barrette en la tirant vers à l’extérieur de l’ordinateur. (Figure 33) Rangez le module de mémoire additionnelle dans une gaine protectrice antistatique. -
Page 206: Ports De Périphériques
Ports de périphériques Votre ordinateur portable Fujitsu LIFEBOOK est équipé de plusieurs ports auxquels vous pouvez brancher des périphériques : lecteurs de disque, claviers, imprimantes, etc. Prise de réseau local (RJ-45) interne La prise de réseau local interne (RJ-45) peut être utilisée pour réaliser une connexion interne Ethernet 10/100/1000 Gigabit. -
Page 207: Prise D'écouteurs/Sortie Audio
USB, N RAISON DES CHANGEMENTS CONTINUS APPORTÉS À LA TECHNOLOGIE ET AUX NORMES IL EST IMPOSSIBLE DE GARANTIR LA COMPATIBILITÉ USB. DE TOUS LES DISPOSITIFS ET OU LECTEURS Port USB 3.0 avec * La fonction de charge USB en tout temps peut être activée Chargeur USB Anytime et désactivée à... -
Page 208: Prise Micro/Entrée De Ligne
Prise micro/entrée de ligne La prise micro/entrée de ligne vous permet de connecter un microphone mono externe. Le microphone doit être muni d’une mini fiche de connexion stéréo de 3,5 mm (1/8 po) pour qu’il puisse être branché sur la prise microphone de votre ordinateur portable. -
Page 209: Port Hdmi
Port HDMI Le port HDMI (High-Definition Multimedia Interface, ou Interface multimédia à haute définition) est une interface numérique audio/vidéo permettant de faire transiter des flux de données non compressées. Le HDMI sert à brancher des périphériques numériques compatibles avec votre ordinateur (un téléviseur grand écran et des appareils vidéo, par exemple). -
Page 210: Dépannage De Votre Lifebook
Chapitre 4 Dépannage de votre LIFEBOOK Dépannage Il est possible que vous rencontriez parfois des problèmes simples de configuration ou d’exploitation pouvant être résolus sur le champ, ou des problèmes au niveau d’un périphérique pouvant être résolus en remplaçant l’équipement. Les informations contenues dans cette section vous aideront à... - Page 211 : Appel sans frais : 1-800-8Fujitsu (1-800-838-5487) Site Web : http://solutions.us.fujitsu.com/www/content/support/contact/index.php. Avant de nous contacter, veuillez avoir les informations suivantes à portée de main pour que notre préposé du service à la clientèle puisse vous venir en aide le plus rapidement possible : •...
-
Page 212: Problèmes Spécifiques
Problèmes spécifiques Utilisation du tableau de dépannage Lorsque vous éprouvez des problèmes avec votre ordinateur portable LIFEBOOK, essayez de trouver les symptômes sous la colonne Problème du tableau suivant pour la fonction qui vous cause des problèmes. Vous trouverez une description des causes communes pour ce symptôme sous la colonne Cause possible ;... - Page 213 Problème Cause possible Solutions possibles Problèmes audio Aucun son ne sort des haut- Le volume est réglé à un Réglez le volume de votre ordinateur et de votre système d’exploitation. Pour ce faire, parleurs incorporés. niveau très bas. utilisez la combinaison de touches [Fn+F9] sur votre clavier. Gardez la touche [Fn] enfoncée et appuyez plusieurs fois sur [F9] pour augmenter le volume sonore de l’ordinateur.
- Page 214 Problème Cause possible Solutions possibles L’ordinateur portable Un mauvais identificateur Vérifiez si l’identificateur d’unité utilisé par l’application est le même que celui utilisé LIFEBOOK ne reconnaît d’unité a été utilisé pour par le système d’exploitation. Lorsque le système d’exploitation démarre à partir d’un pas les disques optiques.
- Page 215 Problème Cause possible Solutions possibles Vous avez installé un clavier Le logiciel de votre système Consultez la documentation du périphérique et du système d’exploitation, puis installez ou une souris externe et il/elle d’exploitation n’est pas le pilote approprié. ne semble pas fonctionner. configuré...
- Page 216 Problème Cause possible Solutions possibles Problèmes de carte ExpressCard Une carte ExpressCard L’adresse d’E/S sélectionnée Consultez la documentation de la carte pour connaître l’adresse appropriée. Modifiez est insérée mais elle ne pour la carte est incorrecte. les paramètres dans le Gestionnaire de périphériques. fonctionne pas ou elle Voir « Utilisation des cartes ExpressCards »...
- Page 217 Problème Cause possible Solutions possibles Lorsque vous allumez le L’adaptateur de courant ne Branchez le cordon d’alimentation secteur dans une autre prise murale et vérifiez si LIFEBOOK, rien ne semble reçoit pas d’énergie de la prise un interrupteur ou un disjoncteur coupe le courant. Si vous utilisez un adaptateur se produire.
- Page 218 Fujitsu est affiché sur l’écran ou utilisez la touche [F2], accédez à l’utilitaire de configuration et ajustez les paramètres de source à partir du menu Amorçage. informations sur la mise en BIOS sont incompatibles avec marche, mais n’est pas en...
- Page 219 Problème Cause possible Solutions possibles Le système se met en marche Vous avez un système protégé Assurez-vous d’avoir le bon mot de passe. Accédez à l’utilitaire de configuration et et affiche les informations qui requiert un mot de passe vérifiez les paramètres de sécurité, puis modifiez-les en conséquence. Voir «...
- Page 220 Problème Cause possible Solutions possibles L’écran d’affichage intégré Les temporisations de gestion Appuyez sur une touche du clavier ou déplacez la souris. Si cela ne fonctionne pas, appuyez demeure vide lorsque vous de l’alimentation peuvent être sur le bouton d’alimentation/veille/reprise (L’écran d’affichage peut avoir été arrêté par mettez en marche votre réglées à...
- Page 221 Problème Cause possible Solutions possibles L’écran affiche des zones Si les zones sont de taille réduite Ne faites rien. claires ou sombres. et peu nombreuses, cela est normal pour un écran ACL grand format. Si les zones sont nombreuses L’écran est défectueux : communiquez avec le service d’assistance. ou suffisamment grandes pour perturber vos besoins d’exploitation.
- Page 222 Problème Cause possible Solutions possibles Problèmes de connectivité Vous essayez de vous Les fonctions du dispositif sans Pour activer le dispositif de réseau local sans fil, appuyez sur les touches [Fn] et [F5] connecter à Internet mais le fil ont été éteintes. en même temps.
-
Page 223: Messages De L'auto-Diagnostic De Mise Sous Tension
L’horloge de temps réel a échoué le test du BIOS. Une réparation de la carte mère pourrait être nécessaire. Communiquez avec le service d’assistance. *Erreur de ventilateur, le système s’arrêtera dans 30 secondes. Contactez le service de support technique Fujitsu. Une erreur de ventilateur s’est produite. Communiquez avec votre représentant commercial. -
Page 224: Restauration De Votre Image De Système Et De Vos Logiciels
Restauration de votre image de système et de vos logiciels Avant de commencer à utiliser votre ordinateur, il est très important de faire des copies sur DVD de l’image d’origine et du disque d’amorçage (ainsi que d’autres supports comme le disque de pilotes, d’applications et de restauration). Pour ce faire, suivez les instructions données dans les sections «... - Page 225 Enregistrement de votre image d’origine Lorsque vous avez acheté votre nouveau système, l’image d’origine a été pré-installée dans une partition cachée de votre disque dur. Une copie de l’image d’origine vous permettra, en cas de panne grave, de restaurer votre système exactement comme il était à...
-
Page 226: Création D'une Image De Système
Restauration et Utilitaires à partir du disque dur ». Création d’une image de système Étape facultative : Depuis votre bureau Windows, lancez l’utilitaire Applications Fujitsu en prime, puis sélectionnez les composants que vous désirez installer. 83 - Restauration de votre image de système et de vos logiciels... - Page 227 Copies de sauvegarde de l’image système configurées par l’utilisateur : Sur votre bureau, il existe une icône [MyRecovery] (Ma restauration) qui vous permet de faire une copie de sécurité de votre image système actuelle sur un autre emplacement de votre disque dur ou sur un support externe. Une image My Recovery système est un enregistrement de la configuration de votre unité...
- Page 228 Figure 38. Écran MyRecovery Cliquez sur [Suivant] et vous verrez le système redémarrer. Après le redémarrage, vous voyez apparaître une fenêtre « Création de l’image de sécurité » vous proposant de « Créer l’image sur l’unité de disque D » ou de « Sélectionner une unité de disque » pour le cas où vous préféreriez conserver l’image sur un disque dur externe.
- Page 229 Gestion de vos images de sauvegarde L’outil MyRecovery permet également de copier vos images de sauvegarde, de les archiver sur des DVD, ou de les supprimer de votre disque dur lorsqu’elles n’y sont plus utiles. Tout d’abord, cliquez sur l’icône [MyRecovery] de votre bureau Windows. Dans la fenêtre MyRecovery, cliquez sur [Gérer/Créer].
- Page 230 Si vous désirez vérifier/changer la priorité d’amorçage (plutôt que de démarrer à partir du disque dur ou d’un lecteur de disquette externe), exécutez les opérations suivantes : Mettez le système sous tension. Lorsque le logo Fujitsu apparaît à l’écran, appuyez sur la touche [F12]. Surlignez l’option CD/DVD.
-
Page 231: Onglets Restauration Et Utilitaires
Cliquez sur [OK]. Une barre de progression apparaîtra en bas de l’écran pendant le transfert des fichiers à partir du disque. Lorsque la boîte de dialogue « Options de restauration du système » apparaît, choisissez une nouvelle configuration de clavier si nécessaire, puis cliquez sur [Suivant]. Lorsque la boîte de dialogue Système d’exploitation apparaît, cliquez sur [Suivant]. - Page 232 Veuillez prendre note que vous devez d’abord créer de nouvelles partitions sur le disque dur, puis restaurer l’image d’origine. Mettez le système sous tension. Lorsque le logo Fujitsu apparaît à l’écran, appuyez sur la touche [Entrée]. Surlignez l’option CD/DVD.
- Page 233 2. La mention « Initialisation du disque dur » s’affichera en gras avec le message « Veuillez insérer le disque amorçable dans le lecteur optique ». Insérez le disque amorçable. Cliquez sur [Suivant] pour continuer. Une boîte de dialogue s’affiche, avec un message de vérification de disque. Le message «...
-
Page 234: Téléchargement Des Mises À Jour De Pilotes
Téléchargement des mises à jour de pilotes L’utilitaire FSDM (Fujitsu Software Download Manager) est à votre disposition pour télécharger les plus récentes versions des pilotes, utilitaires et applications depuis le site d’assistance Fujitsu. Si vous avez un système d’exploitation Windows 7, vous devez vous connecter au site d’assistance (http://support.fujitsupc.com/CS/Portal/support.do?srch=DOWNLOADS). -
Page 235: Entretien
Entretien de votre ordinateur portable LIFEBOOK Si vous prenez soin de votre ordinateur portable LIFEBOOK Fujitsu, vous augmenterez sa durée de vie et sa fiabilité. Cette section fournit certains conseils relatifs à l’entretien de votre ordinateur portable et de ses dispositifs. -
Page 236: Nettoyage De Votre Ordinateur Portable Lifebook
Laissez-le sécher pendant 24 heures, ou plus si nécessaire. S’il ne démarre pas une fois sec, contactez le service d’assistance. • N’utilisez pas votre ordinateur portable LIFEBOOK Fujitsu dans un environnement très humide (à proximité d’une baignoire, d’une piscine). • Utilisez toujours l’adaptateur secteur d’origine et des piles homologuées pour votre ordinateur portable. - Page 237 Suivez les procédures de nettoyage en utilisant des produits nettoyants recommandés disponibles dans le commerce Extérieur et clavier de l’ordinateur Pour nettoyer l’extérieur et le clavier, utilisez l’un des nettoyants suivants : • Kit de nettoyage pour ordinateur portable Office Depot® N° 154-616 •...
-
Page 238: Rangement De Votre Ordinateur Portable Lifebook
De plus, une batterie défectueuse pourrait endommager votre ordinateur. • Rangez votre Fujitsu LIFEBOOK dans un endroit frais et sec. Les températures doivent être maintenues entre -25ºC et 60ºC (13°F et 140°F). -
Page 239: Voyager Avec Votre Ordinateur Portable Lifebook
Voyager avec votre ordinateur portable LIFEBOOK • Ne transportez pas votre ordinateur portable pendant qu’il est en marche. • Lorsque vous partez en voyage, apportez toujours avec vous le disque de remise en état du système. Si vous éprouvez des problèmes de logiciel d’exploitation pendant votre voyage, vous pourriez en avoir besoin pour trouver la solution au problème. -
Page 240: Batteries
Batteries Entretien de vos batteries • Manipulez toujours les batteries avec soin. • Ne court-circuitez pas les terminaux des batteries (c’est à dire, ne touchez pas les deux terminaux avec des objets métalliques). Ne transportez pas des batteries dans votre poche ou sac à main où elles pourraient entrer en contact avec de la monnaie, des clés ou d’autres objets métalliques. -
Page 241: Entretien De Votre Lecteur Multimédia
Entretien de votre lecteur multimédia Entretien de votre lecteur multimédia (DVD/CD/CD-R) Les disques multimédias sont des dispositifs précis qui fonctionneront de manière fiable si vous en prenez bien soin. • Rangez toujours vos disques multimédias dans leurs étuis lorsqu’ils ne sont pas utilisés. •... -
Page 242: Cartes Expresscard / Sd
Cartes ExpressCard / SD Entretien de vos cartes Les cartes ExpressCard et SD sont durables, mais vous devez en prendre soin. La documentation fournie avec votre carte vous donnera des renseignements spécifiques, mais vous devriez aussi faire attention aux points suivants : •... -
Page 243: Spécifications Techniques
Spécifications Cette partie présente les spécifications techniques du matériel et de l’environnement de votre ordinateur portable LIFEBOOK Fujitsu. Selon les configurations, les spécifications techniques peuvent varier. Étiquette de configuration L’étiquette de configuration qui est située sur le dessous de votre ordinateur portable comporte des informations spécifiques à... -
Page 244: Microprocesseur
Microprocesseur La famille de processeurs Intel® Core™ de 2e ou 3e génération. (Le modèle de votre processeur est indiqué sur l’étiquette du système) Puce • Mobile Intel HM76 Express Mémoire Mémoire système • Module mémoire vive à double canal SDRAM DDR3 1066 MHz (Veuillez prendre note que ce composant remplace la mémoire SDRAM DDR3-1333 MHz sur les processeurs Intel de 2e génération.) •... -
Page 245: Audio
Audio • Codec Realtek ALC269-VC2 avec système audio haute définition (HD) à deux canaux. • Écouteurs : Écouteurs stéréo/sortie audio, 3,5mm, 1 V ou moins, impédance minimale 32 ohms • Microphone : Prise d’entrée de ligne/microphone stéréo, 3,5mm, 100mV ou moins, crête-à-crête impédance minimale de 10Kohms. -
Page 246: Ports De Périphériques
Ports de périphériques • Fente pour une carte ExpressCard de 34 mm • Fente MS/SD pour une carte SD ou Memory Stick • Connecteur D-SUB 15 broches pour moniteur VGA externe (port RGB analogique) • Trois connecteurs USB 3.0 (Universal Serial Bus) pour périphériques d’entrée/sortie (dont un avec capacité de charge USB en tout temps) •... -
Page 247: Gestion De L'alimentation
Gestion de l’alimentation Batterie Batterie rechargeable au lithium, 6 accumulateurs ; 10.8V ; 4400 mAh. Adaptateur secteur Auto-détection 100-240 V c. a., fournissant 19 V c.c. ; 3,42 A ; 65 W au portable LIFEBOOK, y compris un câble c.a. Gestion de l’alimentation Conforme à... -
Page 248: Accessoires Préférés Des Utilisateurs
Accessoires préférés des utilisateurs Pour commander des accessoires ou demander des informations supplémentaires, veuillez visiter notre site Internet à www.shopfujitsu.com ou appelez au 1-800-FUJITSU. Logiciels fournis Selon votre système d’exploitation préinstallé, votre ordinateur est livré avec des logiciels inclus afin de vous permettre d’écouter des fichiers audio et de visionner des fichiers vidéo de divers formats. - Page 249 Adobe Reader Adobe Reader permet de consulter et d’imprimer des fichiers PDF sur toutes les plateformes informatiques courantes. Roxio Creator Roxio Creator vous permet de graver facilement des CD ainsi que d’organiser, d’éditer et de partager des photos numériques, de la musique, des données, ou des vidéos. Norton Internet Security Votre système est préinstallé...
- Page 250 Microsoft Windows Live Essentials Windows Live Essentials est une suite de programmes vous permettant d’utiliser votre LIFEBOOK avec plus d’aisance et de plaisir. Live Essentials comprend six applications Live : Messenger, Photo Gallery, Writer, Mail, Movie Maker et Silverlight et LiveMail. Microsoft Office Starter 2010 Microsoft Office Starter 2010 est une suite logicielle comprenant les versions simplifiées de Word 2010 et d’Excel 2010 avec des publicités.
-
Page 251: Glossaire
Glossaire Affichage à cristaux liquides. Type d’écran produisant des images par contrôle de l’orientation de cristaux dans un liquide cristallin. ACPI (Advanced Configuration and Power Interface) Interface avancée de configuration et de gestion de l’énergie. Adaptateur auto/avion Un dispositif qui convertit le courant continu d’un allume-cigare de voiture ou une prise c.c. d’avion en courant continu à... - Page 252 Au sein d’un réseau isolé, vous pouvez attribuer des adresses IP au hasard tant que chacune d’elles reste unique. Toutefois, la connexion d’un réseau privé à Internet exige l’utilisation d’adresses IP enregistrées (appelées adresses Internet) afin d’éviter les doublons. Les quatre numéros dans une adresse IP sont utilisés de différentes façons pour identifier un réseau particulier et un serveur hôte.
- Page 253 Authentification à clé partagée Méthode d’authentification réseau établie par la spécification 802.11, selon laquelle le point d’accès transmet au client un paquet texte que le client doit crypter avec la bonne clé de réseau et renvoyer au point d’accès. Si le client possède la mauvaise clé...
- Page 254 Canal Plage de fréquences à bande étroite utilisée par la carte réseau sans fil pour transmettre des données. Cathodique (CRT – Cathode Ray Tube, ou Tube à rayons cathodiques) Tube à rayons cathodiques. Moniteur dont l’affichage est assuré par un faisceau de particules électroniques qui frappe l’écran luminescent.
- Page 255 Décharge électrostatique. Décharge électrostatique soudaine provenant d’une charge statique qui s’est accumulée lentement. Exemple : la décharge reçue d’une poignée de porte ou les étincelles générées par un brossage des cheveux par temps sec. DHCP (Dynamic Host Configuration Protocol) Il s’agit d’un protocole qui permet à un ordinateur qui se connecte sur un réseau d’obtenir dynamiquement sa configuration.
- Page 256 Données Les informations stockées et traitées par un système. Entrée/Sortie. Données électroniques entrant et sortant de votre ordinateur portable. Écran à matrice active Type d’écran plat où un transistor ou un composant similaire est associé à chaque pixel de l’écran. FCC (Federal Communication Commission) Commission fédérale des communications (organisation gouvernementale américaine).
- Page 257 IEEE 802.11g Norme de réseau sans fil autorisant un débit maximum théorique de 54 Mbit/s. Les cartes de norme 802.11g fonctionnent dans les bandes de fréquences ISM de 2,4 GHz. IEEE802.11n Norme de réseau sans fil autorisant un débit maximum théorique de 150 Mbit/s. Les cartes de norme 802.11n fonctionnent dans les bandes de fréquences ISM 2,4 GHz et 5GHz.
- Page 258 Méga-octet. Un million d’octets. Mégahertz / MHz 1 000 000 de cycles par seconde. Mémoire Dépôt de données et d’applications auquel l’unité centrale de votre ordinateur portable LIFEBOOK a directement accès. Mémoire cache Bloc de mémoire intégré au microprocesseur, auquel il est beaucoup plus rapide d’accéder qu’à la mémoire vive et utilisé...
- Page 259 Nom de réseau (ou SSID, Service Set Identifier) La configuration d’un réseau local sans fil fait appel à un regroupement pour éviter les interférences et le vol de données. Ce regroupement est effectué avec le « Nom de réseau (SSID) ». Pour améliorer la sécurité, la clé de réseau n’autorise aucune communication si le SSID ne lui correspond pas.
- Page 260 Pixel Le plus petit élément d’affichage, point de couleur à l’écran. Plus la densité de pixels est élevée, plus l’image est nette. Point d’accès Périphérique de réseau sans fil servant de pont de communication entre un réseau sans fil et un réseau câblé. Port E/S Connecteur et circuits de commande associés à...
- Page 261 RAM CMOS (Complementary metal oxide semiconductor random access memory) Mémoire vive avec Semi-conducteur complémentaire à l’oxyde de métal. Technologie de fabrication de mémoire vive nécessitant une très faible alimentation. Réinitialisation / Redémarrage Le fait de charger à nouveau le système d’exploitation. Une réinitialisation efface toutes les informations stockées dans la mémoire vive.
- Page 262 Système d’exploitation Groupe de programmes de contrôle qui convertissent les commandes des applications, y compris les pilotes, dans la forme exigée par un modèle particulier de processeur afin de produire les résultats voulus avec le matériel employé. TCP/IP (Transmission Control Protocol/Internet Protocol) Littéralement, «...
- Page 263 WFM (Wired for Management) Abréviation de « Wired for Management ». Vaste programme d’Intel visant à réduire les coûts globaux de l’informatique de gestion, sans sacrifier la puissance et la souplesse. WLAN (Wireless Local Area Network) Réseau local sans fil. Interconnexion sans fil d’ordinateurs et de périphériques dans un emplacement géographiquement délimité...
-
Page 264: Renseignements Sur La Réglementation
Renseignements sur la réglementation Avis Les changements ou modifications qui ne sont pas expressément approuvés par Fujitsu pourraient interdire aux utilisateurs d’utiliser le matériel. AVIS DE LA FCC Avis aux utilisateurs de postes radio et de téléviseurs Cet appareil a été testé et jugé conforme aux limites établies pour le matériel numérique de classe B, selon la Partie 15 des règlements de la FCC. - Page 265 Annexe A : Guide d’utilisation de la carte de réseau local sans fil Renseignements sur la réglementation de la FCC Veuillez prendre note des renseignements suivants sur la réglementation relative à la carte réseau sans fil en option. Remarques et déclarations réglementaires Santé...
- Page 266 ; (2) cet appareil doit accepter toutes les interférences reçues, y compris celles pouvant causer un mauvais fonctionnement de l’appareil. Toute modification n’ayant pas été expressément approuvée par la société Fujitsu America peut annuler le droit de l’utilisateur de se servir du matériel.
- Page 267 Avis pour le Canada Le matériel destiné à un usage sur la bande 5 150 - 5 250 MHz doit être utilisé uniquement à l’intérieur afin de réduire les risques de brouillage nuisible causé aux systèmes mobiles par satellite fonctionnant sur un même canal. Un gain d’antenne de 6 dBi est autorisé...
-
Page 268: Avant D'utiliser La Carte Réseau Sans Fil
Avant d’utiliser la carte réseau sans fil Ce guide explique comment installer et configurer correctement la carte réseau sans fil mini intégrée (en option), ci-après désignée sous le nom de « carte réseau sans fil ». Avant d’utiliser la carte réseau sans fil, lisez attentivement le présent guide afin de bien comprendre son fonctionnement. - Page 269 Le mode Ad hoc exige que les paramètres de nom de réseau SSID (service set identifier), d’authentification réseau et de clé de chiffrement soient configurés de façon identique sur tous les ordinateurs du réseau. Réseau en mode Ad hoc 126 - Avant d’utiliser la carte réseau sans fil...
-
Page 270: Remarques Concernant Les Réseaux Sans Fil
Mode point d’accès (Infrastructure) Le mode Infrastructure désigne une topologie de réseau sans fil dans laquelle les appareils communiquent au sein d’un réseau sans fil ou câblé par l’intermédiaire d’un point d’accès. En mode Infrastructure, les appareils sans fil peuvent communiquer directement entre eux ou sur un réseau câblé. -
Page 271: Activation De La Carte Réseau Sans Fil
Manipulation de la carte réseau sans fil La carte réseau local sans fil est un dispositif en option qui peut être fourni avec votre ordinateur portable. Normalement, vous ne devriez pas avoir besoin de la retirer ou de la réinstaller. Le système d’exploitation de l’ordinateur est déjà... -
Page 272: Configuration De La Carte Réseau Sans Fil
Activation de la carte réseau sans fil La carte réseau sans fil peut être activée de la même façon que pour sa désactivation. • A l’aide de la combinaison de touches [Fn]+[F5] • Sous Windows, en cliquant à l’aide du bouton droit de la souris l’icône de la carte réseau sans fil puis en cliquant sur «... -
Page 273: Connexion Au Réseau
2 Sélectionnez « Connexion à un réseau ». 3 Sélectionnez un réseau dans la liste qui apparaît et cliquez sur le bouton [Connexion]. Connexion au réseau Une fois la configuration effectuée, vous pouvez vous connecter à un réseau actif en cliquant sur l'icône « Connexion réseau sans fil »... -
Page 274: Dépannage De La Carte Réseau Sans Fil
Dépannage de la carte réseau sans fil Tableau de dépannage Le tableau ci-dessous présente les causes possibles et les mesures correctives pour différents problèmes de réseau sans fil. Problème Cause possible Solution possible Réseau Nom de réseau (SSID) Connexion en mode Ad hoc : Assurez-vous que le SSID et la clé WEP de tous indisponible ... - Page 275 Problème Cause possible Solution possible Réseau Interférences RF L’utilisation de canaux RF identiques ou se chevauchant peut nuire au indisponible provenant de points fonctionnement de la carte réseau sans fil. Changez le canal de votre connexion d’accès ou d’autres point d’accès en tenant compte du canal du périphérique nuisible.
-
Page 276: Spécifications De La Carte De Réseau Local Sans Fil
Spécifications de la carte de réseau local sans fil Élément Spécification La carte Intel Centrino Wireless-N 2230 intégrée est conforme aux normes 802.11b/g, et 802.11n, Type de réseau et est certifiée Wi-Fi*. Débit (Commutation automatique) débit maximum de 150 Mbit/s •... -
Page 277: Utilisation De Bluetooth
Utilisation de Bluetooth Le module Bluetooth 4.0+HS est situé sur le module de carte réseau sans fil intégrée Intel® Centrino® Wireless. Présentation de Bluetooth La technologie Bluetooth est conçue pour assurer la liaison sans fil à faible portée entre divers appareils mobiles, tels que téléphones, ordinateurs portables, imprimantes et caméras. - Page 278 Les utilisateurs ne sont pas autorisés à modifier ce produit. Toute modification annule la garantie. Cet équipement ne peut être modifié, altéré ou changé en aucune façon sans l’autorisation écrite de Fujitsu. Toute modification non autorisée annulera les autorisations d’équipement de la FCC et d’Industrie Canada, de même que la garantie.
-
Page 279: Annexe B : Utilisation De L'affichage Intel® Wireless Display
Wireless Display Utilisation de la technologie Wireless Display La nouvelle technologie Intel® Wireless Display (WiDi) est offerte en option sur certains ordinateurs Fujitsu LIFEBOOK. Si votre système est doté de la technologie Intel WiDi, veuillez lire ces informations sur son utilisation. -
Page 280: Démarrer L'application Widi
• I VOUS AVEZ ACHETÉ UN SYSTÈME AVEC CARTE RÉSEAU LOCAL SANS FIL NTEL ET TECHNOLOGIE NTEL I EN OPTION IL EST POSSIBLE ’ ). L QUE L APPLICATION I SOIT PRÉ INSTALLÉE SELON LA CONFIGURATION DE VOTRE SYSTÈME ES SYSTÈMES AYANT LA FONCTION NTEL I PRÉ... -
Page 281: Index
Index épuisée 74 À propos de ce guide 7 faible 47 Adaptateur mode veille 47 secteur 33 problèmes 74, 75 Adaptateur auto/avion 33 remplacement 48 adaptateurs remplacement hors tension 48 de fiches 96 remplacement sous tension 48 Alimentation voyant de charge de batterie/entrée c.c. 20, 21 adaptateur auto/avion 33 Batterie au lithium 45 adaptateur secteur 33... - Page 282 Carte Memory Stick Connexion des adaptateurs d'alimentation 33 installation 59 Conventions utilisées dans ce guide 7 retrait 59 Coordonnées pour contacter Fujitsu 8 Carte réseau sans fil activation 129 avant d’utiliser la carte réseau sans fil 125 Dépannage 67 caractéristiques 125...
- Page 283 Microphone 12 Microphone numérique 12 Lecteur de DVD Mode ECO 25 problèmes 70, 71 Lecteur multimédia alimentation par batterie 53 Ordinateur Fujitsu LIFEBOOK entretien 98 voyager 96 installation d’un disque 51 Ouverture logiciels 50, 52 de l'écran 34 panneau de configuration 53 retrait d’un disque 52...
- Page 284 Prise d’écouteurs 64 mémoire 101 Prise de micro 65 microprocesseur 101 Prise de réseau local (RJ-45) 17 options de mémoire de masse 102 puce 101 vidéo 101 Recharge des batteries 46 Réglage Tableau de voyants d'état 12, 20 de l'écran 34 Touche de fonction Réglage du volume 31 F10 25...
- Page 285 USB 15, 17, 72 problèmes 72 Verr maj 22 Verr num 22 Voyant d’accès au disque dur 22 WiDi 136 Windows Power Management 42 Wireless Display 136 142 -...
Need help?
Do you have a question about the LIFEBOOK AH532 and is the answer not in the manual?
Questions and answers