Table of Contents
Advertisement
Quick Links
Advertisement
Table of Contents

Subscribe to Our Youtube Channel
Summary of Contents for FUNAI FDP-100
- Page 1 We would like to take this opportunity to thank you for purchasing this Photo Printer. Please read this User’s guide carefully and keep it for future reference. Photo Printer FDP-100 User's Guide Introduction Printing from the Printing from the computer...
-
Page 2: Table Of Contents
Contents Introduction IMPORTANT SAFEGUARDS ... 4 Introduction... 9 Features... 11 Flow of the Printer Operation ... 12 Quick Guide... 13 Safety Precautions ... 15 Usage/Handling Note... 17 Controls and Components... 20 Paper/Ink cartridge ... 22 Prepare Set the Ink Cartridge in the Printer ... 23 Set the Paper in the Paper Tray... - Page 3 [ERROR] Lamp ... 37 Before Requesting Services ... 38 Troubleshooting ... 38 If Paper Jam has Occurred..40 Using the Cleaner ... 41 Specifications ... 42 Main Specifications ... 42 FUNAI SOFTWARE LICENSE AGREEMENT... 43 FUNAI SOFTWARE LICENSE AGREEMENT... 43 Contents...
-
Page 4: Important Safeguards
IMPORTANT SAFEGUARDS WARNING: TO REDUCE THE RISK OF FIRE OR ELECTRIC SHOCK, DO NOT EXPOSE THIS APPLIANCE TO RAIN OR MOISTURE. CAUTION: TO REDUCE THE RISK OF ELECTRIC SHOCK, DO NOT REMOVE COVER (OR BACK). NO USER SERVICEABLE PARTS INSIDE. REFER SERVICING TO QUALIFIED SERVICE PERSONNEL. - Page 5 10) Ventilation - Slots and openings in the cabinet are provided for ventilation. To ensure reliable operation of the unit and to protect it from overheating, these openings must not be blocked or covered. The openings should never be blocked by placing the unit on a bed, sofa, rug, or other similar surface.
-
Page 6: Installation Location
IMPORTANT SAFEGUARDS Installation Location For safety and optimum performance of this unit: Do not install the unit vertically. Install the unit in a horizontal and stable position. Do not place anything directly on top of the unit. Shield the unit from direct sunlight and keep the unit away from sources of intense heat. Avoid dusty or humid places. -
Page 7: Before Use
Before Use Please read this User’s guide carefully before using your photo printer, and keep it for future reference. This unit is intended for household use only. For Customer Use: Read carefully the information located at the back of this unit and enter the Numbers below. -
Page 8: Connection To Power (For Uk)
Connection to Power (For UK) Before Switching on make sure that the voltage of your electricity supply is the same as that indicated on the rating plate. Mains Cord This appliance may be fitted with a non- rewireable plug. If it is necessary to change the fuse in a nonrewireable plug the fuse cover must be refitted. -
Page 9: Introduction
Introduction Please read the FUNAI SOFTWARE LICENSE AGREEMENT described on page 43 in this User’s guide carefully. Introduction Standard Accessories Please check and make sure that you have all items listed below: Paper tray Ink cartridge/Paper set (for 5 prints) -
Page 10: Copyrights
Introduction Copyrights Whatever you have printed can be used for your personal entertainment only. Under copyright laws, other materials cannot be used without obtaining permission from the holders of the copyrights. Trademarks ® Microsoft and Windows United States and/or other countries. Macintosh and Mac OS are either registered trademarks or trademarks of Apple Computer Inc. -
Page 11: Features
Features Direct print Images in the camera which is compatible with PictBridge-standard can be printed easily by connecting with the printer. Printing from your computer Images can be printed from your computer. (Windows/Macintosh) Multiple image print (2/4/9/16 split) Same images can be printed on one sheet of paper. Index print* Images in the camera are printed as view format. -
Page 12: Flow Of The Printer Operation
Introduction Flow of the Printer Operation You can print in the following order. For actual operating, refer to the page indicated below. Insert the Ink cartridge.→ p.23 Set the paper.→ p.25, 26 Camera printing Plug the power cord→ p.27 Connect the camera with the printer.→... -
Page 13: Quick Guide
Quick Guide Let’s try to print images by connecting the printer with the camera. Refer to the pages below for the details. Inserting the Ink cartridge.→ p.23 a Open the Ink cartridge compartment door. Setting the paper.→ p.25, 26 a Open the Paper tray compartment door. - Page 14 Introduction Connecting→ p.28 a Connect to the b Connect to the AC adapter. To power outlet c Plug the power cord. Printing→ p.29 Printing method varies depending on the camera models. Refer to the user’s guide of the camera. printer. USB cable (supplied with the camera) a Turn on the camera.
-
Page 15: Safety Precautions
Safety Precautions Before using the printer, read the safety precautions and follow them, or there may be fire, electric shock, injuries or malfunction. WARNINGS Do not disassemble or remodel the printer. Do not use the printer if the printer is dropped or the casing becomes damaged. Unplug the power cord immediately if the printer emits smoke or abnormal odor, or shows other signs of significant malfunction. -
Page 16: Cautions
Introduction CAUTIONS Do not install the printer in the following places. − Smoky or dusty places Places subject to direct sunlight − − Steamy places Places close to heating equipment − − Places subject to high temperature such as sun-heated cars Do not place heavy objects on the printer. -
Page 17: Usage/Handling Note
Usage/Handling Note Location Notes Do not install the printer in humid or dusty places. Leave approx. 20 cm of clearance at the front/back side of the printer. Make sure to leave clearance around the paper-handling slot so that paper has room enough to jut out from the slot during printing. -
Page 18: Notes In Printing
Introduction Notes in Printing Do not remove the Ink cartridge or Paper tray forcibly during printing. It may cause malfunction. Do not add any oscillation or shock to the printer. It may cause malfunction. Do not allow more than 10 sheets of printed paper to accumulate on the print output receptacle (on the top cover of the Paper tray). -
Page 19: Prints Notes
Prints Notes Do not touch the printed surface with adhesive tape, rubber goods or plastic, etc., and do not leave the printed surface in contact with other objects. It may cause color loss, change of color or color transfer. Select albums with nylon-based sleeves, polypropylene sleeves or cellophane sleeves for storing prints. -
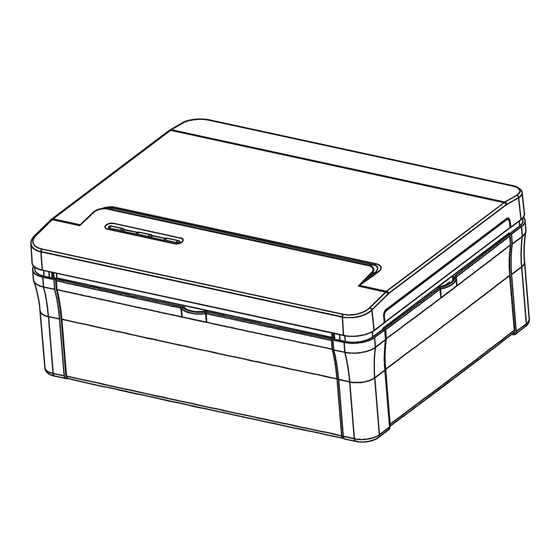
Page 20: Controls And Components
Introduction Controls and Components Printer (Front view) POWER POWER ACCESS ACCESS ERROR ERROR Printer (Back view) -
Page 21: Usb Port
a [POWER] Lamp Lights up when the printer is plugged to the power outlet. Connect the printer to the AC adapter (supplied), and connect the AC adapter to the power outlet. b [ACCESS] Lamp Lights up when the printer is connected to the computer/camera. -
Page 22: Paper/Ink Cartridge
Introduction Paper/Ink cartridge Use the following paper. (Use the Ink cartridge included in the print set.) Postcard size paper (100 x 148 mm) Print set :FCP-40P Postcard size paper (40 sheets)/Ink cartridge (for 40 prints). Do not disassemble the Ink cartridge. Do not open the print set (paper/Ink cartridge) until you use it. -
Page 23: Prepare
Prepare Please use the specified paper and Ink cartridge. Set the Ink Cartridge in the Printer Confirm that there is no slack in the Ink cartridge. If the Ink ribbon is slack, turn a to the direction of the arrow pressing a in until the Ink ribbon is strained. -
Page 24: How To Eject The Ink Cartridge
Prepare How to Eject the Ink Cartridge Open the Ink cartridge compartment door. Press up the Ink cartridge eject lever. The Ink cartridge is flipped out of the Ink cartridge slot. Pull out the Ink cartridge horizontally. Close the Ink cartridge compartment door. -
Page 25: Set The Paper In The Paper Tray
Set the Paper in the Paper Tray Do not use the paper other than the specified paper. Slide the top cover of the Paper tray to the direction of the arrow. Open the top cover. Set the paper in the Paper tray with the print side (glossy side) facing upwards. -
Page 26: Set The Paper Tray In The Printer
Prepare Set the Paper Tray in the Printer Slide the top cover of the Paper tray to the direction of the arrow. Open the Paper tray compartment door. Insert the Paper tray horizontally into the Paper tray slot. How to reject the Paper Tray Pull the Paper Tray out horizontally and close the Paper tray compartment door. -
Page 27: Turning On The Power (Connecting)
Turning on the Power (Connecting) Place the printer on a flat area. Do not place any obstacles within 20 cm of the front/back side of the printer. Paper moves in and out to/from the slot during printing. Connect the power cord to the AC adapter. -
Page 28: Printing From The Camera (Pictbridge Printing)
Printing from the Camera Printing from the Camera (PictBridge Printing) Connecting the camera with the printer, you can print images directly by the operation of the camera. Images can be printed directly with the camera which is compatible with “PictBridge” standard. -
Page 29: Printing From The Camera
Printing from the Camera Perform the printing operation from the camera. Printing operation is performed viewing the LCD monitor of the camera. The operation method varies depending on the camera specification. Refer to the user’s guide of the camera. The printer starts printing. The paper is moved forward and backward several times and the printed paper exits on the top cover of the Paper... -
Page 30: Printing From The Computer
Printing from the Computer System Requirements Please install the printer driver on a computer meeting the following minimum requirements. Windows Computer Model Interface Free Hard Disk Space Display Macintosh Computer Model Interface Free Hard Disk Space Display − A CD-ROM drive is required to install the printer driver. −... -
Page 31: Installing The Printer Driver
Installing the Printer Driver The CD-ROM contains the printer driver required for printing from your computer. Install the printer driver according to the following steps. Windows Be sure to install the printer driver before connecting the printer with the computer. (During the installation, if the message says that the printer should be connected to the computer, follow the message.) Be sure to log on with administrator privileges (computer system administrator) when... -
Page 32: Macintosh
Printing from the Computer Macintosh When installing on Mac OS X 10.2, be sure to connect the printer with the computer by the USB cable (commercial item) and turn on the printer before installing the printer driver. When installing on Mac OS X 10.3, install the printer driver and then connect the printer with the computer by the USB cable (commercial item) and turn on the printer. -
Page 33: Connecting The Printer To A Computer
Connecting the Printer to a Computer Connects the printer to the computer by the USB cable (A-B type / commercial item). Confirm that a camera is not connected with the printer before connecting it to the computer. Connect one end of the USB cable (commercial item) to the USB port on the printer and the other end to a USB port on your computer. -
Page 34: Printing From The Computer
Printing from the Computer Display/Select an image to be printed on your application. Display the print screen and set the printer name to “FUNAI FDP- 100” (“FDP-100” (Mac OS)). Printing and printer selection methods varies depending on the application. Refer to the user’s guide of your application. -
Page 35: Start Printing
Place the CD-ROM disc in the CD-ROM drive. Click “Uninstall” of the Printer Driver. Follow the screen messages to proceed. Macintosh Click “Applications” “Printer Setup Utility” (“Printer Center”) icon. Select “FDP-100” and click “Delete”. Not printed “Utilities” folder, and double-click Printing from the Computer... -
Page 36: Appendix
Appendix If Errors have Occurred... Error Messages When connecting with a camera: If an error (such as print error) has been detected when connecting with a camera, the error message is displayed on the LCD monitor of the camera. The following is an example of error messages. Error messages vary in some measure by the camera models. -
Page 37: [Error] Lamp
Monitor Display Examples Other paper errors File error [ERROR] Lamp The [ERROR] lamp lighting indicates the following probable causes. About the paper: Paper jam has occurred. The Paper tray is not set. There is no paper in the Paper tray. Specified paper is not set in the Paper tray. -
Page 38: Before Requesting Services
Appendix Before Requesting Services Troubleshooting If the printer is not responding properly, check the following items before requesting services. General printer problems Symptom The [POWER] lamp does not light on. Print fails. It takes long time to print images. Images cannot be printed clearly. - Page 39 Symptom Paper jams occur frequently. The full picture is printed with upper/lower parts of the image cutting off. The allotted number of sheets in the print set cannot be printed. Problems in printing from the camera: Symptom Print fails. How to stop printing in progress? Index print or multiple image print function cannot be...
-
Page 40: If Paper Jam Has Occurred
Appendix Symptom More than 2 sheets of paper are printed. Prints has no shooting date. Problems in printing from the computer Symptom Print fails. How to stop printing in progress? If Paper Jam has Occurred... Remove the paper in the following steps when the paper jam has occurred. Unplug the power cord from the power outlet. -
Page 41: Using The Cleaner
Using the Cleaner Faint stripes or spots may be printed on the image if internal part of the printer gets dusty, Clear the printer out of dust or dirt in the following steps. Press up the Ink cartridge eject lever and remove the Ink cartridge. p.24 →... -
Page 42: Specifications
Appendix Specifications Main Specifications Photo printer Power source: Power consumption: Operating temperature: Operating humidity: Dimensions: Weight: Printing system: Maximum number of printing pixels: Gradation: Image format: Paper: Ink: Print size: Print speed: Print mode: Signal transfer method: Connection method: AC adapter (UADPDCAATE02) -
Page 43: Funai Software License Agreement
FUNAI SOFTWARE LICENSE AGREEMENT 1. GRANT OF LICENSE: FUNAI grants you a personal, nonexclusive, limited license to install and use the Software. You may also make copies of the Software as necessary for backup and archival purposes. The term Software shall include the software components, media, all copies made by you and any upgrades, modified versions, updates, additions and copies of the Software licensed to you by FUNAI or its subsidiaries. - Page 44 Agreement. In the event that this Agreement terminates for your failure to comply with this Agreement, in addition to FUNAI enforcing its respective legal rights, you must promptly destroy the Software including any and all copies thereof. Notwithstanding the foregoing, Sections 2, 4, 5, 6, 7, 8, 9 and 10 shall survive any termination of this Agreement.
- Page 45 The terms and conditions of this Agreement are governed by the laws of Japan. Any litigation arising from the interpretation or execution of this license shall be submitted to Osaka District Court. JA321EA © 2005-2006 FUNAI EUROPE GMBH. All rights reserved.
Need help?
Do you have a question about the FDP-100 and is the answer not in the manual?
Questions and answers